Tag: Ashikaga Yoshiaki

  • The First Unifier – Oda Nobunaga. Part Two.

    The First Unifier – Oda Nobunaga. Part Two.

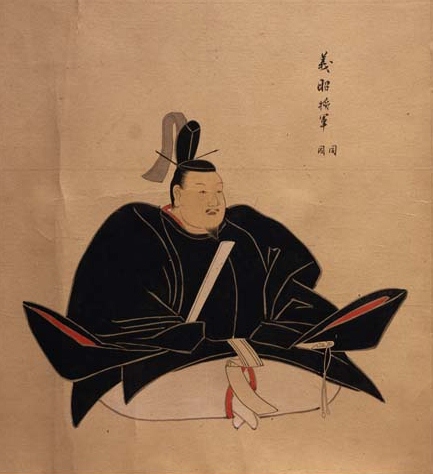
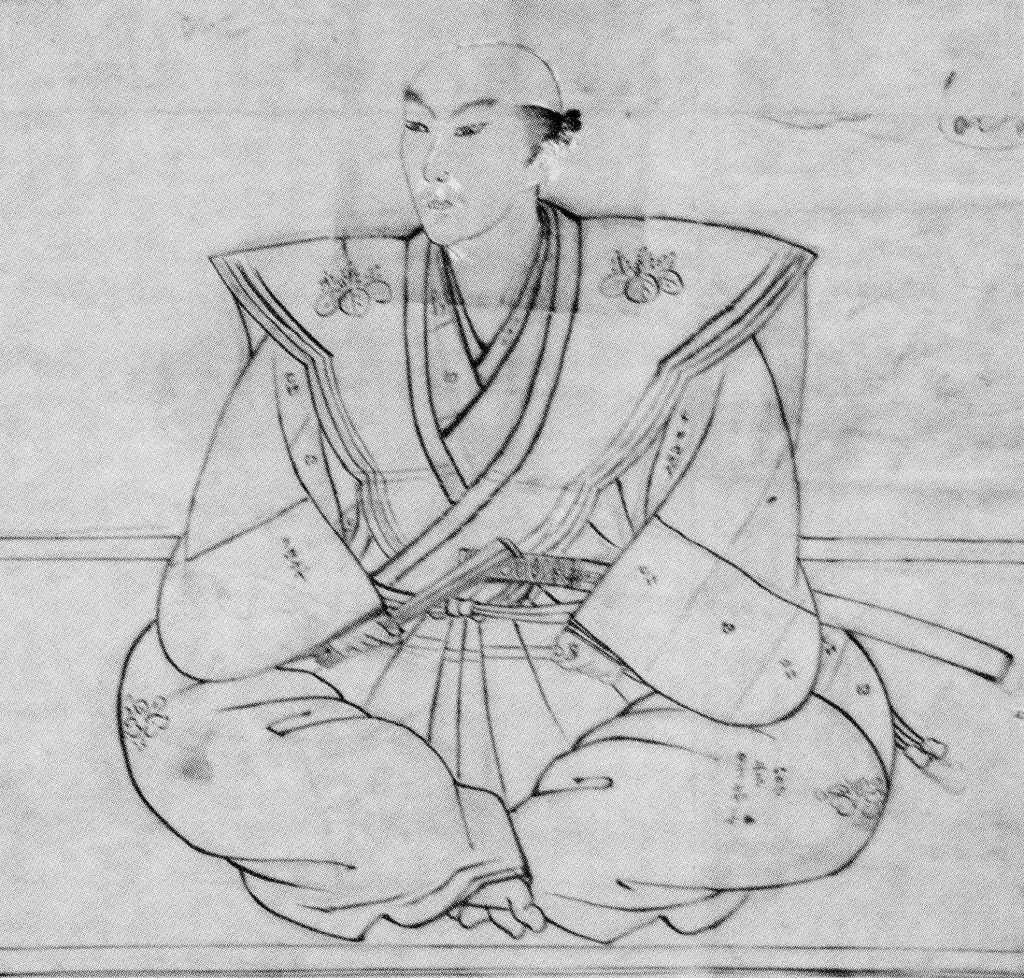
    In June 1565, the powerful Miyoshi Clan launched a coup against the Shogun, Ashikaga Yoshiteru. In the Eiroku Incident (named for the era), the Miyoshi successfully killed Yoshiteru, and his brother, Yoshiaki, a rival claimant to the throne, fled the capital, seeking support from regional warlords.

    Miyoshi Yoshitsugu, one of the main leaders in the Eiroku Incident.

    Nobunaga was initially enthusiastic about supporting Yoshiaki and the Shogunate more generally. Sources aren’t clear about Nobunaga’s ambitions at this point, with some arguing he genuinely wanted to restore the Ashikaga, whilst others portray it as cynical politicking, with Nobunaga intending to replace the Miyoshi’s puppet Shogun with his own.

    Regardless, in the short term, military defeat limited Nobunaga’s practical aid, and it wasn’t until September 1568 that he formally recognised Yoshiaki as Shogun and dispatched an army to Kyoto to secure his accession to the throne. There was some resistance, but Nobunaga’s forces would prove triumphant, and Ashikaga Yoshiaki was installed as the 15th (and final) Ashikaga Shogun. It seems that Yoshiaki wanted to install Nobunaga as kanrei, or deputy, but he refused. Moreover, at this point, the Kyoto political community seemed to have viewed Nobunaga as little more than Yoshiaki’s general, rather than a political force in his own right.

    Ashikaga Yoshiaki

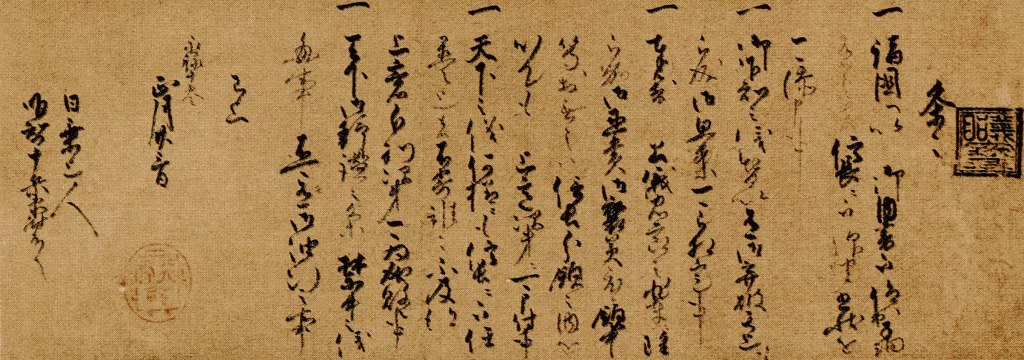
    In early 1569, Nobunaga once again proved his worth to the Shogunate by putting down an attempt by the Miyoshi Clan to restore their position in the capital. Shortly after that, Nobunaga issued the denchuonokite, or “Rules of the Palace”, which were a set of nine (with seven more added later) rules for the management of the Shogun’s court. For a long time, it was believed that these rules were the first clear example of Nobunaga imposing his will on the Shogunate, though later research suggests that Yoshiaki agreed to the rules, and it was only later that the relationship between the two men began to break down.

    Nobunaga seems to have intended to return to his own territories after the restoration, serving as a sort of enforcer for the Shogun. However, by this point, the Shogunate was at such a low ebb that he found himself obliged to become closely involved in the running of the government. It has been suggested that the issuing of the “Palace Rules” was part of wider efforts by Nobunaga to reinforce the Shogunate, whilst also reining in the tendency of the Shogun to use his remaining power arbitrarily, favouring his own supporters at the expense of powerful clans elsewhere, who, Nobunaga (rightly) worried, would then become enemies of the Shogun, and be extension, himself.

    Part of the original Palace Rules.

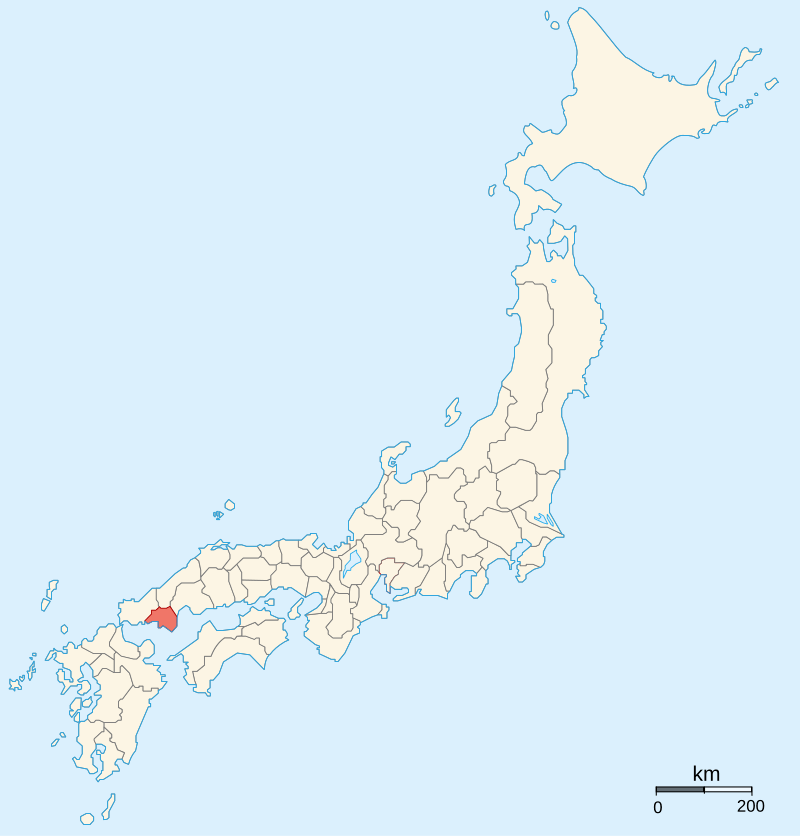
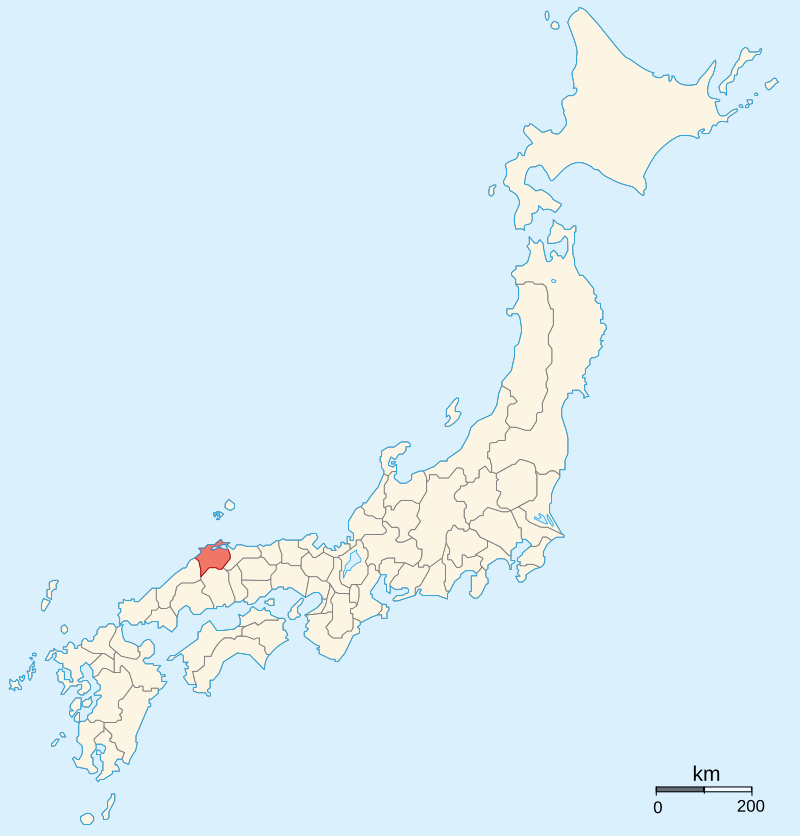
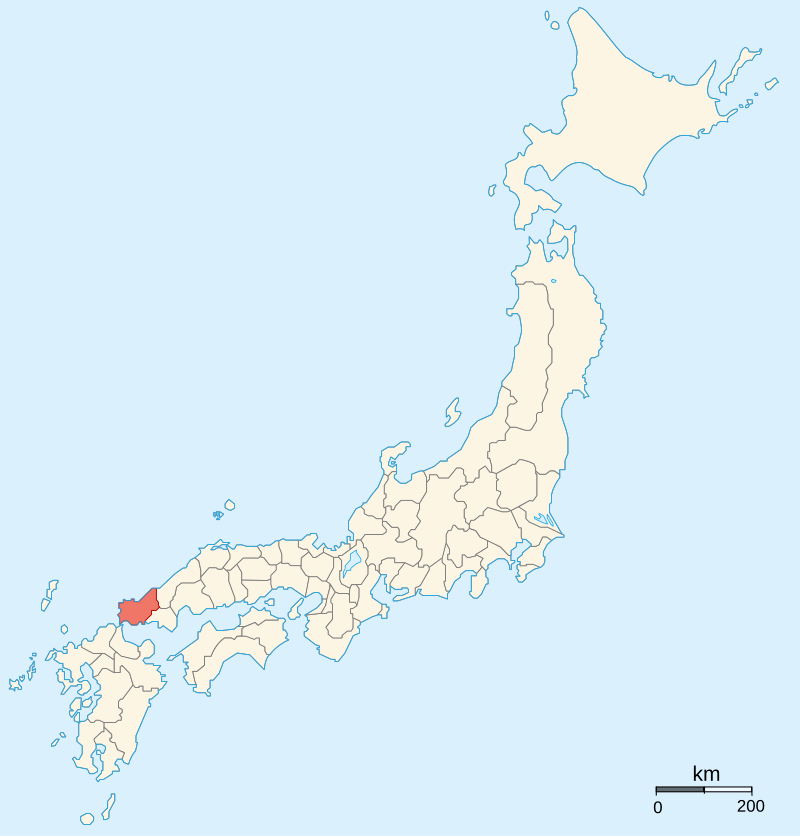
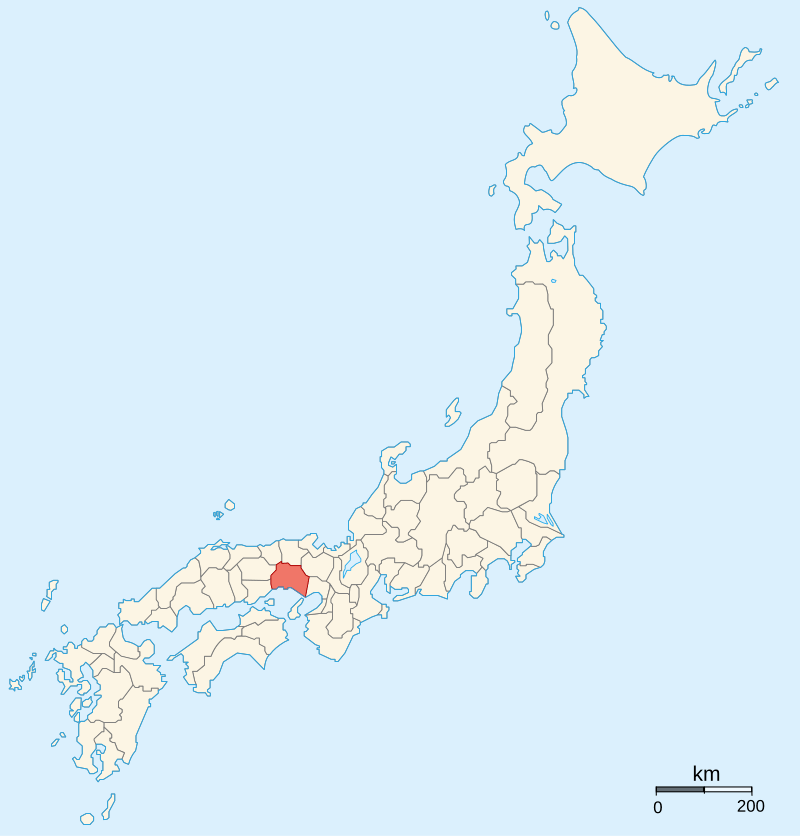
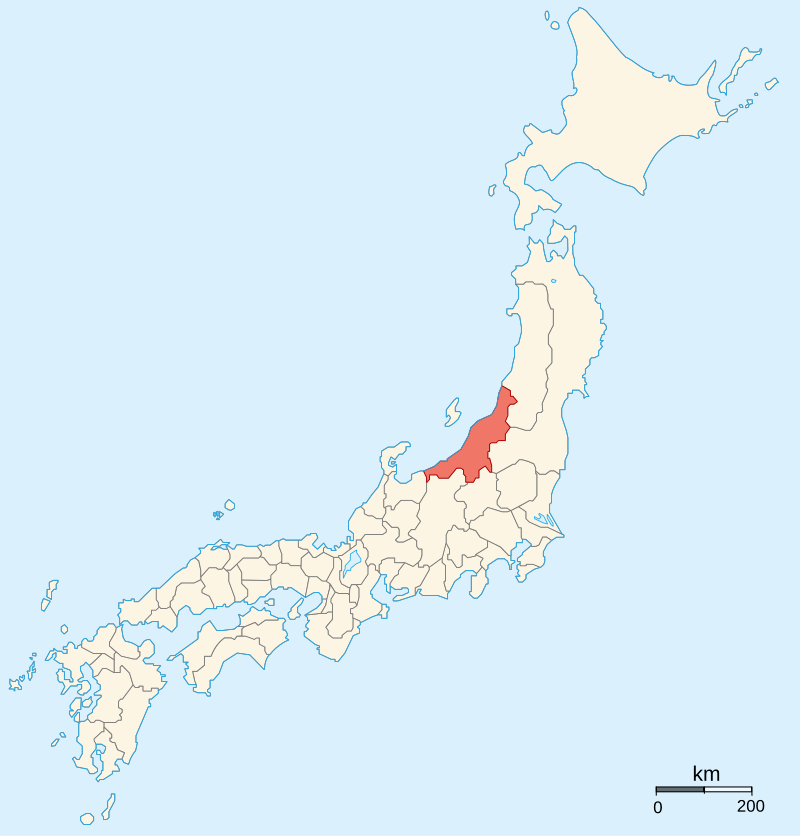
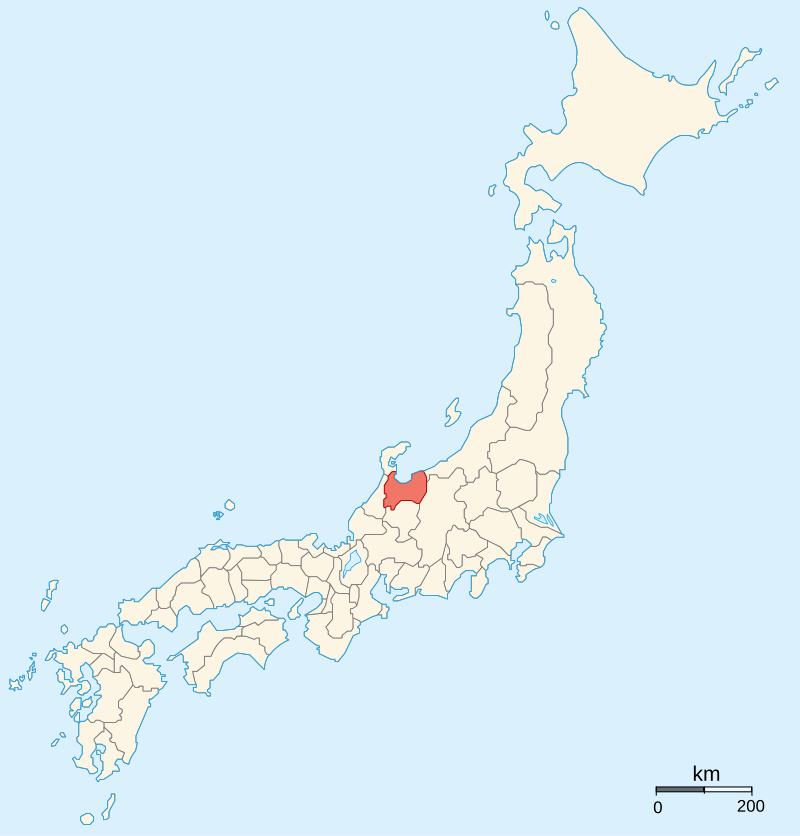
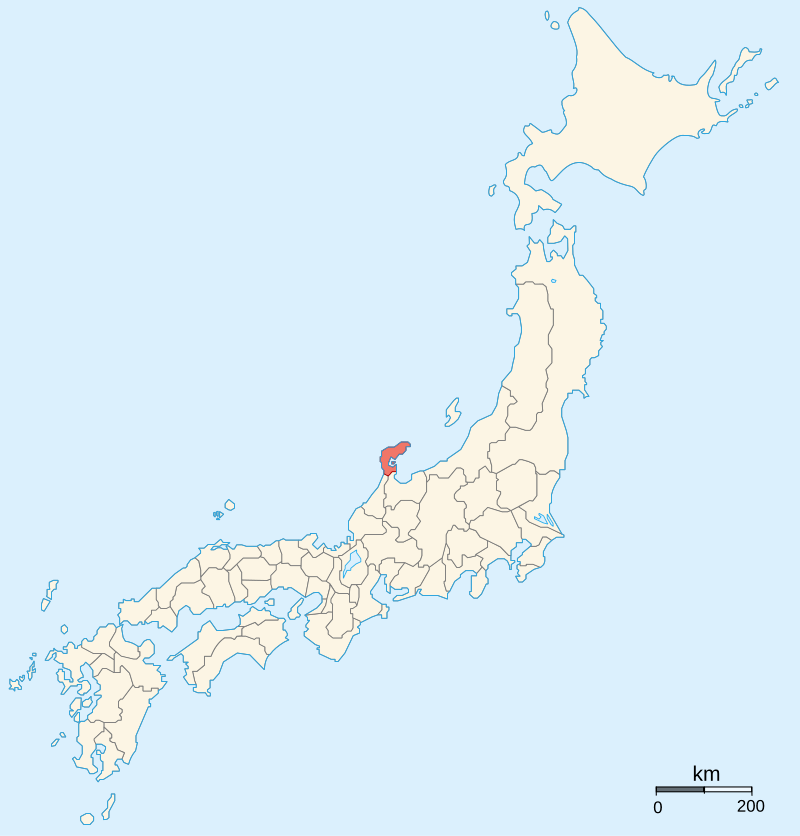
    It was not as though Nobunaga had any trouble finding enemies of his own. In the late 1560s, his forces invaded Ise Province, and in 1570, he led an army north to Wakasa Province to subjugate the Asakura Clan, who had defied him. The invasion went well, but when word reached Nobunaga that the Azai Clan, led by his brother-in-law, had betrayed him, he was forced to retreat.

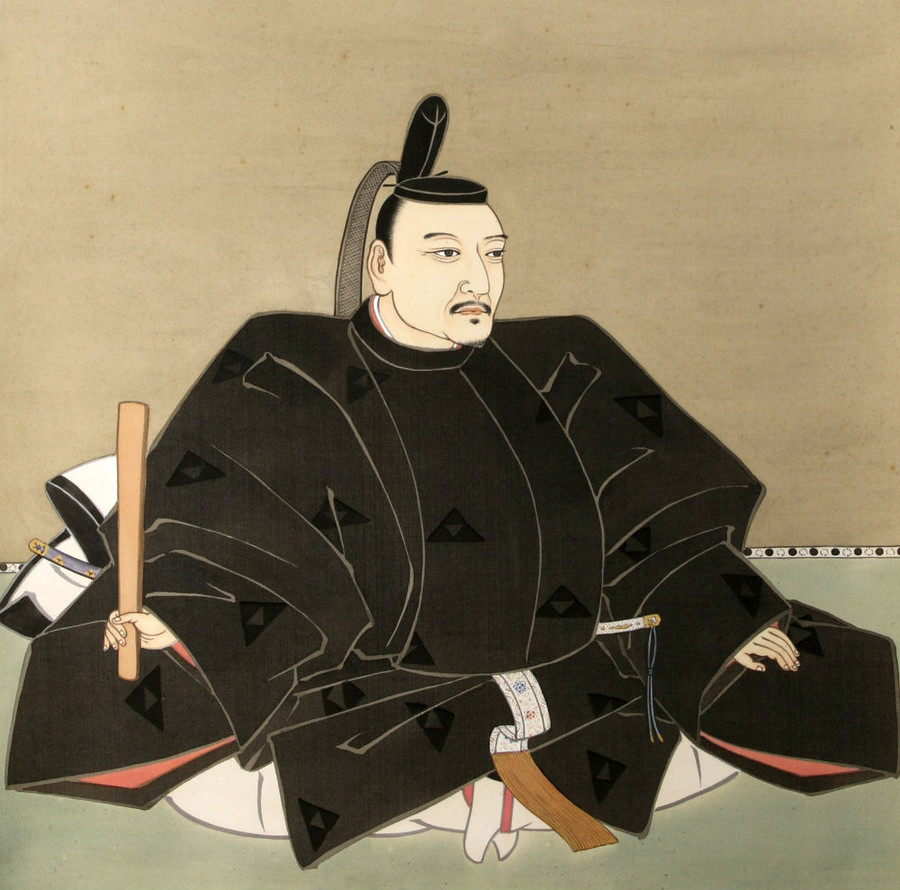
    The reasons for this sudden betrayal have been much romanticised, with Azai Nagamasa sometimes portrayed as a principled opponent of Nobunaga’s tyranny, or else bound by a close alliance to the Asakura that trumped his loyalty to the Oda. Historians are still divided on the exact cause, but the betrayal was likely a combination of opportunism and genuine fear about Nobunaga’s intentions.

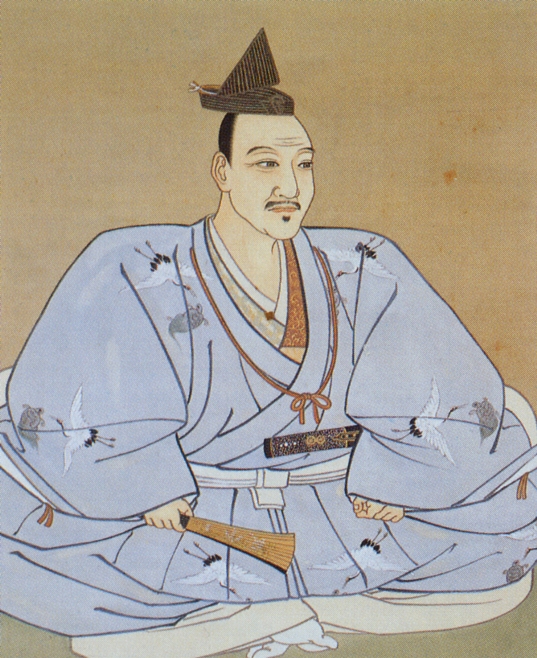
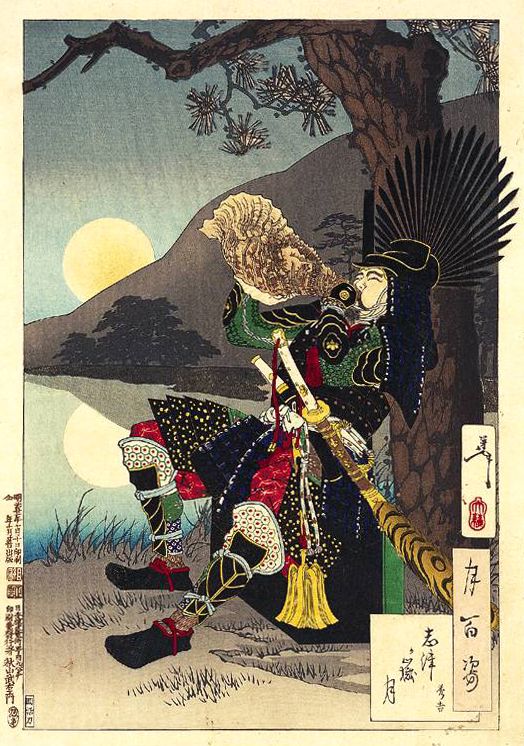
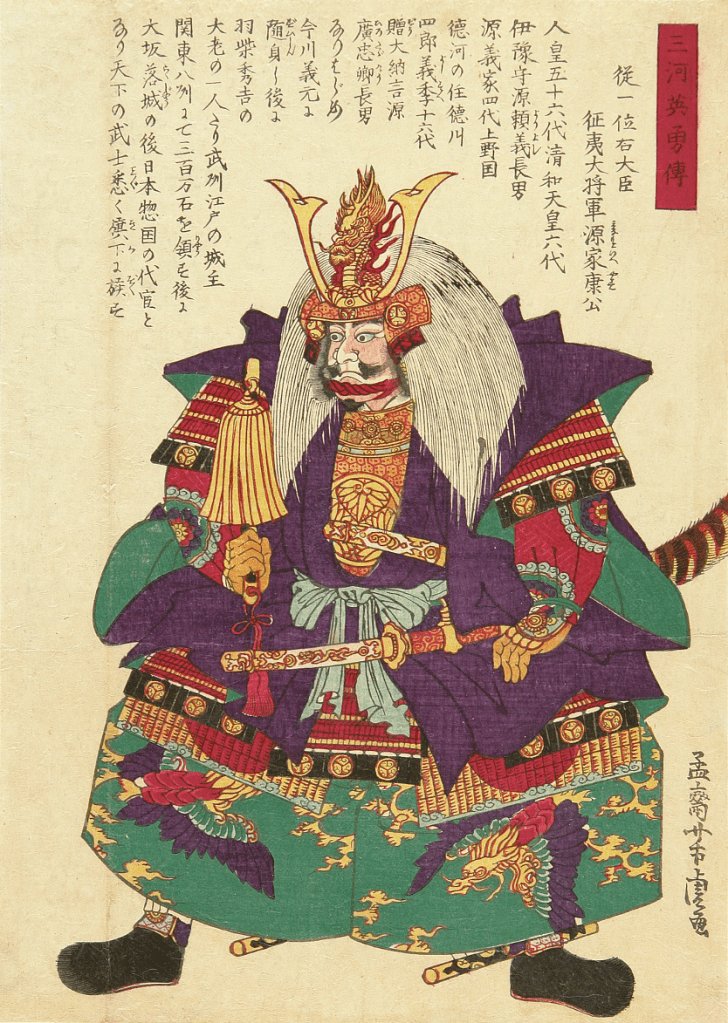
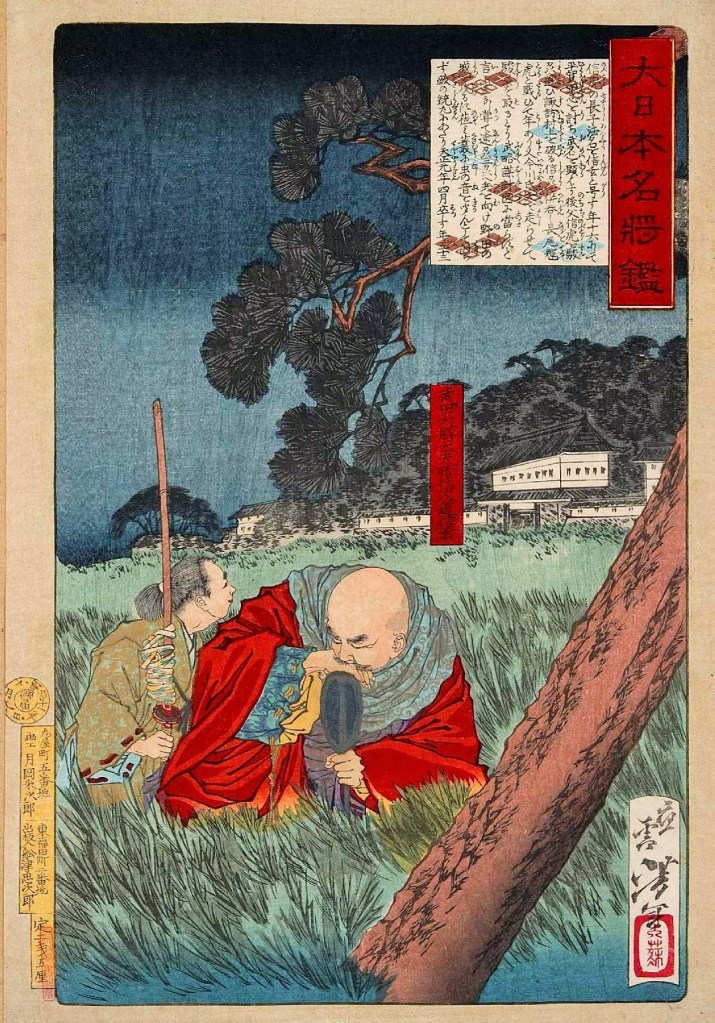
    Nobunaga’s army was defeated at the Battle of Kanegasaki, with Nobunaga himself forced to flee the field. It is said that he was only able to escape because of the rearguard action led by Kinoshita Tōkichirō, who would later be known as Toyotomi Hideyoshi, and who was rewarded with gold by Nobunaga upon his return to Kyoto.

    A later depiction of Hideyoshi in Nobunaga’s service. He first appears in records from the early 1560s, and by the time of Kanegasaki, he had earned a reputation as one of Nobunaga’s most capable subordinates.

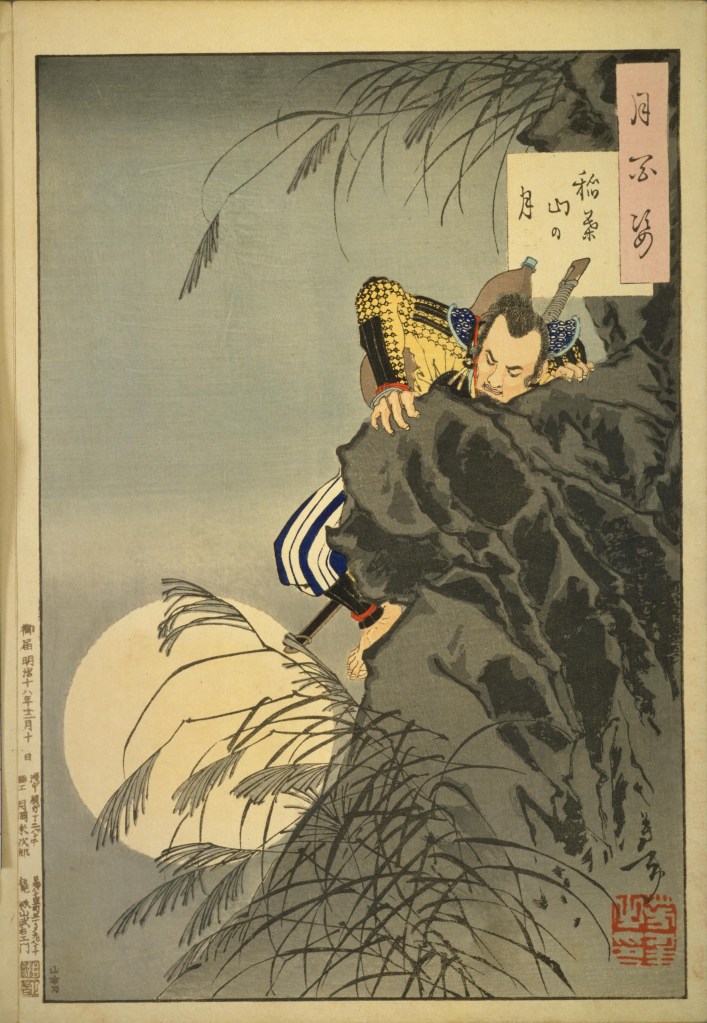
    Sources disagree on exactly how severe the defeat was; some state that Nobunaga returned to Kyoto with just ten men, whilst others put his army’s losses at fewer than 1300, out of a total of 30,000. Both numbers may be true, and it would certainly explain why Nobunaga himself seems to have remained calm in the wake of the defeat, inspecting the Imperial Palace the day after he returned to Kyoto.

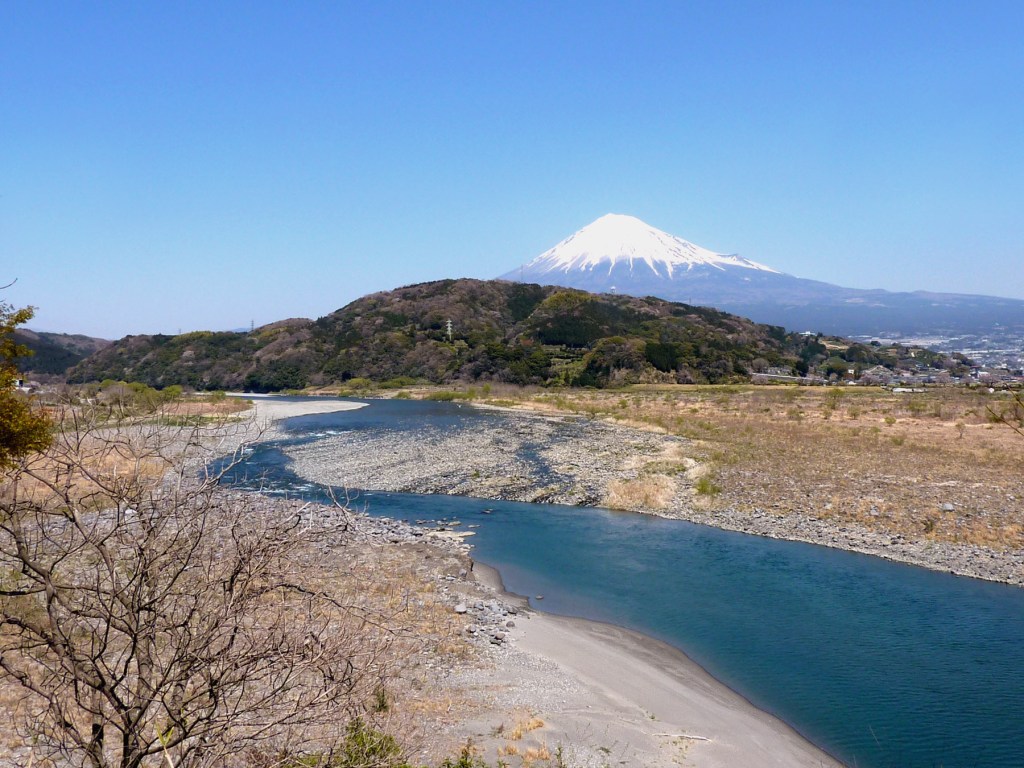
    Whilst Nobunaga had certainly been forced to retreat, the case for his army remaining largely intact is made by the fact that just a few months after Kanegasaki, he, along with his ally, Tokugawa Ieyasu, led a force of up to 40,000 men in a campaign against the Azai-Asakura, culminating in the Battle of Anegawa, which Nobunaga won, though he was unable to finish either the Azai or Asakura off, despite inflicting heavy casualties on both.

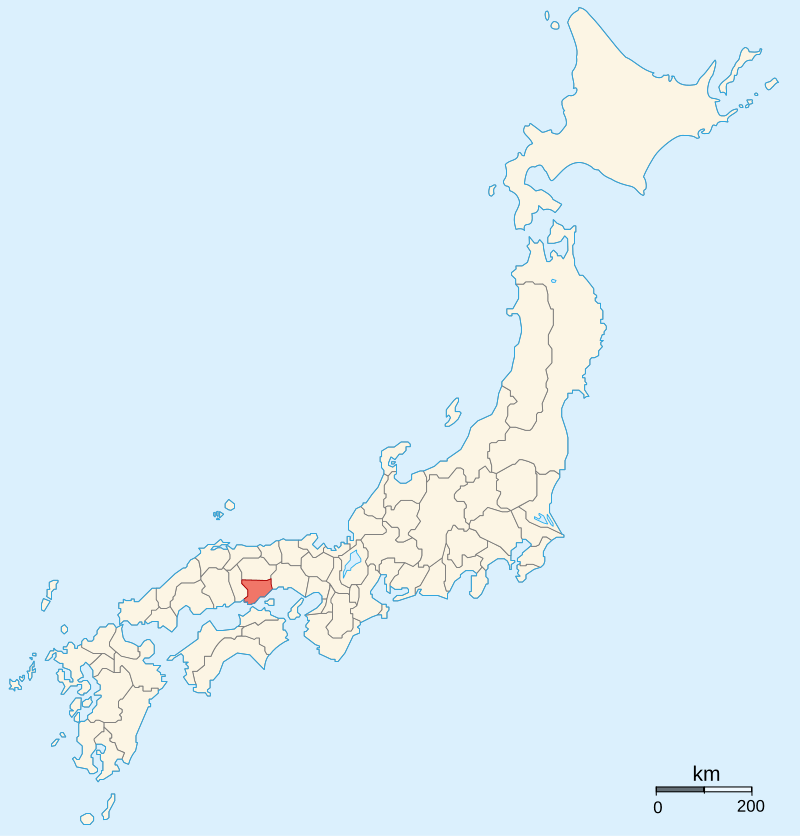
    Nobunaga was prevented from pressing his advantage by events elsewhere. In August, the Miyoshi raised an army in Settsu Province (modern Osaka). Around the same time, the Ishiyama Hongan-ji Temple (on the site of modern Osaka Castle), fearing Nobunaga’s expansionist ambitions, raised an army of its own.

    A model of Ishiyama Hongan-ji, showing it was far more than just a temple. Osaka Castle stands on the site today.
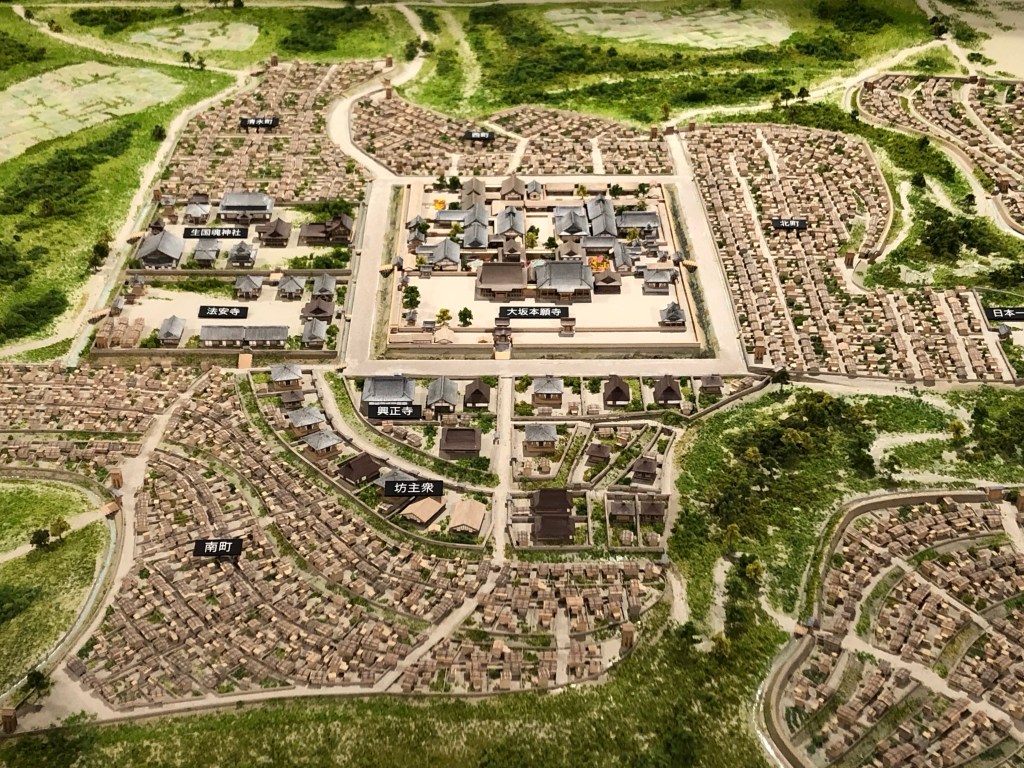
    By Takafuji – Own work, CC BY-SA 4.0, https://commons.wikimedia.org/w/index.php?curid=77306876

    All this was combined with the ongoing conflict with the Azai-Asakura alliance, and in September, supporters of Ishiyama Hongan-ji launched a rebellion in Ise Province in which Nobunaga’s younger brother, Nobuoki, was killed (or forced to commit seppuku) Faced with all this, Nobunaga chose to leverage his power at court, and in December, an Imperial decree was issued, ordering all sides to stop fighting, which they duly did, saving Nobunaga in the short-term.

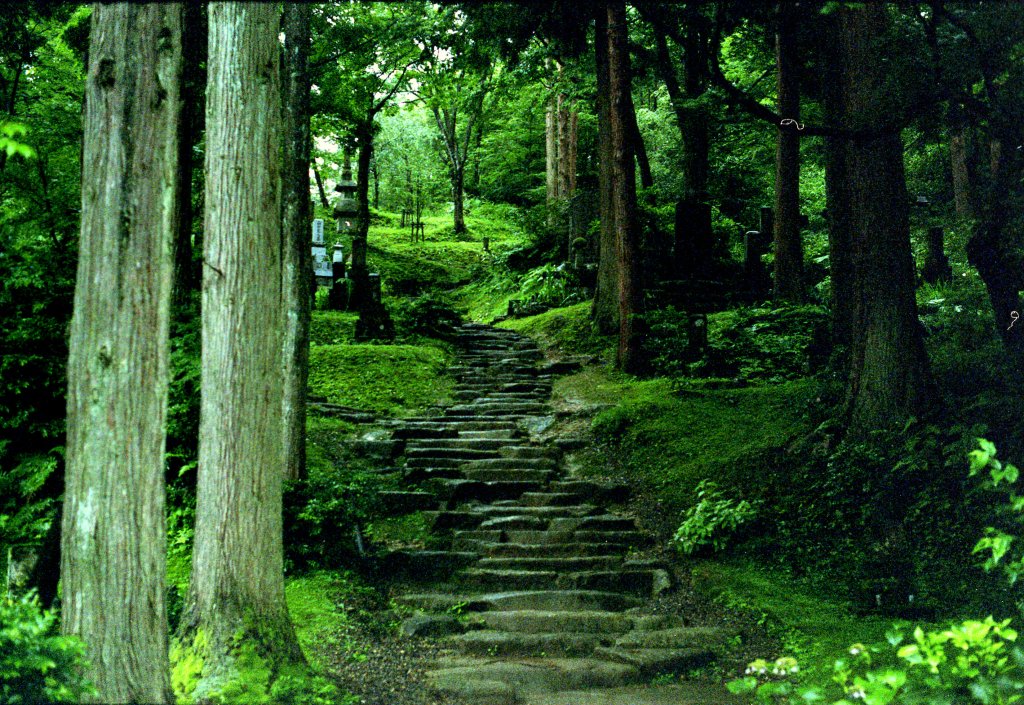
    Peace in the Age of the Country at War was only ever a fleeting thing, however. In February 1571, Nobunaga led an army of some 50,000 against the forces of Ishiyama Hongan-ji, resulting in one of his most controversial acts, the burning of Mt Hiei.

    A semi-contemporary image of the burning of Mt Hiei, showing Nobunaga’s forces cutting people down as they try to flee the flames.

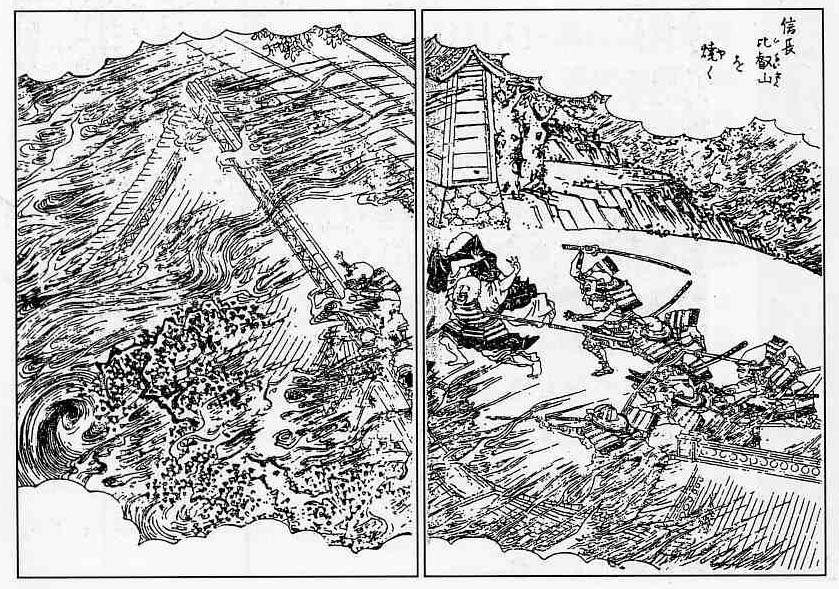
    Mt Hiei is one of the most sacred sites in Japanese Buddhism, and in the late 16th Century, its monks were major political players in their own right, with influence at both the Imperial and Shogunate court, and an army of warrior monks to defend their interests. Nobunaga’s attack should be seen in this context, but it was also an incredibly shocking act, which outraged a Japanese political class that took its religion very seriously. One particularly outraged player was Takeda Shingen, who denounced Nobunaga and began a campaign against his ally, the Tokugawa.

    Whilst historians suggest that Shingen’s outrage over Mt Hiei was just a pretext, the invasion of the Tokugawa home province of Mikawa was a serious threat to Nobunaga’s position. Shingen was arguably the most formidable warlord of his time, and may well have proved more than a match for Nobunaga. He was certainly too much for Tokugawa Ieyasu, who was obliged to retreat and call on Nobunaga for help.

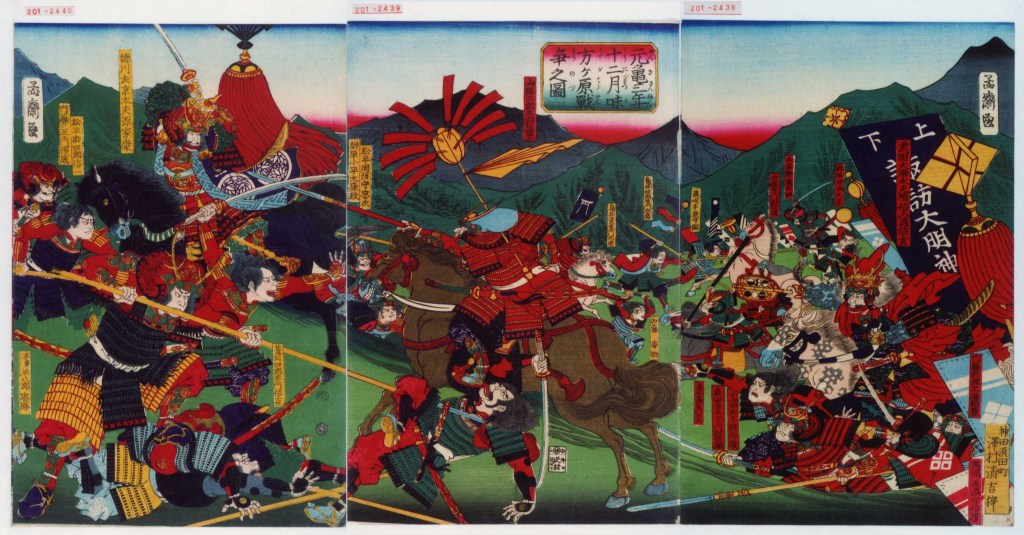
    Nobunaga dispatched a force of 3000 men to help, but they, along with the Tokugawa, were decisively defeated at the Battle of Mikatagahara in January 1573. Ieyasu himself barely managed to escape the disaster. In the aftermath, Nobunaga appeared vulnerable, so vulnerable that Ashikaga Yoshiaki, who had begun to chafe under Nobunaga’s regime, raised an army in opposition to him, presumably in the hope that Takeda Shingen was on his way.

    A 19th-century depiction of the Battle of Mikatagahara. If Takeda Shingen had lived long enough to take advantage of the victory, the outcome of the Sengoku Jidai might have been very different.

    Unfortunately for Yoshiaki, Shingen was dead. Though the circumstances of his death are still murky, it ended a serious threat to Nobunaga, perhaps the most serious threat, and he was able to focus his forces on Kyoto, where he swiftly forced Yoshiaki to make peace and resume his position firmly under Nobunaga’s thumb.

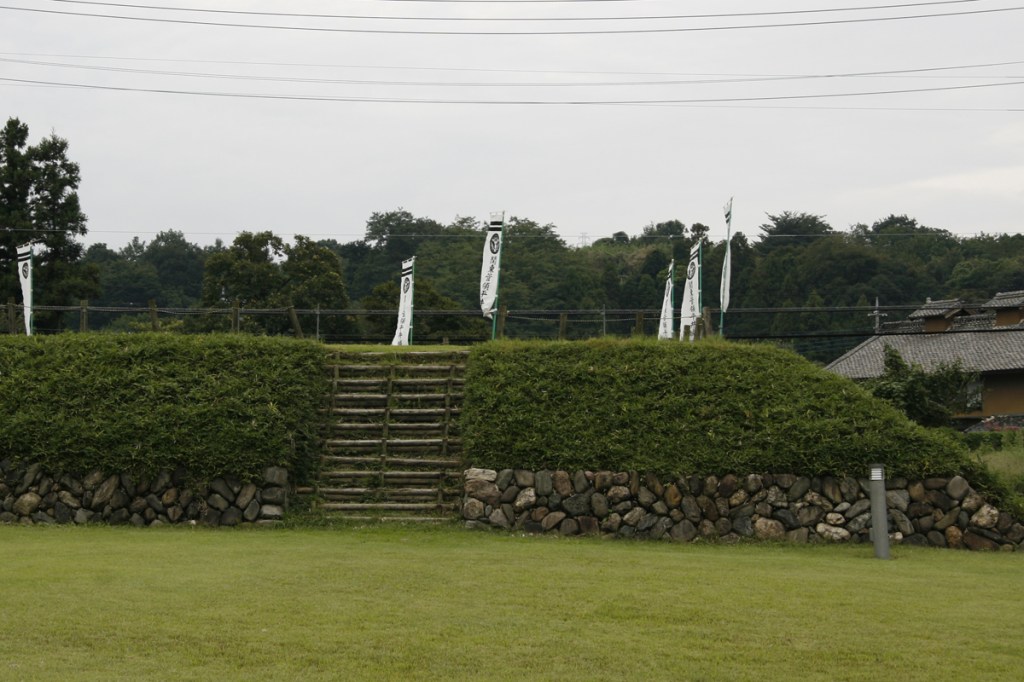
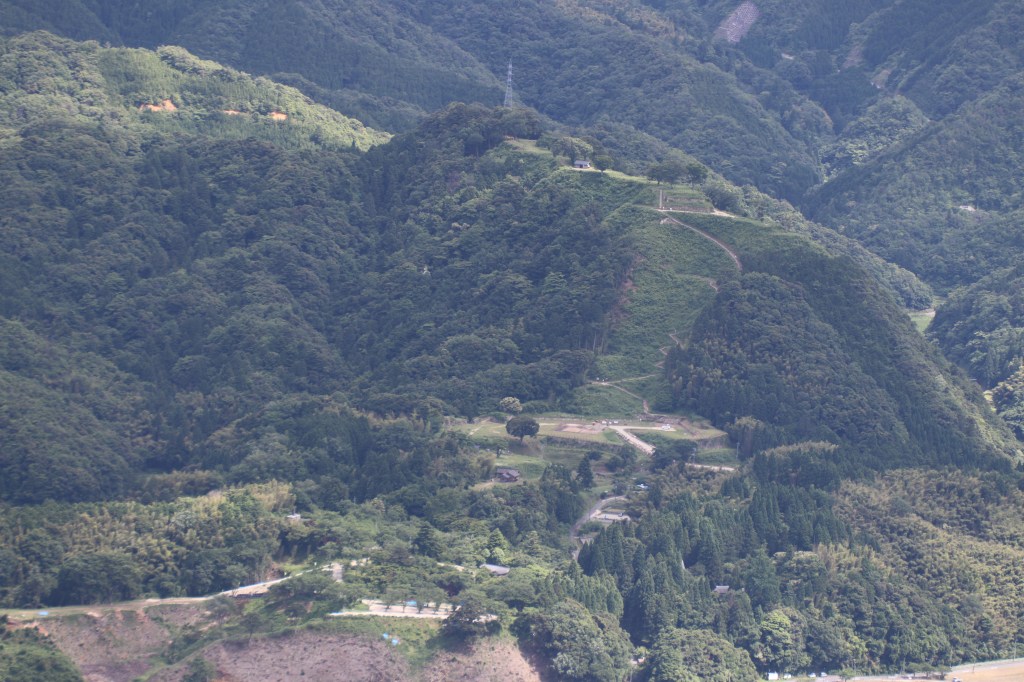
    Yoshiaski refused to learn his lesson, however, and a second rebellion broke out not long after, with Shogunate loyalists barricading themselves inside Makishima Castle, which Nobunaga swiftly took, sending Yoshiaki into exile, and effectively bringing an end to the Ashikaga Shogunate, once and for all. Historians debate whether the Shogunate actually ended at this time, as Yoshiaki continued to use the title, and would spend the next few years roaming Japan seeking support to overthrow Nobunaga.

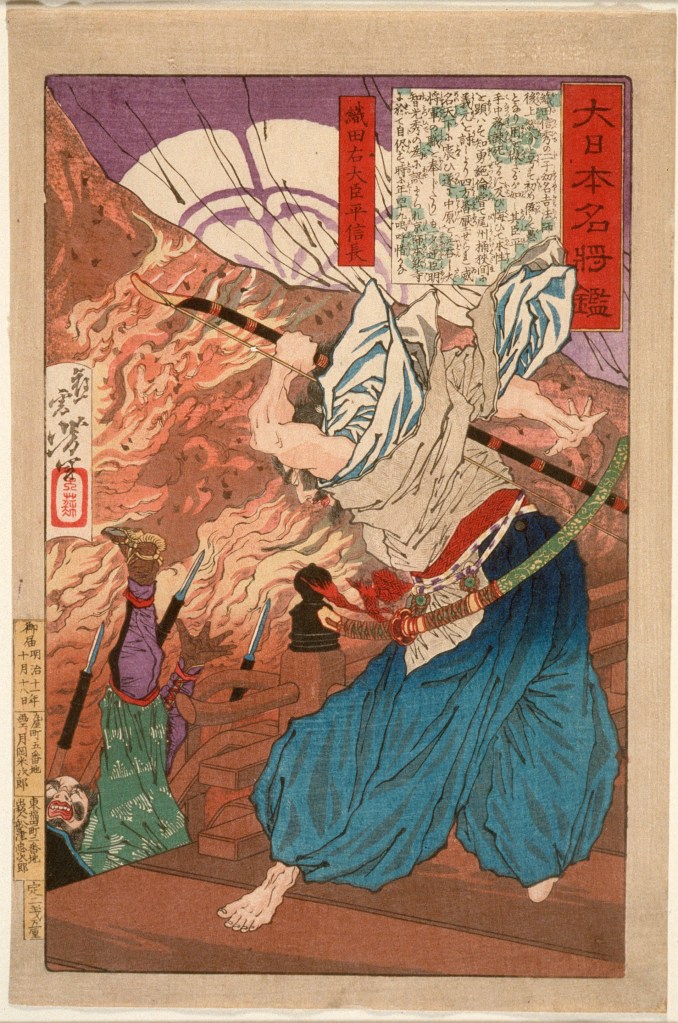
    What is true, though, is that the Ashikaga, long in decline, would never rule from Kyoto again. There had been strongmen before, of course, but they had always ruled through puppet Shoguns, and the institution had remained largely intact. Nobunaga did away with that; though he would never take the title of Shogun for himself, from 1573 until his death, Nobunaga sat at the top of a very precarious pile.

    Nobunaga’s territory is in red, in the centre, surrounded by enemies, or opportunities, depending on your perspective.
    By Alvin Lee – Own work, CC BY-SA 4.0, https://commons.wikimedia.org/w/index.php?curid=39200929

    Sources
    https://ja.wikipedia.org/wiki/%E7%B9%94%E7%94%B0%E4%BF%A1%E9%95%B7
    https://ja.wikipedia.org/wiki/%E4%B8%89%E6%96%B9%E3%83%B6%E5%8E%9F%E3%81%AE%E6%88%A6%E3%81%84
    https://ja.wikipedia.org/wiki/%E6%AF%94%E5%8F%A1%E5%B1%B1%E7%84%BC%E3%81%8D%E8%A8%8E%E3%81%A1_(1571%E5%B9%B4)
    https://ja.wikipedia.org/wiki/%E7%B9%94%E7%94%B0%E4%BF%A1%E8%88%88
    https://ja.wikipedia.org/wiki/%E9%95%B7%E5%B3%B6%E4%B8%80%E5%90%91%E4%B8%80%E6%8F%86
    https://ja.wikipedia.org/wiki/%E5%BF%97%E8%B3%80%E3%81%AE%E9%99%A3
    https://ja.wikipedia.org/wiki/%E5%A7%89%E5%B7%9D%E3%81%AE%E6%88%A6%E3%81%84
    https://ja.wikipedia.org/wiki/%E9%87%91%E3%83%B6%E5%B4%8E%E3%81%AE%E6%88%A6%E3%81%84#%E6%88%A6%E5%BE%8C
    https://ja.wikipedia.org/wiki/%E8%B1%8A%E8%87%A3%E7%A7%80%E5%90%89
    https://ja.wikipedia.org/wiki/%E6%B5%85%E4%BA%95%E9%95%B7%E6%94%BF
    https://ja.wikipedia.org/wiki/%E6%AE%BF%E4%B8%AD%E5%BE%A1%E6%8E%9F
    https://ja.wikipedia.org/wiki/%E8%B6%B3%E5%88%A9%E7%BE%A9%E6%98%AD
    https://ja.wikipedia.org/wiki/%E6%9C%AC%E5%9C%80%E5%AF%BA%E3%81%AE%E5%A4%89
    https://ja.wikipedia.org/wiki/%E6%B0%B8%E7%A6%84%E3%81%AE%E5%A4%89
    https://ja.wikipedia.org/wiki/%E4%B8%89%E5%A5%BD%E7%BE%A9%E7%B6%99
    https://ja.wikipedia.org/wiki/%E8%B6%B3%E5%88%A9%E7%BE%A9%E6%A0%84
    https://ja.wikipedia.org/wiki/%E4%B8%89%E5%A5%BD%E4%B8%89%E4%BA%BA%E8%A1%86
    https://en.wikipedia.org/wiki/Ishiyama_Hongan-ji

  • Lords of the East, Part 2

    Lords of the East, Part 2

    In 1537, Hojo Ujitsuna launched a successful invasion of Suruga Province, establishing the frontier at the Fuji River and ending the threat from the Imagawa-Takeda alliance, at least for now. Shortly after this news broke that (Ogigayatsu) Uesugi Tomoaki had died. Tomoaki had been an implacable foe of the Hojo, and his death severely weakened his clan, which was now led by the 12-year-old Tomosada.

    The Fuji River as it appears today, in modern Shizuoka Prefecture.

    It wasn’t all good news, however. With the bulk of the Hojo forces focused in Suruga against the Imagawa, forces of the Satomi Clan moved to expel the Hojo from the Boso Peninsula (modern Chiba), quickly establishing control and forcing the remaining Hojo loyalists to flee. There was little Ujitsuna could do about that in the short term, but in the summer of 1537, he gathered 15,000 men at Edo Castle before dispatching his son, Ujiyasu, to take the Uesugi stronghold at Kawagoe.

    The castle was taken undamaged after a surprise attack, and when the Uesugi tried to recapture it on New Year’s Day 1538, they were defeated. With his northern flank secure, Ujitsuna launched a campaign to reestablish control over the Boso Peninsula. Though they were initially successful, the attack clashed with the plans of the Koga Kubo, Ashikaga Yoshiaki.

    You may remember from earlier posts that the position of Kubo was the Shogun’s deputy in a given area. In decades past, the centre of the Kubo‘s power had been Kamakura, but the catastrophic decline of Shogunate power meant that the Kubo was eventually obliged to leave Kamakura (which was now under Hojo control) and take up residence at Koga, in Shimosa Province (modern Ibaraki).

    Shimosa Province
    By Ash_Crow – Own work, based on Image: Provinces of Japan.svg, CC BY 2.5, https://commons.wikimedia.org/w/index.php?curid=1691764

    Yoshiaki had the long-term objective of reestablishing the Kubos’ preeminent position over the whole Kanto, and the Hojo stood in direct opposition to this. Both sides were about equal in strength, but while the Hojo were united behind Ujitsuna, Yoshiaki’s forces were united in opposition to the Hojo, but not necessarily in support of the Kubo.

    Though Yoshiaki’s forces agreed to challenge the Hojo at the Edogawa River, they couldn’t decide on a strategy. Yoshiaki’s allies suggested attacking the Hojo as they crossed the river, but sources say that Yoshiaki, proud of his illustrious Ashikaga name, refused such a strategy, deciding that he would march out in person and face the Hojo in the field, once the bulk of their forces were already across the river.

    Satomi Yoshitaka, once a supporter of the Hojo but now serving under Yoshiaki, recognised that the strategy robbed them of the advantage of the river and was reluctant to commit his forces to open battle with the Hojo, where victory was far from certain. Yoshitaka also recognised that if Yoshiaki were defeated, a large expanse of territory would become available; thus, he positioned his forces away from what he assumed would be the main battlefield, ready to retreat quickly if things looked to be going badly.

    Though heavily built up today, this hill was the site of some of the fiercest fighting at the Battle of Konodai.

    What became known as the Battle of Konodai began on the morning of November 8th, when the Hojo forces crossed the river. Initially, Yoshiaki’s forces had the advantage, but throughout the day, more Hojo forces arrived, and the tide of battle turned. When news came that Yoshiaki’s brother and son had been killed, he flew into a rage and charged the Hojo himself, only to be struck down by an arrow and killed. Seeing this, Satomi Yoshitaka withdrew his unengaged army, and shortly afterwards, the remaining forces began a retreat that swiftly turned into a rout.

    The Hojo used the momentum of victory to advance into Kazusa and Shimosa Provinces, whilst Yoshitaka, with his army still intact, would be able to take control of almost the entire Boso Peninsula, where he would continue to resist the Hojo, beginning a feud that would last decades.

    Although the exact date is unclear, after the victory at Konodai, Ujitsuna wouldn’t lead another campaign, and scholars agree that he retired as head of the clan sometime in 1539, when his son, Ujiyasu, completed the conquest of Shimosa and Kazusa Provinces. In late 1540, the reconstruction of Tsurugaoka Hachiman Shrine was completed, and Ujitsuna held a celebration there in which he was recognised as Kanto Kanrei, the Shogun’s official deputy in the Kanto, a title that reflected his preeminent position in the region.

    Hojo Ujiyasu.

    Ujitsuna would eventually pass away in August 1541, and his son, Ujiyasu, lord now in fact as well as name, inherited a strong but dangerous position. Successful campaigns in the east had extended Hojo control to Shimosa province. To the north, the Ogigayatsu-Uesugi plotted revenge and the return of Kawagoe Castle, whilst to the east, the conflict with the Imagawa dragged on, despite a strong frontier on the Fuji River.

    A famine in 1540-41 precluded an immediate campaign, and in 1542 Ujiyasu ordered a land survey, which enabled him to adjust and reform taxation in his territory (which was largely based on rice production) and to ensure a strong economic base for what was to come next. In 1545, the Imagawa sent out peace feelers, but no agreement could be reached, and the Imagawa joined forces with the Uesugi, with both agreeing to attack the Hojo from east and west.

    Ujiyasu rushed forces to the east, but a combined Imagawa-Takeda army proved too strong, and Ujiyasu was eventually obliged to conclude a disadvantageous peace, which saw him cede all the territory the Hojo had controlled in Suruga back to the Imagawa. Though the new border would remain tense, the peace held, and all three sides would eventually conclude an alliance in 1554, though we’re getting ahead of ourselves.

    A later image of Kawagoe Castle.

    Meanwhile, the Uesugi and their allies had massed a force of some 80,000 men around Kawagoe Castle, and with Ujiyasu busy in Surugu, the castle would endure a 6-month siege. Even after the Hojo had secured peace with the Imagawa, Ujiyasu could only muster 10,000 men, and what happened next is a matter of some debate.

    The most common telling is that Ujiyasu, in concert with the garrison inside the castle, organised a night attack on the Uesugi that caught them completely by surprise and routed them in a victory so complete that the Uesugi were destroyed as a serious force in the Kanto. The problem with this version of events is that the only sources describing the battle in that way come from the Edo Period, nearly 100 years after the events.

    Scholars debate the accuracy of those reports, and some suggest that the Battle of Kawagoe Castle happened in a very different way, or may never have happened at all, but what is certain is that the siege was lifted and either during the lifting, or shortly afterwards, the lord of the Uesugi, Tomosada, was killed, and the rest of the clan was forced north, leaving Musashi Province in Hojo hands.

    The remains of Hirai Castle.

    The war against the Uesugi would continue, however. In 1550, an attack on Hirai Castle was repulsed, only for a second attempt the next year to succeed, driving Uesugi Norimasa further north, where he sought refuge with Nagao Kagetora (better known to history as Uesugi Kenshin). In the east, too, the Hojo would advance, marching into Hitachi and Shimotsuke Province, and continuing the war against the Satomi of Kazusa Province to their southeast, conquering Kanaya Castle in 1555 and establishing Hojo control over almost the whole of the western Boso Peninsula.

    These conquests in the east were possible because of the peace established on the Hojo’s western borders. Though there was no actual fighting, the border remained very tense until the establishment of a triple alliance between the Imagawa, Takeda, and Hojo. This alliance was established over the period 1551-1554, as a series of marriages was arranged among all three parties, culminating in 1554, when Ujiyasu’s eldest daughter married Imagawa Yoshimoto’s eldest son, whilst Ujiyasu’s heir, Ujimasa, married the daughter of Takeda Shingen.

    This alliance secured the Hojo’s western border, and in 1559, Ujiyasu retired as head of the clan, handing formal power to his son Ujimasa while retaining actual control himself. That same year, he focused his full attention on pushing the last of the Uesugi clan out of Kozuke Province and established a strong presence at Numata to check any further Uesugi attempts to invade the Kanto.

    The situation in 1560. The Hojo are in Green.
    By Alvin Lee – Own work, CC BY-SA 4.0, https://commons.wikimedia.org/w/index.php?curid=39200926

    In 1560, the Imagawa suffered a serious and surprising defeat at the hands of Oda Nobunaga at the Battle of Okehazama, leaving the clan weak and the Hojo’s western flank reliant on the goodwill of the Takeda. During the same year, another outbreak of famine ravaged Hojo territory, severely weakening their economic power and food supply.

    The timing couldn’t have been much worse, because soon, the Uesugi, now led by Kenshin, would return to the Kanto, and the Hojo would face another serious crisis.

    Sources
    https://ja.wikipedia.org/wiki/%E5%8C%97%E6%9D%A1%E6%B0%8F%E5%BA%B7
    https://en.wikipedia.org/wiki/Imagawa_Yoshimoto
    https://ja.wikipedia.org/wiki/%E5%9B%BD%E5%BA%9C%E5%8F%B0%E5%90%88%E6%88%A6
    https://ja.wikipedia.org/wiki/%E5%B7%9D%E8%B6%8A%E5%9F%8E
    https://ja.wikipedia.org/wiki/%E6%B2%B3%E8%B6%8A%E5%9F%8E%E3%81%AE%E6%88%A6%E3%81%84
    https://ja.wikipedia.org/wiki/%E4%B8%8A%E6%9D%89%E6%9C%9D%E5%AE%9A_(%E6%89%87%E8%B0%B7%E4%B8%8A%E6%9D%89%E5%AE%B6)
    https://ja.wikipedia.org/wiki/%E5%BE%8C%E5%8C%97%E6%9D%A1%E6%B0%8F
    https://ja.wikipedia.org/wiki/%E5%AF%8C%E5%A3%AB%E5%B7%9D
    https://ja.wikipedia.org/wiki/%E5%8F%A4%E6%B2%B3%E5%B8%82
    https://ja.wikipedia.org/wiki/%E5%B9%B3%E4%BA%95%E5%9F%8E

  • Memento Mori, Part 3

    Memento Mori, Part 3

    Last time, we looked at how the relationship between Mori Terumoto and Oda Nobunaga broke down, leaving both sides on the verge of conflict. After Terumoto declared for the Shogun, Ashikaga Yoshiaki (the last Ashikaga Shogun) declared that Terumoto would serve as ‘Vice Shogun’, a slightly ambiguous position which was rendered largely moot in practice, as the Shogun relied almost entirely on Mori’s strength of arms, reducing him to little more than a figurehead.

    Ashikaga Yoshiaki, the last of the Ashikaga Shoguns, and little more than a figurehead.

    The first action of this new ‘Shogunate’ (read: Mori) army was supporting the besieged warrior monks of Ishiyama Hongan-ji. You may recall in the post about the Ikko-Ikki, we mentioned Nobunaga’s campaigns against Hongan-ji, which ultimately lasted more than a decade, and left the temple a charred ruin.

    The Mori, possessing one of the most powerful navies amongst the Sengoku Daimyo, dispatched a fleet which made short work of the Oda forces in Osaka Bay, opening the way for supplies to be delivered to Hongan-ji. This victory prolonged the siege and gave the Mori unchallenged control of the Seto Inland Sea in the short term.

    Later that year, Nobunaga sought to restore the Amago Clan (long-time enemies of the Mori) to a position of strength, putting up Amago Katsuhisa, the last Amago ‘lord’ at Kozuki Castle, in Harima Province, hoping to attract Amago loyalists and any other opponents of the Mori, and make life difficult for Terumoto.

    A later image of Amago Katsuhisa, the last ‘lord’ of the Amago Clan.

    In response, Terumoto himself led an army to lay siege to Kozuki, and when a relief force, led by Hashiba (later Toyotomi) Hideyoshi, arrived, Terumoto handily defeated it, driving the Oda out of Harima Province, taking Kozuki Castle, and obliging the remaining Amago partisans to commit seppuku, which isn’t bad for a day’s work.

    Not long after this success, Terumoto would expand his influence in Harima still further, convincing several lords to defect to the Mori, and bottling up Nobunaga’s remaining loyalists in the province. After this series of successes, Terumoto had Nobunaga on the back foot, and in response, he pressured the Imperial Court to issue an order that Hongan-ji make peace with Nobunaga. The monks of Hongan-ji expressed a desire to make peace, but not without Terumoto, to whom they owed a debt of gratitude. In response, Nobunaga agreed and began negotiations with Hongan-ji and the Mori.

    The strategic situation shifted considerably in the early winter, however, as a Mori fleet dispatched to deliver further supplies to Hongan-ji was defeated by new ironclad ships of the Oda Navy. The exact nature of these vessels isn’t clear; the word ‘ironclad’ is a direct translation from Japanese, implying the vessels were at least partially armoured, though the exact style and extent of armour isn’t clearly recorded.

    An example of the type of warship used by the Mori Navy.

    Shortly after this victory, which drove the Mori beyond Awaji Island and opened Osaka Bay to the Oda, Nobunaga swiftly called off negotiations and made plans to continue the war. Despite the defeat, the Mori were still in a very strong position, however, and at this point, Terumoto made plans to advance on Kyoto and take the fight to Nobunaga directly.

    Plans were laid, including negotiation with Takeda Katsuyori for a simultaneous attack on Nobunaga’s ally, Tokugawa Ieyasu, and Terumoto set the date of the start of the campaign for early 1579. However, early 1579 came and went, and the Mori did not march. A series of rebellions broke out around the same time, supposedly instigated by both Nobunaga and the Otomo Clan (rivals to the Mori on Kyushu), and Terumoto had his hands full.

    The situation went from bad to worse for the Mori throughout 1579, as several border clans, angered at what they saw as a ‘betrayal’ when Terumoto failed to march on Kyoto, defected to the Oda side, disrupting communications with troops on the front line, and opening several gaps in Mori defences. The Mori failure to march also resulted in no further attempts to relieve Hongan-ji, and it was forced to surrender in early 1580.

    Not long after that, Nobunaga was able to focus significant forces on the Mori, and an army led by Hashiba Hideyoshi took advantage of the Mori’s weak position and launched a series of successful attacks against them, capturing castle after castle. A counter-attack in February 1582 led to a brief reprieve, but news from elsewhere was bad.

    A later artistic depiction of Toyotomi Hideyoshi (then still called Hashiba) around 1582.

    The Takeda, with whom the Mori had allied against Nobunaga, were decisively defeated in early Spring, and with their removal, Nobunaga turned his entire attention to the Mori. The situation was dire. A little more than five years earlier, the Mori had been a match for Nobunaga; indeed, had Terumoto marched on Kyoto, he would have had a good chance of success.

    Now, however, Nobunaga was stronger than ever, and internal rebellion, defections, and military defeats meant that the Mori were far weaker in comparison. Had Nobunaga advanced, he almost certainly would have won.

    As is so often the case, however, fate intervened. Nobunaga was betrayed by one of his generals in June 1582 and killed. His supporters immediately turned on each other, with Hashiba Hideyoshi, the man who had been leading the charge against the Mori, wishing to establish himself as Nobunaga’s successor, and so he concluded a swift peace with the Mori. For his part, Terumoto was glad to accept, even though it meant sacrificing three provinces. When news of Nobunaga’s death broke, Ashikaga Yoshiaki, still with the Mori, ordered Terumoto to march on Kyoto and take advantage of the situation.

    A 19th century depiction of Oda Nobunaga’s final moments.

    Terumoto refused, still forced to deal with internal rebellion, and although there would be plenty of opportunities to involve himself in the chaotic fighting that followed Nobunaga’s betrayal, the Mori would not move, instead adopting a ‘wait and see’ approach, which, in hindsight was wise, as although history would record Hideyoshi as the ultimate victor, in the summer of 1582, that was far from certain.

    One thing that Terumoto did agree to, however, was refusing to accept the ceding of three provinces to Hideyoshi as part of their peace deal. No doubt the Mori felt that Hideyoshi had misled them (Terumoto hadn’t known about Nobunaga’s death before the agreement), and with Nobunaga’s successors tearing each other apart, the Mori were in a good position to keep hold of their territory.

    Negotiations dragged on, even after Hideyoshi was able to win a decisive victory at the Battle of Shizugatake in April 1583, and he began to lose patience, threatening a resumption of war if the Mori didn’t concede. It would not be until early 1585 that a peace was actually agreed, and it was achieved largely without fresh fighting. The Mori would be allowed to keep seven provinces, representing much of the territory that had been taken by Terumoto’s grandfather, Motonari. In exchange, the Mori agreed to support Hideyoshi’s campaigns to unite the realm, especially in Shikoku and Kyushu, which the Mori assisted in invading in May 1585 and August 1586, respectively.

    The strategic situation in 1584, just after Hideyoshi secured power. The Mori are represented in yellow, and Hideyoshi in red.
    By Alvin Lee – Own work, CC BY-SA 4.0, https://commons.wikimedia.org/w/index.php?curid=39198357

    Finally, in the summer of 1586, Terumoto formally became a vassal of Hideyoshi (by now known as Toyotomi), ending decades of conflict and proving to be a significant step in bringing the Sengoku Jidai to an end more generally. A testament to the new trust placed in the Mori came in 1590, when Hideyoshi attacked the Hojo Clan, masters of the Kanto. Though the Mori did not join the campaign, Mori troops were entrusted with guarding the capital while Hideyoshi was away.

    Around this time, Terumoto completed his new base at Hiroshima Castle and would take part in Hideyoshi’s ill-fated invasion of Korea in 1592. We will go into more detail about the events that followed later, but after Hideyoshi’s death in 1598, Terumoto was named as one of five regents for his infant son, Hideyori.

    The five regents were meant to stabilise the realm until Hideyori came of age, but it didn’t work; Tokugawa Ieyasu was swiftly opposed by the other four as it was believed (rightly as it turned out) that he wished to overthrow the current government and make himself Shogun. The tension would eventually lead to a new outbreak of violence, and a brief campaign culminated in the decisive Battle of Sekigahara in 1600.

    Teruhito and the Mori Clan were officially in opposition to the victorious Ieyasu, but had dispatched only a small force to Sekigahara, keeping their main strength at Osaka Castle to guard the heir. This was the strongest castle in the realm, and Terumoto had tens of thousands of fresh troops with which to hold it. Ieyasu, apparently aware of this, dispatched a letter to Terumoto, expressing his desire for positive relations between the two, and hoping that the Mori would depart Osaka without further violence.

    The walls of Osaka Castle as they appeared in 1865.

    Terumoto agreed when Ieyasu confirmed that the Mori would lose no territory in the aftermath. However, Ieyasu would almost immediately go back on his word once Terumoto was safely away from Osaka. The Mori were reduced to just two provinces in the far west, Suo and Nagato, and almost all the territory taken by Motonari and Terumoto was lost.

    Terumoto himself would officially retire as head of the clan not long after Sekigahara and became a monk, though in reality, he would retain most of the actual authority within the clan. One challenge that came about almost immediately was the loss of income that came with the loss of territory. Before Sekigahara, the Mori had had an income of more than 1 million koku (a Koku being approximately how much rice one man needed for a year). After Sekigahara and the loss of five of their provinces, this income was down to less than 300,000.

    This loss in income led to a loss in strength, as many of the clan’s retainers found their stipends reduced or lost entirely, leading them to seek employment elsewhere (just in case you thought Samurai were all about unquestioned loyalty.) Terumoto rather astutely recognised that this reduction might actually benefit the clan long term, as disloyal vassals would leave quickly, and even those who remained could be chosen based on ability, leading to a reduction in the clan’s overall strength, but perhaps improving skill and efficiency, at least in theory.

    A 19th century photograph of Hagi Castle, where the Mori Clan were based after their forced relocation.

    This would prove a wise move, as a land survey in 1610 showed that the Mori’s financial situation was better than originally assumed, and the reduction in vassals and retainers had led to a leaner, more efficient administration.

    Peace in the realm would last a while under Tokugawa Ieyasu’s rule, but it was a fragile thing. In 1614, the now adult Toyotomi Hideyori (Hideyoshi’s heir) brought about a crisis when a new prayer bell was inscribed with language that was interpreted as calling for the overthrow of the Tokugawa. Hideyori holed up in Osaka Castle and called on all ‘loyal vassals’ to come to his aid. Most, including Terumoto, ignored him, and when Ieyasu marched on Osaka, he requested the Mori dispatch their navy in support, which they duly did.

    Terumoto also led an army to Osaka, though the Mori would ultimately play a relatively small role in the so-called Winter Siege of Osaka. The following year, during what is called the Summer Siege, Ieyasu attacked Osaka again, this time successfully, capturing and executing Hideyori, and bringing his line to an end.

    Tokugawa Ieyasu, the man who would ultimately bring the Sengoku Jidai to an end.

    The Mori were again asked to dispatch an army, but delays in orders and the length of the march meant they arrived only after Osaka had fallen. There was some concern that this delay might be interpreted as treachery by Ieyasu; however, even the savvy political operator, Ieyasu, chose to lay the blame on slow communication instead, sparing the blushes of the Mori.

    Terumoto, his health failing and age catching up with him, handed full control of the clan over to his heir, Hidenari, in 1621, and although a formal system of ‘dual leadership’ would continue, it was becoming increasingly clear that Terumoto’s time was running out.

    He would continue to play a role in the affairs of the Mori until his death in 1625, and his clan’s distant position from the new capital in Edo afforded them a certain degree of autonomy, at least with regard to internal affairs, in the years that followed.

    That would prove important in the 19th century, as the arrival of American ships in Edo Bay forced Japan to end its period of isolation. It would be the Mori Clan, based in what by then was called the Choshu Domain, who would lead the charge against the Tokugawa Shogunate, overthrowing it, and re-establishing Imperial Rule in the so-called Meiji Restoration, but we are getting way ahead of ourselves.

    Mori Motonari, the last lord of Choshu Domain.

    Mori Terumoto is one of the giants of the Sengoku Era. Building on the successes of his grandfather, Motonari, he led the Mori to a position in which they may well have been able to take power for themselves, had things gone a little differently. Ultimately, despite never gaining ultimate power for themselves, Terumoto and his successors would prove to be one of the success stories of this period, surviving the turmoil and even thriving in the new Japan of the 19th Century.

    Sources
    https://ja.wikipedia.org/wiki/%E6%AF%9B%E5%88%A9%E8%BC%9D%E5%85%83
    https://ja.wikipedia.org/wiki/%E5%BA%83%E5%B3%B6%E5%9F%8E
    https://ja.wikipedia.org/wiki/%E4%BA%AC%E8%8A%B8%E5%92%8C%E7%9D%A6
    https://ja.wikipedia.org/wiki/%E9%B3%A5%E5%8F%96%E5%9F%8E
    https://ja.wikipedia.org/wiki/%E9%89%84%E7%94%B2%E8%88%B9
    https://ja.wikipedia.org/wiki/%E5%89%AF%E5%B0%86%E8%BB%8D
    https://en.wikipedia.org/wiki/M%C5%8Dri_Terumoto
    https://ja.wikipedia.org/wiki/%E5%B0%BC%E5%AD%90%E5%8B%9D%E4%B9%85
    https://en.wikipedia.org/wiki/Toyotomi_Hideyoshi
    https://en.wikipedia.org/wiki/Tokugawa_Ieyasu

  • Memento Mori, Part 2

    Memento Mori, Part 2

    Last time we looked at Mori Motonari, the lord who took his clan from struggling to hold onto their domains to controlling one of the largest territories of any clan during the Sengoku Period. Motonari’s son, Takamoto, died early, and so it would fall to his grandson, Terumoto, to lead the clan after Motonari himself passed in 1571.

    Mori Terumoto

    Terumoto was born in 1553, at a time when his clan, the Mori, were already on the rise. Under the leadership of Motonari, the clan had recently purged the Inoue, who had presented a serious internal threat, obliging Motonari to get rid of them. Shortly before Terumoto was born, the Ouchi, nominal overlords of the Mori, were seriously weakened by an internal coup, allowing Motonari to expand his clan’s power base still further, and not long after that, the Mori would win the decisive Battle of Itsukushima, establishing themselves as the (relatively) unchallenged power in the region.

    Throughout his early life, Terumoto hardly saw his father or grandfather, as both men were frequently on campaign, and the young boy, as the future leader of the Mori, was kept safe, far from the fighting. Takamoto was, by this point, technically the leader of the Mori (though Motonari would remain in control), and when he died suddenly in 1563, Terumoto, just 11 years old, became the nominal head of the clan. Due to his youth, however, Motonari agreed to serve as ‘co-leader’, whilst (again) retaining all the actual power.

    In 1565, as a sign of how far the Mori had risen, Terumoto’s coming-of-age ceremony was attended by an official representative of the Shogunate, lending formal (if only symbolic) prestige to the young man. After this, Terumoto, who was now legally an adult, became the official head of the clan, and from then on, most legal documents carried his signature, though he would continue to defer to his grandfather in practice.

    Later that year, Terumoto would join his grandfather in Izumo Province, taking part in the campaign against the Amago, who had once been strong enough to demand fealty from the Mori, but were now on their last legs. This final campaign against the Amago would be concluded successfully in late 1566, with the surrender of their last stronghold at Gassan-Toda Castle, signalling the end of the war and the Amago Clan.

    The site of Gassan-Toda Castle as it appears today.
    安来市政策秘書課 – 投稿者自身による著作物, CC 表示-継承 4.0, https://commons.wikimedia.org/w/index.php?curid=74692475による

    Despite this victory, an uprising of former Amago retainers would occur in June 1569, followed by a similar uprising amongst former Ouchi warriors in October. These twin uprisings were either instigated or supported after the fact by the Otomo, whom the Mori had been fighting for control of Northern Kyushu with.

    Mori control of Izumo, Suo, and Nagato provinces was suddenly under serious threat. Withdrawing forces from Kyushu allowed them to quickly deal with the Amago rebellion, but the Ouchi proved a much sterner test, and required the Mori to dedicate even more resources to putting them down. Though victorious in early 1570, the consequences were that the Mori lost all their influence in Kyushu and had to continue a long, bloody campaign, trying to stamp out the embers of the Amago.

    Suo Province
    Izumo Province
    Nagato Province

    By Ash_Crow – Own work, based on Image:Provinces of Japan.svg, CC BY 2.5, https://commons.wikimedia.org/w/index.php?curid=1691776

    Around this time, wider events began to have an impact on the Mori as well, bringing them onto the main stage of events in and around Kyoto. Earlier, in 1565, Shogun Ashikaga Yoshiteru was assassinated in what became called the Eiroku Incident, and his replacement, Ashikaga Yoshiaki, went looking for support from the clans further away from the capital.

    In 1568, the new Shogun dispatched a request for aid to several powerful leaders, including Uesugi Kenshin, Oda Nobunaga, and Mori Motonari. The Uesugi and Mori refused, but Nobunaga, based closer to the capital and possessing uncommon ability and ambition, responded positively and dispatched forces to Kyoto.

    Ashikaga Yoshiaki, the last of the troubled Ashikaga Shoguns.

    Not long after that, the Oda and Mori began to cooperate against their common enemy, the Miyoshi (who also happened to be the clan behind the assassination of the previous Shogun, which was handy). Over the next few years, an alliance would be established, and Nobunaga would actually dispatch forces to help the Mori put down the Amago and Ouchi, but beyond that, there would be little direct cooperation.

    When Mori Motonari died in 1572, leaving Terumoto to lead the clan alone, relations with Nobunaga were already in decline. Previously, the Mori had sought to use the authority of the Shogun (by now under Nobunaga’s control) to advance their own goals, and for a time, Nobunaga was happy to acquiesce, but after 1572, it became clear that Nobunaga had plans of his own that didn’t necessarily involve the Mori.

    Though the Shogun had largely been under Nobunaga’s control since 1565, at first, it had been a subtle arrangement. Nobunaga was in charge, but Yoshiaki was permitted to still act like the Shogun, even if his commands and proclamations (such as they were) were increasingly screened and eventually written by Nobunaga.

    Oda Nobunaga.

    Yoshiaki didn’t passively accept this, however. His problem was that he had little military strength of his own (a problem for the Ashikaga Shoguns since the very start), and with Nobunaga’s pre-eminent military position, the Shogun needed help. He thought he might find it in the Mori, one of the few clans that had the strength to challenge Nobunaga directly.

    In 1573, at the recommendation of the Shogun, Terumoto was granted the title of Uma no Kami, which translates as “Master of Horse”. Though Imperial titles had long since become little more than baubles, they still carried prestige, and Yoshiaki almost certainly did it to butter the Mori up and bring them over to his side, against Nobunaga.

    Yoshiaki was desperate by this point. Earlier that year, Takeda Shingen, who had agreed to march on Kyoto at least nominally in support of the Shogun, had died suddenly, bringing an end to the prospect of Takeda support. In early Spring, Yoshiaki raised an army anyway, hoping to take advantage of Nobunaga being distracted elsewhere, but instead suffered a series of defeats, which culminated in the Battle of Makishima Castle in July, which saw Yoshiaki exiled from Kyoto.

    The monument at the ruins of Makishima Castle.
    Muscla3pin – 投稿者自身による著作物, CC 表示-継承 4.0, https://commons.wikimedia.org/w/index.php?curid=77200674による

    Shortly after this, Nobunaga, aware of his vulnerable position, wrote to Terumoto, assuring him that it was the actions of the Shogun that led to Oda troops formally occupying the capital, and that he would do everything he could to maintain peace in the realm. Given that there hadn’t been peace in the realm for more than a century at this point, it leads us to conclude Nobunaga was just being polite.

    Though Terumoto probably eyed Nobunaga’s expansionism warily, the alliance was, for now, convenient for both sides, as it largely secured the border between the two powerful clans and allowed them to carve up the territory of the smaller clans caught in the middle. Terumoto did continue to try to mediate a peace between Yoshiaki and Nobunaga, though neither side seems to have negotiated with much faith.

    Scholars speculate that both Terumoto and Nobunaga wanted to avoid a situation in which the Shogun would flee to Mori territory, Terumoto because had no interest in helping Yoshiaki, but couldn’t rely on some of his more tenuous vassals not making trouble, and Nobunaga for pretty much the same reason, the Mori were one of the few clans strong enough to oppose him, and if they backed the Shogun, Nobunaga might be in trouble.

    Though Nobunaga was allied with the Mori, he took other actions that would be considered unfriendly. On the Eastern borders of Mori territory (the West, as far as Nobunaga was concerned) lay the Urakami Clan, who dominated the three provinces of Bizen, Harima, and Mimasaka. The Mori and Urakami had engaged in a long war before the Urakami had agreed to submit to the Mori in exchange for recognition of this territory, terms to which the Mori agreed, effectively turning the Urakami into vassals.

    Bizen Province
    Harima Province
    Mimasaka Province

    However, Nobunaga issued a “Red Seal Letter” (an official, legally binding document named for its eponymous red seal), recognising the Urakami as lords of the three provinces. This was, in effect, simply making official something that was already a fact; however, when the Urakami accepted the letter, they effectively ceased to be Terumoto’s vassals, that is, if the Mori accepted the new situation.

    The Mori, not surprisingly, did not. In 1575, they attacked the Urakami, defeating them in a series of battles and essentially eliminating them as a power, taking direct control of the provinces. The Urakami had apparently expected Nobunaga to dispatch forces to aid them, but he had erred on the side of caution, deciding that the Urakami were an acceptable sacrifice for keeping the peace with the Mori, at least for now.

    An immediate consequence of this was that there were no more buffers between the Mori and Oda territories, which now shared a border. The relationship was already tense, and it only grew worse as both sides became involved in Tajima Province. Expecting that Nobunaga would seek to make the province part of his domain, Terumoto made an alliance with the province’s local power, the Yamana. You may remember that name from earlier posts, and well done if you did; the Yamana were still around at this point, though no longer the great clan they once were.

    A map showing the borders between the Mori (in Yellow) and the Oda (in Red) in 1575, with Tajima Province marked.
    By Alvin Lee – Own work, CC BY-SA 4.0, https://commons.wikimedia.org/w/index.php?curid=39200929

    Then in 1576, the Shogun, Ashikaga Yoshiaki, having been forced to flee Kyoto by Nobunaga, found himself in Bingo Province, controlled by the Mori. Terumoto was not happy about this. Although he had ostensibly supported the restoration of the Shogunate, he understood that the only way that could happen was through war with Nobunaga, which he had no interest in. When the Shogun showed up on his doorstep and formally asked the Mori to support him in returning to Kyoto, then Terumoto was in a tricky spot.

    The Mori had promised Nobunaga that they would not harbour the exiled Shogun. On the other hand, Nobunaga had taken actions that were widely seen as trying to undermine Mori power, and although he had attacked them directly, the damage had been done.

    Terumoto, for his part, took a long time making up his mind. We’ll never know exactly what he was thinking, but it’s easy to imagine that Terumoto had plenty of reason to be wary of Nobunaga, who had already meddled in Mori affairs and would probably do so again if given the chance. The Mori were also one of the few clans with the power to actually face Nobunaga directly, something that Terumoto must have been aware of.

    Terumoto would declare for the Shogun in May 1576, effectively ending his alliance with Nobunaga and setting the Mori on a collision course with the Oda, but more on that next time.

    Sources
    https://ja.wikipedia.org/wiki/%E6%AF%9B%E5%88%A9%E8%BC%9D%E5%85%83
    https://en.wikipedia.org/wiki/M%C5%8Dri_Terumoto
    https://ja.wikipedia.org/wiki/%E6%9C%88%E5%B1%B1%E5%AF%8C%E7%94%B0%E5%9F%8E
    https://ja.wikipedia.org/wiki/%E6%A7%87%E5%B3%B6%E5%9F%8E%E3%81%AE%E6%88%A6%E3%81%84
    https://ja.wikipedia.org/wiki/%E6%9C%B1%E5%8D%B0%E7%8A%B6
    https://en.wikipedia.org/wiki/Oda_Nobunaga
    https://en.wikipedia.org/wiki/Ashikaga_Yoshiaki

  • The Dragon of Echigo

    The Dragon of Echigo

    Much like Takeda Shingen, Kenshin’s real name wasn’t Kenshin, but Kagetora, with Kenshin being a religious name given in later life. However, as this is the name he is best known by, we will be referring to him as it throughout.

    Uesugi Kenshin, the Dragon of Echigo and the topic of this post.

    If you live your life in such a way that you earn the nickname ‘Dragon of something’ and have followers who think of you as an avatar of the God of War, then I’d say you’ve done pretty well for yourself. By this standard, our subject for today, Uesugi Kenshin, is a historical figure worthy of a closer look.

    Confusingly enough, Uesugi Kenshin wasn’t actually a member of the Uesugi family to begin with. He was a scion of the Nagao family, a strong clan who were vassals of the Yamanouchi branch of the Uesugi Clan, based in Echigo Province, in what is now Niigata Prefecture.

    Echigo Province.
    By Ash_Crow – Own work, based on Image:Provinces of Japan.svg, CC BY 2.5, https://commons.wikimedia.org/w/index.php?curid=1655309

    Born in 1530, it is quite likely that Kenshin’s mother was a concubine, and what’s more, the boy himself was the second son. He was never intended to inherit control of the Nagao Clan, and he entered the temple at Risenji at age 11, apparently set on a life as a monk.

    He doesn’t seem to have stayed at Risenji for long, however, as when his father died in 1542, just a year later, he was at the funeral with armour and sword at his side, and shortly after that, he was at Tochio Castle when a rebellion against Kenshin’s brother (the new Lord Nagao) broke out. Despite being just 14, Kenshin is supposed to have led the defence of the castle and won his first victory.

    At the time, though the Uesugi were nominally the lords of the region, the Nagao served as deputy (and de facto) governors in their place. After the death of Kenshin’s father, it was his elder brother, Harukage, who inherited this position. The brothers don’t seem to have gotten along very well, however, and in the late 1540s, a movement emerged within the Nagao clan that sought to replace Harukage with Kenshin as head of the clan.

    The remains of Tochio Castle, site of Kenshin’s first victory.
    nubobo – 栃尾城本丸跡, CC 表示 2.0, https://commons.wikimedia.org/w/index.php?curid=59682349による

    Exactly why the clan was so against Harukage isn’t clear, but their efforts were ultimately successful. In 1548, under mediation from Uesugi Sadazane (their nominal overlord), Harukage agreed to adopt Kenshin, then retire as head of the clan, clearing the way for Kenshin to become head of the Nagao Clan aged just 18 or 19 (depending on the source).

    In 1550, Sadazane died without an heir, leaving Echigo Province without a lord. At this point, Shogun Ashikaga Yoshiteru instructed Kenshin to take the position of shugo of the province, effectively making him the new lord. Shogunate recognition was not quite the prestigious thing it had once been, however, and not long after this, supporters of Kenshin’s brother rose up in rebellion against him.

    Kenshin quickly bottled up the rebels at Sakado Castle, when the castle fell, the leader of the rebels was spared because he was Kenshin’s brother-in-law, and following this, Kenshin, still aged just 22 had established effectively control over the whole of Echigo Province.

    Looking back for a moment, five years earlier, the Uesugi Clan (or more accurately, the Ogigayatsu branch of the clan) had been defeated at the Battle of Kawagoe by the new rising star of the Kanto, the Hojo Clan. The Ogigayatsu-Uesugi were wiped out after this battle, leaving only the Yamanouchi Branch of the clan. In 1552, Uesugi Norimasa, who was, on paper, the Kanto Kanrei (Shogun’s deputy) was finally driven out of the Kanto entirely and sought refuge with Kenshin.

    A later depiction of Kawagoe Castle.

    Unsurprisingly, harbouring their enemies didn’t do much for the relationship between Kenshin and the Hojo, and Kenshin would send an army to oppose the Hojo’s invasion of Kozuke Province (modern Gunma Prefecture), capturing Numata Castle, and forcing the Hojo to retreat.

    A year later, Kenshin would face a new enemy, as Takeda Shingen’s long-running invasion of Shinano eventually obliged some of the clans there to flee and seek refuge with Kenshin in Echigo. Much like the Hojo, the Takeda didn’t take kindly to someone giving refuge to their enemies, and one of Japanese history’s most famous rivalries was born.

    In August 1553, an army led by Kenshin himself advanced against the Takeda in Shinan, defeating Shingen himself at the Battle of Fuse on August 30th, then again at Yuwata on September 1st. After this, Shingen adopted a strategy of avoiding direct battle with Kenshin, and the conflict settled into a stalemate that was later called the First Battle of Kawanakajima.

    A modern view of Kawanakajima.
    日本語版ウィキペディアのBlogliderさん – 原版の投稿者自身による著作物 (Original text: Photo by Bloglider.), CC 表示-継承 3.0, https://commons.wikimedia.org/w/index.php?curid=12400636による

    In 1554-55, Kenshin was obliged to face a rebellion launched by treacherous vassals in league with Shingen. Putting down the rebellion quickly, Kenshin again marched into Shinano in April 1555 to face the advancing Takeda forces, again led by Shingen.

    At the Second Battle of Kawanakajima, the two sides faced each other in another stalemate, which dragged on for five months, before mediation from the Imagawa Clan led to both sides withdrawing after little actual fighting.

    In the following year, Kenshin apparently announced he would retire and become a monk, however, another outbreak of Takeda-backed rebellion forced him to change his plans, and after a period of peace, in 1557, Shingen again advanced against Kenshin’s allies in Shinano, forcing him to intervene and leading to the Third Battle of Kawanakajima, which, much like the previous two, swiftly settled into stalemate.

    A year later, Kenshin dispatched an army in an ultimately unsuccessful invasion of Kozuke Province and then in 1559 he was ‘invited’ for a meeting with the Shogun, Ashikaga Yoshiteru. Some sources say that Kenshin was granted the title of Kanto Kanrei at this time, the position traditionally held by the Uesugi Clan. He also apparently donated funds towards the maintenance and repair of the Imperial Palace.

    Swords supposedly gifted to Kenshin by the Emperor, photographed in 1928.

    It seems that Kenshin enjoyed good relations with the Shogunate, but the already well-established decline of the Shogun’s power is highlighted again when he asked Kenshin, Shingen, and the Hojo to make peace in order to combine their forces against the Shogun’s enemies. All three parties refused.

    In March 1560, the Imagawa Clan’s devastating defeat at Okehazama opened the way for Kenshin to intervene directly in the Kanto again, as the Imagawa had been allied to his enemies, the Hojo, and their defeat left the Hojo vulnerable. Later that year, Kenshin launched another large-scale invasion of Kozuke Province, driving the Hojo back and capturing several important castles before celebrating New Year at Maebashi Castle, the gateway to the Kanto Plain.

    In March 1561, Kenshin was formally adopted by the Yamanouchi-Uesugi Clan (the only remaining branch) and changed his surname to match. Though he would be known as Uesugi Kagetora from this point, we will continue to call him Kenshin to keep things simple.

    In August of that year, Kenshin led another large army into Shinano, and engaged the Takeda at the Fourth Battle of Kawanakajima. Unlike the previous three, this battle was not an extended stalemate, but a bloody one. Both sides suffered heavy casualties, with sources ranging from around 20% losses, to as high as 60 or 70%, and when the battle was over, the Takeda held the field, but made no attempt to intervene as the Uesugi withdrew, leading some to suggest the battle was a bloody draw.

    A legendary depiction of the Fourth Battle of Kawanakajima, depicting the (possibly apocryphal) moment that Uesugi Kenshin and Takeda Shingen met on the field.

    The Takeda and Hojo clans, recognising the Uesugi as their common enemy, renewed their combined efforts and launched a joint counter-attack in Musashi Province in late 1561. At first, Uesugi forces were successful against the alliance, even getting as far as besieging Odawara Castle, the Hojo’s main stronghold, before being forced to withdraw after allied counter-attacks in other parts of the Kanto.

    The strategic situation in the Kanto would ebb and flow over the following years, as Uesugi, Takeda, and Hojo armies advanced and retreated, and the local lords would switch sides depending on whoever appeared to be in the ascendancy.

    All three factions would be occupied with fighting each other, but also engaged in other battles and proxy wars with allies and supporters of each other’s enemies. For Kenshin, this meant being obliged to dispatch forces into neighbouring Etchu Province in 1568, to deal with Ikko Ikki forces nominally allied with Shingen.

    Etchu Province.

    Seeking to take advantage of this distraction, Takeda forces attacked in Shinano and were ultimately defeated, but a rebellion in Echigo (Kenshin’s home province) meant he was unable to take advantage of this victory in the short term.

    Later that year, the strategic situation would shift in Kenshin’s favour, however, as the long-term decline in Takeda-Imagawa relations finally led to open conflict between two of his main rivals. The Imagawa would request aid from both the Uesugi and the Hojo, and while Kenshin would refuse, the Hojo dispatched forces to oppose the Takeda, bringing an end to the alliance that had done so much to oppose Kenshin.

    However, years of expensive (and bloody) campaigns in the Kanto had left the Uesugi exhausted, and in 1569, Kenshin reluctantly agreed to a peace deal with the Hojo, which saw the Uesugi withdraw from Musashi Province (modern day Tokyo and Saitama) and the Hojo withdrew from Kozuke.

    With his borders with the Hojo (relatively) secure, Kenshin was able to focus on campaigning against the Takeda again. In 1570 and 1571, he would engage the Takeda and their allies in Etchu and Shinano Provinces, generally having the better of the fighting, but the situation would shift again in 1572 when the lord of the Hojo, Ujiyasu, passed away, and was replaced by Ujimasa, who made peace with the Takeda, turning on the Uesugi. At the same time, the Etchu Ikko Ikki launched a fresh attack, instigated by Takeda Shingen.

    Hojo Ujimasa, who reversed his father’s diplomatic policy.

    The Ikko Ikki would initially be successful against Kenshin, but by mid-1573, the momentum had shifted back in his favour, and several key fortresses within Etchu were taken. Also in that year, Kenshin’s long-time rival, Takeda Shingen, passed away, an event that apparently caused Kenshin to weep openly, but also significantly weakened the Takeda.

    Over the following two years, Kenshin was forced to split his focus between his ongoing campaign in Etchu and the situation in the Kanto. By the end of 1574, the Hojo had effectively ended any Uesugi presence in the region, and although Kenshin would launch counterattacks, the writing was on the wall for Uesugi power in the Kanto.

    In 1576, Kenshin would receive a request for aid from the Shogun, seeking support against Oda Nobunaga, who now dominated central Japan and had forced the Shogun into exile. In order to get to Kyoto, Kenshin was obliged to focus all his resources on securing Etchu and Noto Provinces. This campaign would drag on throughout 1576 and 1577, delayed by intervention from the Hojo and internal rebellion, but by November 1577, Kenshin had secured control of the provinces and was poised to strike at Kyoto itself.

    Noto Province.
    By Ash_Crow – Own work, based on Image:Provinces of Japan.svg, CC BY 2.5, https://commons.wikimedia.org/w/index.php?curid=1690738

    Mustering a large army, Kenshin would march out to meet a force led by Nobunaga’s generals, Shibata Katsuie and Hashiba Hideyoshi (better remembered to history as Toyotomi Hideyoshi), who were not fond of each other. A dispute led to Hideyoshi withdrawing his forces early, and when the two sides clashed at the Battle of the Tedori River on November 3rd, Kenshin would emerge victorious.

    The exact course of the battle, and even the size of the forces involved, is not clear from contemporary sources, but Kenshin would withdraw temporarily, issuing instructions for a renewed campaign to begin in the spring. The battle at the Tedori River had opened a strategic opportunity for Kenshin, and it has been speculated that he might have been able to complete his march on Kyoto.

    Much like his rival, Shingen, however, Kenshin would never make the march. In early March, Kenshin would collapse (allegedly whilst in the toilet) and fall into a coma from which he would never wake up; he died on March 13th, aged 49.

    The site of Kenshin’s grave at Risenji, where he studied as a boy.
    By shikabane taro, CC BY 3.0, https://commons.wikimedia.org/w/index.php?curid=54071606

    Much like the Takeda after the death of Shingen, the Uesugi would be seriously weakened by Kenshin’s death. Though they had been a threat to Nobunaga, Kenshin’s death, and the ongoing effects of years of more or less constant conflict, rendered them powerless to stop the rise of Nobunaga, and after his death in 1582, the Uesugi would make their peace with his successors.

    Decisions made at the end of the Sengoku Jidai would see the clan’s star fall even further, though that is a story for another time.

    Sources
    https://ja.wikipedia.org/wiki/%E4%B8%8A%E6%9D%89%E8%AC%99%E4%BF%A1
    https://ja.wikipedia.org/wiki/%E6%89%8B%E5%8F%96%E5%B7%9D%E3%81%AE%E6%88%A6%E3%81%84
    https://en.wikipedia.org/wiki/Battle_of_Tedorigawa
    https://ja.wikipedia.org/wiki/%E5%B7%9D%E4%B8%AD%E5%B3%B6
    https://ja.wikipedia.org/wiki/%E5%89%8D%E6%A9%8B%E5%9F%8E
    https://ja.wikipedia.org/wiki/%E6%B2%BC%E7%94%B0%E5%9F%8E
    https://en.wikipedia.org/wiki/Battles_of_Kawanakajima

  • Takeda-mned if you don’t…

    Takeda-mned if you don’t…

    (I had to make this a two-parter or the joke in the title wouldn’t have worked.)

    Note: Takeda Shingen’s real name was Harunobu, with Shingen being a name he took as part of his religious vocation. In keeping with my policy of using the names that figures are best known by, we’ll be referring to him as Shingen throughout this post, but in other sources, he is often called Harunobu, just so you know.

    Takeda Shingen, who has kind of become an unofficial mascot of this site.

    In June 1541, Takeda Shingen (then known as Harunobu) overthrew his father, Nobutora, and established himself as the leader of the Takeda Clan and master of Kai Province. As we mentioned last time, the exact reasons for this coup aren’t known; some sources say he was overthrowing his tyrannical father, others that it was a self-serving power grab, but whatever his motivation, Harunobu was in charge, and he had big plans.

    The strategic and diplomatic situation that Shingen inherited was full of risks and opportunities. His father had successfully subjugated all of Kai Province and even expanded the borders of Takeda control into neighbouring Shinano. He had been a fierce rival of the Hojo Clan, based in Izu and Sagami Provinces (modern day Kanagawa Prefecture), but had established peaceful relations or alliances with other powerful neighbours.

    Almost immediately, Shingen would chart a radically different course. His father had been allied with the Suwa Clan of Shinano, to the Takeda’s north, but in June 1542, Shingen invaded Shinano Province, defeating the Suwa at the Battle of Kuwabara Castle, and forcing their leader to commit suicide, absorbing their lands into his own.

    Takeda territory is in blue, and the clans that Shingen quickly made enemies of are shown approximately in red.

    Though the result of this campaign is relatively undisputed, the exact nature of how things got started is more controversial. Allegedly, in March 1542, before Shingen’s invasion of Shinano, the Suwa Clan and their allies attacked first, before being defeated at the Battle of Sezawa. The problems come from there being little evidence that this battle ever took place, with some historians suggesting that it might have been a later invention to justify Shingen’s invasion after the fact.

    Regardless of its origins, the campaign would be a long and ultimately successful one for Shingen. A series of battles through the late 1540s put the Takeda in a pre-eminent position in Shinano. By 1553, the clan occupied almost the entire province; only the far north, around the modern city of Nagano, remained outside their control.

    This would prove significant later, but during this period, Shingen would also prove himself to be a savvy political player as well. In 1544, Shingen made peace with the Hojo and then mediated between them and the Imagawa, bringing an end to their conflict, allowing both clans to focus on issues elsewhere, and securing peace on Kai’s southern borders.

    Hojo Ujiyasu, with whom Shingen made peace.

    Turning his attention back to Shinano, Shingen would launch semi-annual campaigns into Shinano, winning a series of victories against the clans based in the province, and slowly extending Takeda dominance. He didn’t have it all his own way, however; in March 1548, the Takeda marched against the Murakami Clan, one of their chief rivals for control of Shinano. The Battle of Uedahara was arguably a draw, as both sides suffered similar losses; however, the Takeda advance was stopped, and they lost several key commanders, with Shingen himself being wounded.

    In July of that year, another of Shingen’s enemies in Shinano, the Ogasawara Clan, sought to take advantage and push the Takeda back into Kai; however, at the Battle of Shiojiri Pass, the Ogasawara were decisively defeated by a resurgent Shingen, and the momentum would swing back in favour of the Takeda.

    In 1550, Shingen took control of what is today called the Matsumoto Basin (around the modern city of the same name), but a second serious defeat would follow in September of that year, as the Takeda tried and failed to take Toishi Castle. Sources differ, with some saying the Takeda lost a fifth of their forces, and others saying it was as many as two-thirds.

    Although losses were clearly heavy, as with Uedahara a few years earlier, Shingen wasn’t on the back foot for long. In April 1551, Toishi Castle was taken (supposedly through trickery), and over the next two years, he would drive the Murakami Clan out of Shinano, until they were forced to flee Shinano entirely.

    This left Shingen in control of almost all of Shinano, but it also presented a new problem. In fleeing Shinano, the Murakami Clan sought the support of another powerful player in the region, the lord of Echigo Province and lord of a clan that was every bit as powerful as the Takeda, Uesugi Kenshin. Though neither side knew it yet, the stage was now set for one of the great rivalries of the Sengoku Period.

    A later depiction of Uesugi Kenshin, Shingen’s legendary rival.

    Shingen and Kenshin would clash repeatedly in the years to come, mostly at and around the now-famous battlefield of Kawanakajima (which literally means “The Island in the River”). The first clash of these rivals would come in April 1553, and would be indecisive, but the frontier in northern Shinano would remain volatile.

    In 1554, Shingen strengthened his diplomatic position by marrying his son to a daughter of the Imagawa Clan, followed shortly afterwards by a marriage of his son to a daughter of the Hojo Clan, who were also conveniently an enemy of the Uesugi. Following the establishment of the so-called Koso Alliance, Shingen secured control of southern Shinano and advanced into neighbouring Mino Province, securing the submission of several border clans in the process.

    The second and third Battles of Kawanakajima would be fought in 1555 and 1557, respectively, and both would end in further stalemate, but following the third battle, the Shogun (very much a figurehead at this point) issued a command that both sides make peace. Kenshin accepted immediately, but Shingen responded that he would only make peace if the Shogun named him shugo (governor) of Shinano, which was duly granted.

    In 1559, the Eiroku Famine and a serious flood in Kai Province led to the cessation of hostilities (at least temporarily) and that year, Shingen became a monk, formally adopting the name Shingen. Exactly why he chose to become a monk isn’t recorded, but it is speculated that it was in response to the twin disasters of famine and flood, with Shingen perhaps seeking divine intervention.

    Whether or not the gods were listening isn’t known, but after 1560, Shingen and the Takeda clan would begin to move away from older alliances and local authority and towards a policy of seeking power on the national stage. In May 1560, the Imagawa, allies of the Takeda, were severely defeated by the rising star that was Oda Nobunaga, and although Shingen publicly declared his intention to continue the alliance, he made secret arrangements with Nobunaga, with his son, Katsuyori, marrying Nobunaga’s adopted daughter.

    Oda Nobunaga. He would go on to be one of the most significant figures in Japanese history, but in the 1560s he was just getting started.

    The relationship continued to break down until 1567, when the Imagawa ended the trade of salt (abundant in their coastal provinces) to Kai, effectively cutting the Takeda off from this vital resource. The next year, in cooperation with a former Imagawa vassal, Tokugawa Ieyasu (then known as Matsudaira Motoyasu), Shingen invaded Imagawa territory, taking Suruga Province, whilst Ieyasu invaded Totomi, to the west.

    The invasion was a military success, but had serious diplomatic repercussions more or less immediately. The relationship with the Imagawa was obviously already pretty bad, but when Shingen tried to enlist the help of the Hojo in attacking Suruga, he was rebuffed, and the Hojo would instead send troops to support their Imagawa allies.

    The relationship with Ieyasu, always a marriage of convenience, broke down swiftly as well. The erstwhile allies got into a dispute about actual control of Totomi Province, and Ieyasu took his proverbial ball and went home, making peace with the Imagawa, and ignoring his previous agreement with Shingen.

    Tokugawa Ieyasu. Much like Nobunaga, he came up in the shadow of men like Shingen, but the future was very bright indeed for him and his clan.

    Shingen, now surrounded by potential enemies, sought out allies amongst the pre-existing enemies of the Hojo, and launched a counter-attack in 1569, getting as far as the Hojo capital at Odawara, which he briefly laid siege to before withdrawing, contenting himself with burning the town around the fortress.

    Retreating to Kai, Shingen defeated a pursuing Hojo force at the Battle of Mimasu Pass, effectively ending the Hojo threat to Kai and preventing them from intervening further in the invasion of Suruga. By the end of 1569, Shingen was in complete control of the province.

    Shingen would consolidate his position, but in 1571, Oda Nobunaga, with whom Shingen had enjoyed good relations previously, attacked and burned Mt Hiei, one of the holiest sites in Japanese Buddhism, sparking religious outrage across the realm.

    Shingen, who was a monk, remember, was personally outraged, and allowed surviving monks from Mt Hiei to take refuge in Kai. In 1572, the Shogun, Ashikaga Yoshiaki, sent a letter, reaching out to Shingen and calling on him to march on Kyoto and destroy Nobunaga.

    By this point, the Shogun’s options were severely limited (Yoshiaki would prove to be the last Ashikaga Shogun), but it was probably a smart move. By the early 1570s, Nobunaga had risen to become one of the most powerful warlords in Japan, and there simply weren’t that many contemporaries who could match him for strength and strategic acumen.

    Ashikaga Yoshiaki, the last Ashikaga Shogun. Even by the standards of his troubled dynasty, Yoshiaki was a powerless leader.

    Shingen had the strength, he had the experience, and after Mt Hiei, he had plenty of reason to answer the Shogun’s request. Gathering somewhere in the region of 27,000 men, a gigantic army for the time, the Takeda Steamroller began its move west in October 1572, first striking at Tokugawa Ieyasu’s territory in Mikawa Province, taking several fortresses in a matter of days, and forcing Ieyasu to call for help from Nobunaga.

    Nobunaga, however, was busy elsewhere, and could only spare 3000 troops to help, not nearly enough, and whenever Tokugawa forces made a stand, they were defeated. Initially, Ieyasu sought to defend the castle at Hamamatsu, a strong position, but weak strategically, as Shingen was able to bypass it on his march to Kyoto.

    Forced to either give battle or see himself rendered effectively impotent, Ieyasu marched out and met Shingen at Mikatagahara in January 1573. The result was a catastrophic defeat for Ieyasu, who saw his army scattered in all directions, with thousands left for dead on the battlefield. It was only due to the heroic resistance of several of his retainers that Ieyasu himself was able to survive the battle.

    A 19th century depiction of the Battle of Mikatagahara.

    Flush with victory, the Takeda forces would continue their advance, defeating what remained of the Tokugawa Clan and securing many castles throughout Mikawa Province. At that point, it may well have seemed that Shingen was well placed to launch a final thrust at the capital, and it isn’t unreasonable to speculate that, had such an attack occurred, he may have been successful, and we might today be talking about a ‘Takeda Shogunate’.

    Alas, it wasn’t to be. Despite his military and political acumen, Shingen was still just a man. His health had been getting steadily worse for years. As early as 1571, he was forced to abandon military action due to symptoms as severe as coughing up blood, and after Mikatagahara, his condition took a turn for the worse.

    In early spring 1573, Shingen made the decision (or had it made for him) to return to Kai Province to recover his health. Somewhere along the road home, however, he died. Exactly when and where he passed isn’t clear, but most historians agree it was sometime in April. According to Shingen’s will, his death was kept a secret, and although this would later lead to speculation around the circumstances of his death (perhaps best seen in the film Kagemusha), Shingen’s remains were most likely returned to his capital in modern Kofu, Yamanashi Prefecture.

    A later artistic rendition of Shingen’s final moments.

    Shingen’s sudden death raises some of the most interesting ‘what if?’ questions of this period. He was arguably one of the few men who could match Oda Nobunaga for strength and cunning, and it is possible that, if he had lived, he might have defeated Nobunaga and perhaps led the unification of Japan himself.

    This is ultimately not how things played out, but Shingen’s role in Japanese history didn’t end with his death. Although he had a well-earned reputation as a warrior, he was also a wise administrator and reformer, and many of the policies he introduced in his territories were adopted by those who came after him, with some even going on to influence Japanese law after the Sengoku Jidai, but we’ll talk about that another time.

    Sources
    https://ja.wikipedia.org/wiki/%E6%AD%A6%E7%94%B0%E4%BF%A1%E7%8E%84
    https://ja.wikipedia.org/wiki/%E4%B8%89%E6%96%B9%E3%83%B6%E5%8E%9F%E3%81%AE%E6%88%A6%E3%81%84
    https://ja.wikipedia.org/wiki/%E6%9D%BE%E6%9C%AC%E7%9B%86%E5%9C%B0
    https://ja.wikipedia.org/wiki/%E7%A0%A5%E7%9F%B3%E5%B4%A9%E3%82%8C
    https://ja.wikipedia.org/wiki/%E5%A1%A9%E5%B0%BB%E5%B3%A0%E3%81%AE%E6%88%A6%E3%81%84
    https://ja.wikipedia.org/wiki/%E4%B8%8A%E7%94%B0%E5%8E%9F%E3%81%AE%E6%88%A6%E3%81%84
    https://ja.wikipedia.org/wiki/%E7%94%B2%E7%9B%B8%E9%A7%BF%E4%B8%89%E5%9B%BD%E5%90%8C%E7%9B%9F
    https://ja.wikipedia.org/wiki/%E5%AE%AE%E5%B7%9D%E3%81%AE%E6%88%A6%E3%81%84
    https://ja.wikipedia.org/wiki/%E6%B2%B3%E6%9D%B1%E3%81%AE%E4%B9%B1
    https://ja.wikipedia.org/wiki/%E9%AB%98%E9%81%A0%E5%90%88%E6%88%A6
    https://ja.wikipedia.org/wiki/%E7%94%B2%E5%B7%9E%E6%B3%95%E5%BA%A6%E6%AC%A1%E7%AC%AC
    https://ja.wikipedia.org/wiki/%E6%A1%91%E5%8E%9F%E5%9F%8E%E3%81%AE%E6%88%A6%E3%81%84
    https://ja.wikipedia.org/wiki/%E7%80%AC%E6%B2%A2%E3%81%AE%E6%88%A6%E3%81%84
    https://en.wikipedia.org/wiki/Ashikaga_Yoshiaki
    https://en.wikipedia.org/wiki/Battle_of_Mikatagahara