Tag: Harima Province

  • The Second Unifier – Toyotomi Hideyoshi. Part Two.

    The Second Unifier – Toyotomi Hideyoshi. Part Two.

    In 1577, a dispute between Toyotomi Hideyoshi and Shibata Katsuie led to Hideyoshi taking his army home, and leaving Katsuie to battle the mighty Uesugi Kenshin alone, a battle he lost. In the aftermath, Hideyoshi had every reason to fear the wrath of his master, Oda Nobunaga, and he was arguably lucky to keep his head, let alone his position.

    A 19th-century depiction of Hideyoshi in Nobunaga’s service.

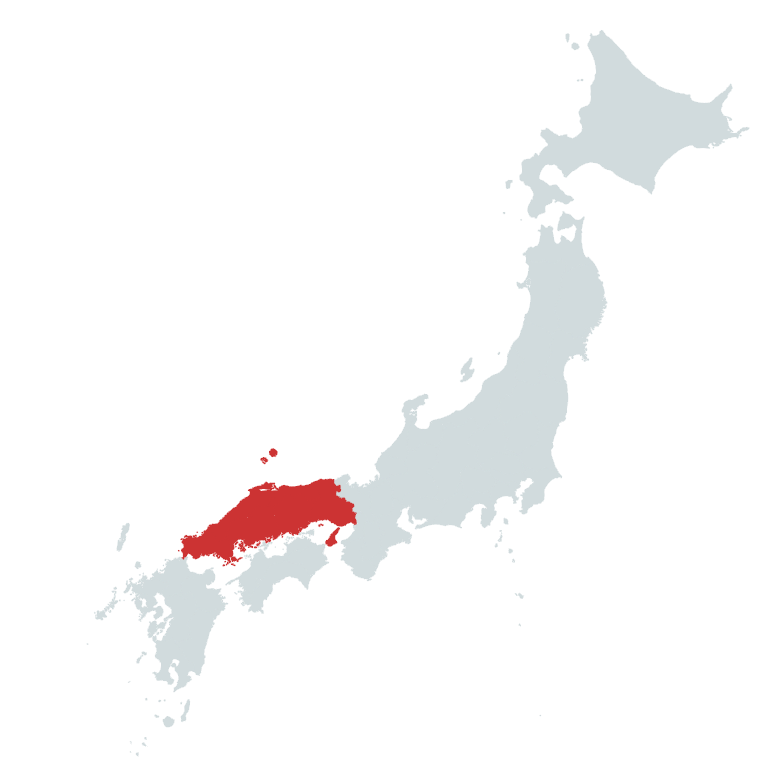
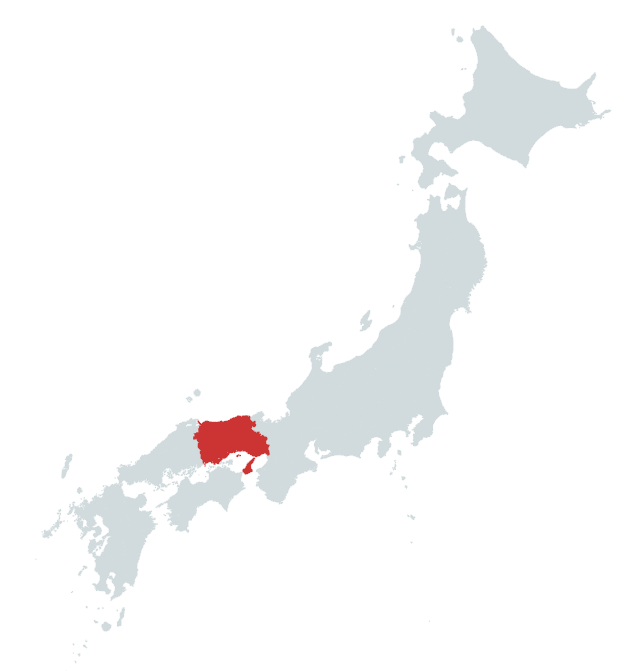
    Nobunaga was well known for his ferocity, but he recognised capable subordinates. Hideyoshi had been reckless, but he had also earned a reputation as a good administrator and leader of men, and it wasn’t long before he was back in the Great Lord’s good books. In late 1577, he was dispatched west to contend with the powerful Mori Clan and by the end of the year, he was in control of Harima Province and advancing into neighbouring Tajima.

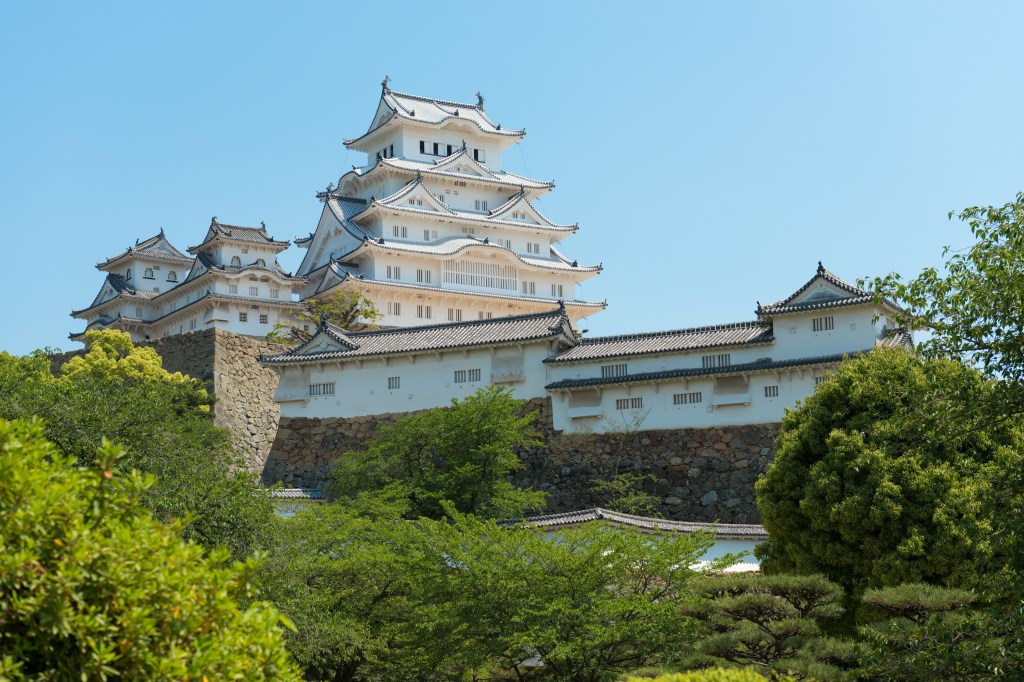
    During this period, Hideyoshi made the famous Himeji Castle his base and used it as a springboard for a series of successful campaigns against the Mori over the next few years. By late 1578, he had subjugated (either through conquest or submission) Bizen and Mimasaka Provinces, in addition to his earlier conquests, and he was poised to advance further when the Araki Clan, based at Arioka Castle, rebelled, obliging him to redeploy his forces to put them down.

    Himeji Castle as it appears today (after renovations in 2015)
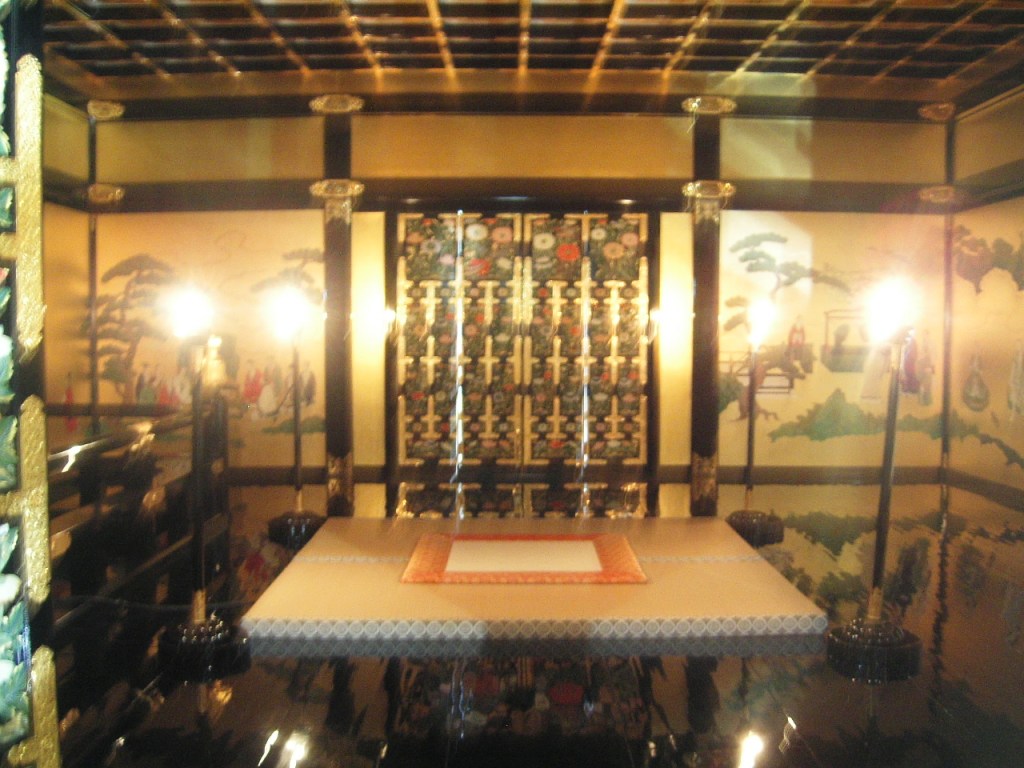
    Niko Kitsakis – 投稿者自身による著作物, CC 表示-継承 4.0, https://commons.wikimedia.org/w/index.php?curid=40135622による

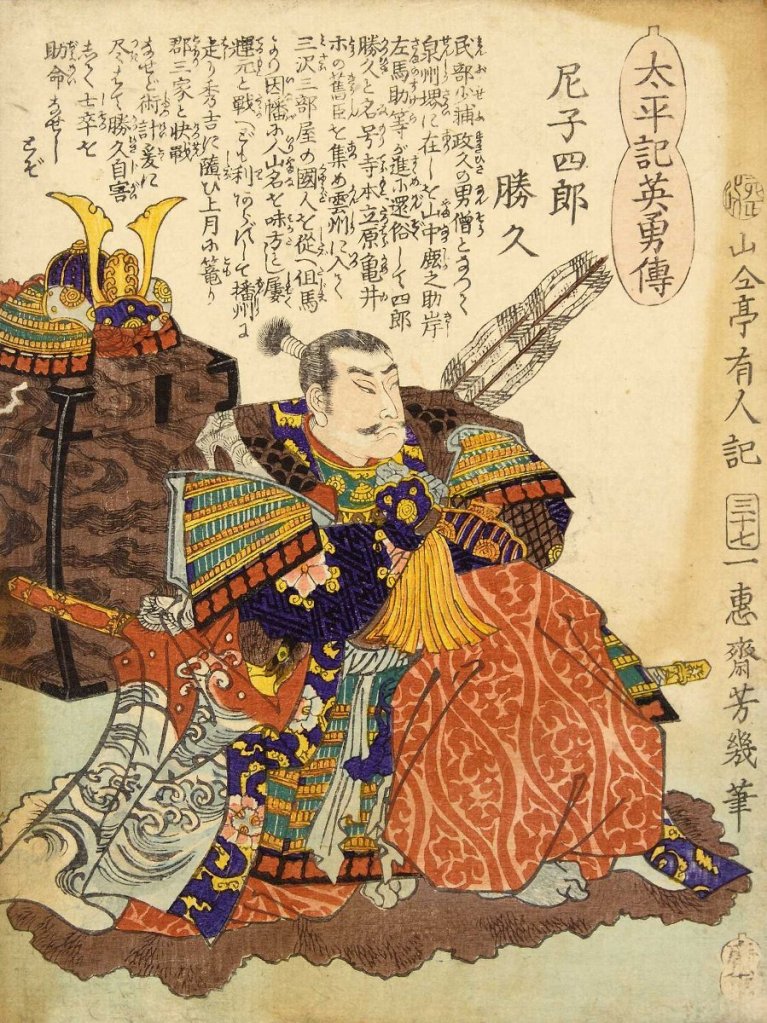
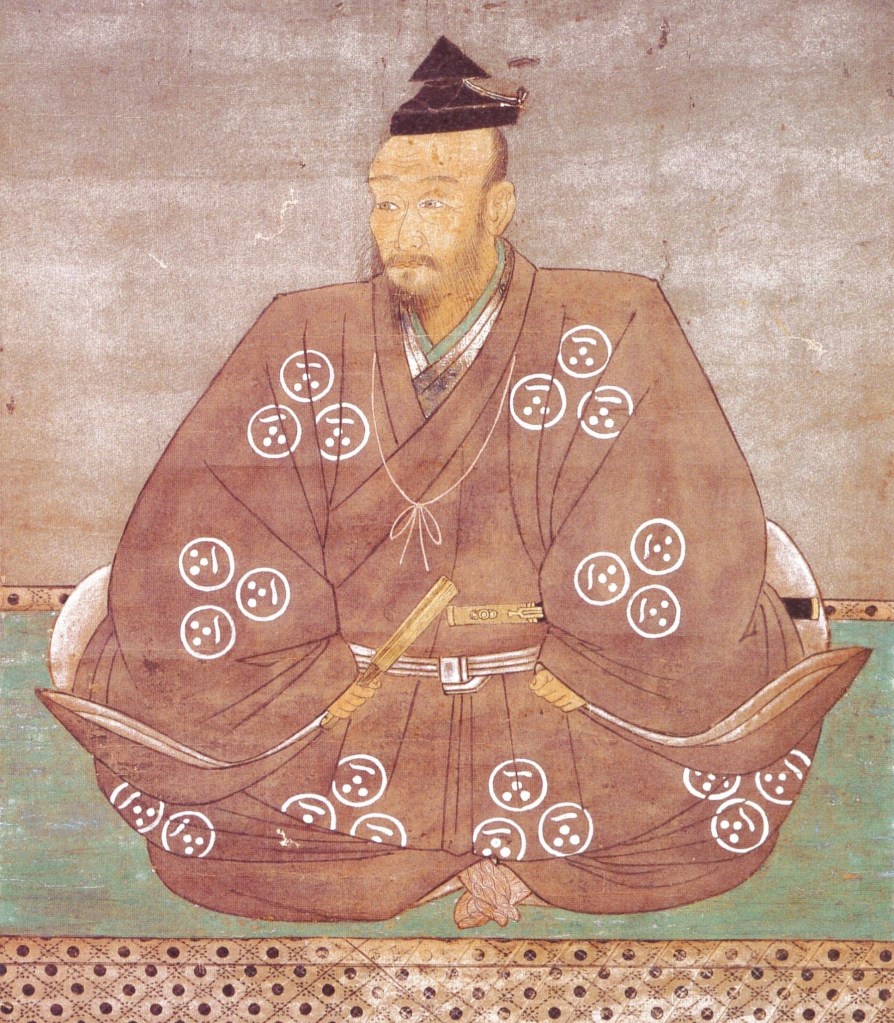
    Able to resume his advance in 1580, Hideyoshi secured Tajima Province, bringing the once-mighty Yamana Clan under his control and incorporating many of their former vassals and members of the clan itself into the new administration, a policy widely praised as the reason that Tajima was swiftly pacified.

    By 1581, he had advanced into Bitchu Province and secured Awaji Island for his master, utilising slow but effective siege tactics, starving his enemies into submission, a time-consuming but strength-preserving strategy. One disadvantage, though, was that it meant you were easy to find should your enemy have sufficient strength elsewhere.

    The area that Hideyoshi either conquered or was fighting in during this period.

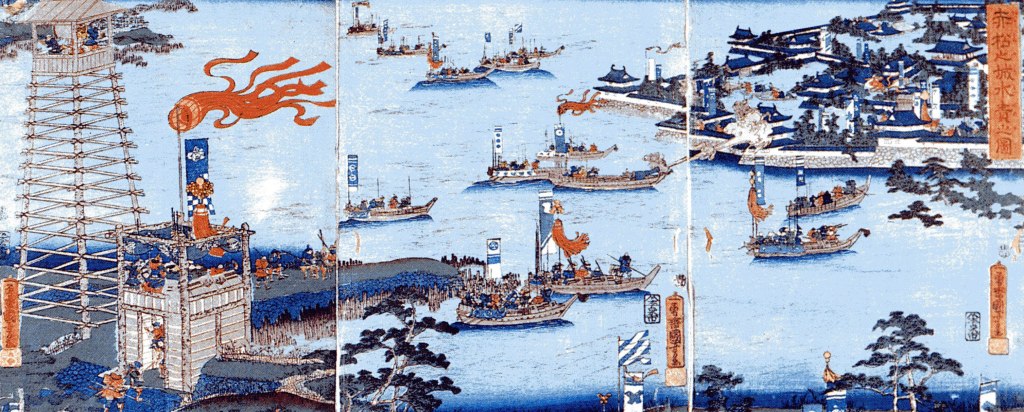
    In Spring 1582, Hideyoshi led an army of some 30,000 to besiege the mighty fortress at Takamatsu. Strategically vital for control of Bitchu Province, the castle was defended by 3,000 Mori warriors, who quickly called for aid. Mori Terumoto responded and began mustering an army that would eventually number over 50,000. Hideyoshi now faced a problem: already outnumbered, if he tried to take the formidable fortress by storm, he’d deplete his forces further. On the other hand, trying to starve the garrison, who knew help was on the way, would take too long and risk trapping his army between the walls of the fortress and the vengeful spears of the Mori.

    Hideyoshi responded in a typically inventive fashion. Unable to take the castle by storm, he ordered a levee built and the nearby river dammed, diverting water into Takamatsu itself, flooding the castle to such an extent that the garrison’s food supplies were almost completely ruined and they were reduced to communicating by boat.

    A later depiction of the Siege of Takamatsu Castle. The tower to the left is Hideyoshi’s observation post, and you can see the castle itself flooded in the background.

    Despite this, the castle still held out, and when news arrived that Terumoto was on the march, Hideyoshi sent a message to Azuchi, requesting immediate reinforcement from Nobunaga. Sensing an opportunity to catch the powerful Mori clan in open battle, where they could be destroyed, Nobunaga quickly dispatched Akechi Mitsuhide to reinforce Hideyoshi, while he went to Kyoto to make arrangements for a larger force that would be sent to finish the job.

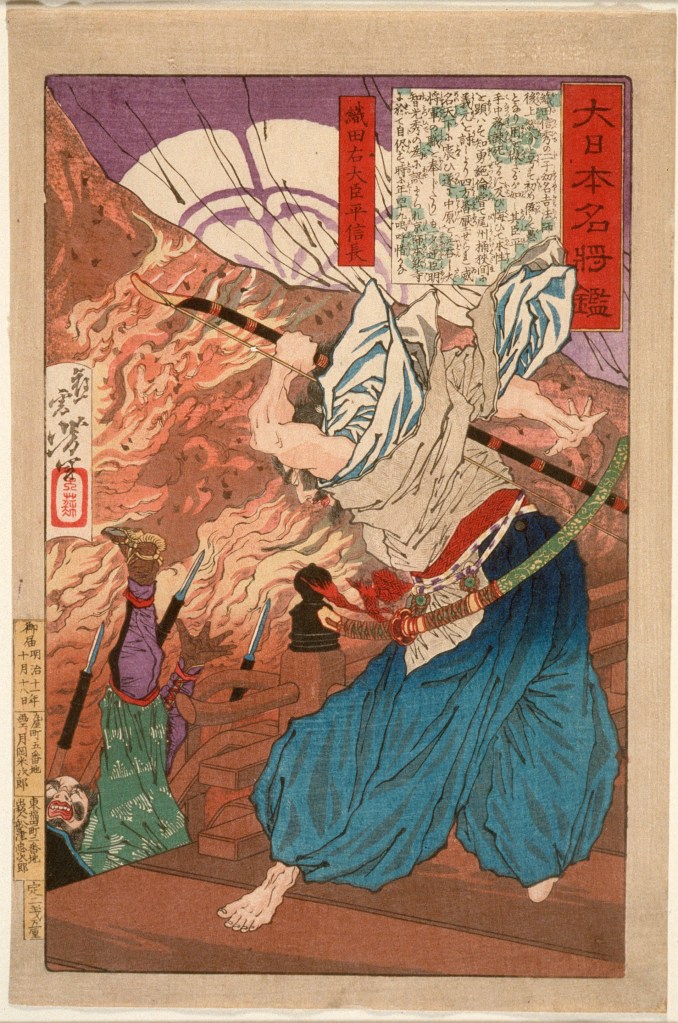
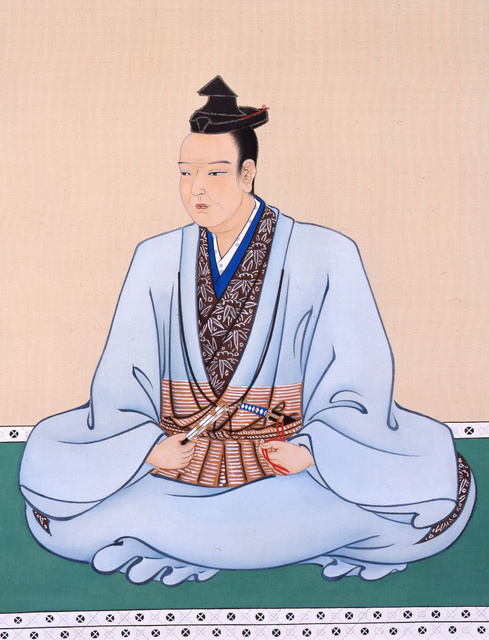
    As we already know, Mitsuhide never arrived; instead, he turned his forces around and attacked Nobunaga at his base at Honnoji, killing him and his heir. Hideyoshi was well placed to respond to this betrayal, and he swiftly concluded a peace treaty with the Mori (who were apparently initially unaware of Nobunaga’s death). Some have speculated that his rapid reaction is evidence of his involvement, or at least foreknowledge of the plot, though there’s nothing concrete to suggest that he was anything other than in the right place at the right time.

    Funasaka Pass as it appears today. This was one of the narrow routes that Hideyoshi’s army had to contend with during their remarkable march back towards Kyoto.
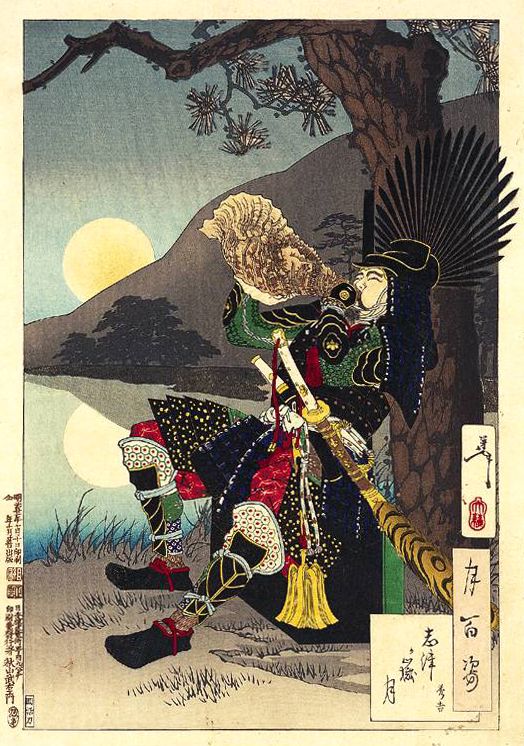
    Bakkai – 投稿者自身による著作物, CC 表示 3.0, https://commons.wikimedia.org/w/index.php?curid=92337495による

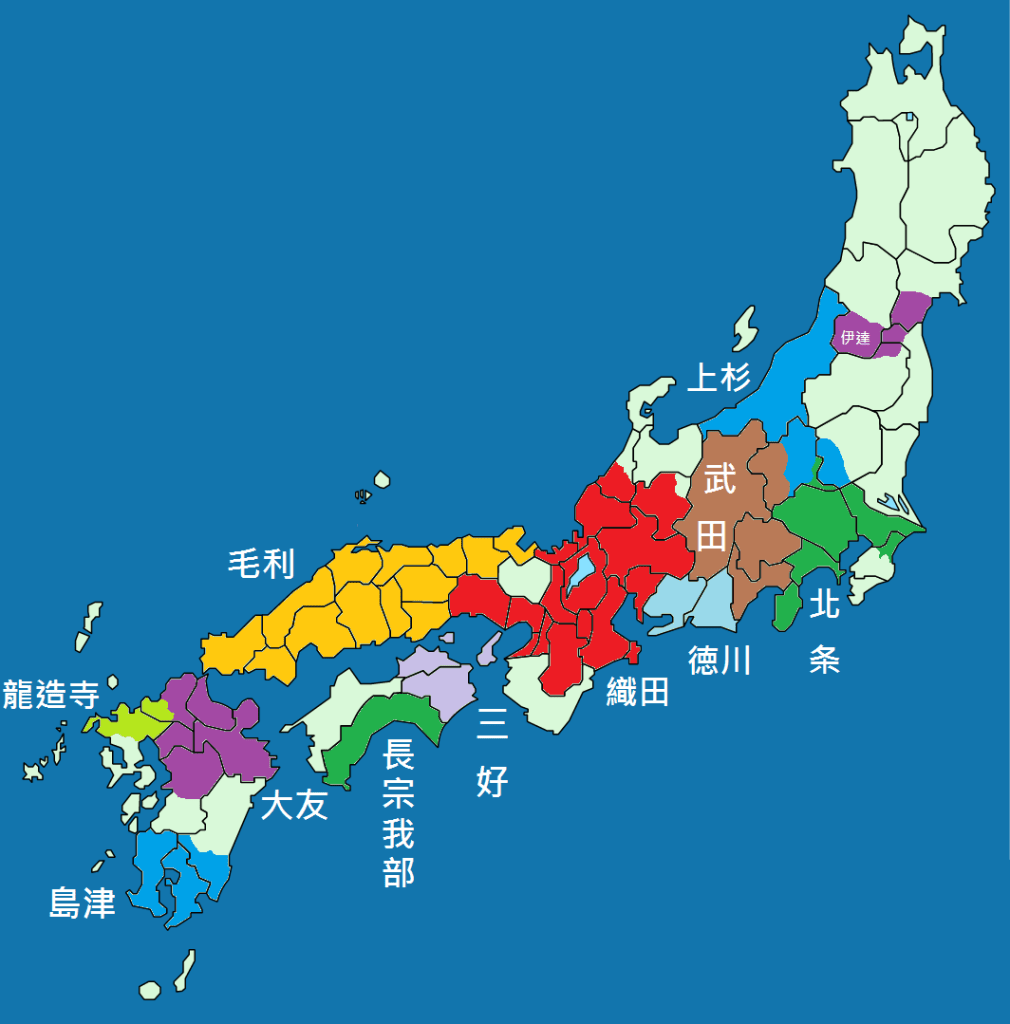
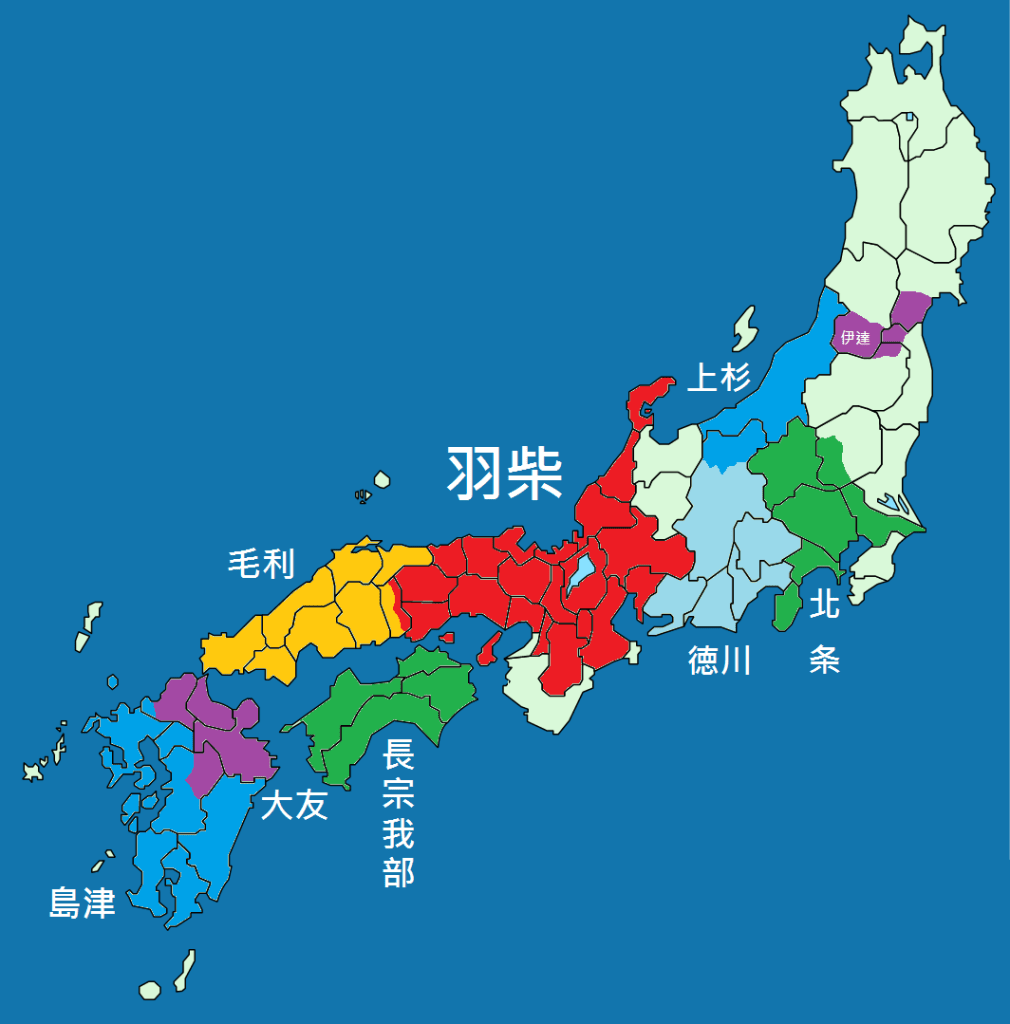
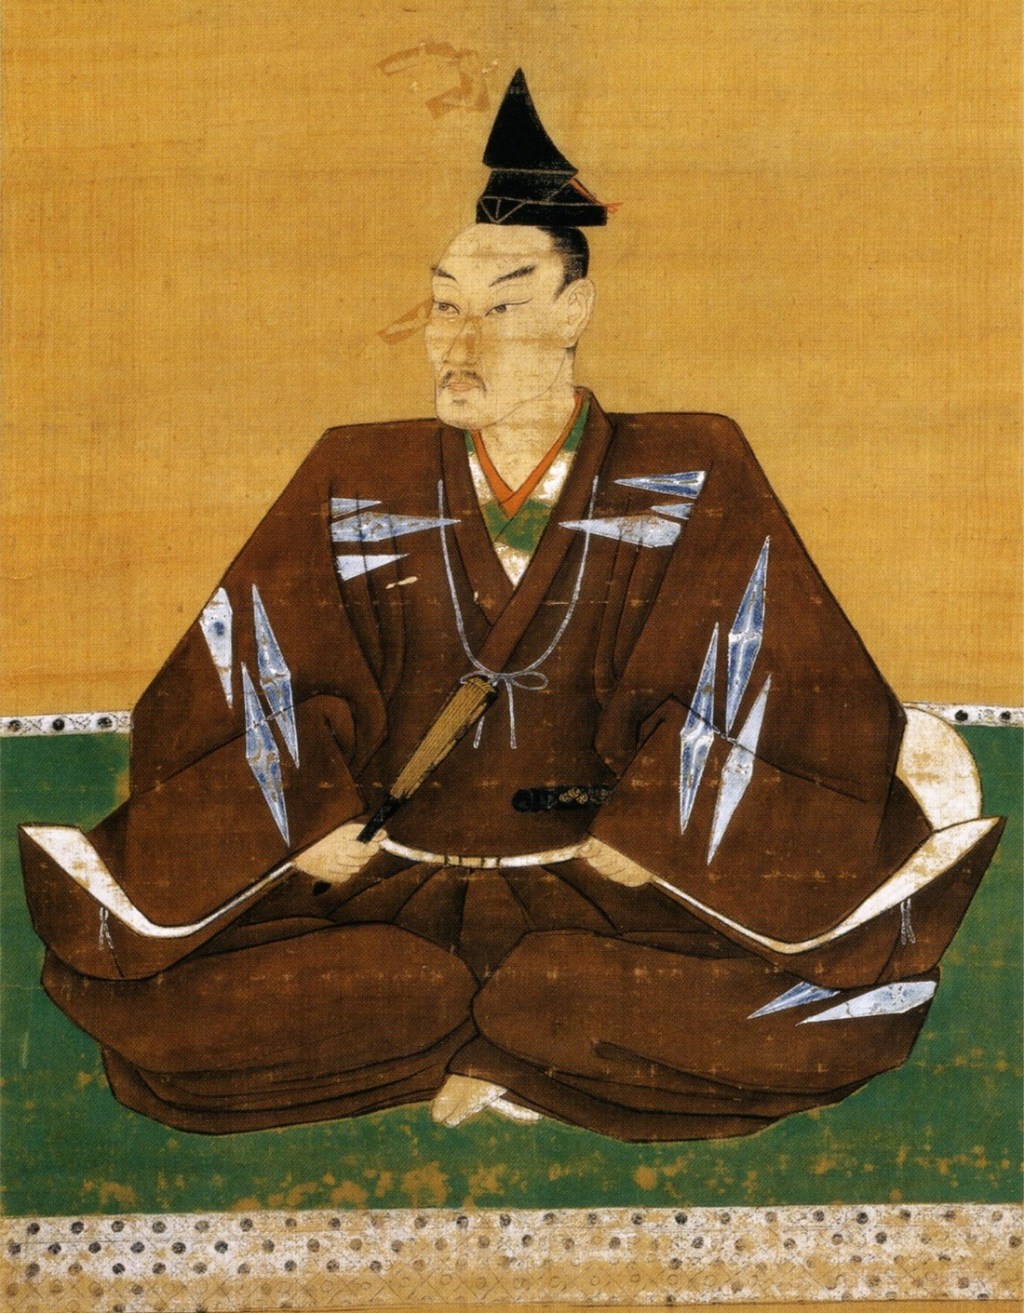
    More to the point, Hideyoshi was far from the only player on the board. Hideyoshi’s former rival, Shibata Katsuie, was to the north, with an army facing the Uesugi, while in the Kanto, Takigawa Kazumasu (sometimes called Sakon) had a large army intended to monitor the Hojo. Nobunaga’s son and heir had been killed during the Honno-ji Incident, but his third son, Nobukatsu, had gathered a force at Sakai (modern Osaka) to conquer Shikoku.

    Any one of these forces could have been the one to avenge Nobunaga’s death and put an abrupt end to Akechi Mitsuhide’s ambitions. Even Tokugawa Ieyasu was a potential avenger, making his famed escape from mortal danger with the (supposed) help of the famous Ninja of Iga. Ieyasu would return to his home in Mikawa and gather his forces, but events would move quickly, and though all parties moved against Mitsuhide, it was Hideyoshi who struck first.

    Tokugawa Ieyasu as he appeared in later life. He was close to Kyoto during the Honnoji Incident and was forced to make a dramatic escape back to Mikawa. Hideyoshi would prove to be faster, but Ieyasu’s time would come.

    In the days following the Honnoji Incident, Mitsuhide moved to consolidate his position. Unfortunately for him, he faced harsh military and political opposition. On the one hand, Nobunaga’s body had not been recovered from the flames, and rumours abounded that he was still alive. Even among those who may have believed Nobunaga was dead, Mitsuhide commanded little respect. He was a traitor, after all, and surrounded by enemies who wished to avenge Nobunaga and take power for themselves.

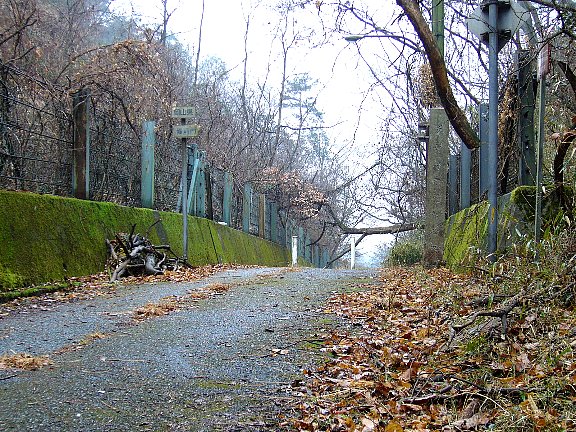
    Militarily, Mitsuhide was too weak to assert effective control over much territory. He had between 13,000 and 15,000 men, but was obliged to capture and garrison several important castles, whittling his already limited forces down still further. Then there was the speed at which Hideyoshi moved. Mitushide arguably did what he could, and with the limited communications and transportation available at the time, it’s hard to see how he could have moved faster, but Hideyoshi was faster still, and on July 2nd, 1582, just 12 days after Honnoji, the two sides clashed at the Battle of Yamazaki, to the south-east of Kyoto.

    Akechi Mitsuhide. Historians debate why he decided to betray Nobunaga, but within two weeks of the incident, he’d be dead.

    The numbers vary by source, but Hideyoshi is said to have had between 20 and 40,000 men, while Mitsuihides had 10 to 16,000. Despite the long odds, Mitsuhide’s army was well-positioned, and the ground around Yamazaki was boggy, limiting movement and reducing Hideyoshi’s advantage in numbers.

    Mitsuhide probably understood that a defensive victory against difficult odds would have greatly enhanced his prestige, and for most of the day, Hideyoshi’s army took heavy losses in vicious frontal assaults. Around 4pm, however, reinforcements arrived for Hideyoshi, outflanking Mitsuhide’s position, and causing his army to fall back. As the battle moved to higher and drier ground, Mitsuhide’s force was gradually surrounded and forced back.

    The battlefield of Yamazaki as it appears today. Historians believe the heaviest fighting took place around the bypass that can be seen in the centre.

    Later sources suggest that the casualties were about the same (around 3,000 each), but under attack from three sides, the morale of Mitushide’s army broke first, and by sunset, their retreat became a rout. When the battle was over, it is said that Mitsuhide had just 700 men remaining. His exact fate isn’t clear; some say he was wounded and committed seppuku, while others suggest he was killed by vengeful peasants or bandits. Either way, his head was brought to Hideyoshi the day after the battle, and then displayed at Honnoji, a powerful statement confirming Hideyoshi as Nobunaga’s ‘avenger’ and giving an enormous boost to his credibility.

    Hideyoshi would spend a few weeks stamping out the last embers of Mitushide’s rebellion, but despite his military successes, he was not unchallenged as Nobunaga’s successor. The other players, who had all been poised to strike, still remained in the field, and each had their own ambition to rule, either directly or through one of Nobunaga’s other sons.

    This would result in the Kiyosu Conference, but we’ll cover that and its consequences next time.

    Sources
    https://ja.wikipedia.org/wiki/%E8%B1%8A%E8%87%A3%E7%A7%80%E5%90%89
    https://ja.wikipedia.org/wiki/%E5%B1%B1%E5%B4%8E%E3%81%AE%E6%88%A6%E3%81%84
    https://ja.wikipedia.org/wiki/%E6%9C%AC%E8%83%BD%E5%AF%BA%E3%81%AE%E5%A4%89
    https://ja.wikipedia.org/wiki/%E4%B8%AD%E5%9B%BD%E5%A4%A7%E8%BF%94%E3%81%97
    https://ja.wikipedia.org/wiki/%E5%B1%B1%E5%90%8D%E5%A0%AF%E7%86%99
    https://ja.wikipedia.org/wiki/%E4%B8%89%E6%9C%A8%E5%90%88%E6%88%A6
    https://ja.wikipedia.org/wiki/%E6%9C%89%E5%B2%A1%E5%9F%8E%E3%81%AE%E6%88%A6%E3%81%84
    https://ja.wikipedia.org/wiki/%E5%A7%AB%E8%B7%AF%E5%9F%8E
    https://ja.wikipedia.org/wiki/%E5%82%99%E4%B8%AD%E9%AB%98%E6%9D%BE%E5%9F%8E%E3%81%AE%E6%88%A6%E3%81%84
    https://ja.wikipedia.org/wiki/%E9%AB%98%E6%9D%BE%E5%9F%8E_(%E5%82%99%E4%B8%AD%E5%9B%BD)

  • The First Unifier – Oda Nobunaga. Part Three.

    The First Unifier – Oda Nobunaga. Part Three.

    By 1573, Oda Nobunaga was arguably the strongest warlord of his day, controlling a large territory that dominated central Japan. He had taken control of Kyoto and brought about the end of the Ashikaga Shogunate (though he would never take the title for himself), and with the death of Takeda Shingen, his most dangerous rival had been removed.

    Nobunaga’s position is red. Dominant, but not yet unchallenged.
    By Alvin Lee – Own work, CC BY-SA 4.0, https://commons.wikimedia.org/w/index.php?curid=39200929

    You probably know by now that even a strong position was never completely unchallenged during the Sengoku Jidai, and Nobunaga still had enemies to deal with. In the summer of 1573, he launched a campaign against the Azai-Asakura alliance, whom he had defeated at the Battle of Anegawa in 1570 and now meant to finish off.

    Nobunaga’s forces laid siege to the formidable Odani Castle. When Azai-Asakura forces marched to relieve it, they were ambushed and forced to retreat to Ichijodani Castle with Nobunaga in hot pursuit. The Azai-Asakura were then decisively defeated at the Battle of Tonezaka and tried to retreat again; however, a series of defeats, betrayals, and suicides put an end to the alliance and then to the clans themselves.

    A modern reconstruction of the castle down around Ichijodani.
    663highland – 投稿者自身による著作物, CC 表示 2.5, https://commons.wikimedia.org/w/index.php?curid=12059706による

    A side note to these events is the end of the marriage between Nobunaga’s sister, Oichi, and Azai Nagamasa, lord of the Azai Clan. When Nagamasa betrayed Nobunaga, Oichi remained faithful and was by his side as Odani Castle came under siege. Some sources say that Oichi gave birth to her third daughter during the siege (though others disagree). There is also debate over how she escaped, with some saying she was aided by a loyal retainer, and others stating that Nobunaga and Nagamasa agreed to let Oichi and her daughters go, a tale often romanticised as demonstrating the love both men had for her.

    Romantic stories aside, with the end of the Azai-Asakura threat, Nobunaga turned his attention to the peasant rebellion in Ise Province (the so-called Nagashima Ikko-Ikki), which had resulted in the death of his younger brother, Nobuoki. The campaign was successful at first, with several outlying forts being taken, but an attempt to secure the rebels’ main fortress at Nagashima failed, and Nobunaga was obliged to fall back after an ambush threatened to cut him off.

    A 19th-century depiction of the fighting in Nagashima.

    The year would end on a more positive note for him, however, as Ashikaga Yoshiaki, who was still claiming the title of Shogun, was forced to flee Wakae Castle (in modern Osaka) and retreat to Kii Province. In December, Nobunaga’s forces captured the important and wealthy Tamonyama Castle (modern Nara), further securing his territory in central Japan.

    1574 would bring new problems, starting with another peasant rebellion (the Echizen Ikko-Ikki) in territory that Nobunaga had only recently taken from the Azai-Asakura. Shortly after that, a renewed attack by the Takeda, now led by Shingen’s son, Katsuyori, invaded Mino Province. Nobunaga marched to meet them, but the border castles fell before he could arrive, and so he withdrew, avoiding a decisive clash with the Takeda for now.

    Takeda Katsuyori

    With crises in all directions, Nobunaga was stretched to his limit, but it was in moments like this where he showed his brilliance and his brutality. The Ikko-Ikki fortress at Nagashima had been a thorn in his side for years, and he set out to remove it in the summer of 1574, surrounding the fortress from land and sea and starving the defenders into surrender by September.

    It is said that some attempted to flee by boat, but Nobunaga stopped them with a volley of gunfire. Suitably provoked, the Ikko-Ikki launched a counterattack that ultimately failed, but killed Nobunaga’s half-brother. In response, Nobunaga had the remaining 20,000 defenders, including women and children, locked up inside the castle, which he then ordered burned.

    A memorial to those who were killed during the fall of Nagashima.
    立花左近 – 投稿者自身による著作物, CC 表示-継承 3.0, https://commons.wikimedia.org/w/index.php?curid=20094400による

    With Nagashima subdued, Nobunaga turned his attention to the Takeda, who had launched a series of relatively small-scale invasions throughout 1574, and by April 1575, were besieging the Tokugawa-controlled fortress at Nagashino. What followed was one of the most heavily mythologised battles of the era, and even today, many of the details are open to debate, but what is not in doubt is that the Battle of Nagashino inflicted a mortal wound on the Takeda. They never again posed a serious strategic threat to Nobunaga’s ambitions.

    One of his other long-term enemies was the Temple of Hongan-ji, the spiritual centre of the widespread Ikko-Ikki movement. The movement had been severely weakened by the loss of Nagashima, and in late Summer 1575, Nobunaga crushed the Echizen Ikko-Ikki, further weakening Hongan-ji’s power. This turn of events allowed Nobunaga to establish a short-lived peace in the territory he controlled.

    Emperor Ogimachi (r 1557-1586) was Emperor for most of Nobunaga’s rise to power.

    In November 1575, Nobunaga was appointed Dainagon, and Ukone no Taisho, Chief Councillor, and General of the Right, respectively, positions in the Imperial court which established his position, and right to rule the country (in the Emperor’s name, of course) Around this time Nobunaga also began distributing territory and other titles to his followers on behalf of the Emperor, and it is from this point that historians generally agree that Nobunaga gave up the pretence of supporting the Ashikaga, and began eyeing the position for himself. In light of this, he officially recognised his son, Nobutada, as his heir and gave orders for the construction of a new fortress at Azuchi.

    It couldn’t last, however, and in Spring 1576 Ishiyama Hongan-ji was in arms against him again, supported by a loose coalition of powerful clans, and at least nominally acting on behalf of the exiled Shogun, Yoshiaki. Initial attempts by Oda forces to subdue Hongan-ji failed, but when Nobunaga himself arrived, he won a decisive victory at the Battle of Tennoji, and subsequently laid siege to the vast Ishiyama temple complex.

    This modern recreation shows that the Ishiyama Hongan-ji complex was more akin to a fortified town than a temple.

    Nobunaga might have hoped to repeat his success at Nagashima, but those hopes were to be dashed when a fleet from the Mori Clan destroyed the Oda blockade at the Battle of Kizugawaguchi in August 1576, ensuring that, for the time being, supplies would continue to flow into Ishiyama, and the siege would drag on.

    Meanwhile, in 1577, Nobunaga led an army into Kii Province and forced the surrender of the Saika Clan before withdrawing, only to then have to face a rebellion from the Matsunaga Clan in Ise Province, which was put down in characteristically brutal fashion, with the castle burned, and its occupants forced to commit Seppuku.

    This image depicts Matsunaga Hisahide at the moment of his death. The story goes that Nobunaga offered to spare him in exchange for a rare tea kettle. In response, Hisahide is supposed to have smashed the kettle to pieces before killing himself.

    From 1578 to 1580, Nobunaga was forced to contend with the powerful Mori Clan and their allies for control of Harima Province. Meanwhile, his vassal, Akechi Mitsuhide, successfully subdued the provinces of Tamba and Tango. In late 1580, Nobunaga forced the surrender of Arioka and Miki Castles, bringing the whole of Harima under his control.

    Meanwhile, the Second Battle of Kizugawaguchi in December 1578 reversed the strategic situation in the seas around Ishiyama (Osaka Bay), when the rebuilt Oda navy inflicted a decisive defeat on the Mori fleet, finally cutting Ishiyama off completely. The siege would last until 1580, however, and it would eventually take an Imperial Order to convince the leadership to surrender, in exchange for being allowed to leave.

    A semi-contemporary image of Ishiyama Hongan-ji during the siege.

    War was never far away, but as 1581 dawned, Nobunaga was stronger than any Daimyo had ever been, and it was seriously possible that if anyone were to bring an end to the Sengoku Jidai and reunite the country, it would be him. However, he still had a few more rivals to overcome first.

    The Battle of Nagashino had been a death blow to the Takeda, but as late as 1582, they were still clinging on, and now Nobunaga made the decision to end them once and for all. Gathering a force of some 100,000 and supported by his ally Tokugawa Ieyasu, Nobunaga invaded Takeda territory in early 1582. The campaign was almost too easy, as Takeda resistance crumbled almost immediately, forts often surrendered without a fight, or after only a token display of defiance, and many former Takeda retainers simply switched sides, or else ran away from the advancing Oda.

    A heavily stylised (and much later) depiction of the end of Takeda Katsuyori, whose death would signal the end of his clan.

    The Takeda eventually stood their ground at the formidable Takato Castle, but, despite its reputation, it was taken quickly, and what remained of the Takeda began to melt away. Eventually, Takeda Katsuyori and his son Nobukatsu were trapped at Tano (modern Tsuru, Yamanashi Prefecture) and forced to commit Seppuku, bringing an end to the Takeda line and any hope of resistance to Nobunaga.

    With the Takeda gone, Nobunaga took some time to reorganise the newly conquered territories, and then headed home through the lands of his ally Tokugawa Ieyasu, who laid on entertainments, refreshments, and accommodation, all purpose-built for Nobunaga’s visit.

    A reconstruction of Nobunaga’s ‘throne’ at Azuchi.
    日本語版ウィキペディアのMaakunさん – 原版の投稿者自身による著作物, CC 表示-継承 3.0, https://commons.wikimedia.org/w/index.php?curid=115518317による

    By Spring, Nobunaga was back at his base at Azuchi, from where he made plans to invite the Emperor for a formal visit, and rumours began that the court was about to appoint him Shogun, or else some other senior position. The exact nature of this appointment and Nobunaga’s receptiveness to it are unclear, as the sources don’t agree on whether anything was offered at all, let alone what Nobunaga said about it. The Imperial visit was supposedly arranged for the following year, but again, the sources are scant.

    During this brief period of peace, Nobunaga is supposed to have announced his plans to conquer Shikoku from the Chosokabe. One of his retainers, Akechi Mitsuhide, was apparently unhappy about this, as he had previously acted as an intermediary between Nobunaga and the Chosokabe. Mitsuhide was further agrieved when Nobunaga ordered him to provide entertainment for the visiting Tokugawa Ieyasu. The story goes that Nobunaga accused Mitsuhide of doing a poor job (rightly or not) and launched into a public dressing-down of Mitsuhide that ended (according to some sources) with a literal kick in the backside.

    A 19th-century imagining of Nobunaga publicly chastising Mitsuhide.

    Given the importance of public image in Japan, it is easy to see why Mitsuhide might have felt a genuine grievance over this treatment. There is also a story that Mitsuhide’s mother had once served as a hostage for a truce that Nobunaga had gone on to break, resulting in the poor woman’s death. Whilst some of these stories are poorly sourced at best, what is known is that by the summer of 1582, Akechi Mitsuhide had had enough.

    Sources
    https://ja.wikipedia.org/wiki/%E7%B9%94%E7%94%B0%E4%BF%A1%E9%95%B7
    https://en.wikipedia.org/wiki/Tsuru,_Yamanashi
    https://ja.wikipedia.org/wiki/%E9%AB%98%E9%81%A0%E5%9F%8E
    https://ja.wikipedia.org/wiki/%E7%94%B2%E5%B7%9E%E5%BE%81%E4%BC%90
    https://ja.wikipedia.org/wiki/%E4%B8%89%E6%9C%A8%E5%90%88%E6%88%A6
    https://ja.wikipedia.org/wiki/%E4%BF%A1%E8%B2%B4%E5%B1%B1%E5%9F%8E
    https://ja.wikipedia.org/wiki/%E7%B4%80%E5%B7%9E%E5%BE%81%E4%BC%90
    https://ja.wikipedia.org/wiki/%E5%A4%A9%E7%8E%8B%E5%AF%BA%E3%81%AE%E6%88%A6%E3%81%84_(1576%E5%B9%B4)
    https://ja.wikipedia.org/wiki/%E7%9F%B3%E5%B1%B1%E5%90%88%E6%88%A6
    https://ja.wikipedia.org/wiki/%E7%AC%AC%E4%B8%80%E6%AC%A1%E6%9C%A8%E6%B4%A5%E5%B7%9D%E5%8F%A3%E3%81%AE%E6%88%A6%E3%81%84
    https://ja.wikipedia.org/wiki/%E7%AC%AC%E4%BA%8C%E6%AC%A1%E6%9C%A8%E6%B4%A5%E5%B7%9D%E5%8F%A3%E3%81%AE%E6%88%A6%E3%81%84
    https://ja.wikipedia.org/wiki/%E9%95%B7%E5%B3%B6%E4%B8%80%E5%90%91%E4%B8%80%E6%8F%86

  • Memento Mori, Part 3

    Memento Mori, Part 3

    Last time, we looked at how the relationship between Mori Terumoto and Oda Nobunaga broke down, leaving both sides on the verge of conflict. After Terumoto declared for the Shogun, Ashikaga Yoshiaki (the last Ashikaga Shogun) declared that Terumoto would serve as ‘Vice Shogun’, a slightly ambiguous position which was rendered largely moot in practice, as the Shogun relied almost entirely on Mori’s strength of arms, reducing him to little more than a figurehead.

    Ashikaga Yoshiaki, the last of the Ashikaga Shoguns, and little more than a figurehead.

    The first action of this new ‘Shogunate’ (read: Mori) army was supporting the besieged warrior monks of Ishiyama Hongan-ji. You may recall in the post about the Ikko-Ikki, we mentioned Nobunaga’s campaigns against Hongan-ji, which ultimately lasted more than a decade, and left the temple a charred ruin.

    The Mori, possessing one of the most powerful navies amongst the Sengoku Daimyo, dispatched a fleet which made short work of the Oda forces in Osaka Bay, opening the way for supplies to be delivered to Hongan-ji. This victory prolonged the siege and gave the Mori unchallenged control of the Seto Inland Sea in the short term.

    Later that year, Nobunaga sought to restore the Amago Clan (long-time enemies of the Mori) to a position of strength, putting up Amago Katsuhisa, the last Amago ‘lord’ at Kozuki Castle, in Harima Province, hoping to attract Amago loyalists and any other opponents of the Mori, and make life difficult for Terumoto.

    A later image of Amago Katsuhisa, the last ‘lord’ of the Amago Clan.

    In response, Terumoto himself led an army to lay siege to Kozuki, and when a relief force, led by Hashiba (later Toyotomi) Hideyoshi, arrived, Terumoto handily defeated it, driving the Oda out of Harima Province, taking Kozuki Castle, and obliging the remaining Amago partisans to commit seppuku, which isn’t bad for a day’s work.

    Not long after this success, Terumoto would expand his influence in Harima still further, convincing several lords to defect to the Mori, and bottling up Nobunaga’s remaining loyalists in the province. After this series of successes, Terumoto had Nobunaga on the back foot, and in response, he pressured the Imperial Court to issue an order that Hongan-ji make peace with Nobunaga. The monks of Hongan-ji expressed a desire to make peace, but not without Terumoto, to whom they owed a debt of gratitude. In response, Nobunaga agreed and began negotiations with Hongan-ji and the Mori.

    The strategic situation shifted considerably in the early winter, however, as a Mori fleet dispatched to deliver further supplies to Hongan-ji was defeated by new ironclad ships of the Oda Navy. The exact nature of these vessels isn’t clear; the word ‘ironclad’ is a direct translation from Japanese, implying the vessels were at least partially armoured, though the exact style and extent of armour isn’t clearly recorded.

    An example of the type of warship used by the Mori Navy.

    Shortly after this victory, which drove the Mori beyond Awaji Island and opened Osaka Bay to the Oda, Nobunaga swiftly called off negotiations and made plans to continue the war. Despite the defeat, the Mori were still in a very strong position, however, and at this point, Terumoto made plans to advance on Kyoto and take the fight to Nobunaga directly.

    Plans were laid, including negotiation with Takeda Katsuyori for a simultaneous attack on Nobunaga’s ally, Tokugawa Ieyasu, and Terumoto set the date of the start of the campaign for early 1579. However, early 1579 came and went, and the Mori did not march. A series of rebellions broke out around the same time, supposedly instigated by both Nobunaga and the Otomo Clan (rivals to the Mori on Kyushu), and Terumoto had his hands full.

    The situation went from bad to worse for the Mori throughout 1579, as several border clans, angered at what they saw as a ‘betrayal’ when Terumoto failed to march on Kyoto, defected to the Oda side, disrupting communications with troops on the front line, and opening several gaps in Mori defences. The Mori failure to march also resulted in no further attempts to relieve Hongan-ji, and it was forced to surrender in early 1580.

    Not long after that, Nobunaga was able to focus significant forces on the Mori, and an army led by Hashiba Hideyoshi took advantage of the Mori’s weak position and launched a series of successful attacks against them, capturing castle after castle. A counter-attack in February 1582 led to a brief reprieve, but news from elsewhere was bad.

    A later artistic depiction of Toyotomi Hideyoshi (then still called Hashiba) around 1582.

    The Takeda, with whom the Mori had allied against Nobunaga, were decisively defeated in early Spring, and with their removal, Nobunaga turned his entire attention to the Mori. The situation was dire. A little more than five years earlier, the Mori had been a match for Nobunaga; indeed, had Terumoto marched on Kyoto, he would have had a good chance of success.

    Now, however, Nobunaga was stronger than ever, and internal rebellion, defections, and military defeats meant that the Mori were far weaker in comparison. Had Nobunaga advanced, he almost certainly would have won.

    As is so often the case, however, fate intervened. Nobunaga was betrayed by one of his generals in June 1582 and killed. His supporters immediately turned on each other, with Hashiba Hideyoshi, the man who had been leading the charge against the Mori, wishing to establish himself as Nobunaga’s successor, and so he concluded a swift peace with the Mori. For his part, Terumoto was glad to accept, even though it meant sacrificing three provinces. When news of Nobunaga’s death broke, Ashikaga Yoshiaki, still with the Mori, ordered Terumoto to march on Kyoto and take advantage of the situation.

    A 19th century depiction of Oda Nobunaga’s final moments.

    Terumoto refused, still forced to deal with internal rebellion, and although there would be plenty of opportunities to involve himself in the chaotic fighting that followed Nobunaga’s betrayal, the Mori would not move, instead adopting a ‘wait and see’ approach, which, in hindsight was wise, as although history would record Hideyoshi as the ultimate victor, in the summer of 1582, that was far from certain.

    One thing that Terumoto did agree to, however, was refusing to accept the ceding of three provinces to Hideyoshi as part of their peace deal. No doubt the Mori felt that Hideyoshi had misled them (Terumoto hadn’t known about Nobunaga’s death before the agreement), and with Nobunaga’s successors tearing each other apart, the Mori were in a good position to keep hold of their territory.

    Negotiations dragged on, even after Hideyoshi was able to win a decisive victory at the Battle of Shizugatake in April 1583, and he began to lose patience, threatening a resumption of war if the Mori didn’t concede. It would not be until early 1585 that a peace was actually agreed, and it was achieved largely without fresh fighting. The Mori would be allowed to keep seven provinces, representing much of the territory that had been taken by Terumoto’s grandfather, Motonari. In exchange, the Mori agreed to support Hideyoshi’s campaigns to unite the realm, especially in Shikoku and Kyushu, which the Mori assisted in invading in May 1585 and August 1586, respectively.

    The strategic situation in 1584, just after Hideyoshi secured power. The Mori are represented in yellow, and Hideyoshi in red.
    By Alvin Lee – Own work, CC BY-SA 4.0, https://commons.wikimedia.org/w/index.php?curid=39198357

    Finally, in the summer of 1586, Terumoto formally became a vassal of Hideyoshi (by now known as Toyotomi), ending decades of conflict and proving to be a significant step in bringing the Sengoku Jidai to an end more generally. A testament to the new trust placed in the Mori came in 1590, when Hideyoshi attacked the Hojo Clan, masters of the Kanto. Though the Mori did not join the campaign, Mori troops were entrusted with guarding the capital while Hideyoshi was away.

    Around this time, Terumoto completed his new base at Hiroshima Castle and would take part in Hideyoshi’s ill-fated invasion of Korea in 1592. We will go into more detail about the events that followed later, but after Hideyoshi’s death in 1598, Terumoto was named as one of five regents for his infant son, Hideyori.

    The five regents were meant to stabilise the realm until Hideyori came of age, but it didn’t work; Tokugawa Ieyasu was swiftly opposed by the other four as it was believed (rightly as it turned out) that he wished to overthrow the current government and make himself Shogun. The tension would eventually lead to a new outbreak of violence, and a brief campaign culminated in the decisive Battle of Sekigahara in 1600.

    Teruhito and the Mori Clan were officially in opposition to the victorious Ieyasu, but had dispatched only a small force to Sekigahara, keeping their main strength at Osaka Castle to guard the heir. This was the strongest castle in the realm, and Terumoto had tens of thousands of fresh troops with which to hold it. Ieyasu, apparently aware of this, dispatched a letter to Terumoto, expressing his desire for positive relations between the two, and hoping that the Mori would depart Osaka without further violence.

    The walls of Osaka Castle as they appeared in 1865.

    Terumoto agreed when Ieyasu confirmed that the Mori would lose no territory in the aftermath. However, Ieyasu would almost immediately go back on his word once Terumoto was safely away from Osaka. The Mori were reduced to just two provinces in the far west, Suo and Nagato, and almost all the territory taken by Motonari and Terumoto was lost.

    Terumoto himself would officially retire as head of the clan not long after Sekigahara and became a monk, though in reality, he would retain most of the actual authority within the clan. One challenge that came about almost immediately was the loss of income that came with the loss of territory. Before Sekigahara, the Mori had had an income of more than 1 million koku (a Koku being approximately how much rice one man needed for a year). After Sekigahara and the loss of five of their provinces, this income was down to less than 300,000.

    This loss in income led to a loss in strength, as many of the clan’s retainers found their stipends reduced or lost entirely, leading them to seek employment elsewhere (just in case you thought Samurai were all about unquestioned loyalty.) Terumoto rather astutely recognised that this reduction might actually benefit the clan long term, as disloyal vassals would leave quickly, and even those who remained could be chosen based on ability, leading to a reduction in the clan’s overall strength, but perhaps improving skill and efficiency, at least in theory.

    A 19th century photograph of Hagi Castle, where the Mori Clan were based after their forced relocation.

    This would prove a wise move, as a land survey in 1610 showed that the Mori’s financial situation was better than originally assumed, and the reduction in vassals and retainers had led to a leaner, more efficient administration.

    Peace in the realm would last a while under Tokugawa Ieyasu’s rule, but it was a fragile thing. In 1614, the now adult Toyotomi Hideyori (Hideyoshi’s heir) brought about a crisis when a new prayer bell was inscribed with language that was interpreted as calling for the overthrow of the Tokugawa. Hideyori holed up in Osaka Castle and called on all ‘loyal vassals’ to come to his aid. Most, including Terumoto, ignored him, and when Ieyasu marched on Osaka, he requested the Mori dispatch their navy in support, which they duly did.

    Terumoto also led an army to Osaka, though the Mori would ultimately play a relatively small role in the so-called Winter Siege of Osaka. The following year, during what is called the Summer Siege, Ieyasu attacked Osaka again, this time successfully, capturing and executing Hideyori, and bringing his line to an end.

    Tokugawa Ieyasu, the man who would ultimately bring the Sengoku Jidai to an end.

    The Mori were again asked to dispatch an army, but delays in orders and the length of the march meant they arrived only after Osaka had fallen. There was some concern that this delay might be interpreted as treachery by Ieyasu; however, even the savvy political operator, Ieyasu, chose to lay the blame on slow communication instead, sparing the blushes of the Mori.

    Terumoto, his health failing and age catching up with him, handed full control of the clan over to his heir, Hidenari, in 1621, and although a formal system of ‘dual leadership’ would continue, it was becoming increasingly clear that Terumoto’s time was running out.

    He would continue to play a role in the affairs of the Mori until his death in 1625, and his clan’s distant position from the new capital in Edo afforded them a certain degree of autonomy, at least with regard to internal affairs, in the years that followed.

    That would prove important in the 19th century, as the arrival of American ships in Edo Bay forced Japan to end its period of isolation. It would be the Mori Clan, based in what by then was called the Choshu Domain, who would lead the charge against the Tokugawa Shogunate, overthrowing it, and re-establishing Imperial Rule in the so-called Meiji Restoration, but we are getting way ahead of ourselves.

    Mori Motonari, the last lord of Choshu Domain.

    Mori Terumoto is one of the giants of the Sengoku Era. Building on the successes of his grandfather, Motonari, he led the Mori to a position in which they may well have been able to take power for themselves, had things gone a little differently. Ultimately, despite never gaining ultimate power for themselves, Terumoto and his successors would prove to be one of the success stories of this period, surviving the turmoil and even thriving in the new Japan of the 19th Century.

    Sources
    https://ja.wikipedia.org/wiki/%E6%AF%9B%E5%88%A9%E8%BC%9D%E5%85%83
    https://ja.wikipedia.org/wiki/%E5%BA%83%E5%B3%B6%E5%9F%8E
    https://ja.wikipedia.org/wiki/%E4%BA%AC%E8%8A%B8%E5%92%8C%E7%9D%A6
    https://ja.wikipedia.org/wiki/%E9%B3%A5%E5%8F%96%E5%9F%8E
    https://ja.wikipedia.org/wiki/%E9%89%84%E7%94%B2%E8%88%B9
    https://ja.wikipedia.org/wiki/%E5%89%AF%E5%B0%86%E8%BB%8D
    https://en.wikipedia.org/wiki/M%C5%8Dri_Terumoto
    https://ja.wikipedia.org/wiki/%E5%B0%BC%E5%AD%90%E5%8B%9D%E4%B9%85
    https://en.wikipedia.org/wiki/Toyotomi_Hideyoshi
    https://en.wikipedia.org/wiki/Tokugawa_Ieyasu

  • The Power in the Provinces Part Two

    The Power in the Provinces Part Two

    Western Japan

    Western Japan was, much like the Kanto, away from the centre of power, but still close enough to be a perpetual source of trouble.

    The Ouchi

    The mon of the Ouchi Clan
    By Mukai – No machine-readable source provided. Own work assumed (based on copyright claims)., CC BY-SA 3.0, https://commons.wikimedia.org/w/index.php?curid=7845833

    At the end of the 15th Century, the Ouchi Clan were one of the strongest in Japan. Based at Yamaguchi, in the furthest west of ‘The West’, they were in an enviable position. Their centre of power was far enough away from Kyoto that they were often spared the worst of the destruction, and the city of Yamaguchi, positioned as it was, near the coast, was a prime location for getting involved in the trade with China and Korea.

    These close links to mainland Asia go back into the mists of time. Unlike many other clans, the Ouchi did not claim descent from one of the ‘Imperial’ Clans (Fujiwara, Minamoto, or Taira). Instead, they claimed as their ancestor a Korean prince, Prince Imseong, although the long years involved make a definitive link impossible to prove.

    During the Nanbokucho Period, the Ouchi proved to be staunch supporters of the Northern Court and the Ashikaga Shoguns, earning them rich rewards, and by the time of the Onin War, they had extended their control into Northern Kyushu, officially on behalf of the Shogun, but effectively ruling their little empire independently.

    During the Onin War, the Ouchi sided with the Yamana Clan and the Western Army. In fact, after the decline of the Yamana during the war, it was the Ouchi who stepped forward and played the leading role in securing Western military victories in the West. When the war ended, the Ouchi regained control of their former territories in northern Kyushu, and would continue to be one of the leading powers at the dawn of the 16th Century.

    Their links to international trade continued during this period as well, in fact, during the mid-16th Century, they would prove to be one of the key clans in what became called “Nanban trade”, literally the “Southern Barbarian Trade”, the ‘Barbarians’ in this case, being the Portuguese, who arrived in Japan in the 1540s.

    Despite their wealth and power, the Ouchi would eventually become overstretched. Facing powerful clans in Kyushu and nearer to home, they would initially see success, crushing the Shoni Clan of Kyushu in 1536, and facing the Amago Clan of Izumo Province in 1541. An initial victory over the Amago was followed by a serious defeat in which the Ouchi clan’s heir was killed.

    Ouchi Yoshitaka, who oversaw the decline of his clan.

    After this, the head of clan, Yoshitaka, began neglecting affairs of government, and the Ouchi would enter a period of steep decline. In 1551, Yoshitaka was killed in a rebellion, and over the next five years, the Ouchi’s once expansive domains were chipped away, as rivals took advantage of the chaos, and even formerly loyal vassals (most notably the Mori Clan) went their own way, often violently.

    The Ouchi would enter terminal decline from this point. There was a brief attempt at a restoration in 1569, but it was crushed by the Mori, and the original Ouchi Clan ceased to exist. A supposed branch of the family, the Yamaguchi Clan, would survive as rulers of the Ushiku Domain, in modern Ibaraki Prefecture, but they appear to have died out in the male line in 1991.

    The Mori

    The mon of the Mori Clan.
    Kashiwamon – 投稿者自身による著作物, CC 表示-継承 4.0, https://commons.wikimedia.org/w/index.php?curid=91163213による

    Like the Hojo in the Kanto Region, the Mori were arguably the most successful clan based in Western Japan. Despite this, the origins of the clan are actually in Sagami Province, close to the modern city of Atsugi in Kanagawa Prefecture. From there, the clan would branch off (as they always seem to) into several different ‘Mori’ Clans, but the one we are focusing on here is the ‘Aki Mori’ Clan, which came to be based in Aki Province in what is today Hiroshima Prefecture.

    During the period of the Kamakura Shogunate, the Mori clan remained largely aloof, and when the Emperor Go-Daigo overthrew the Kamakura, the Mori did not get involved. This actually worked against them as Go-Daigo adopted a “With me or against me” approach, and the Mori temporarily saw their territories forfeit.

    This backfired pretty spectacularly when, just three years into the “Kenmu Restoration”, Emperor Go-Daigo himself was overthrown by the Ashikaga Family, leading to the establishment of the eponymous Shogunate, and the Mori (who had helped the Ashikaga) being restored to their lands.

    Much like every other major Samurai family, the Mori broke up into several branch families that would often end up fighting each other. Their situation in the mid-15th Century was further weakened by the presence of the powerful Ouchi and Amago Clans in the region.

    Through the late 15th Century, the Mori would find themselves caught between these two powers, but in the 16th Century, several savvy political marriages and a few adoptions improved their position considerably, and they would eventually rise to eclipse their former masters, the Ouchi, entirely.

    Mori Motonari, the man who would lead his clan to the height of their power.

    Throughout the Sengoku Period, the Mori would become the power in the West in the same way the Hojo were the power in the East. When Oda Nobunaga (him again!) drove the last Ashikaga Shogun out of Kyoto in 1576, he sought protection from the Mori, who would remain Nobunaga’s chief rivals in the West until his death (spoilers) in 1582.

    The Mori would make peace with Nobunaga’s successor, Toyotomi Hideyoshi and remain a major power, eventually establishing their base at Hiroshima. However, the final battles of the Sengoku period would see the Mori choose the losing side, and they were eventually reduced to just two provinces, which became known as the Choshu Domain.

    There they would remain, implacably opposed to the new government, but far enough away from the capital to be too much trouble to get rid of. During the Meiji Restoration in the 19th Century, it was Choshu, and the Mori clan, who would play a leading role in the modernisation of Japan, but that’s a story for another time.

    The Mori family continued through this period and into the modern era, with the current head being Mori Motohide, who works for Hitachi Steel Works, and became the family head in 2020.

    The Amago

    The mon of the Amago Clan

    The Amago were a branch of another clan, the Kyogoku, who were themselves descended from the Sasaki Clan, whose progenitor was a son of the Emperor Uda, who ruled in the late 9th century.

    Emperor Uda, who ruled from 887-897. The Amago claimed him as their illustrious ancestor.

    The Amago Clan themselves were a relative latecomer; their direct ancestor (the ‘first’ Lord Amago) was Takahisa, who took the name Amago for the area (near Kyoto) where he had his manor. In the early 15th Century, he was appointed as the deputy governor (shugo-dai) of Izumo Province (in modern Shimane Prefecture) on behalf of the Kyogoku Clan, who were obliged to reside in Kyoto.

    We’ve discussed in previous posts how the Shogun’s policy of demanding that Shugo reside in Kyoto led to the rise of independently minded deputies; well, the Amago are one of them. Although officially only deputies, the Amago would take advantage of the chaos of the Onin War to consolidate their power, and by the time the war ended, they were in effective control.

    When the Kyogoku line became extinct in 1514, with the death of the last lord, the Amago graduated from de facto to actual lords of Izumo, and it would be there that they based their power. The rise of the Amago was initially opposed by the Ouchi, and throughout the early 16th Century, they would engage in something of a hostile coexistence, neither side quite able to overcome the other, with the Ouchi focusing on the west, whilst the Amago had their eyes to the east.

    The Amago would eventually rise to be the masters of eight provinces in the region, but in the 1540s, the rise of the Mori clan would lead to the decline of the Ouchi and directly threaten the Amago. The conflict between these clans would drag on for nearly 40 years, but the Mori would eventually prevail, with the surviving members of the Amago family serving as retainers for the Mori throughout the Edo Period.

    The family itself would survive until 1940, when the last head of the clan passed away without an heir.

    The Akamatsu

    The mon of the Akamatsu Clan
    By お茶飲む人 – Own work, CC BY-SA 4.0, https://commons.wikimedia.org/w/index.php?curid=53365103

    Unlike many of the other clans we’ve been looking at, the Akamatsu Clan were a family that peaked early, and then never really recovered. The exact origins of the clan are disputed, with some sources suggesting they descended from the Minamoto Clan, whilst others refute this, leading to some confusion.

    What is not disputed is that the Akamatsu Clan originally supported the Emperor Go-Daigo during the short-lived Kenmu Restoration, earning Harima Province for their trouble, only for the province to be forfeited shortly afterwards during Go-Daigo’s controversial “Alienate everyone as quickly as possible” policy, which saw him overthrown by the Ashikaga Shogunate after just three years.

    The Akamatsu, thoroughly alienated as they were, sided with the Ashikaga and had Harima Province restored to them after their victory, and the clan would be steadfast loyalists of the new Shogunate, at least for a while. The Akamatsu remained faithful, but in 1429, a serious peasant revolt in their home province badly weakened them, and not long after that, the Shogun, Yoshinori, came to the throne and proved to be an effective, but extremely paranoid ruler.

    The exact reasons for the so-called Kakitsu Rebellion are unclear, but members of the Akamatsu Clan assassinated the Shogun in 1441, after which they raised an army only to be crushed by the Shogunate army shortly afterwards.

    Branches of the family would survive, and after conspicuous service during the Onin War, the Akamatsu were actually restored to control of Harima Province. For a while, things were looking up. By 1488, the head of the clan, Masanori, had established control of three provinces, and there was every indication that the Akamatsu would enter the 15th century as one of the major players.

    You’ve probably already guessed that that isn’t what happened, though, and you’d be right, good on you for paying attention. Masanori died suddenly in 1496, and his heir was just four years old, meaning that the clan fell into the hands of so-called ‘Elders’ who were supposed to rule until the little lord came of age.

    Akamatsu Masanori, who might have held things together for his clan, if he’d lived.

    This might have worked in more peaceful times, but in the early days of the Sengoku Jidai, it led to chaos. Before long, different factions of the clan were fighting each other, and the Akamatsu entered a period of steady decline. Even after the lord, Yoshimura, came of age, he couldn’t change the situation.

    It got so bad that Yoshimura was first forced to abdicate in 1521 and was then assassinated shortly afterwards. His son, Harumasa, was young and easier to control, which might be why the ‘elders’ favoured him as ruler.

    There was a brief resurgence in 1531, when Harumasa managed to establish his own rule, but years of infighting had effectively bled the Akamatsu dry, and in 1537, the neighbouring Amago Clan invaded and conquered the Akamatsu’s home province of Harima.

    The Akamatsu would return to Harima, but they were never able to establish control of the whole province ever again, and throughout the 16th century, their power was gradually eroded away, until 1568, when they made the somewhat short-sighted decision to resist Oda Nobunaga, who promptly crushed them and took Harima for himself.

    Branches of the family would survive in one form or another, but they never ruled large territories again. In the modern era, a descendant of the clan, Akamatsu Yoshinori, served in several high positions in the Imperial Navy, eventually being granted the title of Baron. His descendants are still going today, although there’s not a lot of information available online.

    Sources
    https://en.wikipedia.org/wiki/%C5%8Cuchi_clan
    https://ja.wikipedia.org/wiki/%E5%A4%A7%E5%86%85%E6%B0%8F
    https://reichsarchiv.jp/%E5%AE%B6%E7%B3%BB%E3%83%AA%E3%82%B9%E3%83%88/%E7%89%9B%E4%B9%85%E5%B1%B1%E5%8F%A3%E6%B0%8F
    https://en.wikipedia.org/wiki/M%C5%8Dri_clan
    https://ja.wikipedia.org/wiki/%E6%AF%9B%E5%88%A9%E6%B0%8F
    https://ja.wikipedia.org/wiki/%E6%AF%9B%E5%88%A9%E5%85%83%E6%95%AC
    https://ja.wikipedia.org/wiki/%E6%AF%9B%E5%88%A9%E5%85%83%E6%A0%84
    https://ja.wikipedia.org/wiki/%E5%B0%BC%E5%AD%90%E6%B0%8F
    https://en.wikipedia.org/wiki/Akamatsu_clan
    https://ja.wikipedia.org/wiki/%E8%B5%A4%E6%9D%BE%E6%B0%8F