Tag: Osaka Castle

  • Tokugawa Ieyasu and the Road to Osaka.

    Tokugawa Ieyasu and the Road to Osaka.

    By 1614, Ieyasu was unquestionably the master of Japan. Though he had formally resigned as Shogun in favour of his son, Hidetada, a decade earlier, the reins of power were firmly in his hands. Already in his 70s, practically ancient by the standards of the day, he was no doubt considering the sort of questions a man at the end of his life might contend with: “What happens after I am gone?”

    Hidetada was, by most accounts, a perfectly capable Shogun. He had earned a relatively good reputation on the battlefield, and most sources agree that he was hard-working and well-trained by his father. The problem for Ieyasu was that, despite everything, Tokugawa rule was not entirely unchallenged.

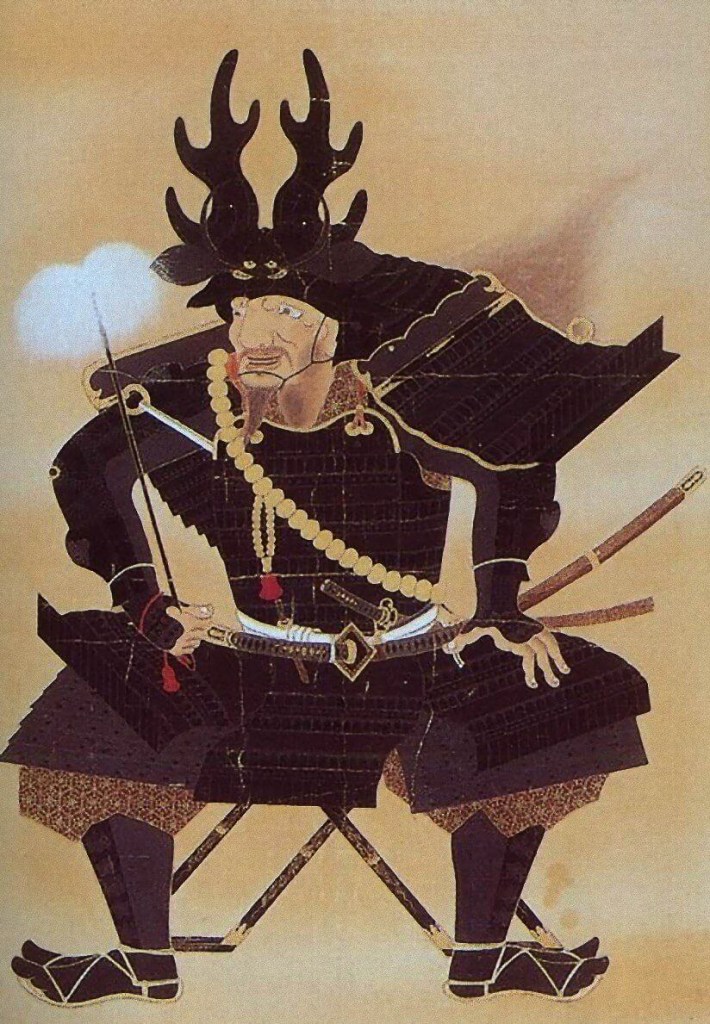
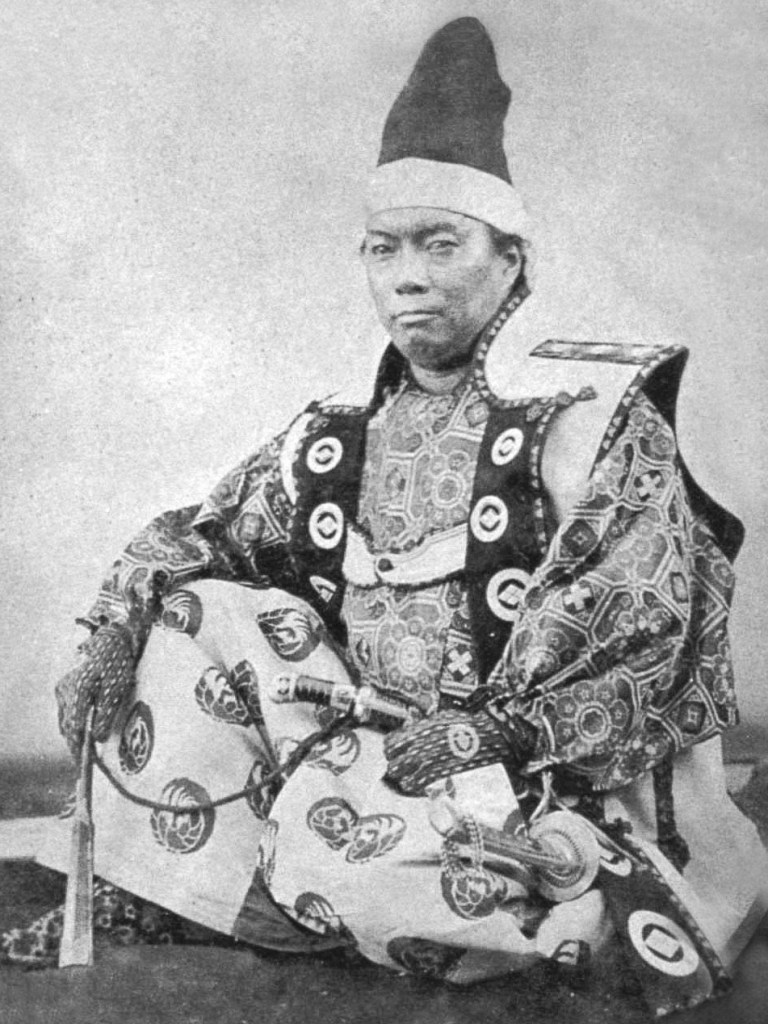
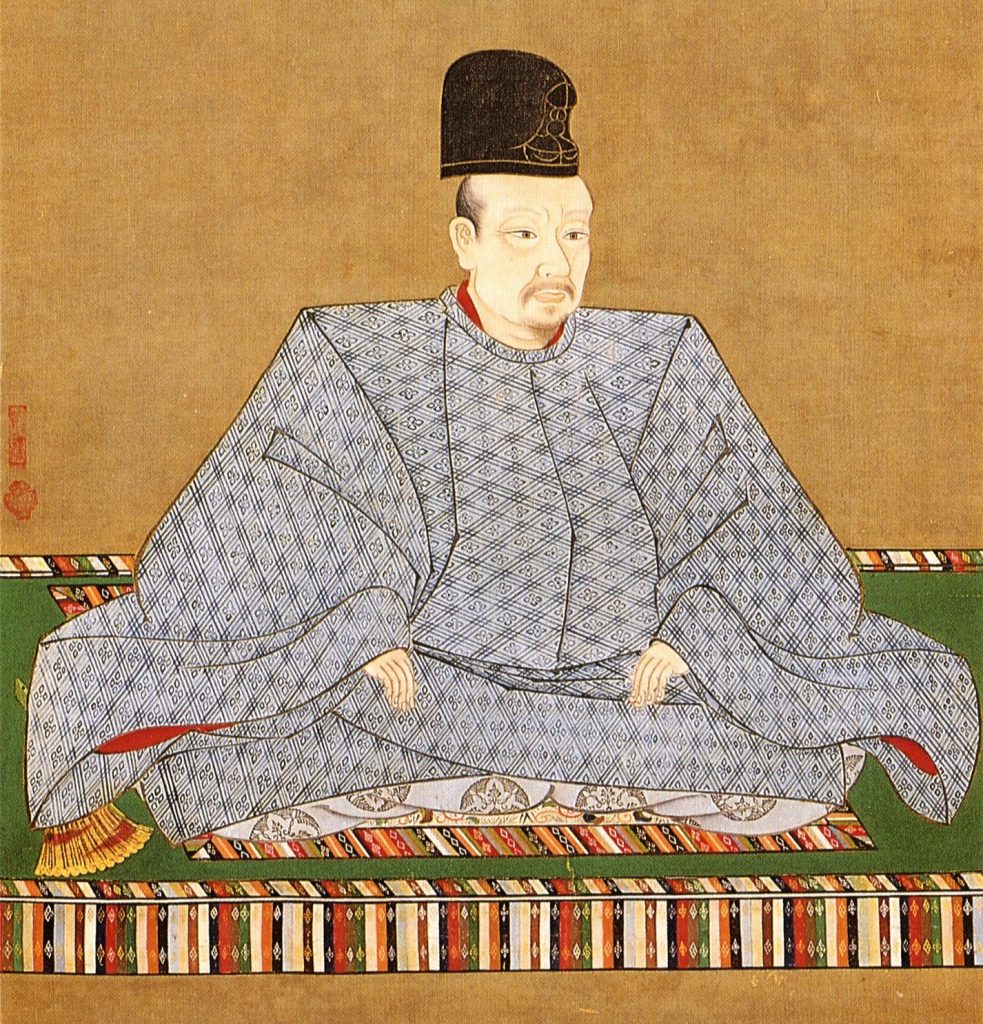
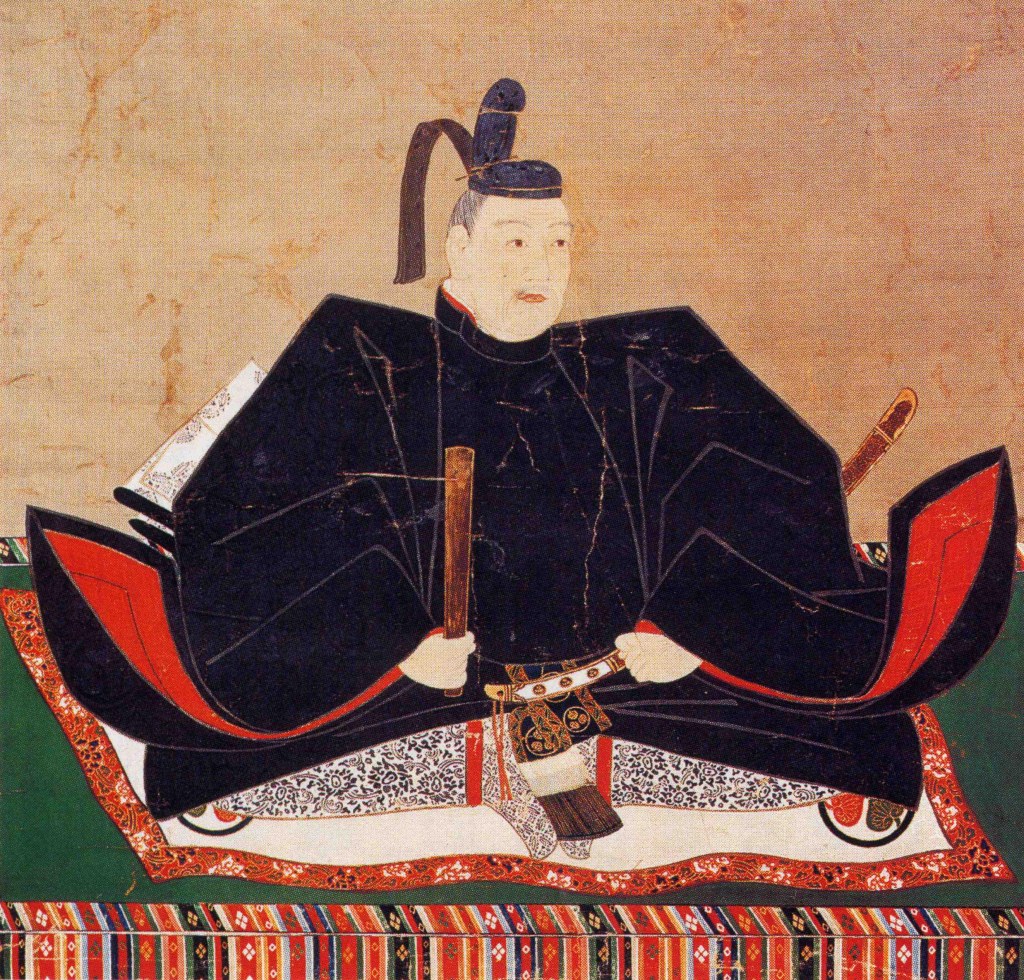
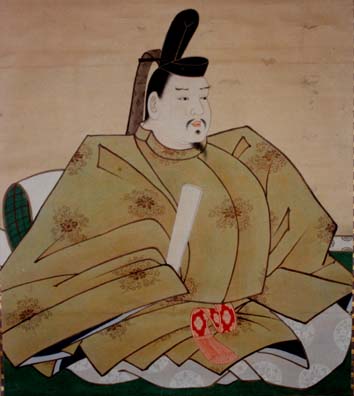
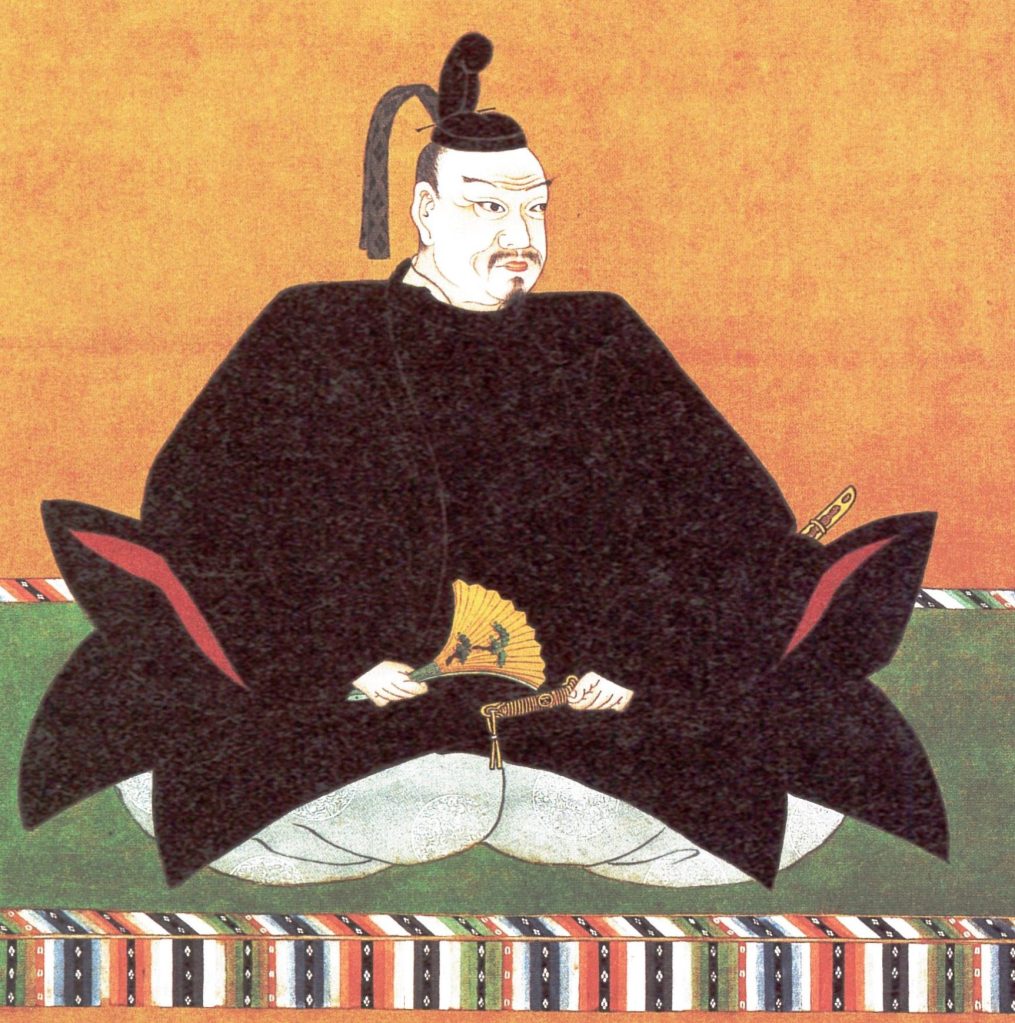
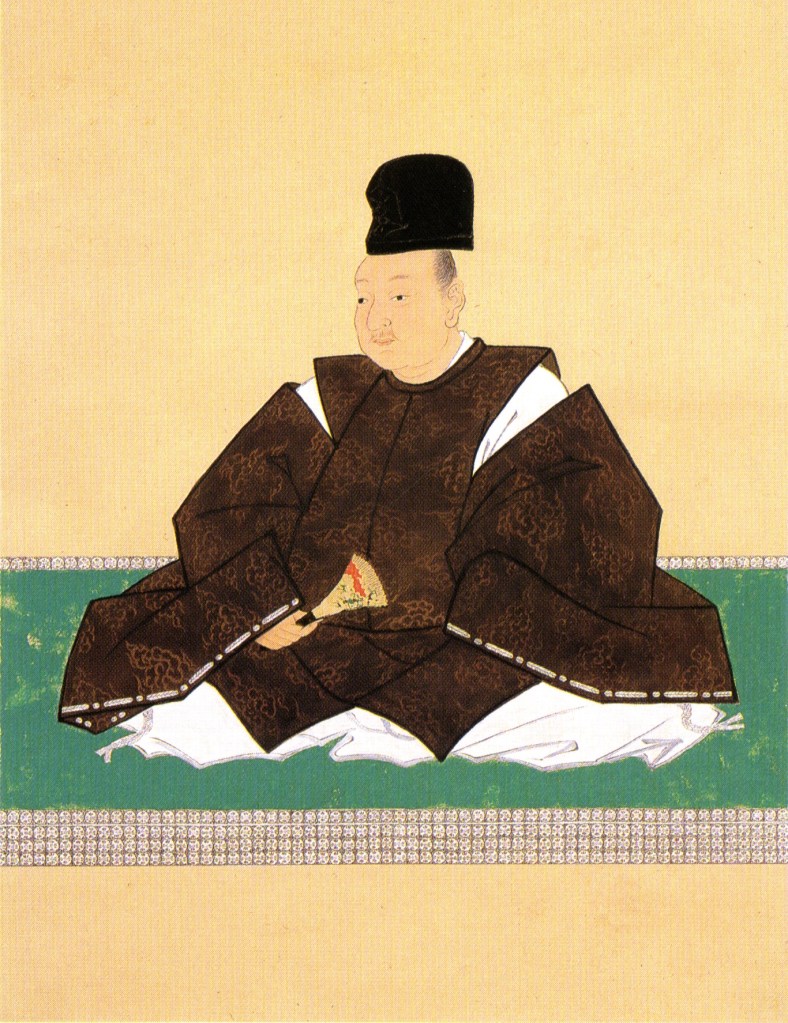
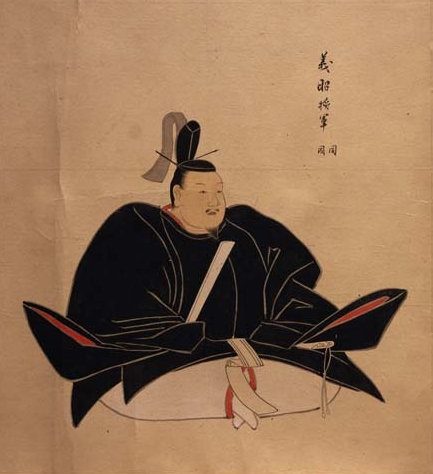
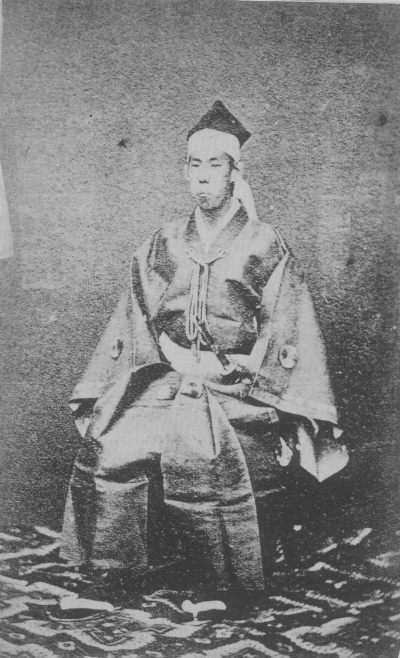
    Ieyasu as he appeared in later life. By 1614, he was the master of Japan, but despite all his power, his rule was not unchallenged.

    After the Battle of Sekigahara, Ieyasu had explicitly refused to take any action against Hideyoshi’s infant son, Hideyori. Instead, he had ensured that the Toyotomi Clan remained wealthy, and as long as Hideyori remained holed up in Osaka Castle, Ieyasu was content to leave him be.

    For his part, Hideyori initially seemed happy enough to remain where he was, spending large sums of money on restoring or rebuilding temples that had been damaged during the war, though his exact motivation for this has been questioned by scholars, with some suspecting he was seeking to gain divine support, and others suggesting that he was simply religious.
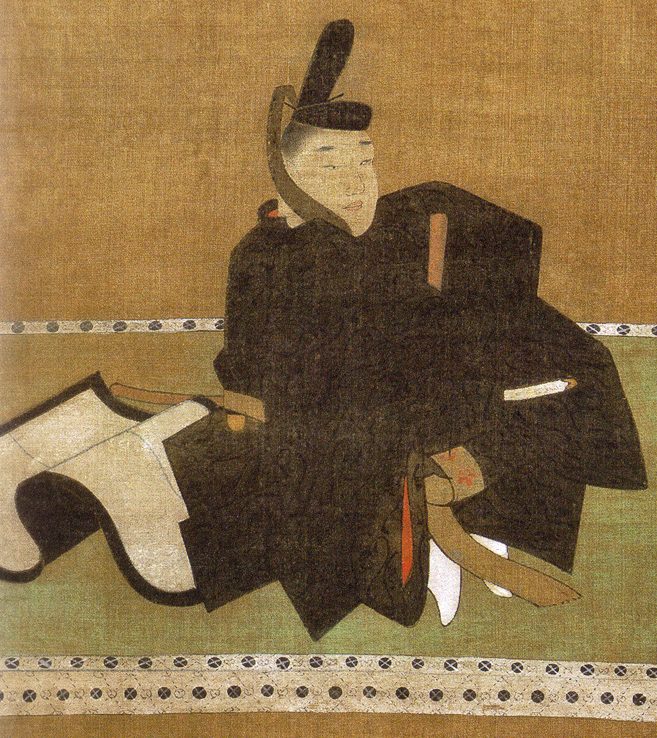
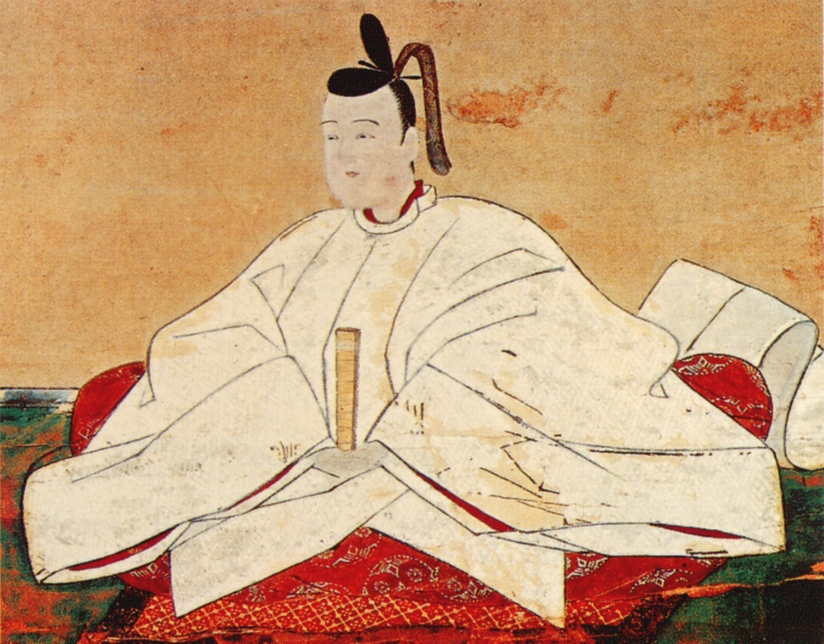
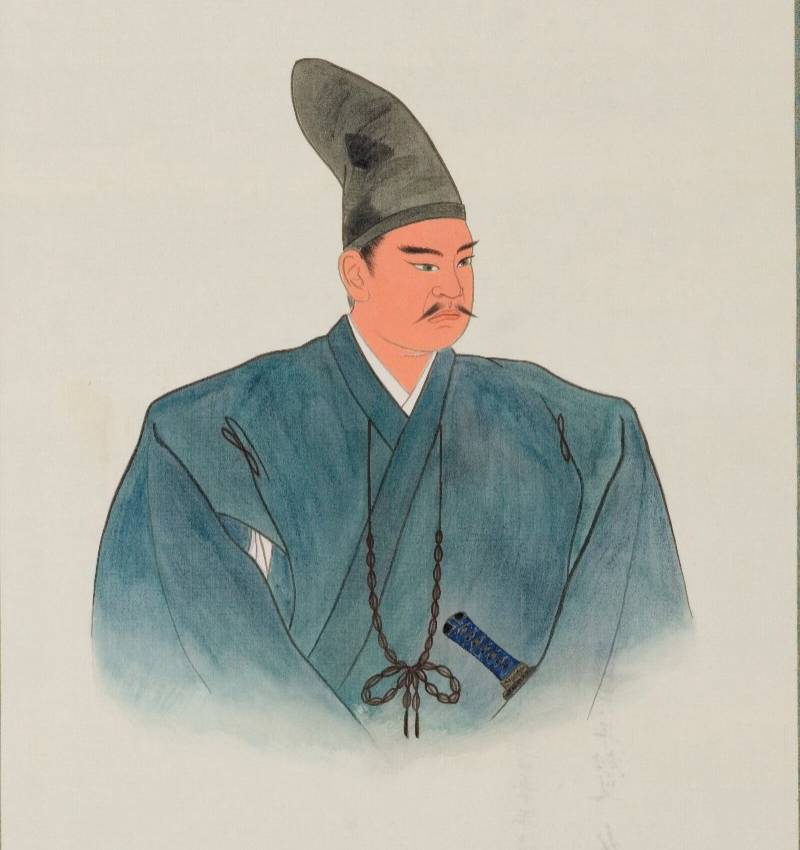
    Toyotomi Hideyori. Though he was his father’s heir, he seemed content to live a peaceful life.

    By late 1614, Hideyori was in his 20s and was beginning to attract attention as Hideyoshi’s rightful heir. One somewhat fanciful account tells us that by this time, Hideyori was nearly 2 metres tall and weighed over 160kg, and while no other sources corroborate his impressive size, he was beginning to become a focal point for Anti-Tokugawa elements in the realm.

    Ieyasu had plenty of reason to fear Hideyori’s challenge to his family’s rule; some scholars even suggest that Hideyori’s generosity towards various temples was actively encouraged by the Shogun as a way to drain Toyotomi resources that might otherwise have been spent on preparations for war. Whether this is true or not, it was increasingly clear that Ieyasu couldn’t simply let Hideyori be; all he needed was a pretext.
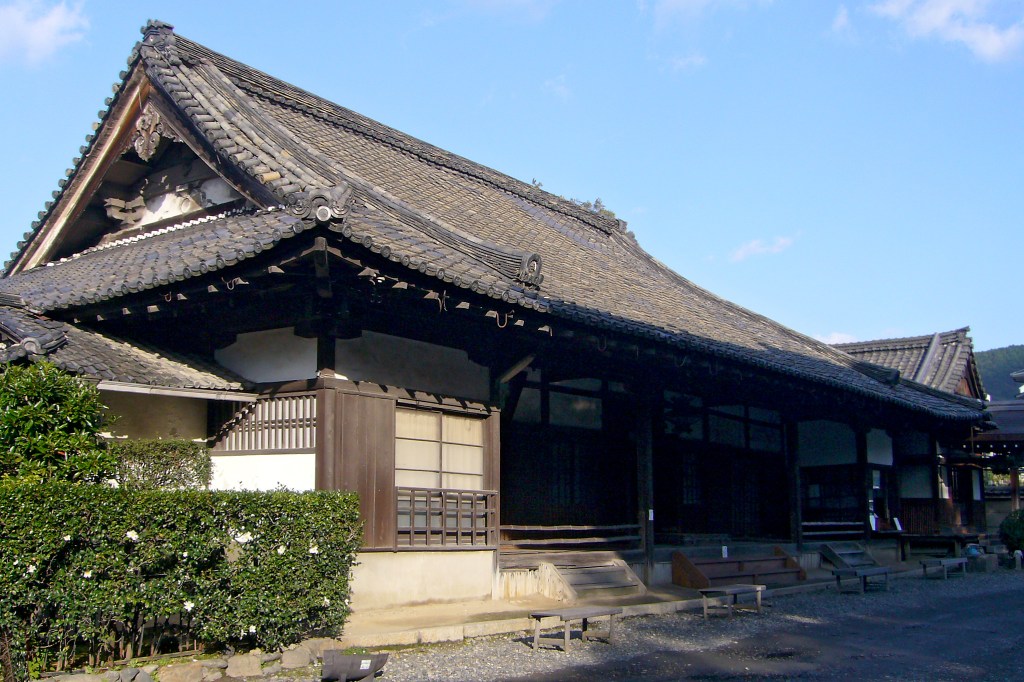
    The main hall of Hokoji as it appears today. Though it was relocated in the 19th Century, it is believed to have been originally built in the 17th.

    As part of his widespread temple-rebuilding projects, Hideyori commissioned a new bell for the Hokoji Temple near Kyoto. This was initially an uncontroversial act, but rumours soon spread that the bell had been inscribed with words that could be construed as prayers for the restoration of the Toyotomi and the downfall of the Tokugawa.

    The phrases themselves translate into English as “National peace and prosperity” and “Lord and subject enjoy abundant happiness“. From a modern perspective, neither of these seem particularly problematic, but the problem was that, in Japanese characters, the writing contained parts of Ieyasu’s name, split in two (ie, and yasu), which was construed as a form of cursing him, whilst the second phrase suggested that the “lord” in question was the Toyotomi.
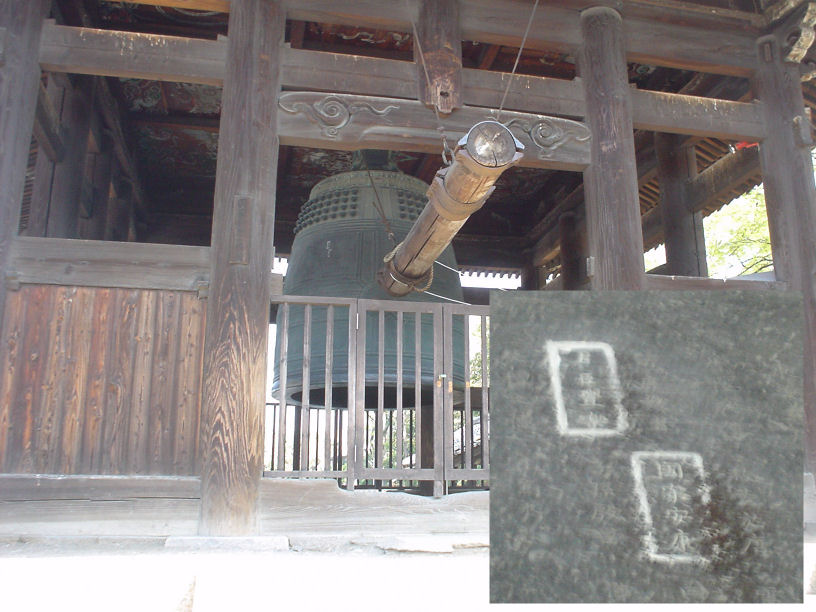
    The bell and the inscription that caused all the trouble.
    +- – 投稿者自身による著作物, CC 表示-継承 3.0, https://commons.wikimedia.org/w/index.php?curid=107332539による

    This was an age of superstition, and signs and portents were taken seriously, but even so, this was as good a reason as any for Ieyasu to finally deal with the Toyotomi once and for all. He apparently wasn’t immediately set on a military option, as negotiations took place in late 1614 to try to defuse the tension. An emissary, Katagiri Katsumoto, was dispatched to explain the ‘true’ meaning of the bell, but he was unable to meet with Ieyasu or Hidetada directly, and instead returned to Osaka with three possible proposals.

    It’s important to note that none of these proposals appear in any Tokugawa documents from the time, and some scholars believe they were the invention of Katsumoto himself. They were as follows:
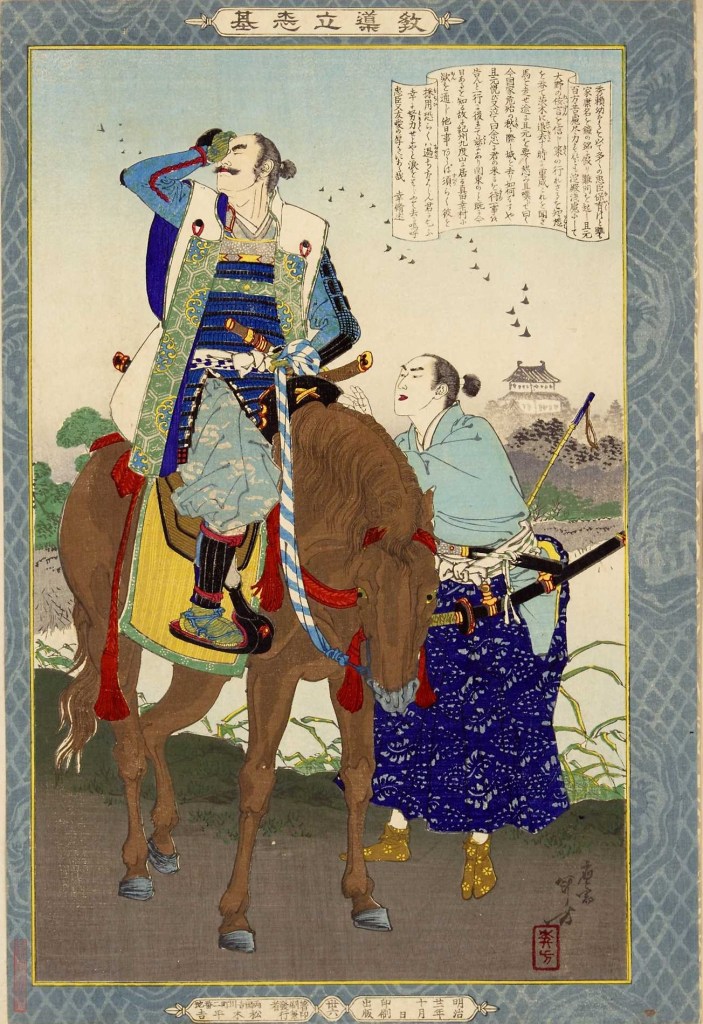
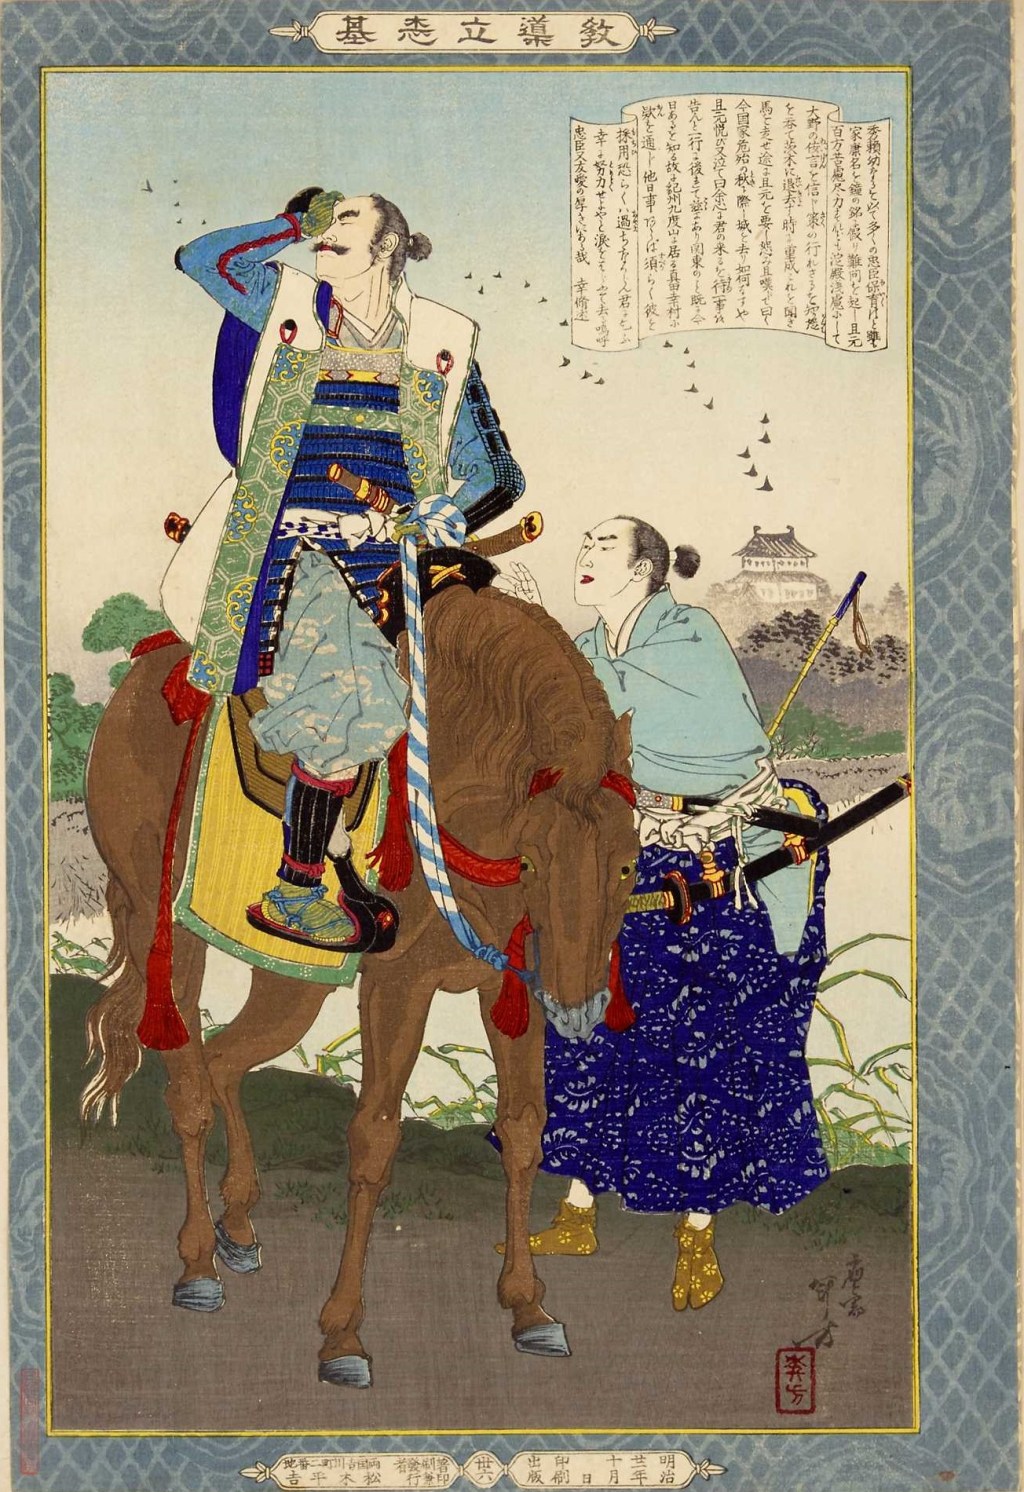
    A 19th-Century depiction of Katagiri Katsumoto departing on his mission to Ieyasu.

    1) Hideyori would reside alternately in Edo and Osaka, as part of the Sankinkotai policy, in which Daimyo were obliged to live one year in Edo, and one year in their home provinces. Hideyori had previously been exempt, and accepting Sanki-kotai would have essentially confirmed him as a vassal of the Shogun.

    2) Hideyori’s mother, Lady Yodo, would be sent to Edo as a hostage. She would likely have lived in comfort, but her life would have been forfeit if Hideyori ever stepped out of line.

    3) Hideyori agreed to give up the formidable Osaka Castle and accept an alternative domain elsewhere.
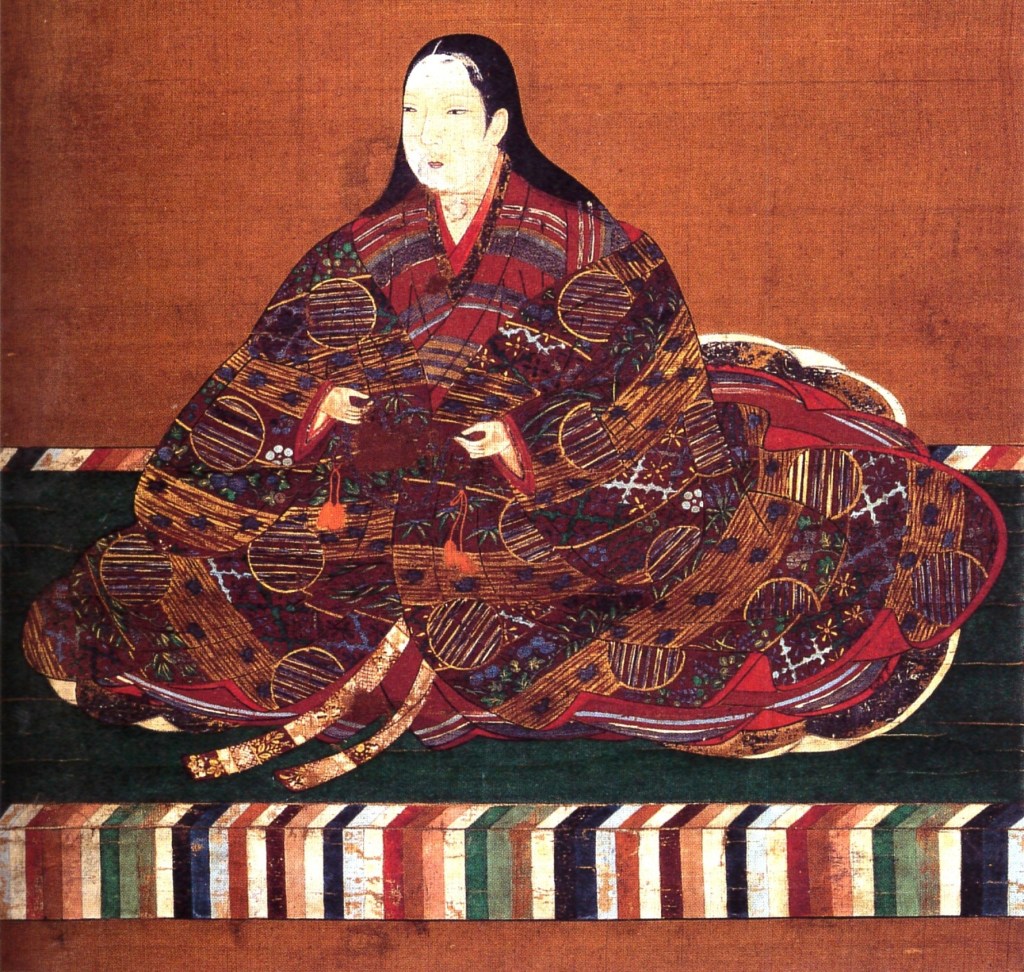
    Hideyori’s mother, Lady Yono (Yodo-Dono). It was suggested that she might be given as a hostage to guarantee peace, a suggestion that was sharply rejected by Hideyori.

    Whether these proposals truly came from the Shogunate or not, they were so offensive to the Toyotomi that Katsumoto came under suspicion of collusion with the Tokugawa. Although no contemporary evidence exists, other Toyotomi vassals believed the rumours and tried to have Katsumoto killed. The man himself escaped by fortifying his residence, and it took direct intervention from Hideyori to end the crisis, with Katsumoto agreeing to become a monk.

    Hideyori swiftly dispatched emissaries to Ieyasu, explaining that the fortification and massing of troops were in no way aimed at the Tokugawa, and that it had been an internal matter, now resolved. Ieyasu either genuinely or else conveniently chose not to believe this explanation, and gave orders for forces to be gathered to punish the Toyotomi.
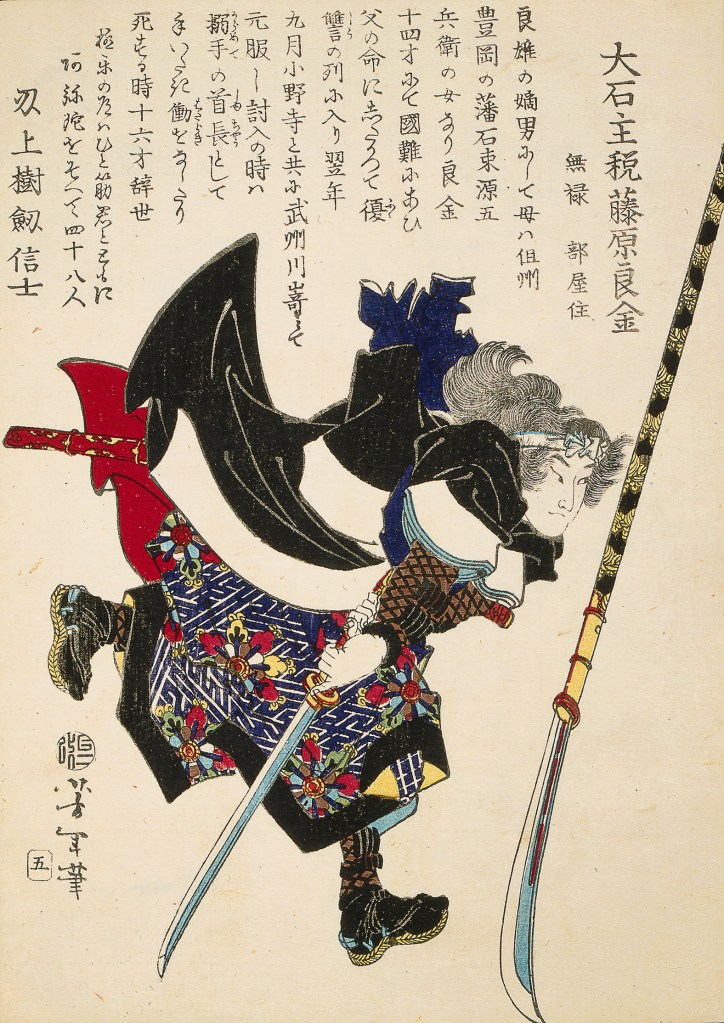
    A later depiction of a Ronin. Although often romanticised in later years, in the period immediately following Sekigahara, huge numbers of recently unemployed Samurai were a serious problem, but, as Hideyori would prove, a potentially useful source of manpower.

    In response, the Toyotomi issued a call to arms, gathering those loyal to the Toyotomi through old association or opposition to the Tokugawa. Very few Daimyo rushed to join up, but the vast wealth left behind at Osaka Castle by Hideyoshi was used to persuade thousands of Ronin (masterless Samurai) to come to Osaka and fight for the Toyotomi.

    Meanwhile, food, provisions, and weapons were either purchased or “acquired” from storehouses in and around Osaka, with or without the owners’ permission. In relatively short order, the Toyotomi had gathered some 100,000 men in Osaka.
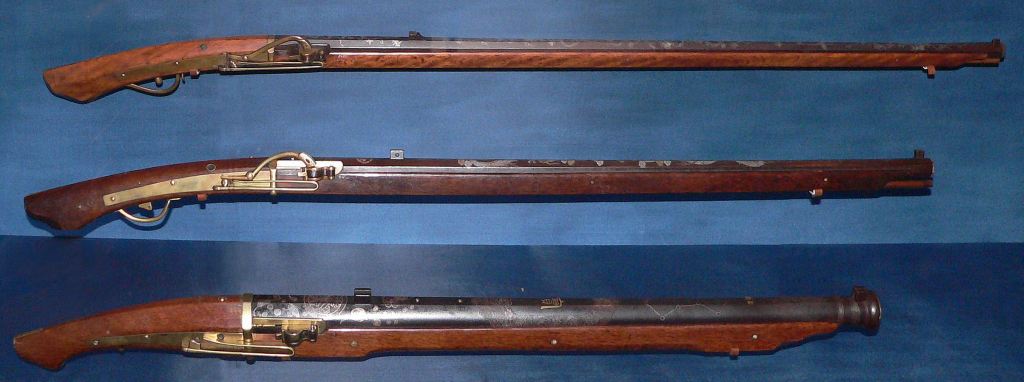
    Guns from the period. Although Samurai are most famously associated with their swords, by this time, guns were as common, if not more so.

    Some were motivated by a genuine desire to see the Toyotomi family restored to power, either out of loyalty or with the expectation of reward should they succeed. Others were there to take revenge on the Tokugawa, with many having become Ronin in the aftermath of Sekigahara, where dozens of lords had lost everything as punishment for opposing Ieyasu. Still others were naked opportunists, motivated to fight for cash rewards or to restore/earn a reputation, as their forefathers had done.

    In response, Ieyasu and Hidetada mustered a force which was, in some accounts, twice the size of the one now surrounding Hideyori, and these men suffered little, if any, confusion about their intentions, loyalty to the Shogun, and hostility to the Toyotomi. Such a massive force was almost impossible to gather in one place, and so detachments of various sizes made their way towards Osaka.
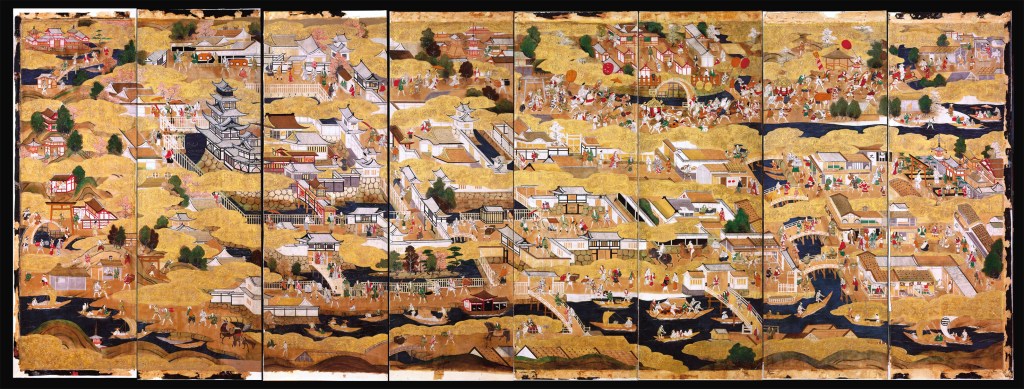
    A contemporary image of the area around Osaka, with the port of Sakai represented in the top right.

    The Toyotomi forces were not idle in the meantime, attacking and briefly taking the important port at Sakai (modern Osaka) before being forced to withdraw by a Tokugawa counter-attack. Understanding the disparity in forces, the Toyotomi then retreated to Osaka Castle, arguably the strongest fortress in the realm, and waited for the storm to break.


    Sources
    https://ja.wikipedia.org/wiki/%E5%A4%A7%E5%9D%82%E3%81%AE%E9%99%A3
    https://ja.wikipedia.org/wiki/%E5%A0%BA
    https://ja.wikipedia.org/wiki/%E5%BE%B3%E5%B7%9D%E5%AE%B6%E5%BA%B7
    https://ja.wikipedia.org/wiki/%E6%B5%AA%E4%BA%BA
    https://ja.wikipedia.org/wiki/%E6%96%B9%E5%BA%83%E5%AF%BA%E9%90%98%E9%8A%98%E4%BA%8B%E4%BB%B6
    https://ja.wikipedia.org/wiki/%E6%96%B9%E5%BA%83%E5%AF%BA
    https://ja.wikipedia.org/wiki/%E5%BE%B3%E5%B7%9D%E7%A7%80%E5%BF%A0
    https://ja.wikipedia.org/wiki/%E6%B7%80%E6%AE%BF
    https://ja.wikipedia.org/wiki/%E8%B1%8A%E8%87%A3%E7%A7%80%E9%A0%BC
  • From Sekigahara to the Shogunate.

    From Sekigahara to the Shogunate.

    In the aftermath of Sekigahara, Ieyasu set about rewarding his supporters and dealing with his opponents. The exact details of who got/lost what are complex (and not particularly interesting), but the main distinction, and the one that would prove to be the most significant, was the separation between Tozama and Fudai Daimyo.

    The exact criteria for what made a Daimyo Tozama or Fudai vary depending on context, but very basically, the Fudai Daimyo were those from families who had supported Ieyasu before his rise to power, either as direct vassals of the Tokugawa Clan, or allies during the Sekigahara Campaign. Meanwhile, the term Tozama originally meant Samurai who had a much looser tie to their lord, and in the context of the post-Sekigahara settlement, the Tozama Daimyo were those lords who had failed to support Ieyasu, or who had actively opposed him.

    Honda Tadakatsu, one of the most famous of the early Fudai Daimyo.

    In the centuries to come, the Fudai would provide many members of the new Tokugawa Government; indeed, it was often said that any candidate for a high-ranking position had to be from a Fudai family, which would prove true in all but one case. In exchange for their service, the Fudai were often stationed near the capital, Edo (modern Tokyo), where they could help protect the city.

    On the other hand, the Tozama were usually located much further away and were consequently excluded from government. It wasn’t all bad, however, as the extreme distances of their realms meant that the central government was often obliged to rule them with a light touch, and in later years, several Tozama would be able to accrue significant wealth and power.

    Matsumae Takahiro, the only Tozama Daimyo to ever hold high rank in the Tokugawa government, though it came at the very end of the Shogunate.

    One family over which a significant question mark remained was the Toyotomi. Ieyasu had gone to great pains not to give the impression that the Sekigahara Campaign had been aimed at the Toyotomi, but in the aftermath, no one seriously expected him to hand over the power he had won, especially given that the incumbent head of the clan, Hideyori, was just seven years old.

    In the short term, Ieyasu explicitly refused to punish either Hideyori or his mother, Lady Yono, and though Toyotomi lands were significantly reduced, and their most powerful supporters either seriously weakened or destroyed outright, the clan, still based at Osaka Castle, retained lands valued at some 650,000 Koku, ensuring their place in the upper echelons of Japanese society.

    Toyotomi Hideyori. Despite being Hideyoshi’s heir, he was just seven at the time of Sekigahara, and Ieyasu ensured he wouldn’t be punished for what others had done on his behalf, a decision he would later come to regret.

    Hideyoshi’s title of Kanpaku (regent) was not returned, however. Though it had been vacant since Hideyoshi’s death in 1595, Ieyasu ensured that the title would instead go to a member of the Kujo Family, who had been one of the “Five Regent Houses” prior to Hideyoshi’s usurping the title. In doing so, Ieyasu earned the approval of the Imperial government and demonstrated that awarding such illustrious (if powerless) titles now lay with him alone.

    Despite his now unassailable position, Ieyasu didn’t immediately take the title of Shogun; there were still territories to redistribute and a new political reality to consolidate. It wouldn’t be until early 1603 that Ieyasu was appointed Shogun, as well as being named Minister of the Right, Commander of the Imperial Guard, and Commander of the Ox-Drawn Carts, which may sound a touch silly, but in a time and place with very few wheeled vehicles, this was a big deal.

    Emperor Go-Yozei, who was on the throne at the time of Ieyasu’s rise to power, would ultimately be the one to appoint him Shogun.

    Strangely enough, Ieyasu would only be Shogun for a relatively short period. In 1605, he officially resigned the post and asked the court to declare his son, Hidetada, the new Shogun. As you probably already know, this ‘abdication’ was only a formality, as Ieyasu retained formal power whilst freeing himself from the often impractical burden of state ritual.

    The abdication had another purpose; it demonstrated to the realm that, from now on, the position of Shogun would be hereditary and belong to the Tokugawa Clan. Perhaps the greatest testament to Ieyasu’s new power was the fact that the handover of power was conducted almost without opposition, signalling that, at last, the years of chaos were finally over.

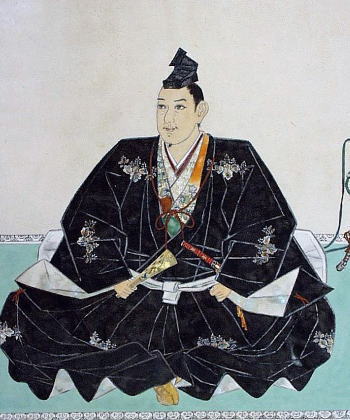
    Tokugawa Hidetada. When he succeeded his father as (nominal) Shogun in 1605, it was the first unchallenged transition of high authority that Japan had seen in decades.

    We’ll take a detailed look at the early years of the Tokugawa Shogunate in a dedicated post, but Ieyasu, now titled “Ogosho” (Retired Shogun), was extremely active in securing his family’s rule and stabilising the realm. Officially, one of Ieyasu’s responsibilities was foreign diplomacy, and during this period, he received envoys from Korea, re-establishing diplomatic relations cut off since Hideyoshi’s invasions, as well as representatives from Spain and the Netherlands, who sought increased trade with Japan.

    One figure who played a significant role in these endeavours was William Adams, the first Englishman in Japan, who will definitely get a post of his own, and helped support the efforts of his countrymen in establishing a permanent (though ultimately short-lived) ‘factory’ to facilitate trade between Japan and England.

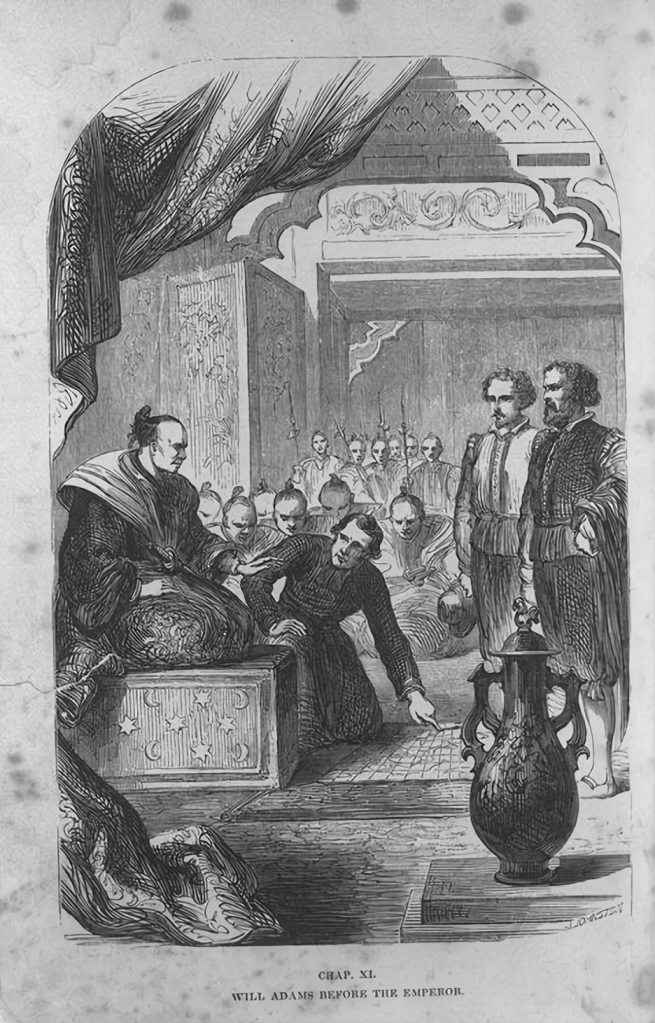
    A 19th-century depiction of William Adams meeting Ieyasu (who is mislabelled “Emperor”). Adams was an important figure, but he was just one of many foreigners who had audiences with Ieyasu during this period.

    With matters at home largely settled, and Japan establishing itself as a reliable trade partner in Asia, but late 1614, Ieyasu would have had good reason to consider his life a remarkable success; he had risen from a regional warlord on the brink of destruction to master of Japan, and established a dynasty that would last for some 250 years.

    All was not well, however. Hideyori, whom Ieyasu had chosen to spare in the aftermath of Sekigahara, had grown into a man, and as Hideyoshi’s heir, he began to attract support from those disaffected by the new Tokugawa regime. It would not take long for Ieyasu to find a convenient pretext to eliminate the Toyotomi once and for all.


    Sources
    https://ja.wikipedia.org/wiki/%E5%BE%B3%E5%B7%9D%E5%AE%B6%E5%BA%B7
    https://en.wikipedia.org/wiki/Toyotomi_Hideyori
    https://ja.wikipedia.org/wiki/%E5%BE%B3%E5%B7%9D%E7%A7%80%E5%BF%A0
    https://ja.wikipedia.org/wiki/%E9%96%A2%E3%83%B6%E5%8E%9F%E3%81%AE%E6%88%A6%E3%81%84
    https://ja.wikipedia.org/wiki/%E5%A4%A7%E5%BE%A1%E6%89%80_(%E6%B1%9F%E6%88%B8%E6%99%82%E4%BB%A3)
    https://ja.wikipedia.org/wiki/%E7%89%9B%E8%BB%8A%E5%AE%A3%E6%97%A8
    https://ja.wikipedia.org/wiki/%E9%9A%8F%E8%BA%AB
    https://ja.wikipedia.org/wiki/%E8%AD%9C%E4%BB%A3%E5%A4%A7%E5%90%8D
    https://en.wikipedia.org/wiki/Fudai_daimy%C5%8D
    https://ja.wikipedia.org/wiki/%E5%A4%96%E6%A7%98%E5%A4%A7%E5%90%8D
    https://en.wikipedia.org/wiki/Tozama_daimy%C5%8D
    https://ja.wikipedia.org/wiki/%E6%9D%BE%E5%89%8D%E5%B4%87%E5%BA%83
    https://ja.wikipedia.org/wiki/%E3%82%A6%E3%82%A3%E3%83%AA%E3%82%A2%E3%83%A0%E3%83%BB%E3%82%A2%E3%83%80%E3%83%A0%E3%82%B9
    https://ja.wikipedia.org/wiki/%E5%BE%8C%E9%99%BD%E6%88%90%E5%A4%A9%E7%9A%87

  • The Road to Sekigahara

    The Road to Sekigahara

    Before his death in 1598, Toyotomi Hideyoshi had established a Council of Five Elders to rule Japan until his son, Hideyori, came of age. Of the five, the two most influential were Tokugawa Ieyasu and Maeda Toshiie, and almost before Hideyoshi’s body was cool, the two men set about trying to undermine and outmanoeuvre each other.

    The ultimate victor would be Ieyasu, largely because Toshiie died in the Spring of 1599 and was replaced by his son, Toshinaga, who lacked his father’s political connections and ability. Later that year, a plot to assassinate Ieyasu was uncovered, and Toshinaga was implicated. Forced to flee to his home province of Kaga, he only avoided direct conflict with Ieyasu by sending his mother as a hostage.

    Maeda Toshinaga. Like many before him, he would prove unable to live up to an illustrious father’s reputation.

    The revelation of his plot allowed Ieyasu to neutralise the threat of Toshinaga in the short term, but it wouldn’t last. Hideyoshi’s death had had exactly the destabilising effect he had feared, and throughout 1598-1600, old rivalries, feuds, and ambitions resurfaced. Historians disagree on what exactly led to a fresh outbreak of conflict, but there are a few theories.

    Some speculate that, without Hideyoshi’s strong hand, his attempts to centralise power in the realm were doomed to failure, as powerful local clans, who had been largely independent for decades (or more), saw little reason to kowtow to a government now headed by an infant. Others suggest that the invasion of Korea, whilst possibly intended to keep the Samurai busy, had actually stirred up old rivalries and forged a few new ones as the prideful warrior class competed for prestige amongst themselves at the expense of a cohesive campaign.

    Despite their reputation for honour and duty, the Samurai primarily followed strength. When Hideyoshi died, the lack of strong central authority meant that it wasn’t long before local clans slipped back into old habits.

    There are others who don’t necessarily disagree with either view, but argue that the unpopularity of Ishida Mitsunari was a key factor in the breakdown of relations between the men at the centre of the post-Hideyoshi political scene. He was not a powerful lord in his own right, and his reputation for military incompetence and political scheming weakened his ability to hold the administration of the realm together during Hideyori’s minority.

    Though it could be argued that Mitsunari’s failings were overemphasised in later (pro-Tokugawa) sources, it is clear that Ieyasu himself had ambitions to increase his own power and perhaps to claim ultimate authority. He frequently violated Hideyoshi’s laws and even his will, doing things like forming marriage alliances with other powerful lords, and eventually residing at Osaka Castle, even though Hideyoshi’s testament had stipulated that he remain at nearby (and weaker) Fushimi Castle.

    A later depiction of Ieyasu. Though he started out as something of a first among equals, by early 1600, it was clear he was aiming for ultimate power.

    Ieyasu was the strongest individual member of the Council of Elders, but he lacked the strength to oppose the other four if they combined against him, so he set about ensuring that that wouldn’t happen. After dealing with Maeda Toshinaga in the aftermath of the alleged assassination plot, he intervened directly in a conflict between another elder, Ukita Hideie, and his vassals.

    The result of the so-called “Ukita Incident” was that many of these vassals left Hideie’s service, seriously weakening his power and, conversely, his ability to oppose Ieyasu. Indeed, by early 1600, it was beginning to appear that Ieyasu might claim supreme power without resorting to violence. He had largely co-opted the former Hideyoshi administration, and even Mitsunari, who had previously opposed Ieyasu, seemed to be coming around.

    Ukita Hideie. One of the Five Elders, Ieyasu’s machinations left him in a severely weakened position.

    In the Spring of 1600, Ieyasu felt strong enough to send envoys to another Elder, Uesugi Kagekatsu, to demand an explanation for the construction of an (illegal) castle in his domain, as well as for rumours of collusion between him and Maeda Toshinaga. Kagekatsu agreed to go to Kyoto, but asked that the trip be postponed until the Autumn, a request that was refused.

    Scholars generally agree that Ieyasu had already decided on a military campaign against the Uesugi, and he had sent the demand, knowing full well that Kagekatsu would refuse, thus giving him the pretext he needed. There are also some sources that suggest that Kagekatsu himself was behind a plot to lure Ieyasu into the difficult terrain of Northern Japan, and there ambush and destroy him.

    Uesugi Kagekatsu. Sources disagree over whether he was a passive victim of Ieyasu’s ambition or a cunning strategist plotting to trap and destroy him.

    Regardless of who ultimately provoked the campaign, Ieyasu left Osaka in mid-June, heading first to his base at Edo, from where he issued orders to his vassals and supporters to prepare for an attack against the Uesugi. It is perhaps a testament to how ephemeral his power was that, no sooner had Ieyasu left Osaka than members of the government, including Ishida Mitsunari, rose up against him and sent a letter to Mori Terumoto inviting him to come to Osaka to “settle affairs.”

    Shortly after this, copies of a letter denouncing Ieyasu as a traitor to Hideyori’s government were circulated, and Terumoto was nominated as Commander of what would eventually become known as the “Western Army”, the collective forces gathered in opposition to Ieyasu’s “Eastern Army”. The first blow would fall on Fushimi Castle, still held by Ieyasu’s vassals, when it came under attack in August 1600.

    Mori Terumoto. In terms of resources, Terumoto was second only to Ieyasu, which made him the obvious choice to lead the coalition army.

    Though some sources suggest that the forces led by the Shimazu and Kobayakawa Clans actually intended to enter Fushimi to fight on Ieyasu’s behalf, they were refused by the garrison and thus ‘forced’ to attack the castle instead. However, the only contemporary source for this is the Shimazu’s own records, and it is generally dismissed as an attempt by the Shimazu to excuse their opposition to Ieyasu after the fact.

    Fushimi was garrisoned by around 1800 men, and when the Western Army’s force of some 40,000 arrived, the result was a foregone conclusion. The garrison held out bravely, and there are many stories of heroism, but the odds were simply too great, and Fushimi fell after a siege of around two weeks, with most of the garrison being put to the sword.

    The reconstructed Fushimi Castle as it appears today. Though the original castle fell, the delay would prove decisive.

    Despite the defeat, the sacrifice of the garrison at Fushimi would not be in vain; 40,000 troops had been tied down for nearly two weeks, and this gave Ieyasu time and relative strategic freedom to gather his allies and position his forces, and it was time that had been well spent. At the beginning of September 1600, Ieyasu departed his capital of Edo and marched towards the most important battle of his life, and one of the most decisive in Japanese history.


    Sources
    https://ja.wikipedia.org/wiki/%E5%BE%B3%E5%B7%9D%E5%AE%B6%E5%BA%B7
    https://ja.wikipedia.org/wiki/%E9%96%A2%E3%83%B6%E5%8E%9F%E3%81%AE%E6%88%A6%E3%81%84
    https://ja.wikipedia.org/wiki/%E4%BC%8F%E8%A6%8B%E5%9F%8E%E3%81%AE%E6%88%A6%E3%81%84
    https://ja.wikipedia.org/wiki/%E5%A4%A7%E8%B0%B7%E5%90%89%E7%B6%99
    https://ja.wikipedia.org/wiki/%E5%AE%87%E5%96%9C%E5%A4%9A%E9%A8%92%E5%8B%95
    https://ja.wikipedia.org/wiki/%E4%BA%94%E5%A5%89%E8%A1%8C
    https://ja.wikipedia.org/wiki/%E5%89%8D%E7%94%B0%E5%88%A9%E5%AE%B6
    https://ja.wikipedia.org/wiki/%E5%89%8D%E7%94%B0%E5%88%A9%E9%95%B7
    https://ja.wikipedia.org/wiki/%E4%BA%94%E5%A4%A7%E8%80%81

  • The Second Unifier – Toyotomi Hideyoshi. Part Four.

    The Second Unifier – Toyotomi Hideyoshi. Part Four.

    Despite an ultimately unsuccessful campaign against Tokugawa Ieyasu, by late 1584, Hideyoshi was the most powerful man in the realm. Having secured his position as Oda Nobunaga’s successor, he dominated central Japan and could call on economic and martial resources that dwarfed those of his rivals.

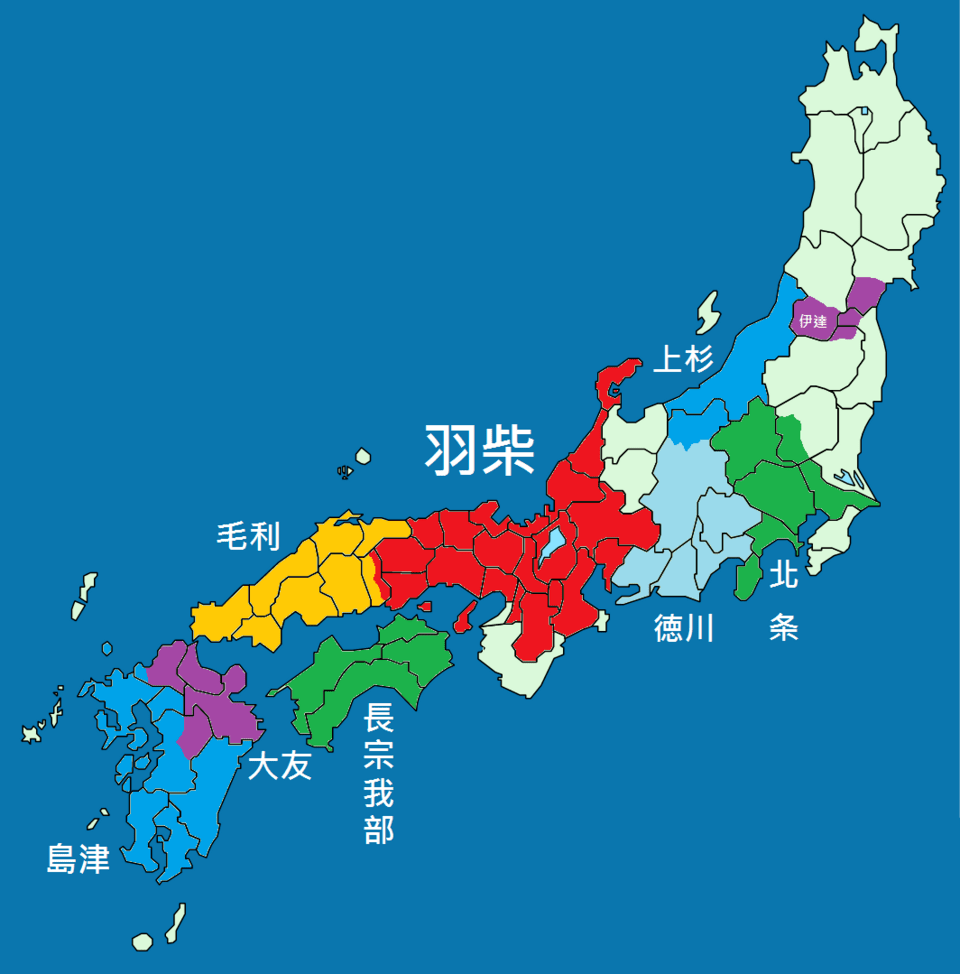
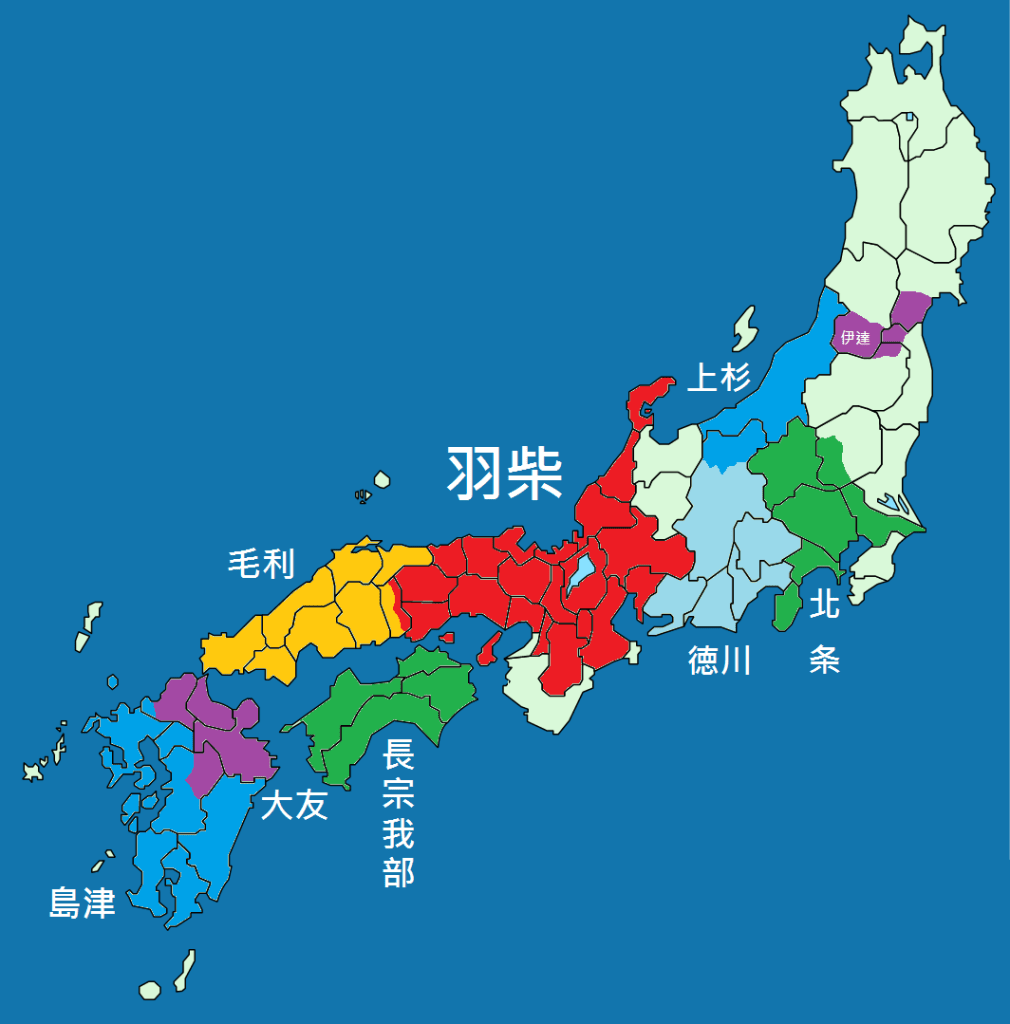
    The strategic situation in late 1584, Hideyoshi controlled the territory in red.
    By Alvin Lee – Own work, CC BY-SA 4.0, https://commons.wikimedia.org/w/index.php?curid=39198357

    Despite this, he was not yet unchallenged. To the west, the Mori remained undefeated, to the east, was Tokugawa Ieyasu, and further away, the Hojo, who had remained untouched by Nobunaga’s conquests, and to the south, in Kii Province, the locals coalesced around fiercely independent religious and social movements that resisted any attempts to impose central rule.

    Meanwhile, Hideyoshi solidified his political power, being elevated to the Third Rank of the nobility in November 1584 and to the Second Rank in March 1585. Around this time, some sources suggest that the Imperial Court even went so far as to offer him the title of Shogun, only for Hideyoshi to refuse, though the exact nature of the offer, if it existed at all, is unclear.

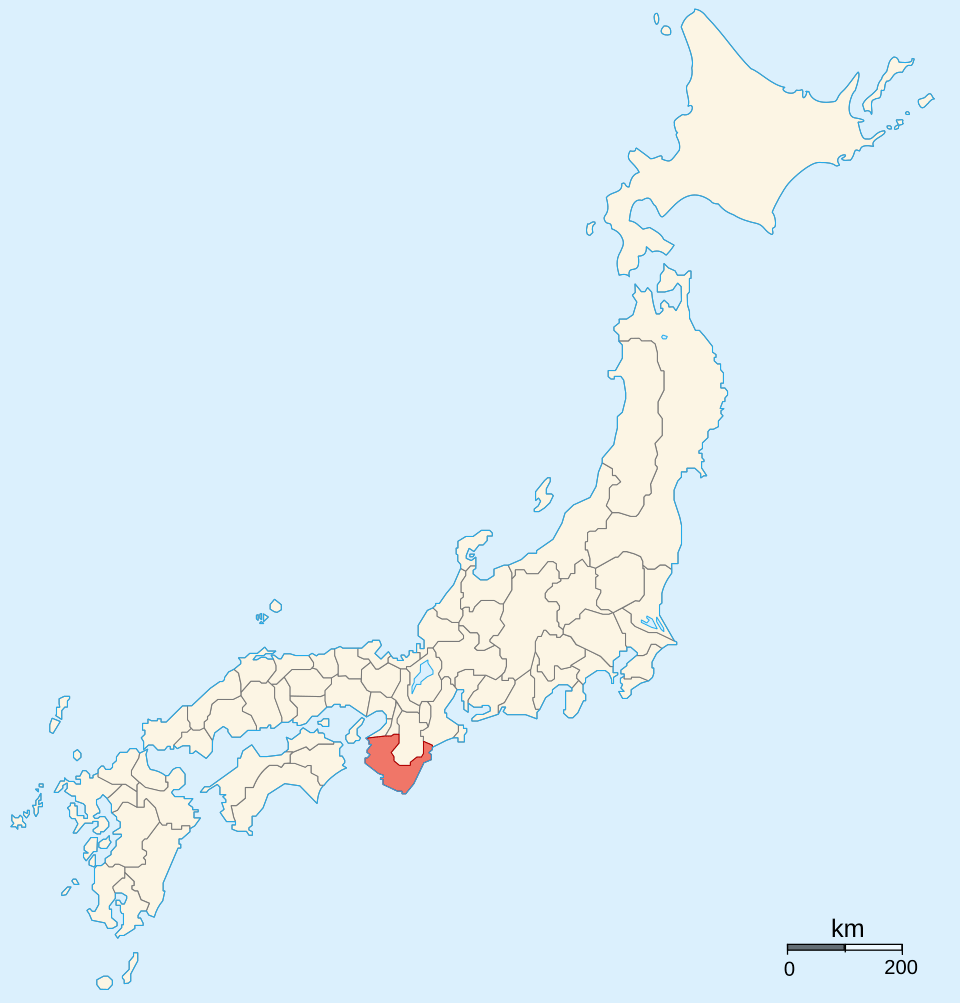
    Kii Province.
    By Ash_Crow – Own work, based on Image:Provinces of Japan.svg, CC BY 2.5, https://commons.wikimedia.org/w/index.php?curid=1683109

    With his position secured, Hideyoshi turned his attention to Kii Province. We’ve spoken about the power of certain religious institutions before, and nowhere was this more apparent than in Kii (sometimes called Kishu). Luis Frois, a well-known Portuguese writer at the time, referred to the area as under the control of five “Great Republics”, which weren’t democracies in the way we’d recognise today, but were strongly independent polities with extensive territories, economic might, and military strength.

    In 1570, Nobunaga began what would prove to be a long campaign against the power of the Ikko-Ikki, based at Honganji Temple. The warrior monks of Kii Province were a key ally of the Ikko-Ikki, and in 1576, Nobunaga dispatched an army against them, aiming to reduce their ability to support his enemies elsewhere.

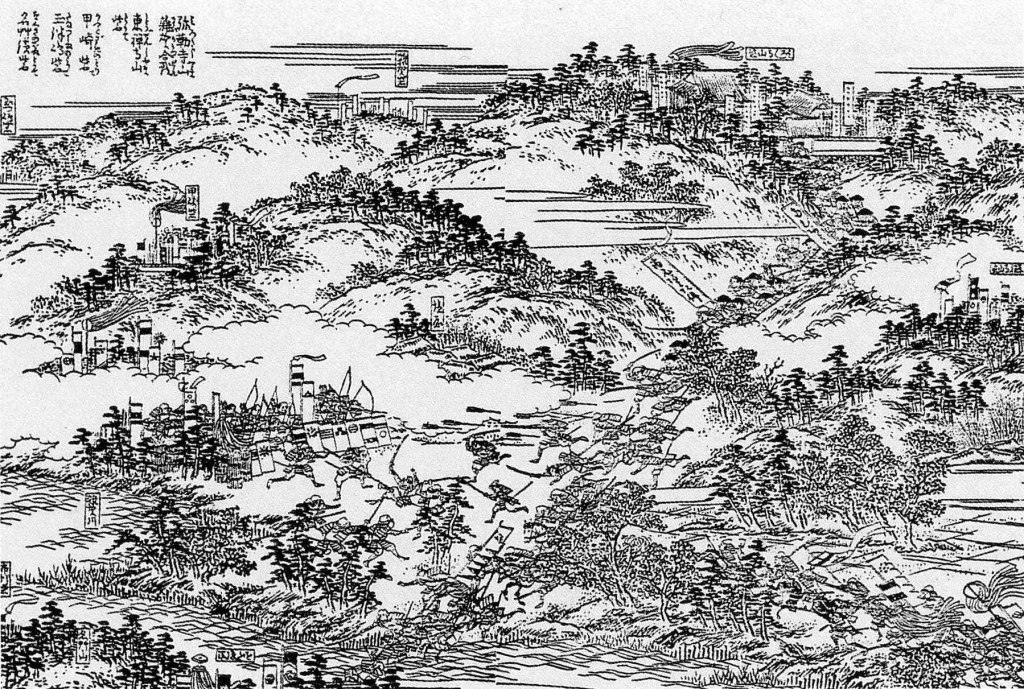
    A semi-contemporary depiction of Nobunaga’s attempts to subdue Kii Province.

    Despite being defeated on the battlefield, the warriors of Kii engaged in guerrilla warfare, led most famously by the Saika-shu, an organisation made up of local samurai and mercenaries, which was well known for its heavy (and skilful) use of firearms. Nobunaga eventually signed a peace treaty and withdrew, allowing his enemies to claim that they had actually defeated him.

    Nobunaga’s death in 1582 put an end to any further campaigning, and for a time, at least, Kii Province was left alone, though no one believed the peace would last. In early spring 1586, Hideyoshi, at the head of an army of some 100,000 men, invaded with the intention of crushing the independent ‘Republics’ for good.

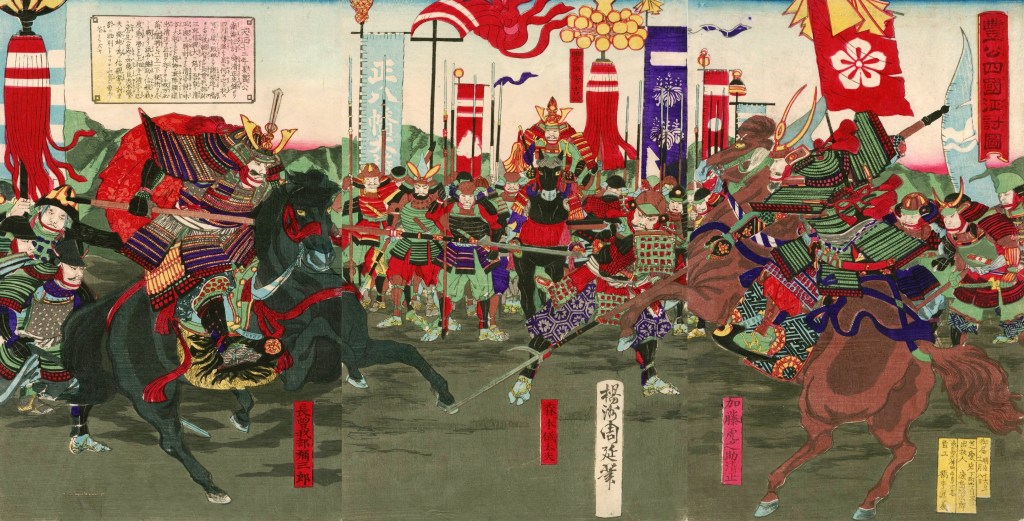
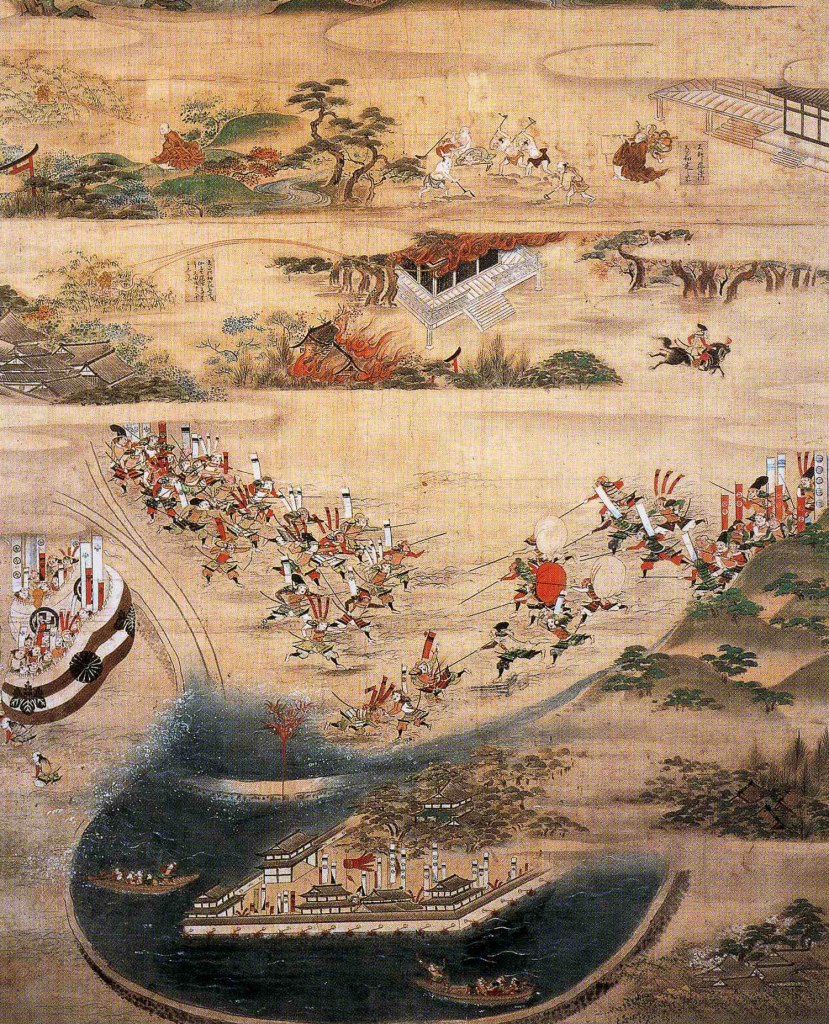
    A depiction of Hideyoshi’s attack on Kii Province.

    The campaign was a true demonstration of Hideyoshi’s new power. Though the Saika-shu and others fought bravely, they were swiftly overwhelmed. Some scholars speculate that the Saika and their allies underestimated Hideyoshi. In the earlier Sengoku Period, it had often been enough to inflict heavy casualties in an initial battle, which would force the attackers to either negotiate or back off.

    These tactics had worked against Nobunaga, who had ultimately been unable to secure decisive control over Kii, for fear of tying down too many men. Hideyoshi had no such hesitation, and even though his losses were heavy, he kept pushing on, and the Saika, who were often hugely outnumbered, were swept aside.

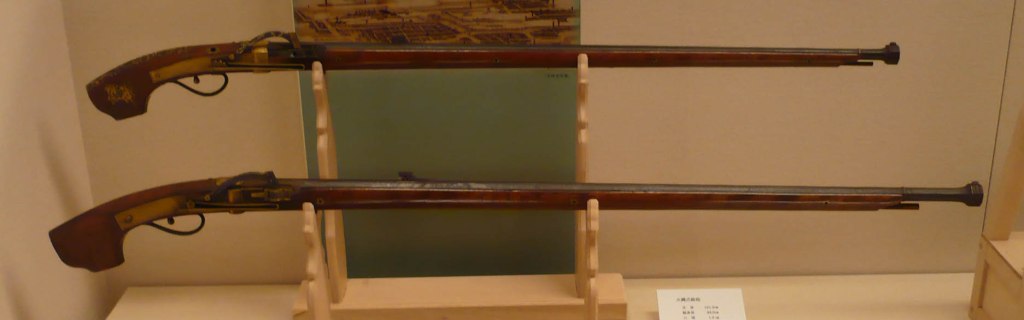
    Firearms of the type used effectively, but ultimately unsuccessfully by the Saika-shu.

    Hideyoshi was able to secure control of Kii in the short term, but his hold over it was always fragile, and there would be several more outbreaks of rebellion in the coming years. In fact, it wouldn’t be until 1614, long after Hideyoshi had passed away, that Kii could be truly said to have been pacified.

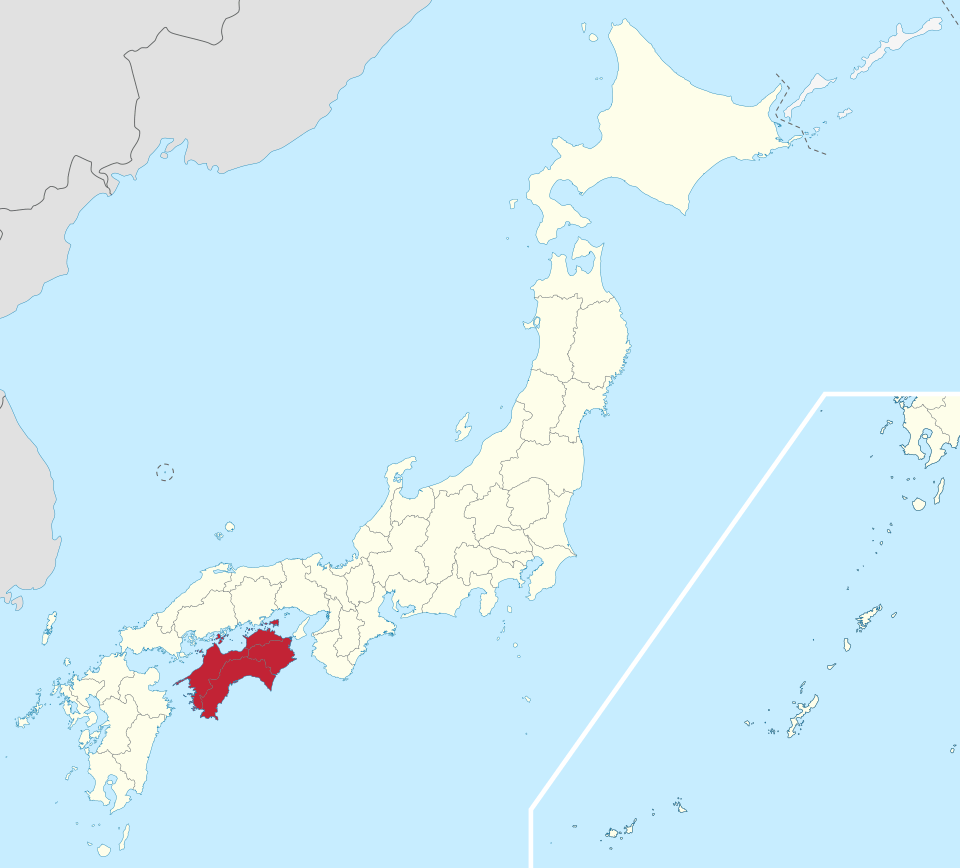
    After this, Hideyoshi turned his attention to Shikoku and the powerful Chosokabe Clan. Once allies of Nobunaga, the Chosokabe had fallen foul of his ambitions and had been under threat of invasion at the time of his death at Honnoji.

    Shikoku.
    By TUBS – This vector image includes elements that have been taken or adapted from this file:, CC BY-SA 3.0, https://commons.wikimedia.org/w/index.php?curid=16385942

    An army under Nobunaga’s third son, Nobutaka, had been gathered at Sumiyoshi (in modern Osaka) with the purpose of attacking Shikoku; in fact, they had been meant to set out on the same day that Nobunaga was killed, and news of his death demoralised the army, some of which simply went home.

    In the aftermath of Nobunaga’s death, the Chosokabe had consolidated control of all of Shikoku and lent support to opponents of Hideyoshi, notably Shibata Katsuie, Tokugawa Ieyasu, and the Saika-shu of Kii Province. None of these enemies had been able to overcome Hideyoshi, however, and it was probably no surprise when he turned his vengeful eye on the Chosokabe themselves.

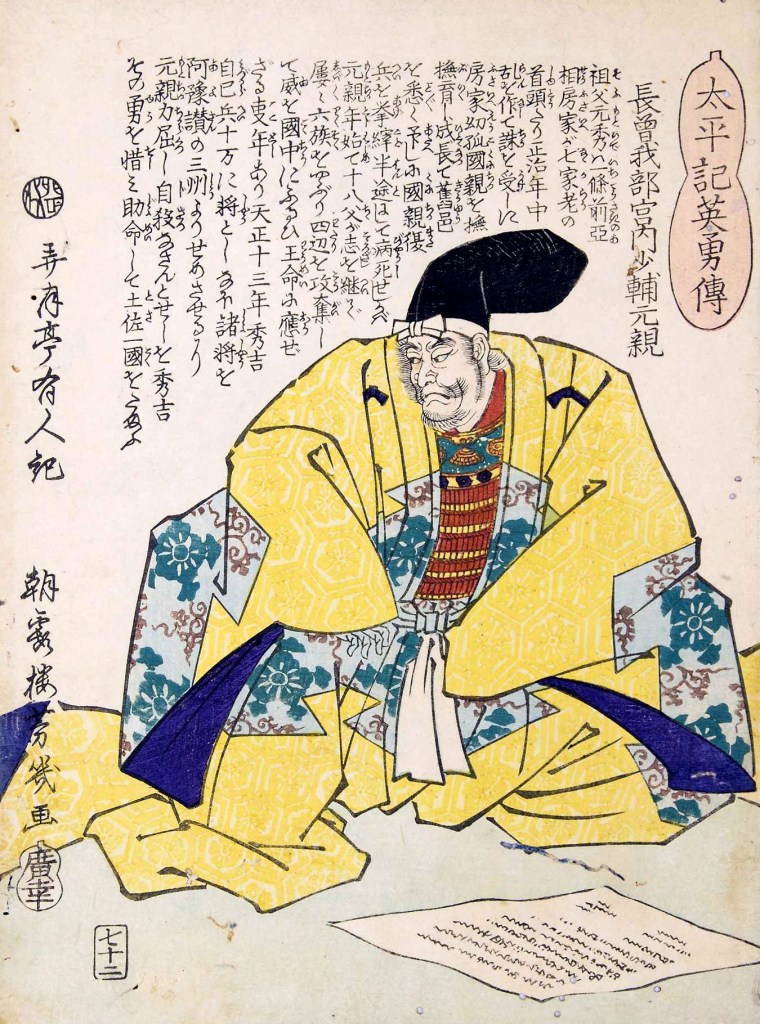
    Chosokabe Motochika, Lord of the Chosokabe at the time of Hideyoshi’s invasion.

    There were some attempts at negotiation, but Hideyoshi’s demands that the Chosokabe give up three of the four provinces of Shikoku were unacceptable. The strategic situation for the Chosokabe was made worse when the Mori, one-time antagonists of Hideyoshi, instead made a permanent peace with him. Some sources suggest that it was at this point that the Mori submitted to Hideyoshi outright.

    With the support of the Mori and their powerful navy, Hideyoshi launched a three-pronged attack on Shikoku, which the Chosokabe were hard-pressed to oppose. Outnumbered some 3 to 1, the Chosokabe fought bravely, but the campaign was over quickly. From June to August 1585, there was a series of battles and sieges that invariably resulted in Chosokabe defeat.

    A 19th-century depiction of the Invasion of Shikoku.

    Eventually, despite claiming he would rather fight to the end, Chosokabe Motochika surrendered at the urging of his senior vassals. As punishment for his defiance (or reward for his surrender), Hideyoshi confiscated three of the four Shikoku Provinces, leaving the Chosokabe with their home province of Tosa and an obligation to provide Hideyoshi with up to 3,000 troops for any future campaign and hostages to ensure the peace.

    During the Shikoku Campaign, which was led by his brother, Hideyoshi was appointed Kampaku by the Imperial Court. This was a result of a political crisis that had been ongoing since before Nobunaga’s death in 1582. At the time, the Imperial Court had (allegedly) invited Nobunaga to become Shogun, or Kampaku (Regent). Both contemporary and modern scholars disagree on Nobunaga’s response to this offer, but his death in June of that year ultimately rendered it moot.

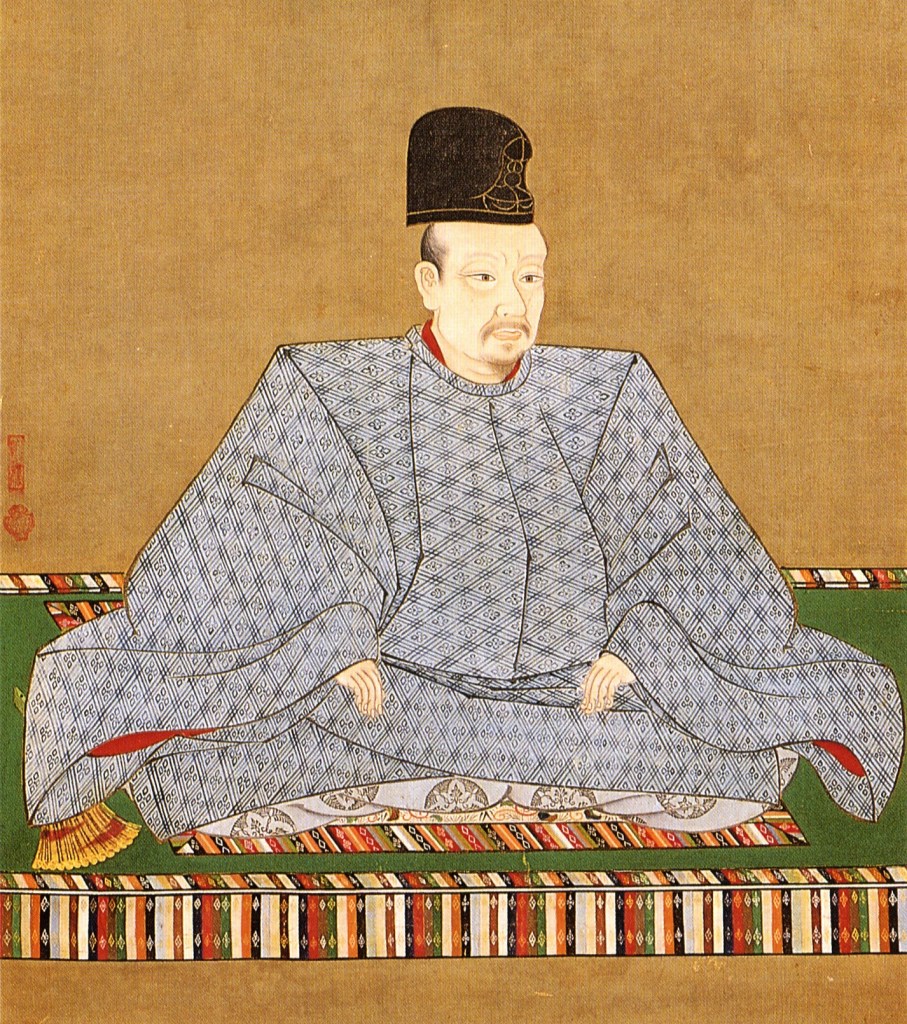
    Emperor Go-Yozei, who was the sovereign during this time.

    What followed was a drawn-out political squabble between rival factions at court over who would ultimately take the position of Regent. We’ve spent a lot of time looking at how the Imperial Court was a decorative but ultimately impotent organisation by this point, and any title the Emperor might bestow would be largely symbolic without any external political power to back it up.

    Into this silk-clad quagmire stepped Hideyoshi. Traditionally, the position of Regent had rotated amongst five prestigious warrior families, of which Hideyoshi was not a member. To overcome this issue (which was one of tradition, rather than law), he was formally adopted as the son of Konoe Sakahisa (who was less than a year older than him) in July 1585, being named Kampaku shortly afterwards.

    Konoe Sakahisa, who formally adopted Hideyoshi.
    Leehiroki258 – 投稿者自身による著作物, CC 表示-継承 4.0, https://commons.wikimedia.org/w/index.php?curid=162775880による

    There was supposedly an agreement in which the childless Hideyoshi would take the position as a temporary solution to the crisis, before handing it over to the Konoe family’s chosen heir at a later date. Hideyoshi had other ideas, however. In 1586, he petitioned the Emperor for a new family name, which the Emperor duly bestowed. From then on, Hideyoshi would be known as Toyotomi Hideyoshi, the name by which he is best remembered in English sources.

    Hideyoshi would then adopt the Emperor’s younger brother, Prince Hachijo, as his son and eventual successor. This was a clear breach of the agreement with the Konoe, but since Hideyoshi was the most powerful man in the realm, and the proposed heir was a member of the Imperial Family, there was nothing anyone could do about it.

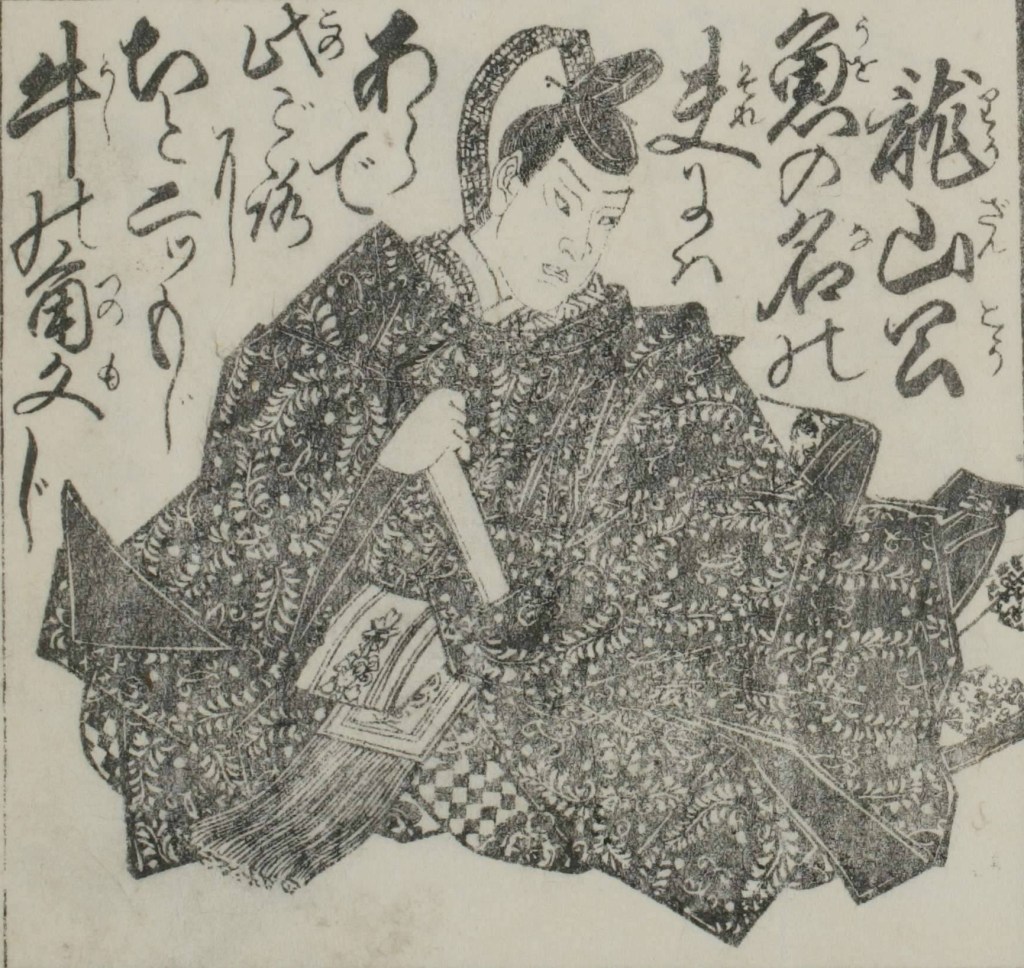
    Prince Hachijo

    Hideyoshi went further, seeking to replace the powerless Imperial aristocracy with a new “Samurai Nobility”. For centuries, the ‘Nobles’ had held all the prestige, but practically none of the actual power, which was in the hands of the Samurai after long years of civil war.

    Hideyoshi sought to address this by bestowing titles on some of the other powerful Daimyo, including Tokugawa Ieyasu and Ishida Mitsunari, appointments that would have long-term political repercussions.

    Ishida Mitsunari, we haven’t talked about him much, but he’s going to become very important later.

    Another attempt was made to force obedience from Ieyasu when Hideyoshi demanded that he hand over hostages to ensure ongoing peace. Ieyasu refused, and Hideyoshi began planning a large-scale military campaign to finally bring Ieyasu to heel. The massive Tensho Earthquake in January 1586 caused severe damage to Hideyoshi’s capital at Osaka and several other castles and staging areas, bringing an end to the plans, and causing Hideyoshi to adopt a more conciliatory policy towards Ieyasu.

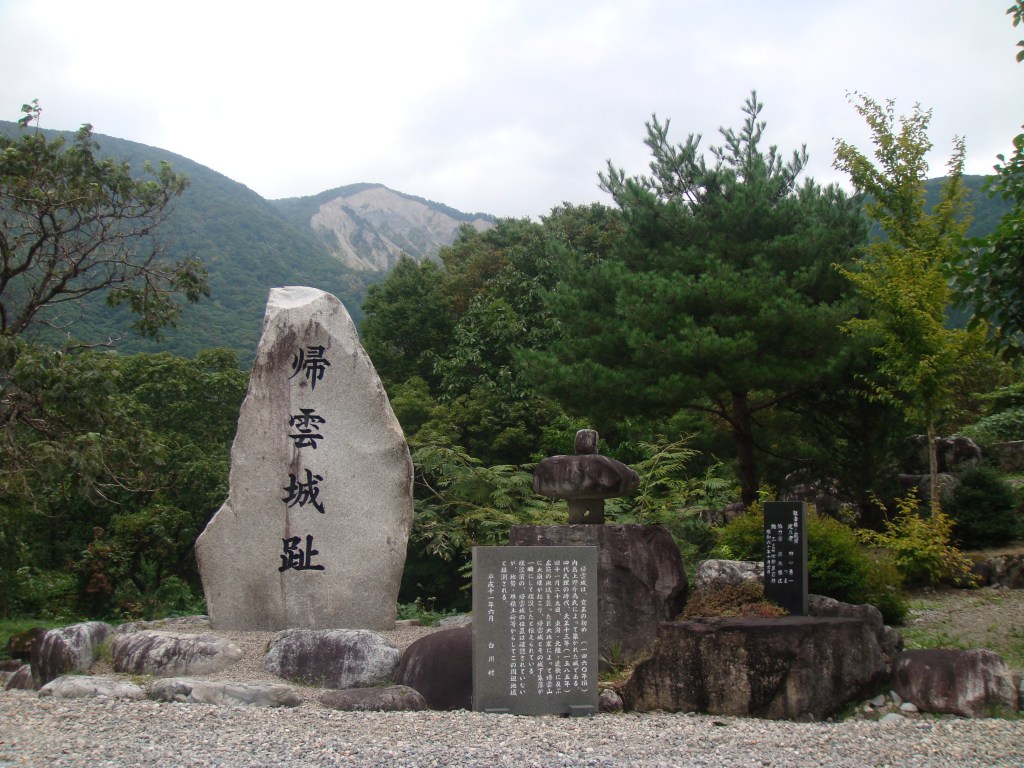
    A monument at the site of Kaerikumo Castle, which was destroyed in a landslide during the 1586 earthquake. The evidence of the landslide can be seen on the hill in the background.

    Later that year, Ieyasu would marry Hideyoshi’s younger sister, Princess Asahi, and he would later travel to Kyoto and swear allegiance to Hideyoshi as Regent. Despite this nominal submission, Hideyoshi had failed to subdue Ieyasu, whose military power remained intact.

    Sources
    https://ja.wikipedia.org/wiki/%E8%B1%8A%E8%87%A3%E7%A7%80%E5%90%89
    https://ja.wikipedia.org/wiki/%E6%9C%9D%E6%97%A5%E5%A7%AB
    https://ja.wikipedia.org/wiki/%E9%96%A2%E7%99%BD%E7%9B%B8%E8%AB%96
    https://ja.wikipedia.org/wiki/%E5%85%AB%E6%9D%A1%E5%AE%AE%E6%99%BA%E4%BB%81%E8%A6%AA%E7%8E%8B
    https://ja.wikipedia.org/wiki/%E8%BF%91%E8%A1%9B%E5%89%8D%E4%B9%85
    https://ja.wikipedia.org/wiki/%E5%9B%9B%E5%9B%BD%E6%94%BB%E3%82%81
    https://ja.wikipedia.org/wiki/%E4%B8%B8%E5%B1%B1%E5%9F%8E%E3%81%AE%E6%88%A6%E3%81%84
    https://ja.wikipedia.org/wiki/%E5%9B%9B%E5%9B%BD%E5%9B%BD%E5%88%86
    https://ja.wikipedia.org/wiki/%E5%9B%9B%E5%9B%BD%E5%B9%B3%E5%AE%9A
    https://ja.wikipedia.org/wiki/%E7%B4%80%E5%B7%9E%E5%BE%81%E4%BC%90
    https://ja.wikipedia.org/wiki/%E9%9B%91%E8%B3%80%E8%A1%86
    https://ja.wikipedia.org/wiki/%E6%A0%B9%E6%9D%A5%E8%A1%86
    https://en.wikipedia.org/wiki/Kii_Province
    https://en.wikipedia.org/wiki/1586_Tensh%C5%8D_earthquake
    https://en.wikipedia.org/wiki/Kaerikumo_Castle

  • The Second Unifier – Toyotomi Hideyoshi. Part Three.

    The Second Unifier – Toyotomi Hideyoshi. Part Three.

    Hideyoshi’s victory over Nobunaga’s killer, Akechi Mitsuhide, left him in a strong, but far from unchallenged position. Though Hideyoshi was arguably the strongest of Nobunaga’s remaining supporters, his power was not so great that he could overcome the others on the battlefield.

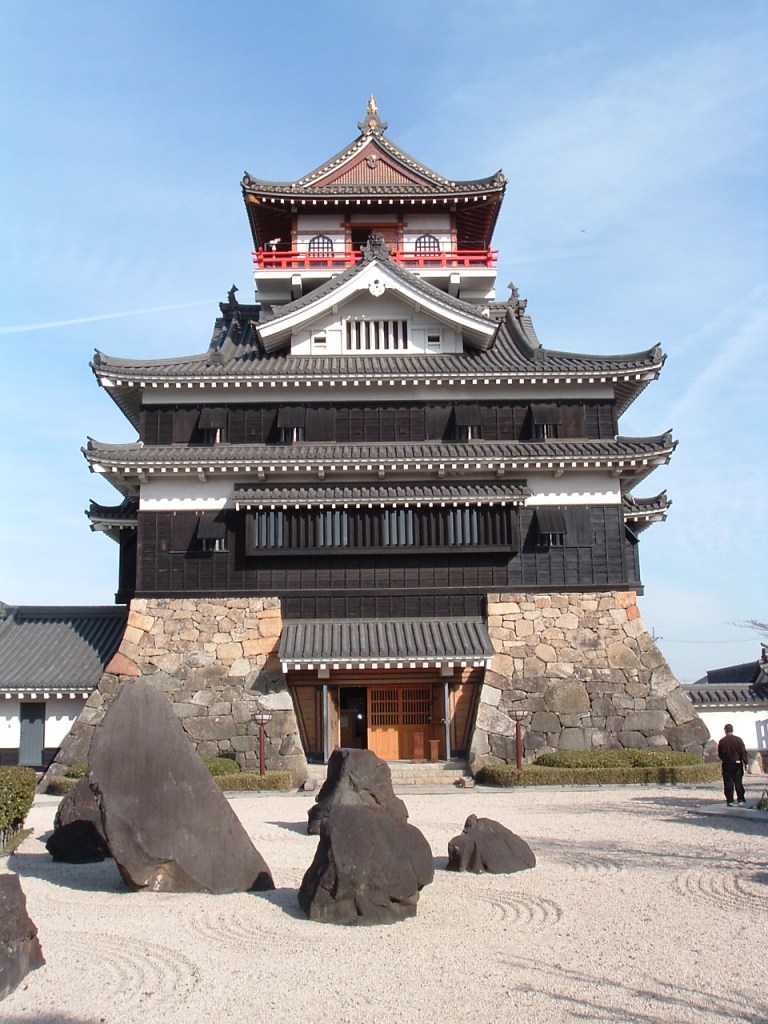
    Instead, a conference was called at Kiyosu Castle on July 16th, 1582. Historians still debate exactly what Nobunaga’s plans had been for his succession, given that his second son, and most obvious heir, Nobutada, had been amongst the dead at the Honnoji Incident. Two camps quickly emerged: Hideyoshi, supporting Nobutada’s son, Hidenobu, and Shibata Katsuie, who supported Nobunaga’s third surviving son, Nobutaka.

    The reconstructed Kiyosu Castle as it appears today.
    Oliver Mayer, CC 表示-継承 3.0, https://commons.wikimedia.org/w/index.php?curid=230610による

    The exact course of the meeting isn’t clear, but by the end of it, Hideyoshi’s faction was in the ascendancy, and Hidenobu, at just two years old, was declared Nobunaga’s heir, with Nobutaka officially acting as his guardian. There was an attempt to mollify Katsuie by having him marry Nobunaga’s sister, Oichi, a woman of impeccable rank, but the seeds of conflict had already been sown.

    In October 1582, Hideyoshi held Nobunaga’s formal funeral, and played a central, highly visible role in the ceremony, cementing his position as chief amongst Nobunaga’s retainers. Not long after this, Katsuie, supported by Nobutaka, issued letters of impeachment against Hideyoshi, who responded by demanding that Nobutaka, who had custody of the ‘heir’, Hidenobu, return him to Azuchi, as per the Kiyosu Agreement.

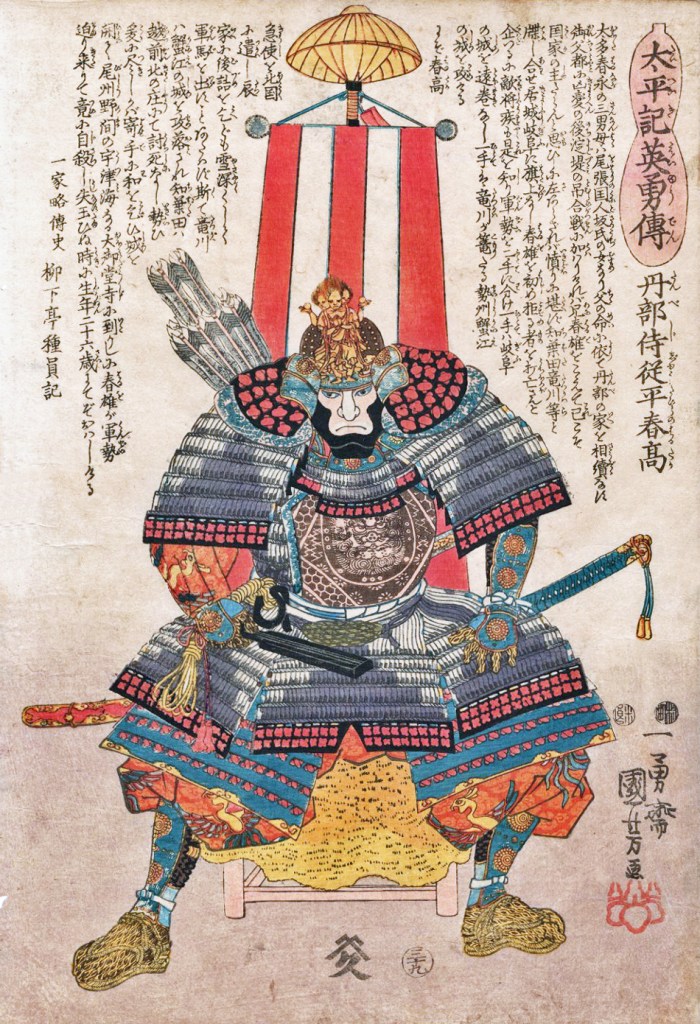
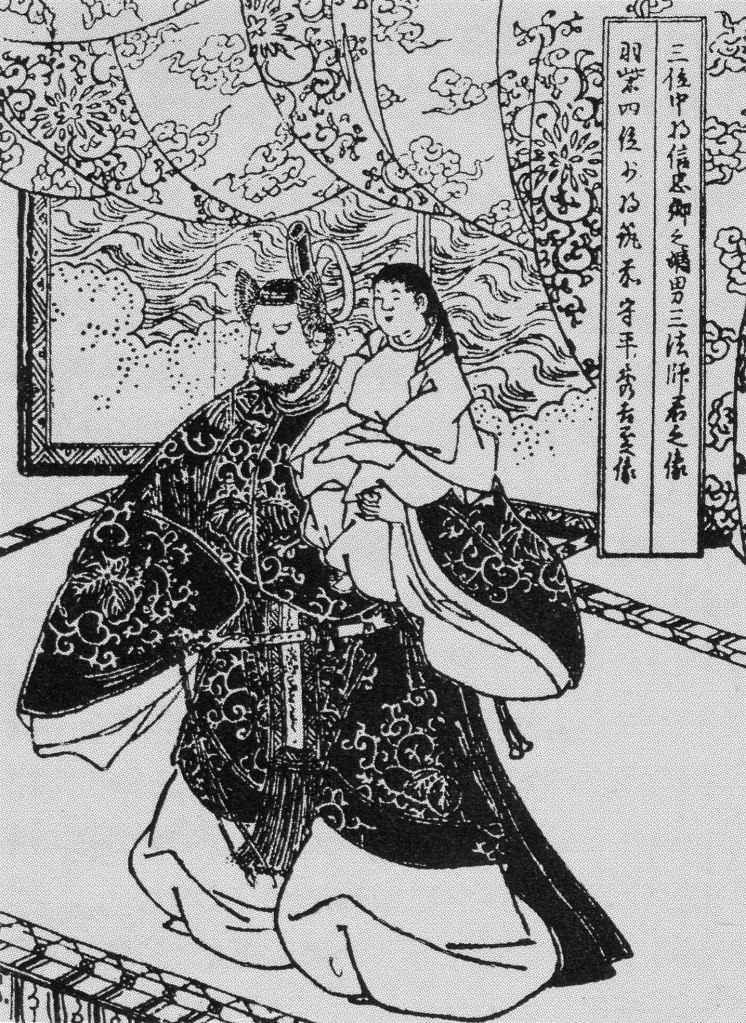
    Oda Nobutaka

    When Nobutaka refused, Hideyoshi used this as justification to renounce the agreement and raise an army against him. Katsuie, trapped in the north by snows and the ongoing war with the Uesugi, was unable to send help, and in a short, sharp campaign, Hideyoshi raised an army of some 50,000, forced Nobutaka to retreat, and eventually surrender, handing over Hidenobu and sending his mother and daughter as hostages to secure the peace.

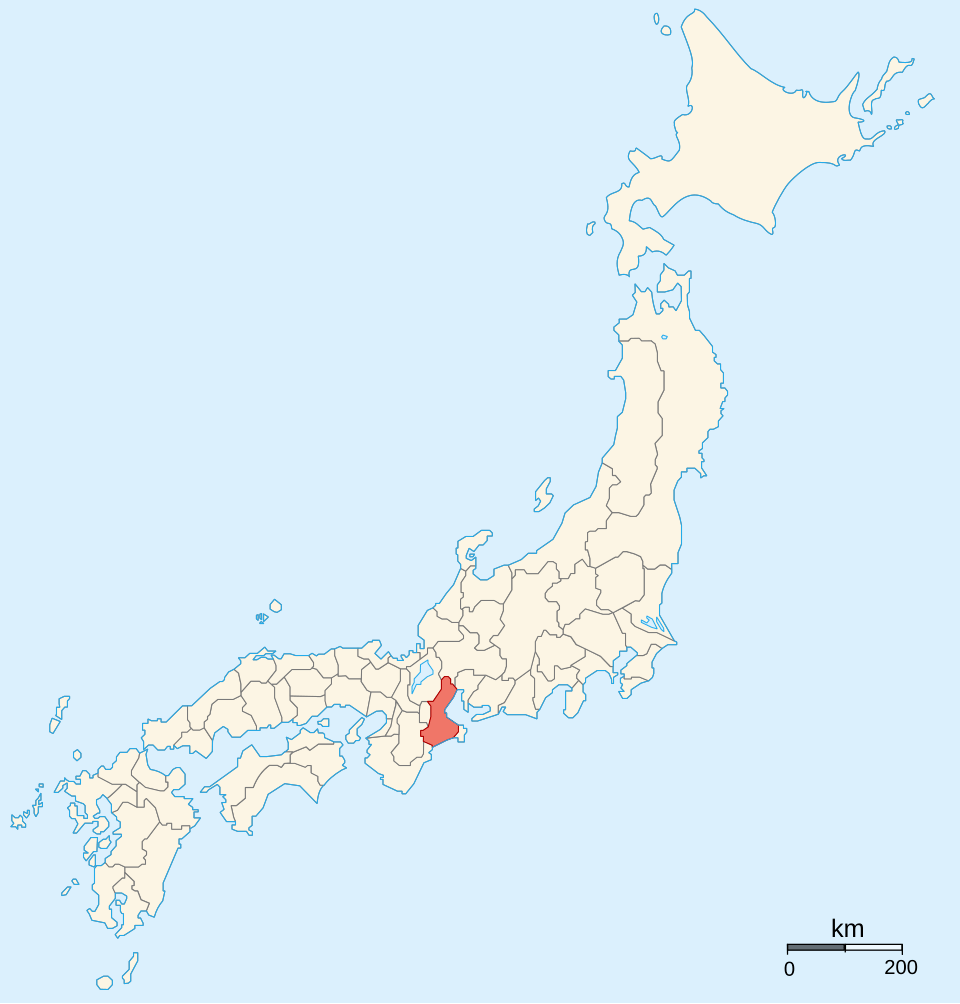
    This victory did not end the war, however, and shortly after the New Year, Takigawa Kazumasu (also known as Sakon) launched successful attacks in Ise Province. Hideyoshi responded with counterattacks against Kuwana and Nagashima Castles, but the attacks failed, and he was forced to withdraw, despite an overall advantage in numbers, leaving northern Ise Province (temporarily) in the hands of his enemies.

    Ise Province
    By Ash_Crow – Own work, based on Image:Provinces of Japan.svg, CC BY 2.5, https://commons.wikimedia.org/w/index.php?curid=1682471

    The situation got worse for Hideyoshi when Katsuie himself led an army of 30,000 into Omi Province, whilst Nobutaka raised another army at Gifu Castle. Katsuie also made contact with Mori Terumoto, hoping to secure his support in the battle to come. The Mori never outright refused, but instead adopted a ‘wait and see’ approach, as it was not immediately clear which side would win.

    Throughout spring and early summer, the two sides clashed in skirmishes in Ise, Mino, and Omi Provinces, and the momentum would swing back and forth for some time until a decisive engagement near the fortress at Shizugatake. Hideyoshi’s forces were aided by the timely arrival of reinforcements from across Lake Biwa, and the betrayal of Maeda Toshiie, one of Katsuie’s most important generals, who switched to Hideyoshi’s side, for reasons that are still debated.

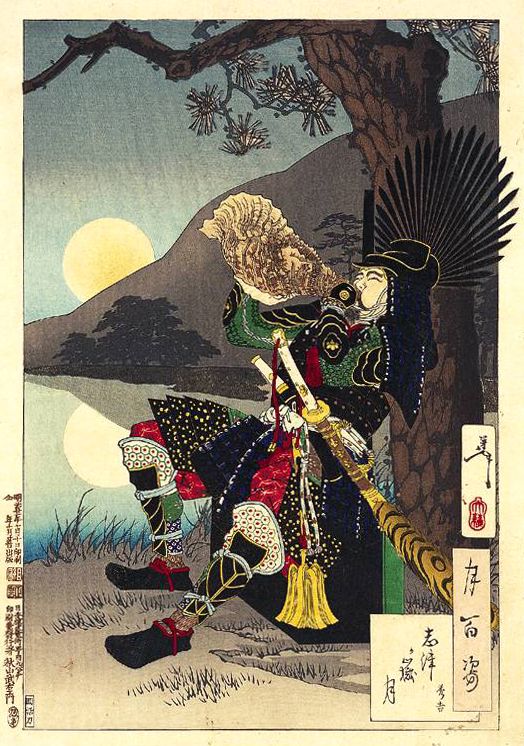
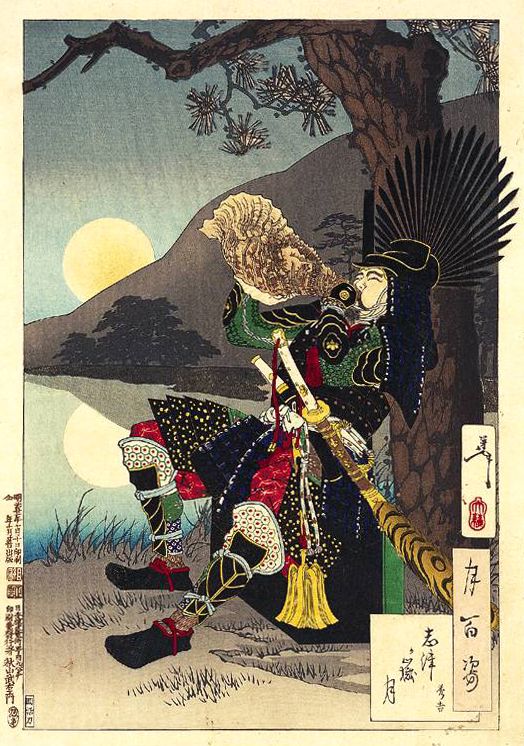
    A 19th-century depiction of Hideyoshi on the night before the Battle of Shizugatake.

    By all accounts, Katsuie and his army forced tenaciously, but with Toshiie’s betrayal, they were outflanked and outnumbered, and Katsuie was forced to retreat. He got as far as Kitanosho Castle, in modern Fukui, where Hideyoshi’s forces laid siege.

    The night before the final assault, Katsuie held a final banquet with his close family and retainers, whilst his wife, Oichi, made arrangements for her three daughters to be protected by Hideyoshi and avoid what was to come. Despite pleas to save herself, Oichi refused to leave her husband’s side.

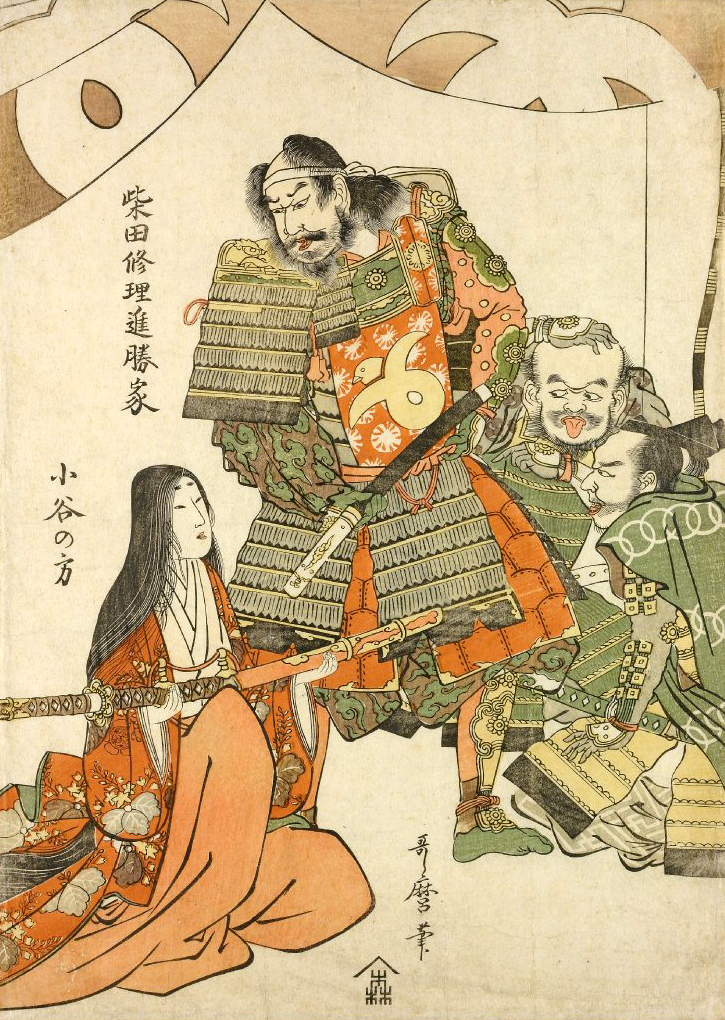
    A later depiction of Shibata Katsuie preparing for battle, with Oichi beside him.

    The attack started at dawn, and despite stiff resistance, by midday, the battle was clearly lost, and Katsuie retreated to the main castle, where he and 80 members of his family, including Oichi, killed themselves. Calling it ‘suicide’ is perhaps a bit generous, as the records suggest that a large number of the dead were children. When it was over, Katsuie’s forces ignited a store of gunpowder, blowing the tower apart and bringing a spectacular end to the Shibata Line.

    “Katsuie, a martial artist, fought seven times but was unable to defend himself. He climbed to the ninth floor, the highest level of the main tower, and addressed the entire group, loudly proclaiming, “Watch Shuri’s hara-kiri and learn from it.” The samurai, with their hearts in tears, wet their armor sleeves. As everyone fell silent, Katsuie stabbed his wife, children, and others to death, then committed seppuku with 80 others. It was the hour of the tiger (5:00 PM).”

    Hideyoshi’s letter to Kobayakawa Takakage dated May 15, 1583,

    Just a side note, the actual record of Katsuie’s suicide is pretty harrowing stuff, and it’s always difficult to read about the death of women and children who weren’t guilty of anything other than being related to the losers. This kind of thing was expected, though; even children weren’t generally shown mercy, and though there are notable examples (Oichi’s daughters, for instance), if a child was caught in a siege, they generally died in the same manner as their parents.

    With Katsuie crushed, Hideyoshi was able to extend his direct control over the northern provinces of Koto, Noto, and Echizen, and when Nobutaka committed seppuku, and Kazumasu surrendered, Hideyoshi had established himself as the most powerful man in the realm and while Hidenobu (still just an infant) remained as the nominal ‘heir’ there was no no doubt that Hideyoshi was in charge.

    An image of Hideyoshi carrying Hidenobu at the time of the Kiyosu Conference.

    In 1583, construction began on Osaka Castle, built on the former site of the Ishiyama Hongan-ji Temple complex. It would eventually become Hideyoshi’s base and was widely considered one of Japan’s finest castles. Meanwhile, in the Kanto, a marriage alliance between the Tokugawa and Hojo presented a clear threat to Hideyoshi’s power.

    In early 1584, Oda Nobukatsu, another son of Nobunaga, rebelled against Hideyoshi, quickly gaining the support of Tokugawa Ieyasu and Chosokabe Motochika, who raised armies of their own in opposition to Hideyoshi. Despite a huge advantage in manpower (some sources say 3-to-1), Hideyoshi struggled to achieve a decisive victory.

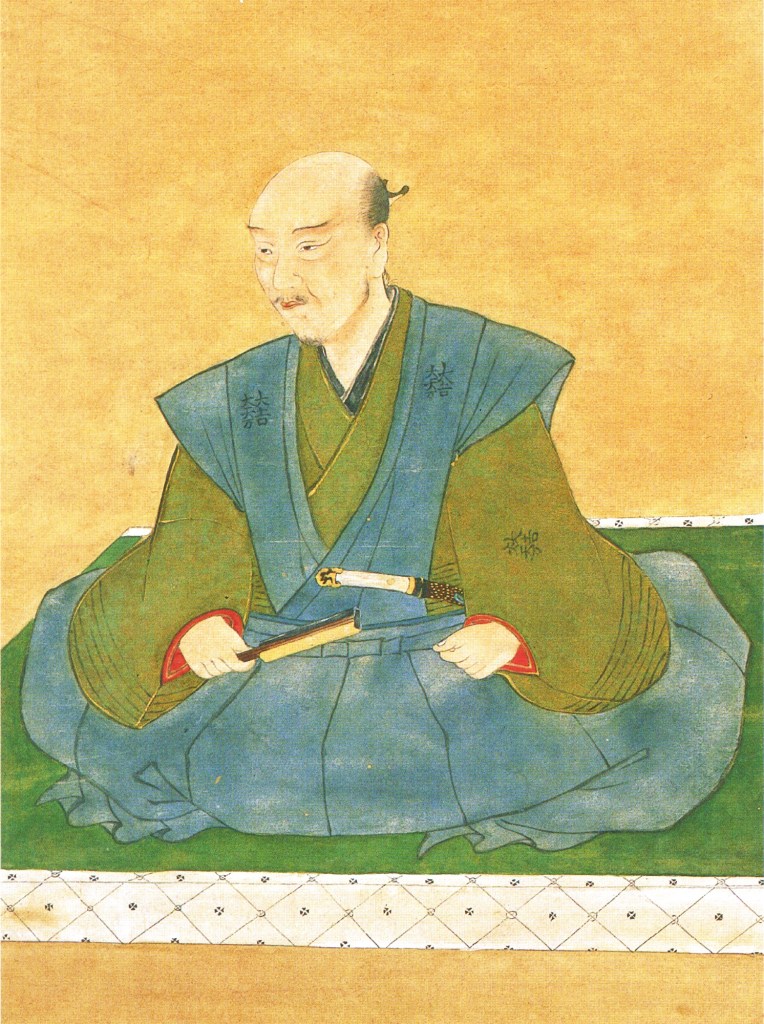
    Tokugawa Ieyasu

    Some initial success in Ise Province was followed by a defeat at the Battle of Haguro Castle, after which Hideyoshi, who had been waiting at Osaka Castle, took the field himself, meeting Ieyasu near Komaki (near the modern city of the same name). Again, despite a significant manpower imbalance, Ieyasu’s strong position meant that Hideyoshi was unable to force a decisive engagement, and both sides focused on reinforcing castles and constructing new earthworks in anticipation of the fight to come.

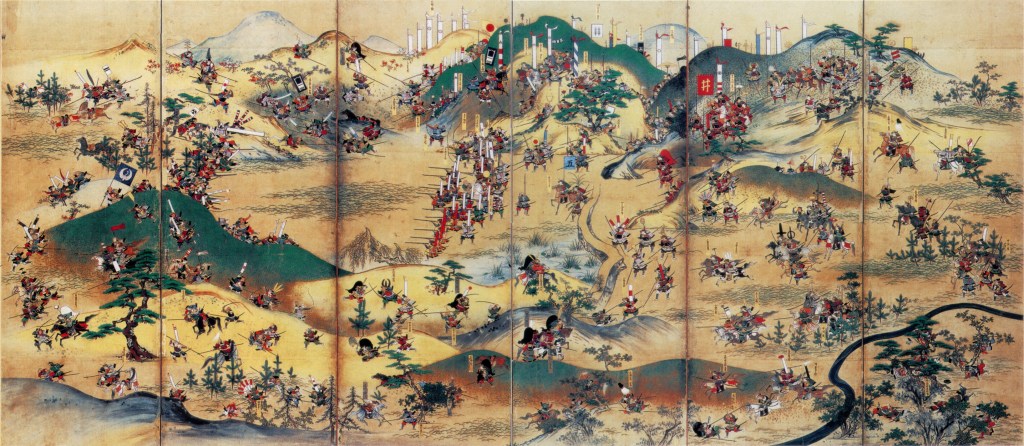
    The campaign that followed is often called the Battle of Komaki and Nagakute, after its two most decisive engagements, but there were actually a series of sieges, counterattacks, and skirmishes over the summer and early autumn of 1584. The fighting would result in a tactical victory for the Tokugawa, as they would arguably have the best of the fighting. On the other hand, the strategic situation favoured Hideyoshi, and he would ultimately be able to secure control over his new territory and the power that went along with it.

    An 18th-Century depiction of the Battle of Komaki and Nagakute.

    In the end, both sides had bigger problems. Ieyasu’s domains were under severe economic strain from the war, and a series of floods, combined with the burden of having a large number of peasants away at war, drained his treasury and threatened famine (this was before a serious earthquake in 1586 compounded his problems).

    For his part, Hideyoshi’s position was not as strong as it appeared. Though he had the advantage in men, he also had powerful enemies elsewhere, enemies that were arguably more pressing problems than Ieyasu, who had proven he could hold Hideyoshi off, but not that he could mount a serious attack of his own.

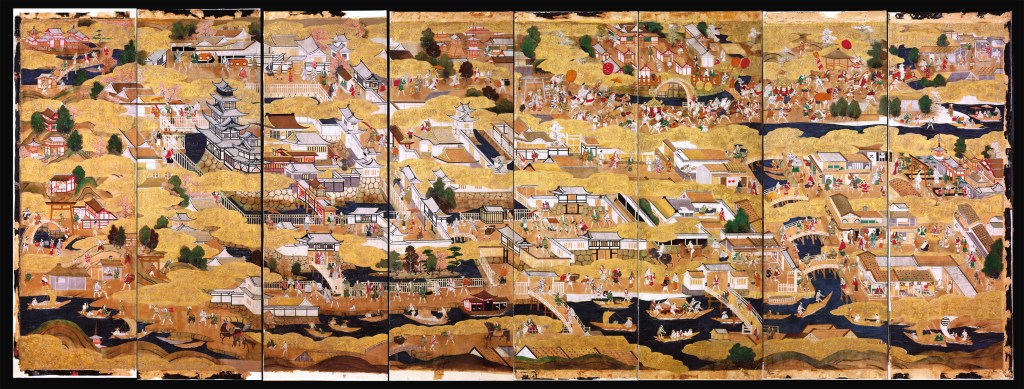
    Osaka as it appeared around 1650. The city would become Hideyoshi’s base, centred at the castle, which appears in the second screen from the left.

    Despite his inability to defeat Ieyasu, by the dawn of 1585, Hideyoshi was effectively the ruler of Japan, already on the verge of surpassing his nominal masters (the Oda), and about to launch the campaigns that would finally bring an end to the centuries of bloodshed.

    Sources
    https://ja.wikipedia.org/wiki/%E8%B1%8A%E8%87%A3%E7%A7%80%E5%90%89
    https://ja.wikipedia.org/wiki/%E5%B0%8F%E7%89%A7%E3%83%BB%E9%95%B7%E4%B9%85%E6%89%8B%E3%81%AE%E6%88%A6%E3%81%84
    https://ja.wikipedia.org/wiki/%E5%B2%A9%E5%B4%8E%E5%9F%8E%E3%81%AE%E6%88%A6%E3%81%84
    https://ja.wikipedia.org/wiki/%E5%B0%8F%E7%89%A7%E5%B1%B1
    https://ja.wikipedia.org/wiki/%E5%A4%A7%E5%9D%82%E5%9F%8E
    https://ja.wikipedia.org/wiki/%E8%B3%A4%E3%83%B6%E5%B2%B3%E3%81%AE%E6%88%A6%E3%81%84
    https://ja.wikipedia.org/wiki/%E5%8C%97%E3%83%8E%E5%BA%84%E5%9F%8E%E3%81%AE%E6%88%A6%E3%81%84
    https://ja.wikipedia.org/wiki/%E6%B5%85%E4%BA%95%E4%B8%89%E5%A7%89%E5%A6%B9
    https://en.wikipedia.org/wiki/Kitanosho_Castle
    https://ja.wikipedia.org/wiki/%E5%89%8D%E7%94%B0%E5%88%A9%E5%AE%B6#%E4%BA%BA%E7%89%A9%E3%83%BB%E9%80%B8%E8%A9%B1
    https://ja.wikipedia.org/wiki/%E6%A1%91%E5%90%8D%E5%9F%8E
    https://ja.wikipedia.org/wiki/%E6%B8%85%E6%B4%B2%E4%BC%9A%E8%AD%B0
    https://ja.wikipedia.org/wiki/%E5%A4%A7%E5%BE%B3%E5%AF%BA
    https://ja.wikipedia.org/wiki/%E7%B9%94%E7%94%B0%E4%BF%A1%E5%AD%9D
    https://ja.wikipedia.org/wiki/%E7%B9%94%E7%94%B0%E7%A7%80%E4%BF%A1
    https://ja.wikipedia.org/wiki/%E7%B9%94%E7%94%B0%E7%A7%80%E4%BF%A1
    https://ja.wikipedia.org/wiki/%E6%9F%B4%E7%94%B0%E5%8B%9D%E5%AE%B6

  • Memento Mori, Part 3

    Memento Mori, Part 3

    Last time, we looked at how the relationship between Mori Terumoto and Oda Nobunaga broke down, leaving both sides on the verge of conflict. After Terumoto declared for the Shogun, Ashikaga Yoshiaki (the last Ashikaga Shogun) declared that Terumoto would serve as ‘Vice Shogun’, a slightly ambiguous position which was rendered largely moot in practice, as the Shogun relied almost entirely on Mori’s strength of arms, reducing him to little more than a figurehead.

    Ashikaga Yoshiaki, the last of the Ashikaga Shoguns, and little more than a figurehead.

    The first action of this new ‘Shogunate’ (read: Mori) army was supporting the besieged warrior monks of Ishiyama Hongan-ji. You may recall in the post about the Ikko-Ikki, we mentioned Nobunaga’s campaigns against Hongan-ji, which ultimately lasted more than a decade, and left the temple a charred ruin.

    The Mori, possessing one of the most powerful navies amongst the Sengoku Daimyo, dispatched a fleet which made short work of the Oda forces in Osaka Bay, opening the way for supplies to be delivered to Hongan-ji. This victory prolonged the siege and gave the Mori unchallenged control of the Seto Inland Sea in the short term.

    Later that year, Nobunaga sought to restore the Amago Clan (long-time enemies of the Mori) to a position of strength, putting up Amago Katsuhisa, the last Amago ‘lord’ at Kozuki Castle, in Harima Province, hoping to attract Amago loyalists and any other opponents of the Mori, and make life difficult for Terumoto.

    A later image of Amago Katsuhisa, the last ‘lord’ of the Amago Clan.

    In response, Terumoto himself led an army to lay siege to Kozuki, and when a relief force, led by Hashiba (later Toyotomi) Hideyoshi, arrived, Terumoto handily defeated it, driving the Oda out of Harima Province, taking Kozuki Castle, and obliging the remaining Amago partisans to commit seppuku, which isn’t bad for a day’s work.

    Not long after this success, Terumoto would expand his influence in Harima still further, convincing several lords to defect to the Mori, and bottling up Nobunaga’s remaining loyalists in the province. After this series of successes, Terumoto had Nobunaga on the back foot, and in response, he pressured the Imperial Court to issue an order that Hongan-ji make peace with Nobunaga. The monks of Hongan-ji expressed a desire to make peace, but not without Terumoto, to whom they owed a debt of gratitude. In response, Nobunaga agreed and began negotiations with Hongan-ji and the Mori.

    The strategic situation shifted considerably in the early winter, however, as a Mori fleet dispatched to deliver further supplies to Hongan-ji was defeated by new ironclad ships of the Oda Navy. The exact nature of these vessels isn’t clear; the word ‘ironclad’ is a direct translation from Japanese, implying the vessels were at least partially armoured, though the exact style and extent of armour isn’t clearly recorded.

    An example of the type of warship used by the Mori Navy.

    Shortly after this victory, which drove the Mori beyond Awaji Island and opened Osaka Bay to the Oda, Nobunaga swiftly called off negotiations and made plans to continue the war. Despite the defeat, the Mori were still in a very strong position, however, and at this point, Terumoto made plans to advance on Kyoto and take the fight to Nobunaga directly.

    Plans were laid, including negotiation with Takeda Katsuyori for a simultaneous attack on Nobunaga’s ally, Tokugawa Ieyasu, and Terumoto set the date of the start of the campaign for early 1579. However, early 1579 came and went, and the Mori did not march. A series of rebellions broke out around the same time, supposedly instigated by both Nobunaga and the Otomo Clan (rivals to the Mori on Kyushu), and Terumoto had his hands full.

    The situation went from bad to worse for the Mori throughout 1579, as several border clans, angered at what they saw as a ‘betrayal’ when Terumoto failed to march on Kyoto, defected to the Oda side, disrupting communications with troops on the front line, and opening several gaps in Mori defences. The Mori failure to march also resulted in no further attempts to relieve Hongan-ji, and it was forced to surrender in early 1580.

    Not long after that, Nobunaga was able to focus significant forces on the Mori, and an army led by Hashiba Hideyoshi took advantage of the Mori’s weak position and launched a series of successful attacks against them, capturing castle after castle. A counter-attack in February 1582 led to a brief reprieve, but news from elsewhere was bad.

    A later artistic depiction of Toyotomi Hideyoshi (then still called Hashiba) around 1582.

    The Takeda, with whom the Mori had allied against Nobunaga, were decisively defeated in early Spring, and with their removal, Nobunaga turned his entire attention to the Mori. The situation was dire. A little more than five years earlier, the Mori had been a match for Nobunaga; indeed, had Terumoto marched on Kyoto, he would have had a good chance of success.

    Now, however, Nobunaga was stronger than ever, and internal rebellion, defections, and military defeats meant that the Mori were far weaker in comparison. Had Nobunaga advanced, he almost certainly would have won.

    As is so often the case, however, fate intervened. Nobunaga was betrayed by one of his generals in June 1582 and killed. His supporters immediately turned on each other, with Hashiba Hideyoshi, the man who had been leading the charge against the Mori, wishing to establish himself as Nobunaga’s successor, and so he concluded a swift peace with the Mori. For his part, Terumoto was glad to accept, even though it meant sacrificing three provinces. When news of Nobunaga’s death broke, Ashikaga Yoshiaki, still with the Mori, ordered Terumoto to march on Kyoto and take advantage of the situation.

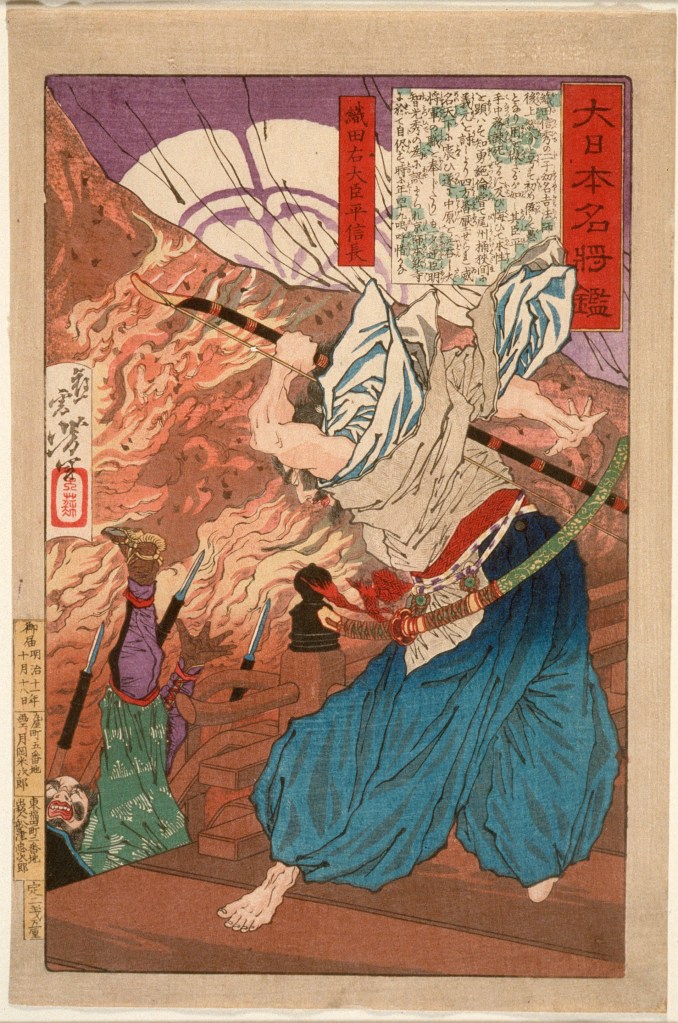
    A 19th century depiction of Oda Nobunaga’s final moments.

    Terumoto refused, still forced to deal with internal rebellion, and although there would be plenty of opportunities to involve himself in the chaotic fighting that followed Nobunaga’s betrayal, the Mori would not move, instead adopting a ‘wait and see’ approach, which, in hindsight was wise, as although history would record Hideyoshi as the ultimate victor, in the summer of 1582, that was far from certain.

    One thing that Terumoto did agree to, however, was refusing to accept the ceding of three provinces to Hideyoshi as part of their peace deal. No doubt the Mori felt that Hideyoshi had misled them (Terumoto hadn’t known about Nobunaga’s death before the agreement), and with Nobunaga’s successors tearing each other apart, the Mori were in a good position to keep hold of their territory.

    Negotiations dragged on, even after Hideyoshi was able to win a decisive victory at the Battle of Shizugatake in April 1583, and he began to lose patience, threatening a resumption of war if the Mori didn’t concede. It would not be until early 1585 that a peace was actually agreed, and it was achieved largely without fresh fighting. The Mori would be allowed to keep seven provinces, representing much of the territory that had been taken by Terumoto’s grandfather, Motonari. In exchange, the Mori agreed to support Hideyoshi’s campaigns to unite the realm, especially in Shikoku and Kyushu, which the Mori assisted in invading in May 1585 and August 1586, respectively.

    The strategic situation in 1584, just after Hideyoshi secured power. The Mori are represented in yellow, and Hideyoshi in red.
    By Alvin Lee – Own work, CC BY-SA 4.0, https://commons.wikimedia.org/w/index.php?curid=39198357

    Finally, in the summer of 1586, Terumoto formally became a vassal of Hideyoshi (by now known as Toyotomi), ending decades of conflict and proving to be a significant step in bringing the Sengoku Jidai to an end more generally. A testament to the new trust placed in the Mori came in 1590, when Hideyoshi attacked the Hojo Clan, masters of the Kanto. Though the Mori did not join the campaign, Mori troops were entrusted with guarding the capital while Hideyoshi was away.

    Around this time, Terumoto completed his new base at Hiroshima Castle and would take part in Hideyoshi’s ill-fated invasion of Korea in 1592. We will go into more detail about the events that followed later, but after Hideyoshi’s death in 1598, Terumoto was named as one of five regents for his infant son, Hideyori.

    The five regents were meant to stabilise the realm until Hideyori came of age, but it didn’t work; Tokugawa Ieyasu was swiftly opposed by the other four as it was believed (rightly as it turned out) that he wished to overthrow the current government and make himself Shogun. The tension would eventually lead to a new outbreak of violence, and a brief campaign culminated in the decisive Battle of Sekigahara in 1600.

    Teruhito and the Mori Clan were officially in opposition to the victorious Ieyasu, but had dispatched only a small force to Sekigahara, keeping their main strength at Osaka Castle to guard the heir. This was the strongest castle in the realm, and Terumoto had tens of thousands of fresh troops with which to hold it. Ieyasu, apparently aware of this, dispatched a letter to Terumoto, expressing his desire for positive relations between the two, and hoping that the Mori would depart Osaka without further violence.

    The walls of Osaka Castle as they appeared in 1865.

    Terumoto agreed when Ieyasu confirmed that the Mori would lose no territory in the aftermath. However, Ieyasu would almost immediately go back on his word once Terumoto was safely away from Osaka. The Mori were reduced to just two provinces in the far west, Suo and Nagato, and almost all the territory taken by Motonari and Terumoto was lost.

    Terumoto himself would officially retire as head of the clan not long after Sekigahara and became a monk, though in reality, he would retain most of the actual authority within the clan. One challenge that came about almost immediately was the loss of income that came with the loss of territory. Before Sekigahara, the Mori had had an income of more than 1 million koku (a Koku being approximately how much rice one man needed for a year). After Sekigahara and the loss of five of their provinces, this income was down to less than 300,000.

    This loss in income led to a loss in strength, as many of the clan’s retainers found their stipends reduced or lost entirely, leading them to seek employment elsewhere (just in case you thought Samurai were all about unquestioned loyalty.) Terumoto rather astutely recognised that this reduction might actually benefit the clan long term, as disloyal vassals would leave quickly, and even those who remained could be chosen based on ability, leading to a reduction in the clan’s overall strength, but perhaps improving skill and efficiency, at least in theory.

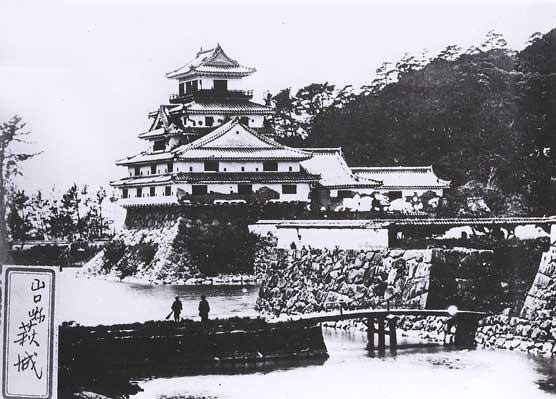
    A 19th century photograph of Hagi Castle, where the Mori Clan were based after their forced relocation.

    This would prove a wise move, as a land survey in 1610 showed that the Mori’s financial situation was better than originally assumed, and the reduction in vassals and retainers had led to a leaner, more efficient administration.

    Peace in the realm would last a while under Tokugawa Ieyasu’s rule, but it was a fragile thing. In 1614, the now adult Toyotomi Hideyori (Hideyoshi’s heir) brought about a crisis when a new prayer bell was inscribed with language that was interpreted as calling for the overthrow of the Tokugawa. Hideyori holed up in Osaka Castle and called on all ‘loyal vassals’ to come to his aid. Most, including Terumoto, ignored him, and when Ieyasu marched on Osaka, he requested the Mori dispatch their navy in support, which they duly did.

    Terumoto also led an army to Osaka, though the Mori would ultimately play a relatively small role in the so-called Winter Siege of Osaka. The following year, during what is called the Summer Siege, Ieyasu attacked Osaka again, this time successfully, capturing and executing Hideyori, and bringing his line to an end.

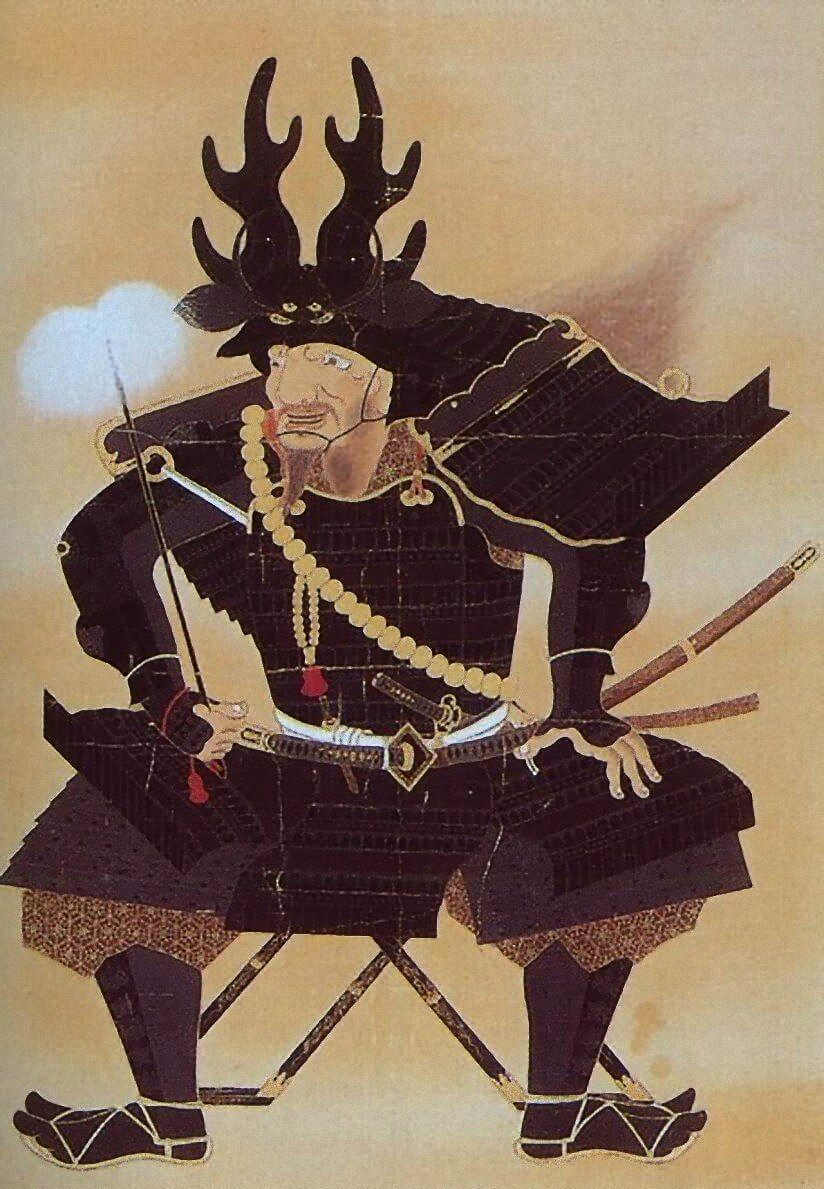
    Tokugawa Ieyasu, the man who would ultimately bring the Sengoku Jidai to an end.

    The Mori were again asked to dispatch an army, but delays in orders and the length of the march meant they arrived only after Osaka had fallen. There was some concern that this delay might be interpreted as treachery by Ieyasu; however, even the savvy political operator, Ieyasu, chose to lay the blame on slow communication instead, sparing the blushes of the Mori.

    Terumoto, his health failing and age catching up with him, handed full control of the clan over to his heir, Hidenari, in 1621, and although a formal system of ‘dual leadership’ would continue, it was becoming increasingly clear that Terumoto’s time was running out.

    He would continue to play a role in the affairs of the Mori until his death in 1625, and his clan’s distant position from the new capital in Edo afforded them a certain degree of autonomy, at least with regard to internal affairs, in the years that followed.

    That would prove important in the 19th century, as the arrival of American ships in Edo Bay forced Japan to end its period of isolation. It would be the Mori Clan, based in what by then was called the Choshu Domain, who would lead the charge against the Tokugawa Shogunate, overthrowing it, and re-establishing Imperial Rule in the so-called Meiji Restoration, but we are getting way ahead of ourselves.

    Mori Motonari, the last lord of Choshu Domain.

    Mori Terumoto is one of the giants of the Sengoku Era. Building on the successes of his grandfather, Motonari, he led the Mori to a position in which they may well have been able to take power for themselves, had things gone a little differently. Ultimately, despite never gaining ultimate power for themselves, Terumoto and his successors would prove to be one of the success stories of this period, surviving the turmoil and even thriving in the new Japan of the 19th Century.

    Sources
    https://ja.wikipedia.org/wiki/%E6%AF%9B%E5%88%A9%E8%BC%9D%E5%85%83
    https://ja.wikipedia.org/wiki/%E5%BA%83%E5%B3%B6%E5%9F%8E
    https://ja.wikipedia.org/wiki/%E4%BA%AC%E8%8A%B8%E5%92%8C%E7%9D%A6
    https://ja.wikipedia.org/wiki/%E9%B3%A5%E5%8F%96%E5%9F%8E
    https://ja.wikipedia.org/wiki/%E9%89%84%E7%94%B2%E8%88%B9
    https://ja.wikipedia.org/wiki/%E5%89%AF%E5%B0%86%E8%BB%8D
    https://en.wikipedia.org/wiki/M%C5%8Dri_Terumoto
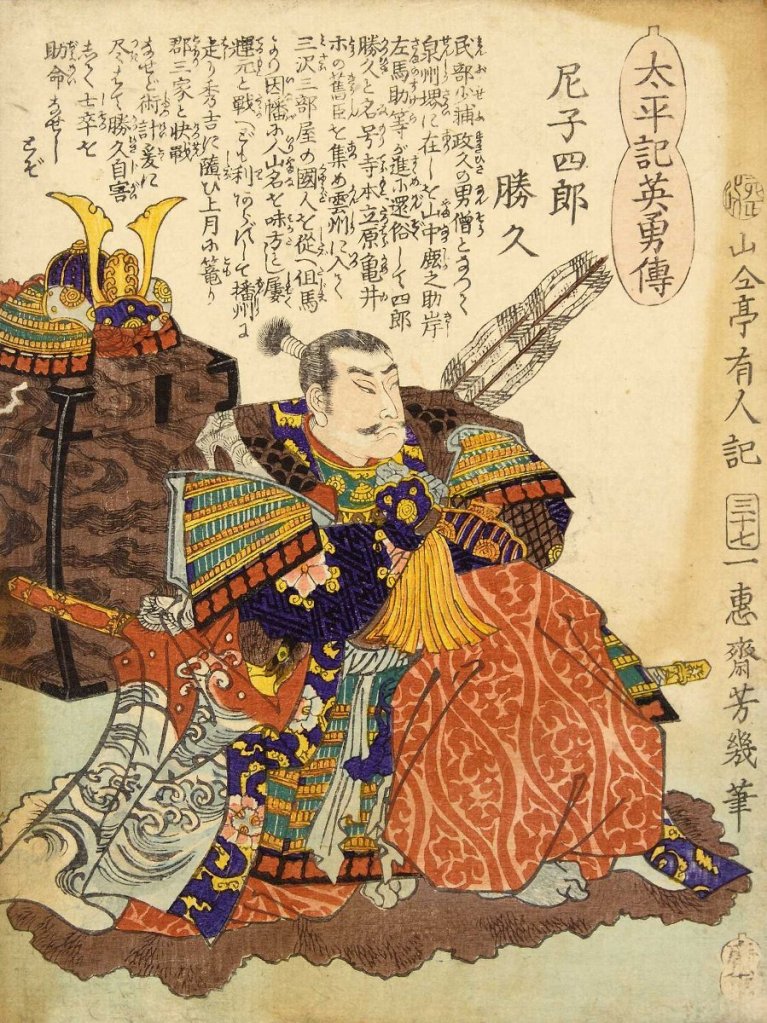
    https://ja.wikipedia.org/wiki/%E5%B0%BC%E5%AD%90%E5%8B%9D%E4%B9%85
    https://en.wikipedia.org/wiki/Toyotomi_Hideyoshi
    https://en.wikipedia.org/wiki/Tokugawa_Ieyasu