Tag: Samurai warfare

  • Kings in the North, Part 2

    Kings in the North, Part 2

    This is the 50th post on this blog. Well done for getting this far.

    In 1565, Date Harumune retired and handed control of the clan over to his son Terumune. Despite this, Harumune held onto the real power, and it wasn’t until 1570, when Terumune accused several of his father’s supporters of treason and had them removed, that he gained actual power.

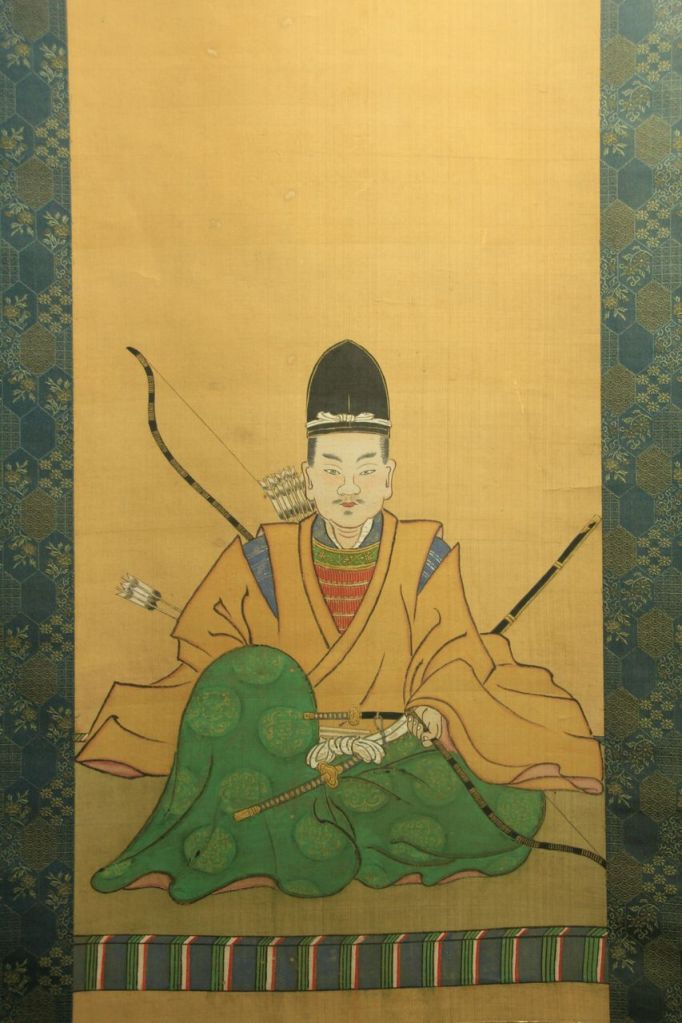
    Date Terumune

    Despite this, Terumune continued most of his father’s policies, especially in diplomacy. The alliance with the Ashina Clan was maintained, and Date diplomats reached out to the Hojo, Oda, and Shibata Clans, establishing friendly relations with several of Japan’s most powerful warlords. The Sengoku in Sengoku Jidai literally means ‘country at war’; however, alongside his diplomatic efforts, Terumune showed he wasn’t afraid to throw his weight around if an opportunity presented itself.

    In 1578, the death of Uesugi Kenshin presented just such an opportunity, and Terumune dispatched forces to intervene in the internal struggle that followed. The Date intervention was ultimately unsuccessful, largely due to the military skills of the Shibata Clan, vassals of the Uesugi, who fought off the Date in several engagements.

    Frustrated, Terumune withdrew, but the Shibata had apparently expected more generous rewards for their service, and in 1581, when it was clear that they would not beforthcoming, the Shibata rebelled. Terumune dispatched his army once again, this time in support of the Shibata, and the conflict within the Uesugi Clan would drag on for years.

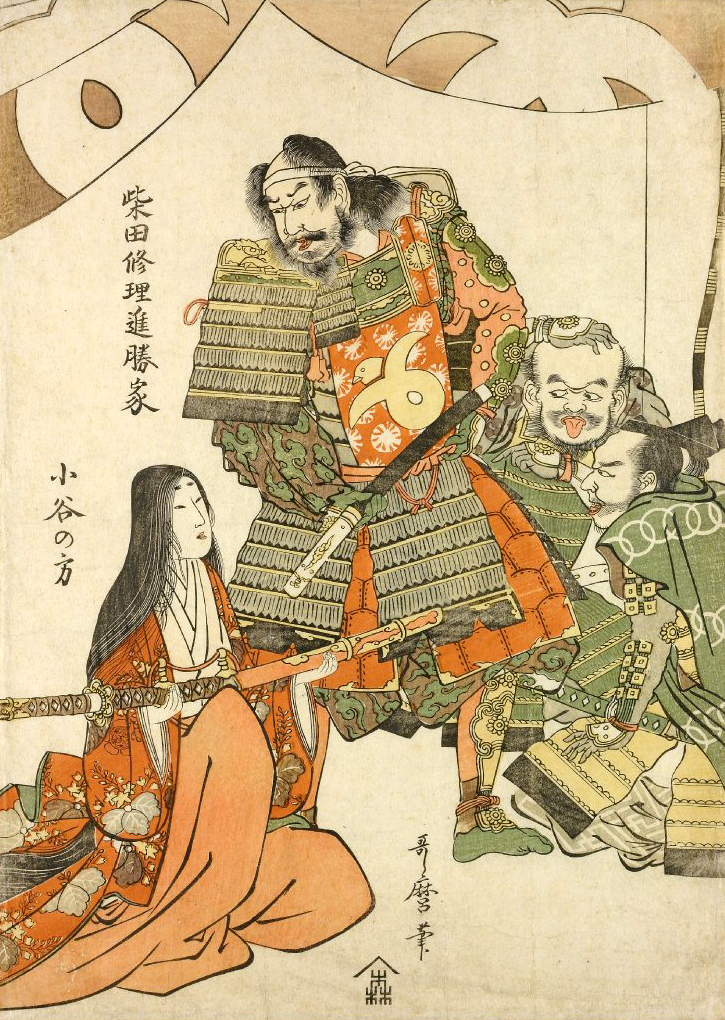
    Shibata Shigeie, one of the Shibata brothers who gave the Date so much trouble.
    さどこhttp://blog.livedoor.jp/sadosado_4hi/archives/8412806.html, CC 表示-継承 4.0, https://commons.wikimedia.org/w/index.php?curid=99877267による

    Closer to home, the long war against the nearby Soma Clan continued into Terumune’s reign. The Soma were based in southern Mutsu Province (the area of modern Fukushima Prefecture) and had proven to be tenacious opponents of the Date, with neither side ever able to establish a permanent advantage over the other, despite decades of conflict.

    In the period of 1582-84, however, the Date finally managed to overcome the Soma. Although the latter clan was not completely subdued, the strategic situation compelled them to make peace in 1584, with the border between the two clans agreed upon by treaty.

    Also in 1584, the long-time allies of the Date, the Ashina Clan, fell prey to an internal power struggle, after their lord, Moritaka, was murdered by a retainer (the official reason is said to be ‘due to sodomy’, so make of that what you will). The new head of the clan was just a month old, and so the Ashina were effectively subordinate to the Date, despite nominally remaining independent.

    Shortly after this, Terumune retired, handing leadership over to his son, Masamune. Sources disagree on the exact reason for this, with some suggesting that Terumune planned to make his second son head of the Ashina, only to encounter serious opposition from within the Ashina and his own clan, who then forced him to abandon the idea and retire in disgrace. Other sources say that Terumune learned a lesson from the fate of the Ashina and decided to hand over the leadership of the Date to his son while he was still alive, rather than leave the succession to chance.

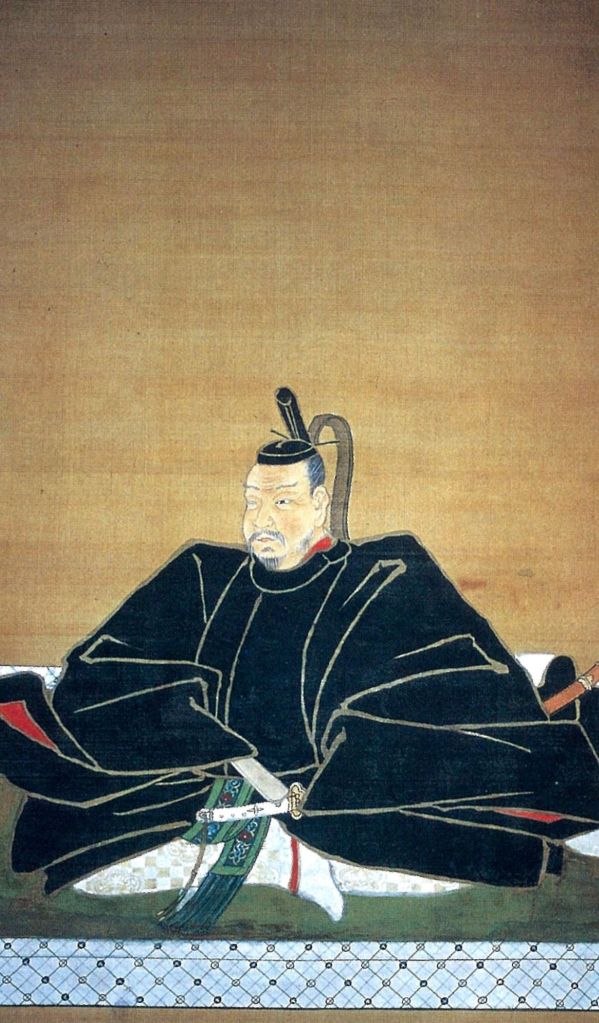
    Date Masamune

    Regardless of the reason, Masamune became head of the clan in 1585, and immediately set out to prove that he was not going to do things the same way as his father had. Whilst Terumune had intended to continue the war against the Uesugi, along with his Ashina and Mogami allies, Masamune made peace, without consulting either clan, leading to a sudden and serious decline in relations.

    Masamune would definitively end the alliance shortly afterwards when he invaded Ashina territory, which the Ashina, unsurprisingly, interpreted as a hostile act. The invasion would prove to be a back-and-forth affair, with the Ashina successfully repelling the Date’s first attacks only to be defeated by a second wave, led by Masamune himself.

    In late 1585, the Ashina asked for a truce, and a peace was mediated by Terumune and his uncle, Sanemoto. The negotiations would prove to be a ruse, however, as Ashina forces kidnapped Terumune at sword point and tried to escape back to their own territory. What happened next is a matter of debate; some sources state that Terumune, seeing that he couldn’t escape, ordered the pursuing Date forces (his own men) to open fire with their bows, killing the entire party, including Terumune.

    Another source suggests that the Ashina, trapped by the Date pursuit, killed Terumune themselves, and were then cut down. A third source (written later) states that Masamune himself was responsible for Terumune’s death, and may have orchestrated the whole thing to get rid of his father. Though the exact circumstances will never be known, Terumune’s death also signalled the end of serious attempts to end the local conflicts through negotiation.

    Shortly after his father’s somewhat controversial death, Masamune continued the war. In January 1586, he laid siege to Nihonmatsu Castle (in the city of the same name, in modern Fukushima). At this time, an army led by the Satake Clan, from Hitachi province (to the south), arrived to relieve the castle. The Date were defeated at the Battle of Hitotori Bridge, and Masamune himself was badly wounded before a rearguard action allowed him to escape.

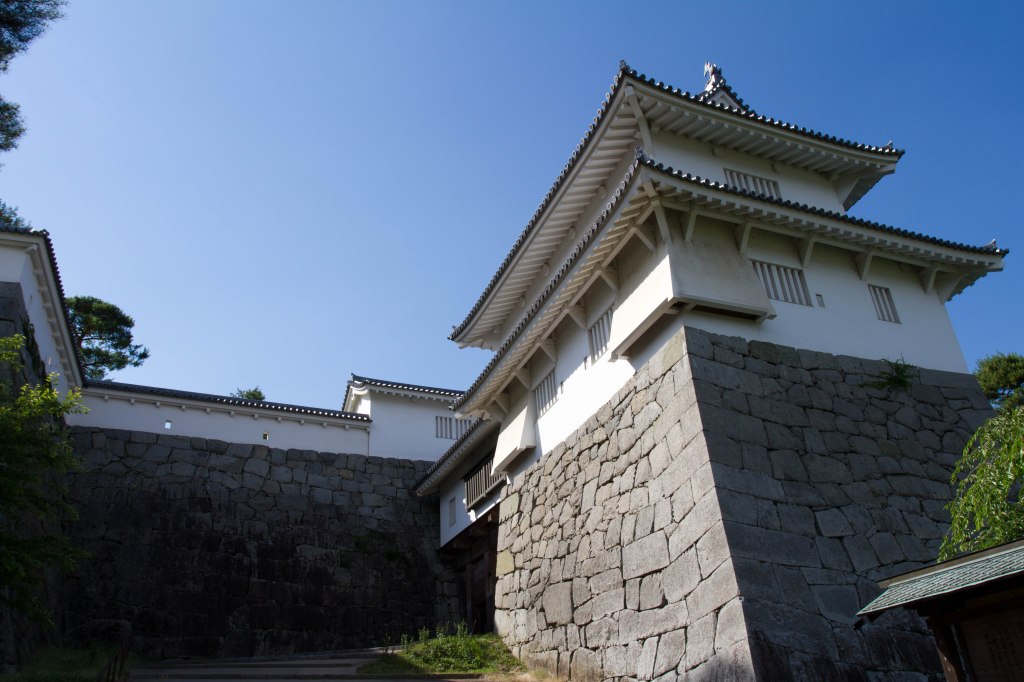
    The restored Nihonmastu Castle.
    baku13 – 投稿者自身による著作物, CC BY-SA 2.1 jp, https://commons.wikimedia.org/w/index.php?curid=11354374による

    The defeat was evidently not serious, because only a few months later, after the Satake had withdrawn, Masamune tried again, once again besieging Nihonmatsu Castle, forcing its surrender in July. Not long after this, he negotiated a peace with the Satake with the intention of focusing his efforts on finishing off the Ashina. This peace was short-lived, even by the standards of the day, as a succession crisis within the Ashina Clan drew the attention of the Satake, who supported a rival candidate to Masamune’s preferred choice.

    Masamune interpreted this as the Satake intending to bring the Ashina under their control, which would have put the Date in an extremely vulnerable situation. In response, he declared his intention to wage a full-scale war against both the Ashina and Satake. In 1587, Toyotomi Hideyoshi, by now acting as regent, issued an order that all private wars should halt, an order that Masamune, for now at least, ignored.

    Masamune initially had reason to regret his continued belligerence. In 1588, his old enemies, the Mogami Clan, took advantage of Masamune being distracted elsewhere and invaded Date territory at the same time as the Ashina Clan attacked in the south. After defeats at the Battle of Osaki and then at Koriyama, Masamune was obliged to seek peace with both clans, stabilising the situation in the short term.

    In 1589, the peace with the Ashina Clan broke down once again, with Masamune invading the Aizu region (in the west of modern Fukushima). Masamune won a decisive victory at the Battle of Suriagehara in July 1589, causing the Ashina to flee their home castle at Kurokawa (modern Aizuwakamatsu) and seek help from the Satake. The Satake were obeying Hideyoshi’s peace order, however, and no help was forthcoming. Shortly after this, Masamune moved his base to Kurokawa Castle, and when a second order from Hideyoshi arrived, threatening direct intervention, Masamune took the opportunity to make peace.

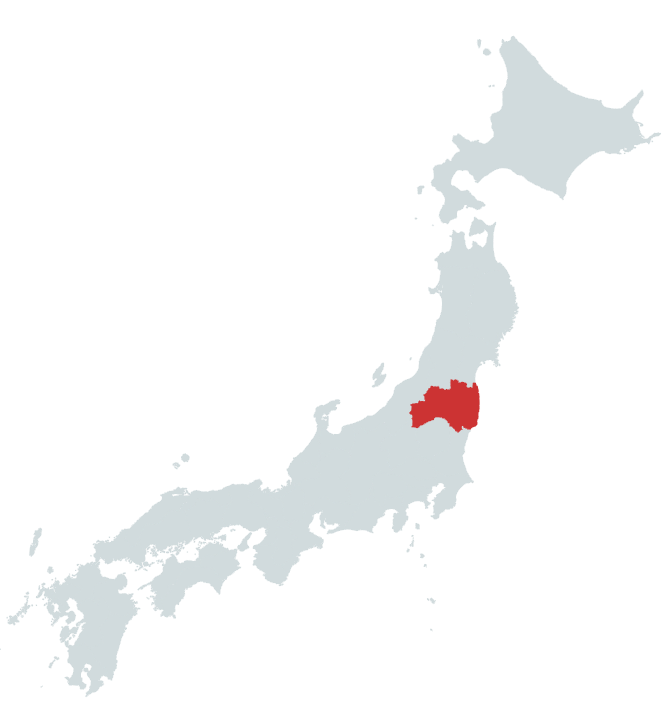
    Fukushima Prefecture, where Aizu is located.

    A year later, Hideyoshi ordered the Date to join him in his attack on the Hojo Clan at the siege of Odawara. This put Masamune in a difficult spot, since the rule of his father, Terumune, the Date and Hojo had been nominal allies, and when Hideyoshi’s order arrived, it wasn’t immediately clear which side Masamune would join. Masamune eventually marched in support of Hideyoshi, but the regent wouldn’t forget Date disobedience of his peace order.

    Sources
    https://ja.wikipedia.org/wiki/%E4%BC%8A%E9%81%94%E6%94%BF%E5%AE%97
    https://ja.wikipedia.org/wiki/%E8%B1%8A%E8%87%A3%E7%A7%80%E6%AC%A1
    https://ja.wikipedia.org/wiki/%E6%91%BA%E4%B8%8A%E5%8E%9F%E3%81%AE%E6%88%A6%E3%81%84
    https://ja.wikipedia.org/wiki/%E8%8B%A5%E6%9D%BE%E5%9F%8E
    https://ja.wikipedia.org/wiki/%E4%BA%8C%E6%9C%AC%E6%9D%BE%E5%9F%8E
    https://ja.wikipedia.org/wiki/%E4%BD%90%E7%AB%B9%E6%B0%8F
    https://en.wikipedia.org/wiki/Hitachi_Province
    https://en.wikipedia.org/wiki/Aizu
    https://ja.wikipedia.org/wiki/%E4%BC%8A%E9%81%94%E6%B0%8F
    https://ja.wikipedia.org/wiki/%E4%BC%8A%E9%81%94%E8%BC%9D%E5%AE%97

  • The Battles of Kawanakajima

    The Battles of Kawanakajima

    Having looked closely at the lives and careers of Takeda Shingen and Uesugi Kenshin, it is impossible not to notice the frequent mention of a place called Kawanakajima, and the series of battles that took place there from 1553 to 1564.

    The battles at Kawanakajima were not the only confrontations between the Takeda and Uesugi clans, nor were they the largest or most significant battles in the Sengoku period, but they have been the subject of extensive study, writing, and mythologising, as they seem to symbolise the famous rivalry between Shingen and Kenshin, and so they’re worth a closer look.

    Kawanakajima

    Kawanakajima as it appears today.
    By Bloglider at Japanese Wikipedia – Own work by the original uploader (Original text: Photo by Bloglider.), CC BY-SA 3.0, https://commons.wikimedia.org/w/index.php?curid=12400636

    The area called Kawanakajima is located in the northern part of Nagano Prefecture, and is the area surrounding where the Chikuma and Sai rivers meet. Now within the modern city of Nagano, in the 16th century the area was in Shinano Province and had long served as a key transportation route from north to south, and as such had frequently been a battleground.

    There had been many small, but long-established clans in the area, but by the early 1500s, it was largely under the control of the Murakami Clan, who would come into frequent conflict with the Takeda, from neighbouring Kai Province, who were beginning to expand into Shinano around this time.

    Starting in 1542, Takeda Shingen began a concerted effort to bring the province under his control, but he faced resistance of varying degrees of severity during his campaign, and it was the Murakami who proved the sternest test. At the Battle of Uedahara in 1548, the Murakami inflicted a serious defeat on the Takeda, and although Shingen would recover, he suffered a further defeat at the Siege of Toishi Castle in 1550.

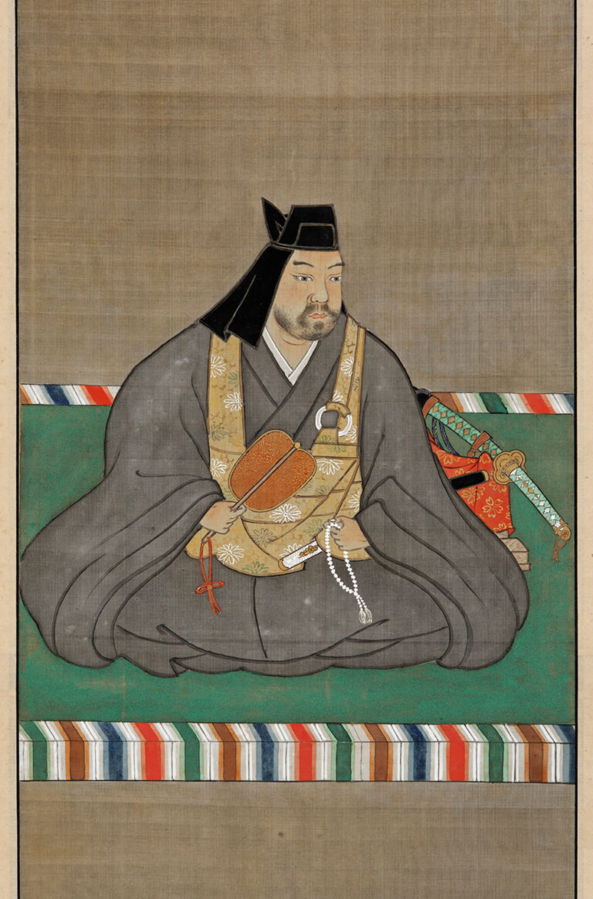
    Takeda Harunobu, better remembered as Takeda Shingen.

    Shingen had what we might call “Bouncebackability”, and in 1551, Toishi Castle fell, leaving the Takeda in control of most of Shinano, with the exception of the area including, and to the north of, Kawanakajima. The clans in this area had previously allied with the Murakami, but with their defeat, they went looking for new friends.

    They found them in the Nagao Clan of Echigo, and their lord, Kagetora, better known to history as Uesugi Kenshin, who advanced into northern Shinano to support these local clans and to oppose the Takeda.

    The First Battle

    In April 1553, Shingen resumed his advance against the remaining clans in northern Shinano, meeting only sporadic resistance and forcing the weakened Murakami to ask for intervention from Kenshin. He responded, and a combined force of around 5000 men counterattacked and defeated the Takeda at the Battle of Yahata in May.

    Nagao Kagetora, better known as Uesugi Kenshin.

    This success would be short-lived, however, as Shingen would resume his advance that summer, forcing the Murakami back again, until September, when Kenshin himself led a force into Shinano, engaging and defeating the Takeda at the Battle of Fuse, before laying siege to several castles in quick succession. Shingen would seek to outmanoeuvre Kenshin and cut off his retreat, but Kenshin responded with a strategic retreat to a place called Hachimanbara.

    Unable to cut off Kenshin’s retreat, Shingen instead retreated to Shioda Castle, entrenching himself there and avoiding direct battle. With neither side apparently up for the fight, both armies gradually disengaged, with Kenshin returning home at the end of September, and Shingen following suit a few weeks later.

    The First Battle of Kawanakajima was more of an extended series of engagements than a pitched battle, and both sides achieved some strategic goals. Kenshin was able to stop the Takeda advance into northern Shinano, whereas Shingen was able to consolidate his control in the central and eastern parts of the province, free from outside intervention.

    The Second Battle

    Through the remainder of 1553 and into 1554, Takeda Shingen continued to expand and consolidate his control of the areas of Shinano south of Kawanakajima. He has also formed an alliance with the Hojo and Imagawa Clans, securing his southern borders and gaining an ally (in the Hojo) against Kenshin’s ambitions in the wider region.

    Shingen also sought to keep Kenshin off balance by supporting local rivals and instigating rebellions amongst his vassals. Though Kenshin was often able to swiftly put down these uprisings, in 1555, a previously loyal vassal, Kurita Eiju, who was based near the Zenkoji Temple, defected to the Takeda side. This was significant because Eiju controlled the southern half of the Nagano Basin, of which Kawanakajima was a central part.

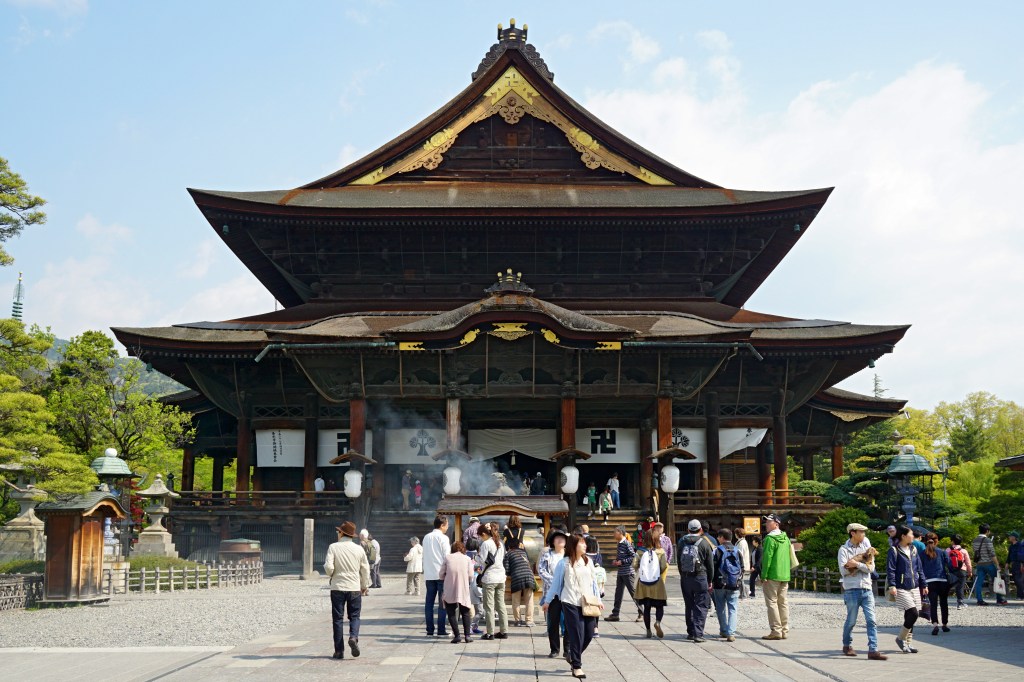
    Zenkoji Temple as it appears today.
    By 663highland, CC BY 2.5, https://commons.wikimedia.org/w/index.php?curid=48785737

    Shingen marched north to support his new ally, whilst Kenshin was obliged to dispatch an army to retake the lost territory. Eiju, alongside 3000 Takeda allies, holed up at Asahiyama Castle (in modern Nagano City), a strategically important location that controlled crossings of the Sai River.

    Kenshin could have manoeuvred around the strong point, but this would have left an enemy garrison at his rear, so instead, he entrenched his forces at Katsurayama (also in modern Nagano) and constructed a castle there, effectively bottling up the garrison at Asahiyama and neutralising the threat.

    Shingen was not idle during all this construction; however, he dispatched an army in support of Kurita Eiju, and it arrived in early July, facing Kenshin’s forces across the Sai River. The only serious engagement of the Second ‘Battle’ was on July 19th, when Kenshin sent forces across the river and engaged in sporadic fighting against the Takeda. Whether this was a serious attempt to force a crossing or just a kind of skirmish isn’t clear, but Kenshin’s forces swiftly withdrew, and both sides spent the next 200 days glaring at each other across the river.

    Eventually, events away from Kawanakajima would force a resolution. Shingen was a long way from his home base in Kai and was beginning to struggle to feed his army, whereas Kenshin was facing issues on his western borders from increasing activity from the local Ikko-Ikki, as well as dissatisfaction from his vassals over the months of inactivity.

    The Ikko-Ikki proved to be difficult to deal with for many lords. Uesugi Kenshin was no different.

    Eventually, both sides agreed to mediation, led by the Imagawa Clan, and a peace was agreed in October. The terms set the border between the rivals as the Sai River, as well as calling for the destruction of Asahiyama Castle, and the complete withdrawal of both armies from the area.

    In the immediate aftermath, Kenshin would turn to deal with the Ikko-Ikki, and Shingen would subdue the remaining independent lords in southern Shinano, but neither side was done with Kawanakajima.

    The Third Battle

    In 1556, Kenshin, apparently suffering from what we might now call ‘burnout’, announced his intention to renounce his lordship and become a monk. His retainers, horrified at the prospect, did everything they could to persuade him to change his mind. They were ultimately successful, and a good thing too, because through the interim period, Shingen had again begun putting pressure on local lords to switch sides, or face conquest.

    During the New Year festivities in January 1557, Kenshin, who had by now given up on his idea of becoming a monk (and the restful lifestyle that would have provided him), offered prayers at the Hachimangu Shrine (in Chikuma, Nagano) for the defeat of Takeda Shingen.

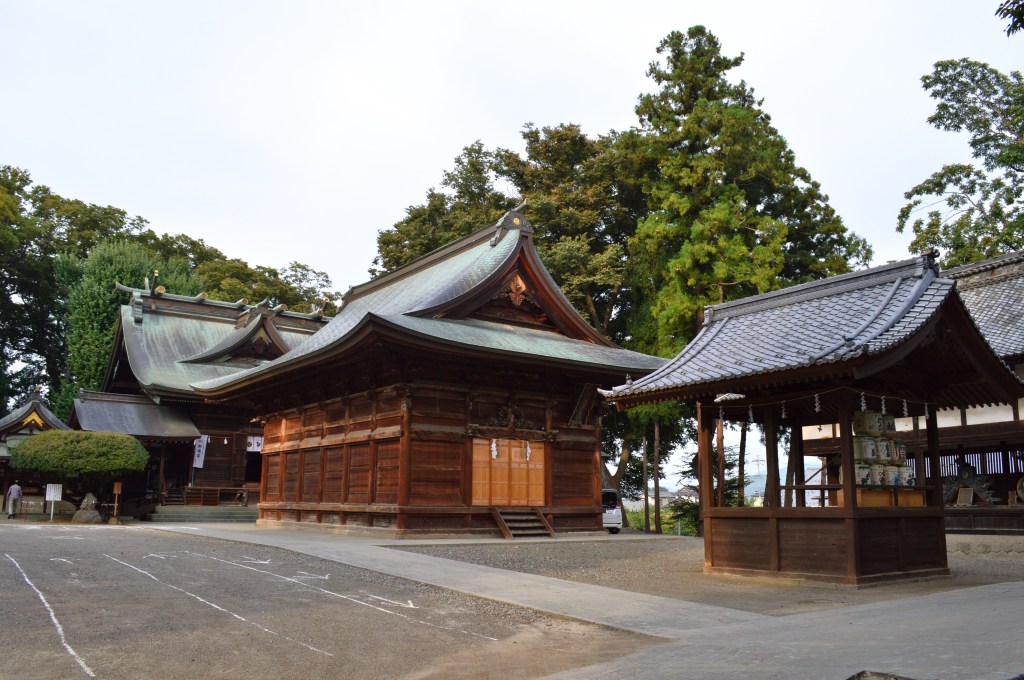
    Hachiman Shrine as it appears today. It’s now called Takemizuwake Shrine.

    Shingen, apparently put out by these attempts at divine intervention, advanced again, taking Katsurayama Castle (the site of the second ‘battle’) in mid-February, then advanced north, defeating the Takanashi Clan, who were allies of Kenshin. Kenshin’s response was delayed by winter snows, but he eventually came south, capturing several Takeda castles and even rebuilding Asahiyama.

    Shingen would continue to evade Kenshin’s advance, and both sides continued to dance around each other until an indecisive clash at Uenohara in late August, after which, Kenshin, who had advanced far from his supply bases in Echigo, withdrew. At this point, the Shogun, Ashikaga Yoshiteru, intervened, sending a letter requesting that both sides make peace, apparently in the hope that they would then send forces to aid the Shogunate.

    Neither side did, but a truce was agreed upon, which did not last long, as both Kenshin and Shingen would dispatch armies to duke it out in Northern Shinano. Kenshin arguably got the better of it, as the remaining clans in the area, previously just allies, were forced to become effectively his vassals.

    The Fourth Battle

    In 1559, Kenshin went to Kyoto to ask that the Shogun grant him the position of Kanto Kanrei, which had long been held by the Uesugi clan. Though the power of the Shogun and the prestige of any positions he might bestow were long since diminished, Kenshin was able to combine his appointment as Kanrei with his considerable martial talents to gather a large army and attack the Hojo in the Kanto region.

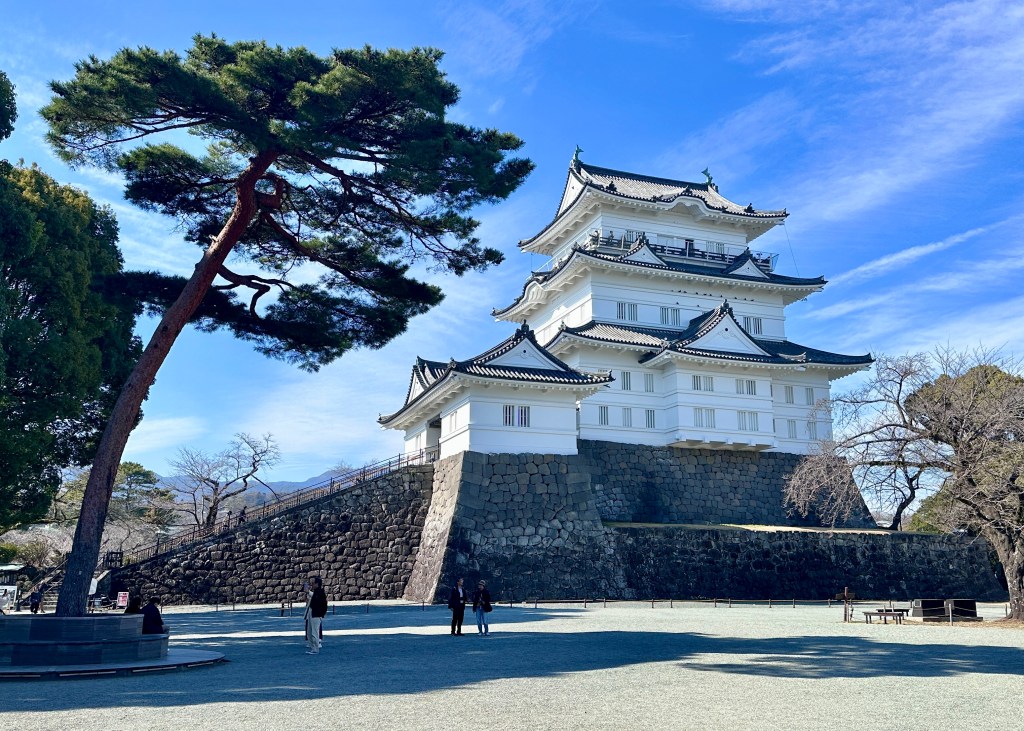
    In 1560, he was apparently able to gather an army of 100,000 men (though this is probably exaggerated) and advance deep into Hojo territory, even besieging their capital at Odawara in March 1561, though he was unable to take the formidable fortress. In response, the Hojo called for help from their ally, Takeda Shingen, who responded by invading Northern Shinano once again.

    The modern reconstruction of Odawara Castle.
    By Akonnchiroll – Own work, CC BY 4.0, https://commons.wikimedia.org/w/index.php?curid=145493350

    When news of Shingen’s attack reached Kenshin’s army, many of his supporters returned home, and he was obliged to lift the siege of Odawara and turn to face the Takeda. Beginning in August, the Takeda and Uesugi forces would again seek to gain advantage, advancing and retreating in turn, largely centred on Kaizu Castle, newly constructed at Shingen’s command.

    This would continue until late October, when the Takeda devised a strategy to launch a surprise attack against the Uesugi, with a second force positioned nearby to ambush and (hopefully) destroy the Uesugi as they attempted to regroup. Kenshin, however, was made aware of the Takeda’s movements, and, taking advantage of a moonless night, he had his army change position, moving them closer to the main Takeda force.

    Just after dawn on October 28th, a thick fog covered the ground around Kawanakajima, obscuring both armies. When the fog cleared, however, the Takeda were confronted with the sight of the entire Uesugi army positioned in front of them. Almost as soon as visibility allowed, Kenshin ordered a furious attack that smashed into the Takeda force and forced them onto the back foot.

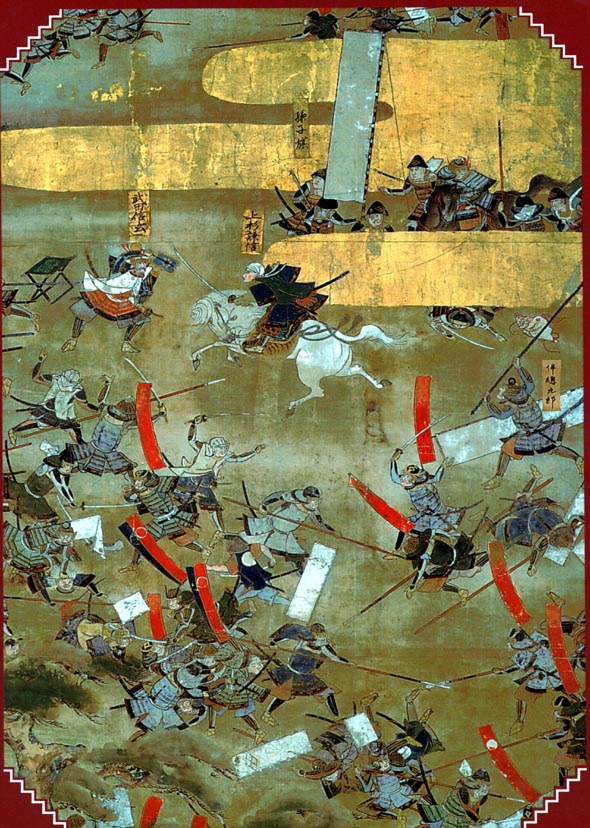
    The Uesugi made it as far as the Takeda’s main camp, and it is here that one of the most famous tales of the Sengoku period takes place. In the heat of the battle, a warrior wearing a white robe (or towel) around his head charged directly at Takeda Shingen. This warrior slashed three times at Shingen, who was able to parry the blows with his war fan (made of iron, not the usual paper, luckily), before Takeda’s soldiers came to the rescue and forced the white-clad warrior to retreat.

    The moment that Uesugi Kenshin and Takeda Shingen are said to have met on the battlefield.

    It was later revealed that this warrior was Uesugi Kenshin himself, and the duel became a legendary scene, symbolising the violence of the age, and the particular rivalry between Shingen and Kenshin. Unfortunately, we’re not sure that the duel actually took place. Takeda sources describe it as I’ve written here, whereas the Uesugi say the duel did take place, but that it was either a different attacker, or that it took place, not in the Takeda camp, but nearer the river, where the fighting was fiercest.

    Whether the famous duel actually happened or not, the battle itself was a bloody affair. The Uesugi attack was ferocious and drove the Takeda back to their camp, but failed to break them. At the same time, Takeda reinforcements rushing towards the battlefield were held up by a Uesugi rearguard.

    The Uesugi army (right) advance against the Takeda (left)

    If the battle had been brought to a conclusion that morning, then it’s likely the Uesugi would have won; however, the Takeda reinforcements arrived at around noon, and, fearing encirclement, Kenshin ordered a retreat. Shingen pursued him until around mid-afternoon, but then called it off, bringing an end to the bloodiest of the Battles of Kawanakajima.

    Exact death tolls are always tricky, as are the size of the opposing armies, but total numbers of combatants are estimated to have been around 20,000 for the Takeda and 13,000 for the Uesugi. When the fighting was over, the Takeda had suffered 4000 casualties, to the Uesugi’s 3000, and since they remained in control of the field, the battle was arguably a Takeda victory.

    The Fourth Battle of Kawanakajima was by far the bloodiest.

    That being said, the Uesugi would also claim victory, as they had foiled Takeda’s attempts to trap them, stopped their advance, and, despite a bloody day, their army remained more or less intact. Strategically, the battle was probably a draw, as it ultimately didn’t change much on the ground, neither side was able to secure new territory in the aftermath, and apart from the casualties (who would no doubt be comforted to know they’d died for nothing), both sides remained relatively strong.

    The Fifth Battle

    The Fifth and Final Battle of Kawanakajima occurred in 1564. In the interim period, Kenshin had continued to send forces into the Kanto, and Shingen had continued to try to expand his control of Shinano and other surrounding provinces.

    In Hida Province, a proxy war between a faction backed by the Uesugi and one by the Takeda swiftly drew both clans into direct confrontation once again. Shingen dispatched troops, and Kenshin moved to intercept them. The Takeda would get as far as the southern end of the Nagano Basin, but there would be no serious fighting. The Uesugi were content to limit themselves to blocking Shingen, and Shingen seemed to be content to allow himself to be blocked.

    Both sides eventually withdrew after nearly two months of little more than dirty looks, and this would prove to be the last confrontation between the clans at Kawanakajima.

    Aftermath

    The conflict between the Takeda and Uesugi Clans did not end after the Fifth Battle (such as it was), but both sides had more pressing concerns elsewhere. Kenshin was keen to focus on Etchu Province, the source of frequent Ikko-Ikki attacks, whilst Shingen’s attention was drawn south, and then eventually towards Kyoto as the political situation shifted dramatically.

    When Shingen died in 1573, Kenshin is supposed to have wept openly at the loss of his great rival, but the fortunes of both clans would continue to decline. The Takeda would be heavily defeated at the Battle of Nagashino in 1575, and their power would be permanently diminished. Then, in 1578, Kenshin died, and the Uesugi Clan was wracked by a civil war to determine who would succeed him.

    The Takeda would eventually be destroyed by Oda Nobunaga in 1582, whereas the Uesugi would survive the Sengoku Period and the centuries to come. In fact, as I mentioned in their brief profile, direct descendants of this famous clan still live in Japan to this day.

    Ultimately, the Battles of Kawanakajima became the stuff of myth and legend in the decades following the actual events. This was largely due to the actions of Tokugawa Ieyasu and his descendants, who made concerted efforts to elevate the actions of Takeda Shingen to almost semi-divine status.

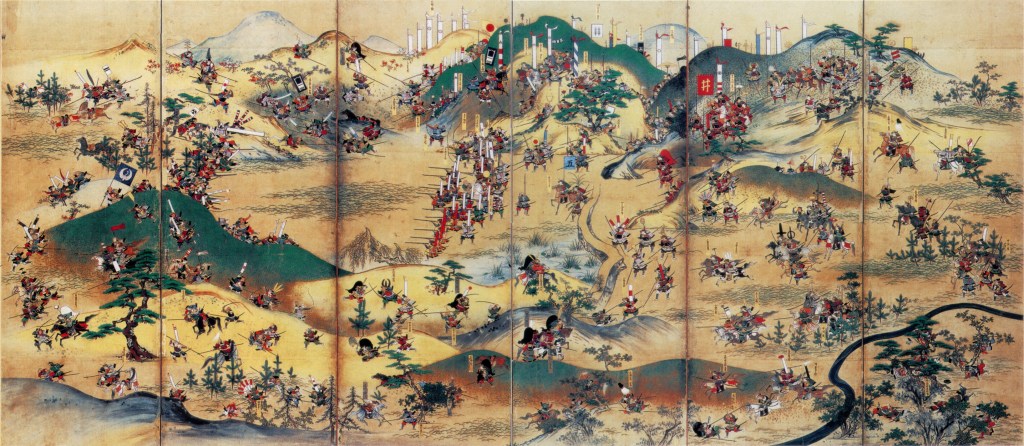
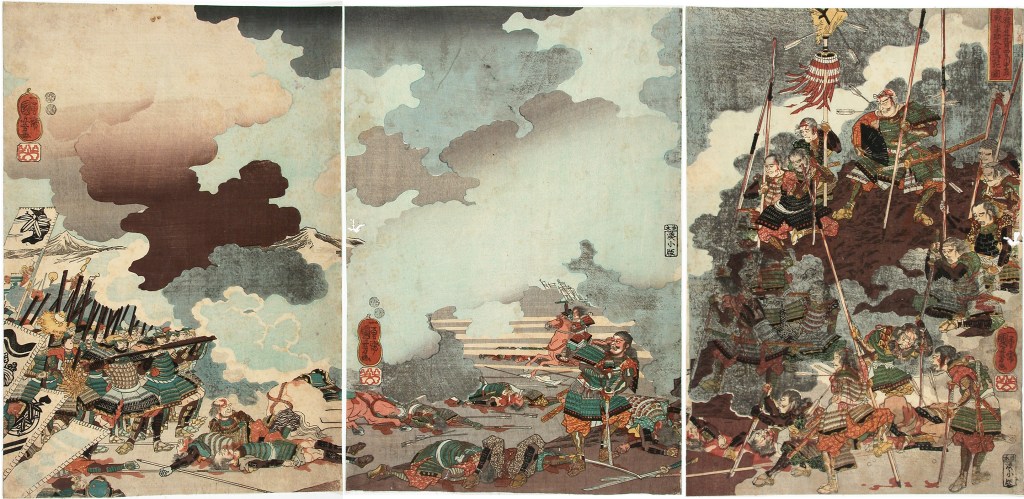
    A 19th Century artistic representation of the Battle of Kawanakajima.

    The reality is that the battles were locally important, but ultimately proved to be fringe events in the course of the enormous bloodshed elsewhere in Japan during this period, as we shall soon see.

    Sources
    https://ja.wikipedia.org/wiki/%E4%BF%A1%E6%BF%83%E6%9D%91%E4%B8%8A%E6%B0%8F
    https://en.wikipedia.org/wiki/Battles_of_Kawanakajima
    https://ja.wikipedia.org/wiki/%E5%B7%9D%E4%B8%AD%E5%B3%B6%E3%81%AE%E6%88%A6%E3%81%84
    https://ja.wikipedia.org/wiki/%E6%97%AD%E5%B1%B1%E5%9F%8E
    https://ja.wikipedia.org/wiki/%E6%AD%A6%E6%B0%B4%E5%88%A5%E7%A5%9E%E7%A4%BE
    https://ja.wikipedia.org/wiki/%E9%AB%98%E6%A2%A8%E6%B0%8F%E9%A4%A8
    https://en.wikipedia.org/wiki/Uesugi_Kenshin
    https://en.wikipedia.org/wiki/Takeda_Shingen

  • Kamakura IV – You can’t invade Japan…

    “…unless you’re the Mongols…” – John Green, Crash Course World History

    By the 1260s, the Mongol Empire was the most powerful state the world had ever seen. Throughout the 13th century, united under their leader, Genghis Khan and his heirs, the Mongols had conquered everything from China to Poland, sweeping aside any who opposed them, and spreading Mongol law and customs across Asia and into Eastern Europe.

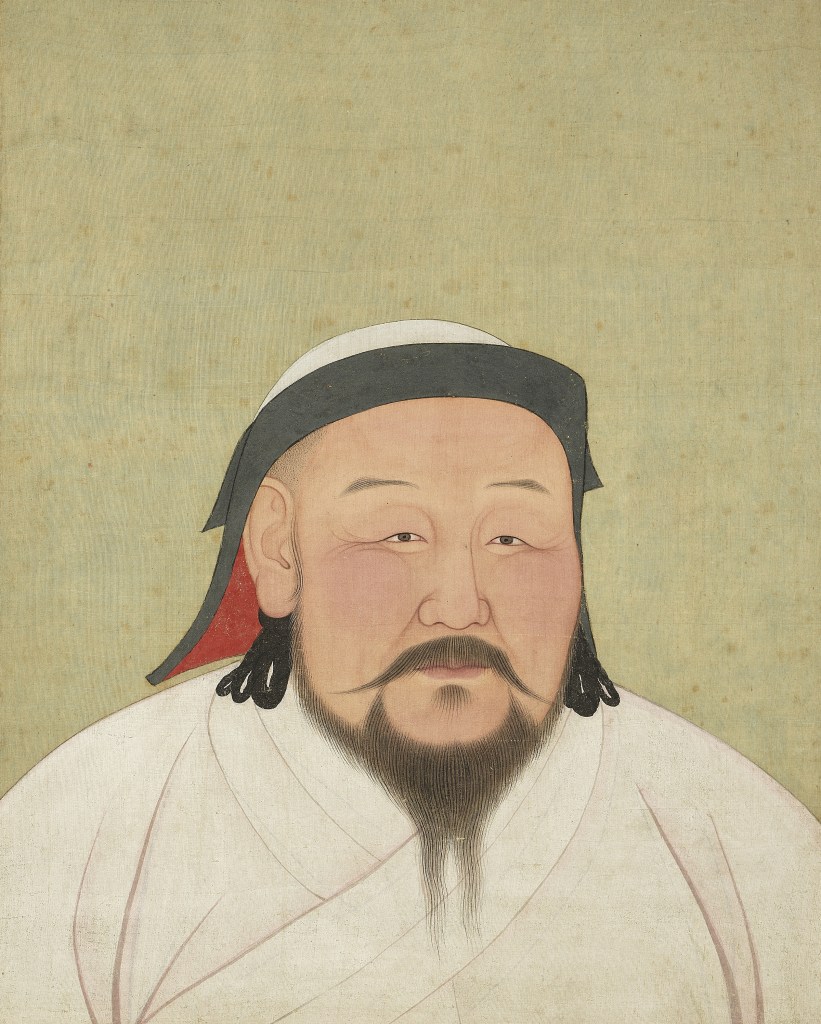
    In 1260, Kublai was elected as Great Khan. The grandson of Genghis, he had established the base at Khanbaliq, in modern Beijing, would go on to declare himself Emperor of China in 1271 (establishing the Yuan Dynasty), and took part in the subjugation of Korea, which had only finally submitted (and even then, as only a vassal) in 1259.

    Kublai Khan, Great Khan, Emperor of China, and would-be conqueror of Japan.

    Though China would not be completely subjugated until 1279, the Mongol position in Asia was strong enough that Kublai could turn his eyes elsewhere in search of new conquests. Japan presented a unique challenge; though Mongol armies were dominant on land, they had relatively little power at sea, and Japan, as an island nation, presented an opportunity to enhance Mongol prestige, but came with considerable risk.

    At first, Kublai tried to get the Japanese to submit without a fight. In 1266, he sent an embassy with a letter inviting the Japanese to send tribute. The embassy was turned away without even delivering its letter. Kublai, apparently not believing that a Mongol embassy would be treated so disrespectfully, sent another mission which met with similar stonewalling.

    In 1269, Kublai sent a third mission, this time to the island of Tsushima, demanding to know why there had been no response to his earlier letters. At this point, the Imperial court in Kyoto got nervous and suggested that it might be better to deal with the Mongols diplomatically. However, the Hojo Regents in Kamakura rejected this approach; a letter was apparently drafted, but evidently never sent.

    The Mongol Cometh.

    Several more attempts at diplomacy were made, but all came to nothing. The Shogunate seems to have taken the threat of invasion seriously as early as 1268, though, and began preparing defences. In China, the first serious preparations weren’t made until 1274, when Kublai and the Mongols(more correctly, the Yuan Dynasty at this point) began the mobilisation of troops, ships and supplies.

    The first invasion force made landfall on the island of Tsushima in November 1274, but it’s not entirely clear how big the opposing forces were. As is common with these things, the numbers vary wildly, with Chinese sources saying the Japanese have over 100,000 warriors, whilst the Japanese claim to have been outnumbered 10 to 1, both of which are clearly exaggerations.

    Most scholars put the total Mongol forces at around 30,000 (including sailors), but what is certain is that they quickly conquered Tsushima and nearby Iki Island, using them as a base for stage two of their plan. Mongol forces (around 6000) landed at Hakata Bay, in modern Fukuoka, on November 19th.

    Here we see the mismatch in fighting styles between the Mongols and Japanese. The Japanese tried to fight in their own way, with individuals announcing themselves and seeking challengers from the opposing side until one side overcame the other. The Mongols, however, fought as units, not individuals, and they made use of early gunpowder weapons, like primitive hand grenades, which terrified the Japanese and their horses and disrupted their tactics.

    “According to our manner of fighting, we must first call out by name someone from the enemy ranks, and then attack in single combat. But they (the Mongols) took no notice at all of such conventions; they rushed forward all together in a mass, grappling with any individuals they could catch and killing them.” – Hachiman Gudokan

    The Japanese fought bravely, but were outmatched by Mongolian tactics and gunpowder weapons.

    The fighting was brief and badly organised, and though the Mongols were able to drive the Japanese back and even burn Hakata, they made no further progress. Overnight, apparently fearing a Japanese counterattack, the Mongols retreated to their ships, and by the next morning, they were gone.

    Japanese sources say that unfavourable winds blew the Mongol fleet back out to sea, whilst Chinese sources make reference to a storm that scattered the fleet either in Hakata Bay or when it was on its way back to Korea.

    Either way, the first Mongol invasion was over. There are no reliable accounts of Japanese losses, though they appear to have been heavy, especially on Tsushima, where the Mongols killed and burned everything before them. As for the Mongols, they may have lost up to half their forces, though again, the sources aren’t entirely clear.

    Scholars disagree about whether this first ‘invasion’ was an actual attempt to conquer territory in Japan, or was instead a reconnaissance in force, designed to test the fighting abilities of the Japanese before a major effort was launched.

    The Empire Strikes Back

    The Japanese at the time certainly believed that the Mongols would be back, and as soon as the last invader disappeared, preparations were made for their return. Potential landing sites in Kyushu were fortified with castles, and stakes were driven into river beds, and at Hakata, a 2-meter wall, the Genko Borui, was built to prevent a second sacking of the city.

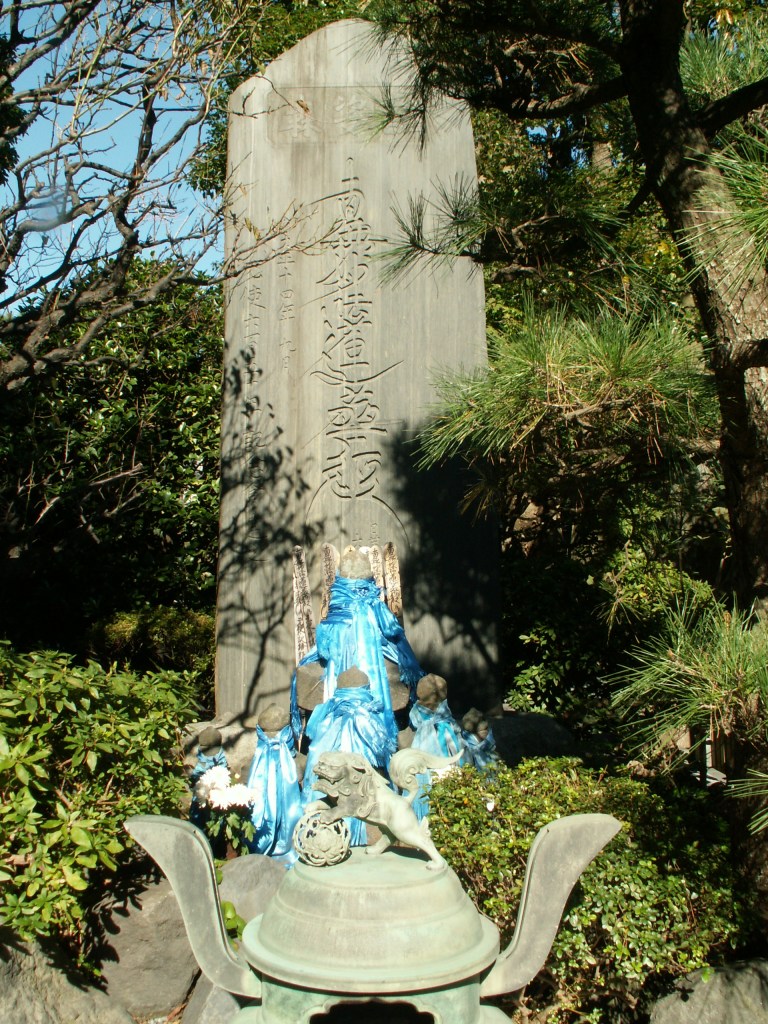
    For his part, Kublai made another attempt at diplomacy and dispatched another embassy, which had orders to refuse to leave until an answer was received. They certainly got an answer when the regent of the day, Hojo Tokimune, had them beheaded. Their graves can still be seen at Joryu-ji Temple in Fujisawa.

    The stele marking the graves of the envoys, in Fujisawa.
    By kamakura – Self-photographed, CC BY-SA 3.0, https://commons.wikimedia.org/w/index.php?curid=3082856

    Another embassy was sent in July 1279 and met the same fate, this time at Hakata, and in 1280, Kublai gathered his men, and together they made plans for a second invasion of Japan.

    By this time, China had been fully conquered, and using his newly acquired resources, Kublai was able to amass more than 1500 ships, and 100,000 men, with a further 40,000 in Korea. These numbers are probably exaggerated, but it does go some way towards showing how large the invasion was when compared to the first.

    The Mongol forces were divided into two: the Eastern and the Southern Army. The Eastern Army landed on Tsushima again in June, and once again, the island and nearby Iki Island were quickly conquered. The Eastern Army was supposed to wait for the Southern Army, but its commanders instead attacked Kyushu directly, landing at Hakata and nearby Nagato Province (in modern Yamaguchi Prefecture).

    The attack in Nagato was a failure, and the one at Hakata ran into the wall that had been built for that purpose. The Japanese had learned their lesson; they no longer sought out individual battles with the Mongols, instead remaining behind their defences and driving the invaders back with their bows (the preferred weapon of the Samurai at the time).

    The Mongols landed, but couldn’t overcome determined Japanese defenders, who had learned their lesson.

    Though driven back, the Mongols busied themselves with occupying the abundant islands around northern Kyushu, turning some of them into bases from which they raided the mainland. The Japanese lacked the naval strength to face the Mongol fleet directly, and instead launched night attacks on Mongol ships, inflicting minor damage and proving to be a nuisance rather than a serious strategic threat.

    The situation got worse for the Japanese when the Mongol Southern Fleet finally arrived, and the combined fleets based themselves at Takashima Island, where they made plans to renew the attack on Kyushu.

    At the same time, an army of some 60,000, dispatched by the Shogun to oppose the invasion, was making its way towards Kyushu, but before it reached Chofu, where it intended to cross from Honshu (Japan’s main island) to Kyushu, the weather had intervened.

    And they were scattered.

    In mid-August, the weather took a sudden turn, experienced sailors amongst the Mongol Fleet recognised the signs sought cover in Imari Bay, but it was already too late. On August 15th, a typhoon smashed into the Mongol Fleet, devastating it; those ships not sunk outright were stranded ashore where the Japanese made short work of their crews.

    The few Mongol ships that managed to survive the storm limped back across the sea to Korea, with some Chinese sources claiming that the losses may have been as high as 90%. The Mongol Invasion of Japan had failed, and though there were discussions about mounting a third attempt, they came to nothing, and Japan would remain free of foreign occupation until 1945.

    Despite having seen off the invasion, the Shogunate and the Hojo Regents were in no position to celebrate. Traditionally, warriors, victorious in war, were granted land taken from their defeated enemies, or at least could expect a share of the loot.

    The problem was that there was no land, and precious little loot to be shared out, and this led to growing resentment amongst the men who had actually done the fighting and dying and the popularity and prestige of the Shogunate was badly shaken.

    Another consequence of the failed invasion was a sharp rise in Japanese amongst the Wako, pirates who were a serious problem for coastal Chinese communities for decades afterwards, so much so, that Wako raids were cited as one of the reasons for an eventual Chinese ban on trade with Japan, though that would come long after the Mongol Yuan Dynasty had fallen.

    In Japan, too, the unsuccessful invasion led to some significant changes. Firstly, the belief that Japan was a land with divine protection became widespread, with the Kamikaze (literally, Divine Wind) being cited as the source of the Typhoon that had smashed the Mongol Fleet.

    Military technology was changed too; prior to the invasion, the Samurai had favoured the bow or spear as their primary weapon. When forced to fight up close with the Mongols, their swords were found to be too easily bent or broken, and this led to innovations in sword manufacturing that produced shorter, lighter, but stronger blades, giving birth to the iconic swords we know today.

    The Hojo and their puppet Shoguns would continue to rule Japan for decades after the threat of invasion had passed, but their rule was shaky, and the 14th century would see them face their final challenge, one of their own.

    Sources
    https://ja.wikipedia.org/wiki/%E5%85%83%E5%AF%87
    https://en.wikipedia.org/wiki/Mongol_invasions_of_Japan
    https://en.wikipedia.org/wiki/Kublai_Khan

    Not that many this week, eh?

  • The Genpei War

    Oh yes, here we go, a good old-fashioned war post! All those posts about economic and social decline are finally paying off! Let’s get into it!

    So, as we’ve discussed, by the mid-12th Century, the Imperial Court was in a bad way. Over the centuries, the throne had been dominated by one powerful clan after another, who would marry into the Imperial family again and again in order to maintain that domination, at the cost of turning their gene pool into more of a muddy puddle. Luckily, Heian Era Japan didn’t have a concept of genetics, so I’m sure it was fine.

    The first of these families had been the Soga, who had been overthrown by the Fujiwara in the Isshi Incident in 645. The Fujiwara had had more or less complete control until the Emperors started abdicating to become insei, that is, cloistered Emperors, or an Emperor with all the power of the throne and none of the restraints that the Fujiwara had taken advantage of.

    With the Fujiwara weakened, their enemies started circling. The Hogen Rebellion in 1156 marked the end of Fujiwara power, as the rival Taira and Minamoto families teamed up to take them down. In a betrayal that will surprise no one, the Taira then shafted the Minamoto in the post-rebellion settlement, taking most of the power and the influence over the Emperor for themselves.

    The Minamoto were understandably a bit put out by that, so they launched a rebellion of their own in 1160. The so-called Heiji Rebellion failed, and the Minamoto were effectively wiped out, their leadership either killed or banished to the provinces.

    For the next 20 years, the Taira ruled as the Fujiwara had, but the problem with a violent takeover is that once one group does it, everyone wants to have a go. The Taira, like the Fujiwara before them, became overly enamoured with court life and neglected the provinces.

    This was unfortunate because, as I mentioned earlier, it was the provinces to which the Minamoto had been banished, and they weren’t in a forgiving mood when it came to the Taira.

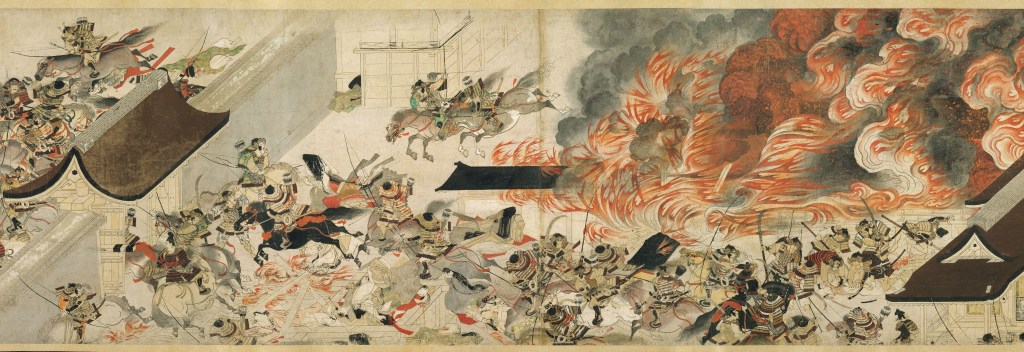
    The Heiji Rebellion in 1160 marked the triumph of the Taira over their Minamoto rivals, at least temporarily.

    The leader of the Taira at this point was Kiyomori. He had led the Taira forces that had overthrown the Fujiwara and then seen off the Minamoto, and he was probably feeling pretty pleased with himself. Using his influence (and presumably the implicit threat of force), he rose through the ranks at court, eventually becoming Daijo-Daijin, which was basically the head of the government and second only to the Emperor (in theory).

    Now, there had obviously been Daijo-Daijin before Kiyomori, but he was significant because he was the first from the buke or warrior families to rise to that rank. Previously, the formal ranks of the Imperial Bureaucracy had been held by members or allies of the Fujiwara, and Kiyomori was an outsider who was seen as having used martial strength to gain his position, which was true, to be fair.

    In 1171, Kiyomori cemented his power at court by having his daughter, Tokuko, marry Emperor Takakura. Now, none of this was particularly new; the Fujiwara had been doing it for centuries, after all, but Kiyomori was different; he was a thug.

    The Fujiwara, for all their faults, had always played the game properly. They knew the rules, understood court etiquette, wrote beautiful poems, all that stuff. Kiyomori wasn’t like that. He’d taken power through military strength, and that was how he intended to keep hold of it. He wasn’t afraid to throw his weight around, and it was a risky business to oppose him.

    In 1177, in response to an alleged coup (the Shishigatani incident), Kiyomori ordered the arrest of dozens of conspirators. That these conspirators were all people who had reason to be offended by Kiyomori was convenient, and some sources speculate that the plot never existed at all, as it appears to have relied entirely on the testimony of a single monk, who Kiyomori had tortured and then beheaded.

    Regardless of whether it was real or not, Kiyomori had reinforced his power. Those who had ‘opposed’ him were dead or exiled, and he filled the vacant posts with family members and allies, further cementing his power and the fury of the opposition against him.

    In 1178, Tokuko gave birth to a son, Antoku, and Kiyomori decided it’d be a good time to remind everyone at court who was really in charge. The so-called Political Crisis of the Third Year of the Jisho Era (which is a bit easier to say in Japanese, I assure you) was basically a military coup d’etat. Kiyomori brought thousands of his warriors from the provinces to the capital and took over.

    There was no longer any pretence, Kiyomori was dictator in all but name, and shortly after the coup, he had Emperor Takakura abdicate in favour of the two-year-old Antoku, who obviously couldn’t rule himself, at which point Kiyomori kindly stepped in as regent.

    You remember what I said about violent takeovers? Well, Kiyomori was about to learn that lesson. The Taira had driven out the Minamoto, but they hadn’t destroyed them, and for twenty years, Kiyomori had ruled in such a way that he alienated just about everyone.

    In 1180, Prince Mochihito, who had been in line for the throne before Kiyomori raised the infant Antoku in his place, raised his banner in rebellion, calling for the opponents of the Taira to gather an army and march on the capital. Unfortunately, for Mochihito, his plan was discovered, and he was forced to flee, eventually arriving at the temple of Mii-Dera in Nara.

    What follows is largely recorded in The Heike Monogatari, which is a pretty epic read, but is largely a fictionalised account of the war, presenting an idealised version of events, in which heroic warriors do heroic things against impossible (and often implausible) odds.

    What we do know is that Mochihito, outnumbered and overwhelmed, was defeated at the Battle of Uji, just outside modern Kyoto, where he was either killed or executed shortly afterwards. Despite his unsuccessful attempts at raising an army, Mochihito’s call to arms did serve to galvanise the opposition to the Taira.

    Prince Mochihito, whose failed rebellion and death at the Battle of Uji served to inspire the opposition to Taira rule.
    ColBase: 国立博物館所蔵品統合検索システム (Integrated Collections Database of the National Museums, Japan), CC 表示 4.0, https://commons.wikimedia.org/w/index.php?curid=92525963による

    It is at this point that Minamoto no Yoritomo enters the stage, he definitely deserves a post of his own, but the short version is that he was 13 in 1160, and the Taira, perhaps feeling pity over his youth, hadn’t executed him, banishing him to the provinces instead.

    Yoritomo, however, had a long memory, and he had spent the last twenty years gaining strength, first over his own clan, and then the surrounding area. His base was the city of Kamakura, in modern-day Kanagawa Prefecture, and it was a relatively long way from the capital.

    When news of Uji reached him, Yoritomo set off looking for a fight. He called for help from the surrounding clans, and although there seems to have been some support, very few actually showed up to fight. In September 1180, Yoritomo had managed to gather just 300 men, and he was attacked by a force ten times that size at the Battle of Ishibashiyama.

    Despite this defeat, Yoritomo was able to escape by sea to Awa Province (in modern Chiba Prefecture), from where he would continue the fight. Meanwhile, the Taira, under Kiyomori, sought to take revenge against the monks who had hidden Prince Mochihito, and attacked and burned the city of Nara.

    Meanwhile, Yoritomo’s uncle was defeated at the Battle of Sunomatagawa in June 1181. The story goes that the Minamoto tried to sneak across a river at night in order to attack the Taira on the other bank. Apparently, their plan failed because Taira sentries were able to distinguish friend from foe by checking who was wet, or not. That seems like remarkable awareness for a battle in the dark, but regardless, the Minamoto failed to surprise the Taira and were defeated.

    Later that year, Yoritomo’s cousin (and sometimes rival) Yoshinaka raised an army in the north and defeated the Taira army sent to stop him, after which, fighting died down for a while.

    Taira no Kiyomori had died earlier in 1181 (the story goes that his fever was so hot anyone who tried to tend him would be burned), and not long after, a famine broke out that would spread across the nation. You can’t fight if you can’t eat, and so what followed was a two-year lull in the fighting, which I imagine wasn’t much comfort to the starving peasants.

    The fighting would resume in 1183, and the Taira would have some initial success, but at the Battle of Kurikara Pass in June of that year, the Taira were decisively defeated, and the momentum shifted to the Minamoto. It was Yoshinaka (Yoritomo’s cousin) and Yukiie (Yoritomo’s Uncle, but not Yoshinaka’s father, I know, it’s confusing) who actually led the Minamoto to the capital.

    As Kiyomori was dead, it fell to his son Munemori to lead the defence of the city. He did this by taking young Emperor Antoku and fleeing west, as you do. It was at this point that the cloistered Emperor, Go-Shirakawa (yeah, he’s still alive at this point!) threw in his lot with Yoshinaka and the Minamoto, calling on them to pursue and destroy the Taira.

    Unfortunately, Yoshinaka had different plans. Fancying himself the rightful leader of the Minamoto, he engaged in a plot against his cousin, Yoritomo, who was by now marching from the East towards the capital. It seems he was initially joined by Yukiie, who then got cold feet and let details of the plot slip.

    Yoshinaka himself became aware that the plot had been discovered and moved first, setting fire to several parts of the capital and taking Go-Shirakawa hostage. It was at this point that Yoritomo’s brothers, Yoshitsune and Noriyori, arrived with a considerable force. They drove Yoshinaka out of the capital, and then killed him at the Second Battle of Uji , bringing an end to the Minamoto Clan’s feuding (for now.)

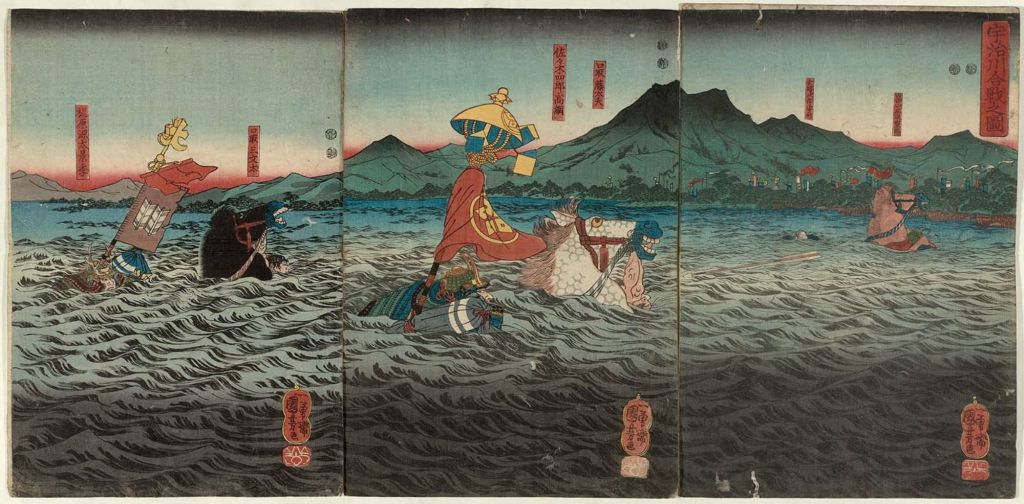
    A scene from the Second Battle of Uji. The bridge had been pulled up, hence the need to swim.

    After this, the momentum was decisively on the side of the Minamoto. They pursued the Taira, who had originally set up camp at Dazaifu, in Kyushu, and fortifying their positions around the Inland Sea, which were the lands the Taira had originally held.

    The Minamoto went on the offensive and defeated the Taira at the Battle of Ichi-no-Tani, near modern-day Kobe, followed up by another victory at Kojima. These successes allowed the Minamoto to drive the Taira out of their strongholds along the coast of the Inland Sea.

    The Taira, in possession of what was apparently the only navy in Japan at the time, and certainly the strongest, retreated to Shikoku, knowing that the Minamoto couldn’t follow. The Minamoto weren’t going to just let the Taira get away, however, and although it took time, they built up their naval strength before launching an attack at Yashima, in modern-day Takamatsu, that took the Taira fortress there, which had also been used as a makeshift palace for Emperor Antoku.

    Driven out of yet another stronghold, the Taira took to their ships and fled. The Minamoto would catch up to them at Dan-no-Ura, in the Straits of Shimonoseki. If you believe the Heike Monogatari (which you shouldn’t), then the Minamoto had 3000 ships to the Taira’s 1000. According to the Azuma Kagami, which is a biased by slightly more believable source, the forces were actually around 800 to 500, which are still considerable forces, but a bit more plausible.

    Despite being outnumbered, the Taira had home advantage and knew the tides and currents better than their foes. They also had the Emperor with them, which they assumed would give their side more legitimacy and encourage their men to fight harder.

    It was a good idea in theory, but it didn’t work. Though the tides were initially in the Taira’s favour, they turned, as tides do, and one of the Taira’s commanders turned as well, as men often do. Surrounded and attacked from all sides, the Taira began committing suicide en masse. One of those who died was six-year-old Antoku. The story goes that his grandmother, Taira no Kiyomori’s widow, took the boy in her arms and jumped with him into the sea. Neither was seen again.

    The Taira also tried to get rid of the Imperial Regalia, tossing them overboard. However, they apparently only managed to dump the mythical Kusanagi Sword and the Yasakani Jewel. The Yata no Kagami, a sacred bronze mirror, was apparently saved when the woman who tried to throw it overboard was killed when she accidentally looked at it.

    All three items were apparently recovered, either on the day of the battle or later, by divers. They are supposedly housed at the Ise Shrine in Mie Prefecture. The fact that no one has been allowed to see the artefacts since Dan-no-Ura is apparently just a coincidence.

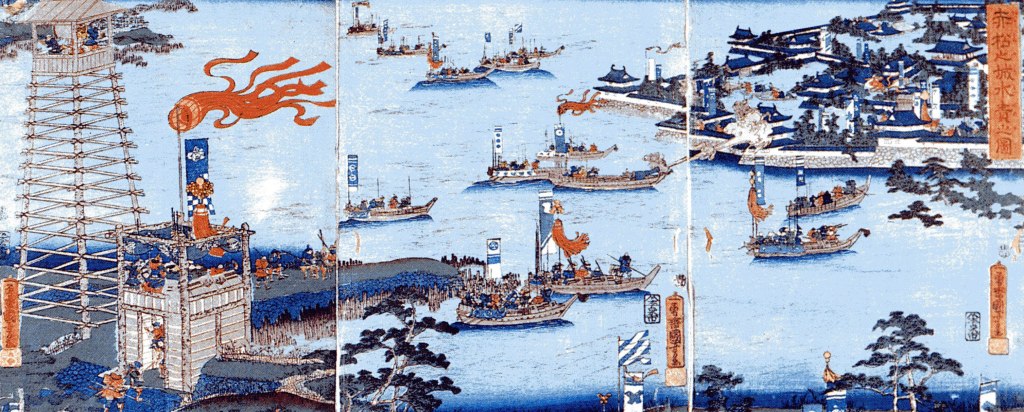
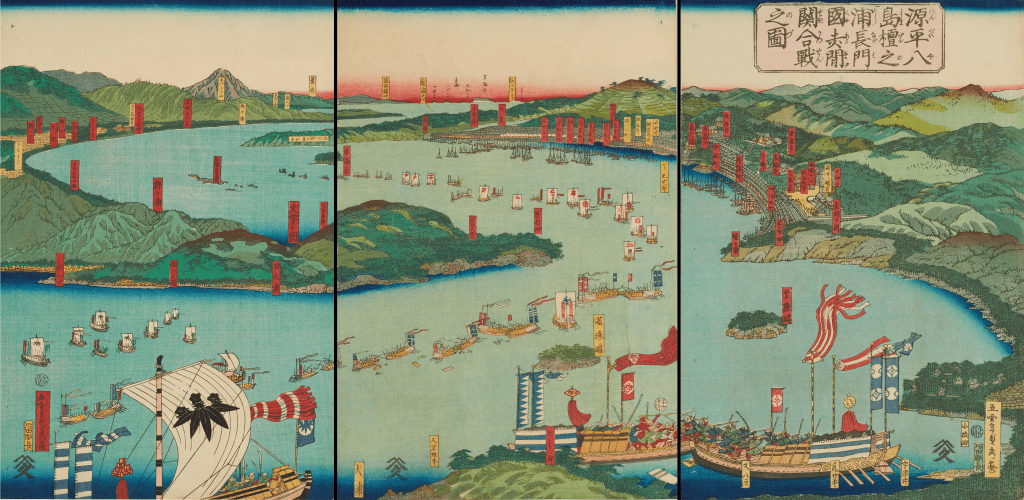
    A later illustration of the Battle of Dan-no-Ura, which brought an end to Taira control of Japan.

    The result of Dan-no-Ura was the end of the Taira as a serious political force. Later that year, the Emperor Go-Shirakawa gave Minamoto no Yoritomo the right to collect taxes and appoint officials, effectively handing control of the state over to him.

    Though it would be some years before Yoritomo would take the formal title, the Genpei War marks the time at which control of Japan shifted from courtiers and Emperors to warriors under a supreme military commander who took a title that had first been used in the earliest days of Imperial rule in Japan, Sei-i Tai Shōgun.

    Cue dramatic music

    Sources
    https://en.wikipedia.org/wiki/Battle_of_Dan-no-ura
    https://en.wikipedia.org/wiki/Battle_of_Uji_(1184)
    https://en.wikipedia.org/wiki/Azuma_Kagami
    https://ja.wikipedia.org/wiki/%E5%B1%8B%E5%B3%B6%E3%81%AE%E6%88%A6%E3%81%84
    https://en.wikipedia.org/wiki/Battle_of_Yashima
    https://ja.wikipedia.org/wiki/%E4%B8%80%E3%83%8E%E8%B0%B7%E3%81%AE%E6%88%A6%E3%81%84
    https://ja.wikipedia.org/wiki/%E8%97%A4%E6%88%B8%E3%81%AE%E6%88%A6%E3%81%84
    https://ja.wikipedia.org/wiki/%E6%BA%90%E8%A1%8C%E5%AE%B6
    https://ja.wikipedia.org/wiki/%E5%80%B6%E5%88%A9%E4%BC%BD%E7%BE%85%E5%B3%A0%E3%81%AE%E6%88%A6%E3%81%84
    https://en.wikipedia.org/wiki/Battle_of_Kurikara_Pass
    https://en.wikipedia.org/wiki/Minamoto_no_Yukiie
    https://en.wikipedia.org/wiki/Minamoto_no_Yoshinaka
    https://en.wikipedia.org/wiki/Battle_of_Sunomata-gawa
    https://en.wikipedia.org/wiki/Battle_of_Ishibashiyama
    https://ja.wikipedia.org/wiki/%E4%BB%A5%E4%BB%81%E7%8E%8B
    https://en.wikipedia.org/wiki/Prince_Mochihito
    https://en.wikipedia.org/wiki/Emperor_Takakura
    https://en.wikipedia.org/wiki/Emperor_Antoku
    https://en.wikipedia.org/wiki/Taira_no_Kiyomori
    https://en.wikipedia.org/wiki/The_Tale_of_the_Heike
    https://en.wikipedia.org/wiki/Battle_of_Uji_(1180)
    https://ja.wikipedia.org/wiki/%E6%B2%BB%E6%89%BF%E3%83%BB%E5%AF%BF%E6%B0%B8%E3%81%AE%E4%B9%B1
    https://ja.wikipedia.org/wiki/%E6%B2%BB%E6%89%BF%E4%B8%89%E5%B9%B4%E3%81%AE%E6%94%BF%E5%A4%89
    https://en.wikipedia.org/wiki/Shishigatani_incident
    https://ja.wikipedia.org/wiki/%E9%B9%BF%E3%82%B1%E8%B0%B7%E3%81%AE%E9%99%B0%E8%AC%80
    https://en.wikipedia.org/wiki/Genpei_War
    https://en.wikipedia.org/wiki/Minamoto_no_Yoritomo