Tag: Sengoku diplomacy

  • Lords of the East, Part 4

    Lords of the East, Part 4

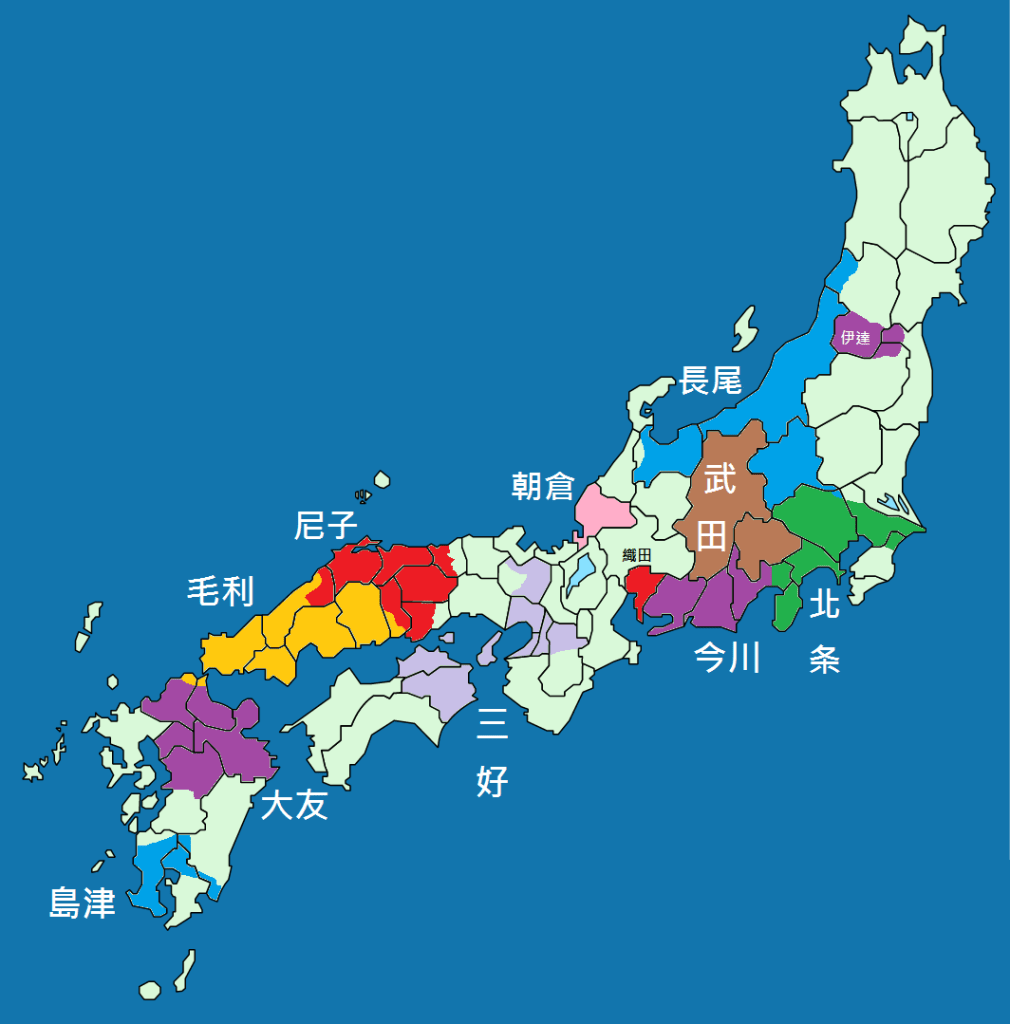
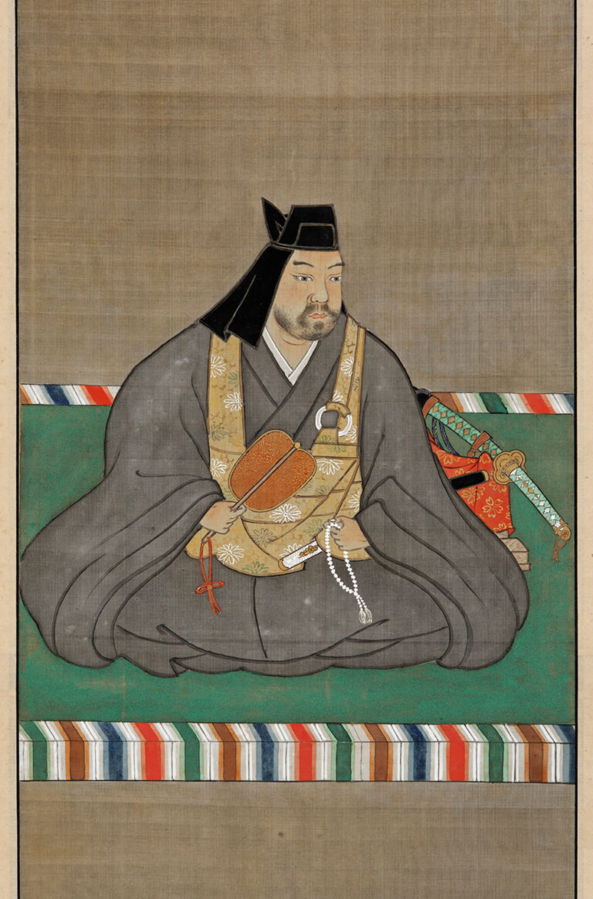
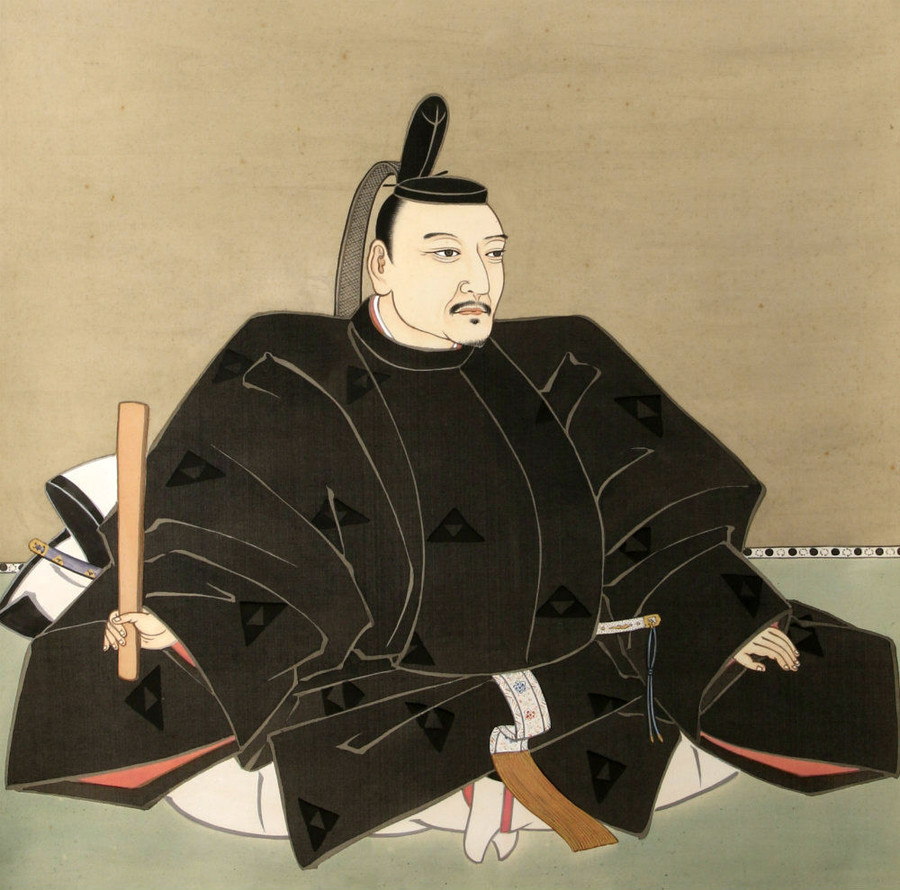
    Hojo Ujiyasu died in 1571, having lived a life in which he had seen the fortunes of his clan rise, fall, and then rise again. His son, Ujimasa, inherited a strong but still dangerous position. Almost as soon as his father had passed, Ujimasa sought to end the war with Takeda Shingen and reestablish an alliance against their mutual enemy, Uesugi Kenshin.

    Hojo Ujimasa

    Shingen, by now in control of Suruga and stronger than ever, agreed, and it didn’t take long for the Hojo and Uesugi to be at each other’s throats again. In 1574, Kenshin invaded the Kanto, but his attention was focused mostly on his conflict with the Takeda, closer to home, and this round of Uesugi-Hojo fighting ended after an indecisive battle at the Tone River.

    With Kenshin busy elsewhere, Ujimasa turned his attention back to the Hojo’s old enemy, the Satomi, invading Shimotsuke in 1576, and advancing deep into Kazusa the next year. The Hojo clearly had the military advantage, with a vastly superior army and much larger territory. Despite this, the terrain of Kazusa and Awa Province (in the south of modern Chiba) is difficult for military operations, and Hojo supply lines relied either on ships crossing Tokyo Bay, which was difficult even in good weather, or on taking the long way around through Musashi Province (modern Tokyo).

    The terrain of Kazusa and Awa as it appears today. Though the Hojo were stronger, the logistical reality made a long term campaign impossible.
    By certified, CC BY 3.0, https://commons.wikimedia.org/w/index.php?curid=55415779

    Neither of these options was particularly appealing, and what was more, the number of troops that the Hojo would have needed to commit to ending the war decisively would have left their other frontiers unacceptably vulnerable. So, in late 1577, a peace agreement (the Boso Ichiwa) was reached, establishing the border between the two factions and arranging a marriage to seal the deal.

    Although the marriage would end within a few years, with the death of Ujimasa’s daughter, the peace held (more or less). This is demonstrated by the fact that when civil war broke out among the Satomi following Yoshihiro’s death in 1578, the Hojo did not intervene, even though it would have been to their advantage to do so. The peace would eventually come to an end in 1590, but we’re getting ahead of ourselves.

    Uesugi Kenshin, one of the Hojo’s most dangerous foes, also died in 1578, and Uesugi, much like the Satomi, quickly fell into infighting over who would succeed him. This time, the Hojo made some attempts to intervene, as Uesugi Kagetora, one of the candidates, was Ujimasa’s younger brother, who had been adopted by Kenshin as part of the earlier peace deal. Ujimasa’s support for his one-time brother seems to have been quite limited, however, as Hojo forces contented themselves with securing control over Kozuke Province before withdrawing.

    Takeda Shingen had died in 1573, and with the Uesugi and Satomi tearing themselves apart over succession, by 1578, Ujimasa might have been forgiven for thinking that he’d ‘won’ in the Kanto. Unfortunately for him, Shingen’s death led to the disastrous Battle of Nagashino in 1575, in which the Takeda clan’s power was broken, leaving the western approaches to the Kanto open to a new, and far more dangerous, player.

    Oda Nobunaga.

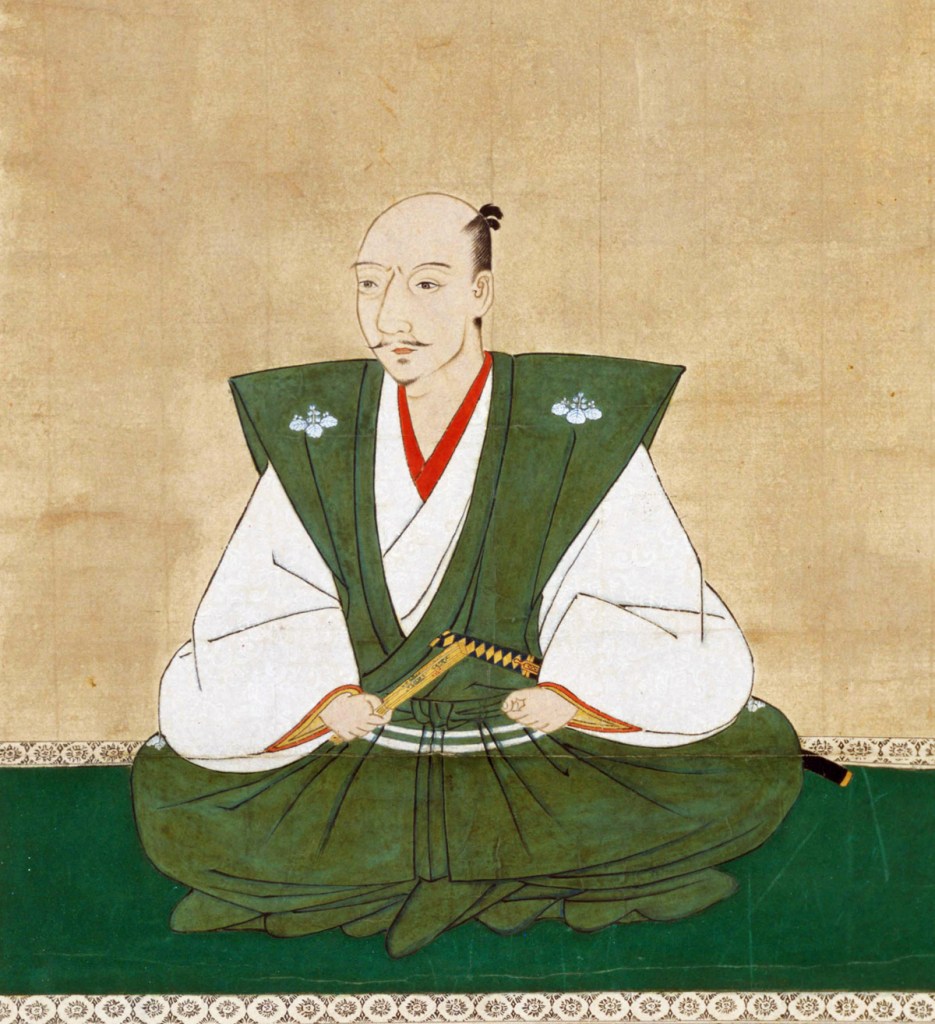
    Oda Nobunaga had risen from obscure origins in Owari Province (around modern Nagoya) to become the preeminent lord in the realm. Though his power was not yet completely unchallenged, by 1578, he was best placed to be the man who would unite the realm and end the Sengoku Jidai. With that in mind, Ujimasa reached out diplomatically, seeking to gain Nobunaga’s favour and perhaps arrange a marriage between the Oda and Hojo. Around this time, he also seems to have ‘retired’ and given control of the clan to his son, Ujinao, whilst in reality retaining actual power for himself.

    For his part, Nobunaga seems to have had little interest in a rapprochement with the Hojo, though his exact plans aren’t clear; it’s reasonable to assume that, much like the Takeda, Nobunaga viewed the Hojo as a rival to eventually be crushed. However, in the short term, he had more pressing concerns in the West, dealing with the powerful Mori Clan, and for now, the Hojo were left alone.

    With Nobunaga’s death in June 1582, everything changed. Taking advantage of the chaos, Ujimasa launched an attack against former Oda loyalists in the Kanto, securing control of the whole of Kozuke Province, and advancing into Kai, where he was met by another power seeking to take advantage of Nobunaga’s death, Tokugawa Ieyasu.

    Tokugawa Ieyasu

    The fighting didn’t go well for the Hojo, but neither side was committed to all-out war, so a peace was agreed upon, which saw Ujimasa’s son, Ujinao, marry Ieyasu’s daughter, Tokuhime. In 1583, following the death of the last Ashikaga Kanto kubo, Ujimasa took the title for himself, positioning the Hojo at the very top of the hierarchy in the Kanto.

    Not long after that, a successful campaign in support of allies in Shimotsuke Province brought the southern half of that province under his control, and Hojo territory reached its greatest extent. By some later estimates, the territory was valued at 2.4 Million Koku, and with control of several key rivers and coastal areas, the Hojo now dominated the political, military, and economic spheres within the Kanto.

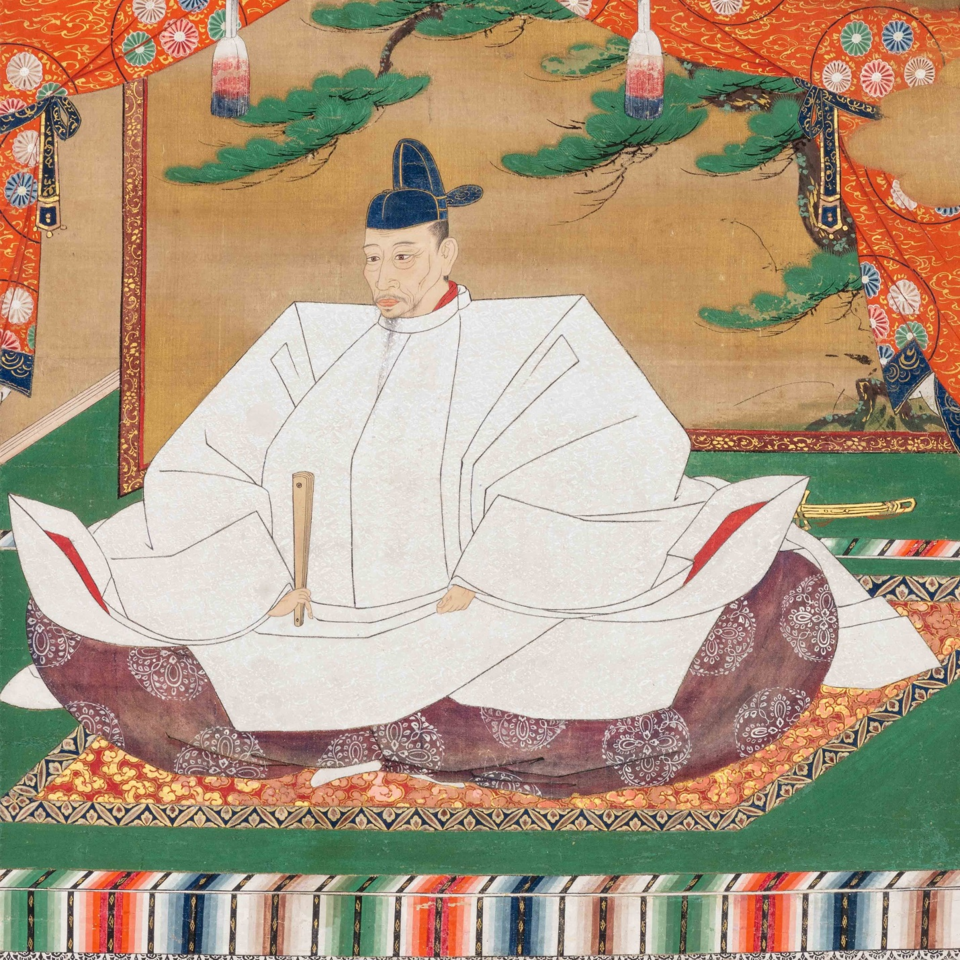
    In 1587, the chaos that had followed Nobunaga’s death had come to an end, with Toyotomi Hideyoshi emerging as the ultimate winner. That year, he issued the Soubujirei or “General Peace Order” commanding that all Daimyo cease private wars, essentially bringing an end to the Sengoku Jidai, at least on paper.

    Toyotomi Hideyoshi

    The Hojo agreed to abide by this order, but there was one outstanding issue. During the fighting in Kai Province in 1582, the Numata Domain, territory of the Sanada Clan, had defied Hojo attempts to conquer it. Though the fighting had largely come to an end, the border remained undefined, and so Hideyoshi dispatched vassals to settle the issue.

    Hideyoshi’s decision was that two-thirds of the territory would go to the Hojo, and the remaining third would remain in Sanada hands. To confirm the arrangement, the powerful Numata Castle was handed over to the Hojo and peace was apparently agreed. However, shortly after this, the new lord of Numata arranged for the defection of nearby Nagurumi Castle, on the Sanada side of the border.

    The site of Nagurumi Castle today.
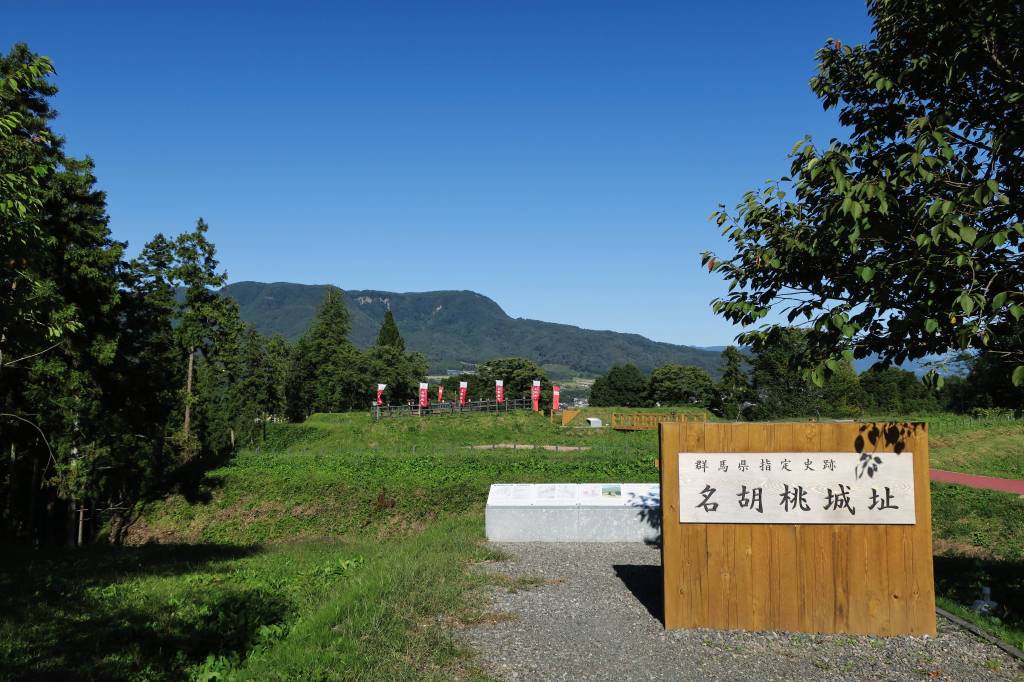
    photo: Qurren (トーク) Taken with Canon PowerShot G9 X – 投稿者自身による著作物, CC 表示-継承 3.0, https://commons.wikimedia.org/w/index.php?curid=63097035による

    The plot succeeded, and Nagurumi was handed over to Hojo forces without a fight. The problem was that this was a clear violation of the peace deal, and things only got worse when Ujinao denied any knowledge of the plot in a letter to Hideyoshi, attempting to present the capture of the castle as a fait accompli.
    Hideyoshi wasn’t about to accept that, and demanded that Ujimasa (retired, but still effective head of the clan) come to Kyoto to explain his clan’s actions.

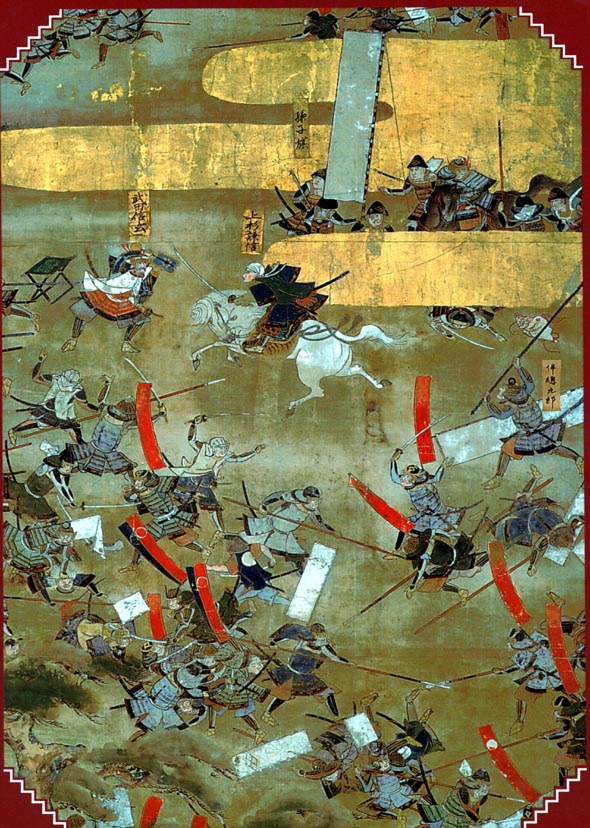
    Ujimasa refused, and Hideyoshi took this as an act of open rebellion. In 1589, he ordered all lords to attack the Hojo as punishment for their defiance. Initial attacks from the Sanada clan were repelled by Hojo forces, but Hideyoshi was able to muster a force in excess of 200,000 men, and when the main attack began, it would be a fight to the death.

    The Odawara Campaign is deserving of a post of its own, I think, so we’ll leave it there for now.

    Sources
    https://ja.wikipedia.org/wiki/%E5%8C%97%E6%9D%A1%E6%B0%8F%E6%94%BF
    https://ja.wikipedia.org/wiki/%E8%B1%8A%E8%87%A3%E7%A7%80%E5%90%89
    https://ja.wikipedia.org/wiki/%E5%B0%8F%E7%94%B0%E5%8E%9F%E5%BE%81%E4%BC%90
    https://ja.wikipedia.org/wiki/%E5%90%8D%E8%83%A1%E6%A1%83%E5%9F%8E
    https://ja.wikipedia.org/wiki/%E6%83%A3%E7%84%A1%E4%BA%8B%E4%BB%A4
    https://ja.wikipedia.org/wiki/%E5%8C%97%E6%9D%A1%E6%B0%8F%E5%BA%B7

  • Lords of the East, Part 3

    Lords of the East, Part 3

    First post of 2026, so Happy New Year and thanks for sticking with me!

    The situation in 1560. The Hojo are in Green.
    By Alvin Lee – Own work, CC BY-SA 4.0, https://commons.wikimedia.org/w/index.php?curid=39200926

    By 1560, the Hojo were masters of much of the Kanto. A series of successful military campaigns over the previous decades had given them control over much of the area that now comprises modern-day Tokyo, Yokohama, and Chiba. Unlike today, when these areas are among the world’s most densely populated megacities, in the 16th century they were largely agricultural, with a few castle towns surrounded by vast expanses of farmland.

    It is also true that economic productivity, such as it was, was measured in rice production, with land being valued according to predicted rice output, though not necessarily actual output. In short, despite being a period of incredible violence, Japanese society relied almost entirely on rice production to function. Famine was a constant problem, and in 1560, the Hojo, despite controlling vast tracts of land, were experiencing just how bad a failed harvest could be.

    The so-called Eiroku Famine (named after the era) left the Hojo with no food or money, and military operations largely ground to a halt. It was a real blow then, when Uesugi Kenshin, at the head of an army of 8000 men, crossed the mountains in the North of the Kanto and invaded Hojo territory. Though the Uesugi army was relatively small, the Kanto region had been ruled by them for decades prior to the Hojo conquests, and when Kenshin appeared, dozens of local clans switched sides and flocked to the Uesugi banner.

    Uesugi Kenshin.

    Kenshin swept all before him; the Hojo lost castles in Kozuke, Shimosa, and Musashi, and by early 1561, the Uesugi had taken Kamakura. Then, at the head of an army that was reported to be 100,000 strong, Kenshin laid siege to Odawara, the Hojo capital. At this point, the Hojo were in real trouble, but fate was on their side. Ironically, the same famine that had left them seriously weakened now proved to be their saviour. An army of that size needs supplies, and there were few enough to be had in the Kanto, so it wasn’t long before the Uesugi began to melt away.

    The fortress of Odawara was one of the strongest in the realm, and with his army already shrinking, Kenshin faced a difficult choice. A long siege might fatally weaken his army, and even a successful assault could prove hugely costly. Then news arrived that his old enemy, Takeda Shingen, had invaded his home province, at the same time as stirring up a rebellion amongst the Ikko-Ikki, forcing Kenshin to return home post-haste.

    The Hojo had been saved by a combination of good luck and excellent timing on the part of Takeda Shingen, and despite their weakened state, Ujiyasu wasted no time in taking advantage of the reprieve. No sooner had Kenshin returned north than Hojo forces began the process of reconquering their lost territory. Most of the smaller clans that had joined the Uesugi now switched their loyalties back to the Hojo. This was a fairly common practice at the time; there were dozens, if not hundreds, of minor clans all over Japan who could never muster the strength to assert themselves against the power of a Daimyo, so their loyalty often proved to be a fickle thing, prioritising flexibility and survival rather than unquestioned loyalty.

    Takeda Shingen

    Not all the clans welcome the return of the Hojo, however, and Ujiyasu was obliged to dispatch armies to retake several castles in northern Musashi, and he won a decisive victory at the Battle of Mt Ikuno in November 1561, reestablishing the line of control along the mountains in the northern Kanto. Over the next two years, two sides form: a Hojo-Takeda Alliance on one side and a Uesugi-Satomi alliance on the other.

    The Hojo would generally have the better of the fighting in the Kanto, but would prove to be unable to advance further north, whilst the Uesugi would be a constant problem, but would struggle to make advances into the Kanto proper. By 1564, the conflict had largely become a stalemate, so Ujiyasu turned his attention to the East and the Satomi, whom he believed to be a weak link in the alliance.

    Though it might have been true that the Satomi were weaker than the Uesugi, they were no soft touch. When the Hojo crossed the Edogawa River on the way to invading Satomi territory, they were ambushed at the second Battle of Konodai and driven back with heavy losses. You may remember in the last post that the lord of the Satomi, Yoshiaki, had avoided the first Battle of Konodai by correctly identifying the weak position of his allies, retreating with his army intact.

    A later depiction of the area around Konodai.

    At the second battle, however, the command fell to Yoshiaki’s son, Yoshihiro, and he decided to celebrate his victory by distributing wine to his men. A party is a common way to celebrate any success, and the Satomi had successfully driven the Hojo back. The problem was that ‘driven back’ does not mean ‘defeated’; the Hojo regrouped and advanced again in the early hours of the following day.

    The Satomi army, now thoroughly inebriated, was no match for them, and Hojo forces forced the Satomi into a chaotic retreat that didn’t end until the Hojo banner was once again flying over most of Kasuza Province. Shortly after this campaign, Ujiyasu, who had already technically retired as lord of the Hojo in 1559, announced that he had fought his last campaign.

    After this, Ujiyasu seems to have largely limited himself to administration, leaving the business of war to his sons, though he would continue to play an important role in his clan’s future. In 1560, the Imagawa, one part of the triple Takeda-Hojo-Imagawa alliance, had been seriously weakened by the defeat at the Battle of Okehazama in 1560. By 1568, they were on their last legs, and Takeda Shingen, despite being a nominal ally, invaded the Imagawa’s home province of Suruga, aiming to take it for himself.

    Suruga Province
    By Ash_Crow – Own work, based on Image: Provinces of Japan.svg, CC BY 2.5, https://commons.wikimedia.org/w/index.php?curid=1691794

    The Hojo, seeking to support the Imagawa and prevent encirclement by a now hostile Takeda, dispatched an army under Hojo Ujimasa to relieve Suruga. At the same time, Ujiyasu engaged in diplomacy with the Tokugawa Clan, who had lands on the other side of Imagawa territory, and had poor relations with the Takeda. A joint attack by the Hojo and Tokugawa convinced Shingen that holding Suruga was impossible in the short term, and he retreated, with the Hojo moving in and taking large parts of eastern Suruga for themselves.

    Despite this success, the Hojo once again found themselves surrounded on three sides by hostile powers: the Takeda to the West, the Uesugi to the North, and the Satomi to the East. Ujiyasu correctly recognised that if he moved to deal with one threat, the other two would take advantage, and the Hojo did not have the strength for a three-front war. Therefore, he decided to make a formal peace with the Uesugi.

    This was unpopular on both sides because the Uesugi had been enemies of the Hojo more or less from the start, and that kind of bad blood isn’t easily forgotten. However, both sides had bigger problems, namely, Takeda Shingen. Though a ceasefire was agreed upon and the border between the two sides set, the consequences for the Uesugi were that many former allies in the Kanto, like the Satomi, felt betrayed and switched to supporting Takeda Shingen.

    This might not have been such a serious problem for the Hojo, because they were going to have fight the Satomi anyway, but in early 1569, the strategic situation shifted again, when the Takeda and Uesugi made a peace between themselves, meaning that Shingen could now focus his entire strength on the Hojo, whilst also relying on support from the Satomi, and other Kanto clans.

    An image depicting the legendary rivalry between Uesugi Kenshin and Takeda Shingen. Despite this, a peace between the two allowed Shingen to focus on the Hojo.

    Later that year, Shingen invaded Musashi Province and advanced south towards Odawara, the capital of the Hojo. Though they were able to lay siege to the mighty fortress, the chances of taking it were slim. The castle was one of the strongest in the realm, and Ujiyasu had made sure it was as well-defended as possible. Shingen likely understood that taking the castle would have been enormously costly, and he had better uses for his army, so he contented himself with burning the town around Odawara and retreating.

    Ujiyasu ordered his son, Ujimasa, to pursue the retreating Takeda, hoping to trap them before they could return to Kai Province. The plan failed, however, as the Takeda moved faster than expected and the ambush was discovered. At the ensuing Battle of Mimasu Pass, the Takeda successfully fended off the Hojo and returned to Kai.

    Some scholars believe that the whole attempt at Odawara had been an elaborate show of force, meant to impress Shingen’s new allies in the Kanto, or that it was a strategic move to keep the Hojo off balance whilst Takeda forces reinvaded Suruga. Either way, there doesn’t seem to have been much enthusiasm amongst either the Hojo or Takeda to continue the war, and some sources suggest that, shortly before his death, Ujiyasu told his son, Ujimasa, that he should return to a state of peace with the Takeda and make war on their traditional enemy, the Uesugi.

    Hojo Ujimasa

    Ujiyasu himself is supposed to have suffered a stroke in the summer of 1570. Sources from the time speak of him slurring his words or being unable to speak at all, and although he rallied briefly around the New Year in 1571, he would begin to decline again shortly afterwards. There are no official documents bearing his seal after May, and he would eventually pass away in October that year.

    Sources
    https://ja.wikipedia.org/wiki/%E5%8C%97%E6%9D%A1%E6%B0%8F%E6%94%BF
    https://ja.wikipedia.org/wiki/%E5%8C%97%E6%9D%A1%E6%B0%8F%E5%BA%B7
    https://ja.wikipedia.org/wiki/%E5%9B%BD%E5%BA%9C%E5%8F%B0%E5%90%88%E6%88%A6#%E7%AC%AC%E4%BA%8C%E6%AC%A1%E5%9B%BD%E5%BA%9C%E5%8F%B0%E5%90%88%E6%88%A6%EF%BC%88%E6%B0%B8%E7%A6%846%E5%B9%B4%E3%83%BB%E6%B0%B8%E7%A6%847%E5%B9%B4/1563%E5%B9%B4%E3%83%BB1564%E5%B9%B4%EF%BC%89
    https://ja.wikipedia.org/wiki/%E6%AD%A6%E7%94%B0%E4%BF%A1%E7%8E%84
    https://ja.wikipedia.org/wiki/%E4%BB%8A%E5%B7%9D%E7%BE%A9%E5%85%83
    https://ja.wikipedia.org/wiki/%E4%B8%89%E5%A2%97%E5%B3%A0%E3%81%AE%E6%88%A6%E3%81%84
    https://ja.wikipedia.org/wiki/%E5%A4%A7%E5%AE%AE%E5%9F%8E_(%E9%A7%BF%E6%B2%B3%E5%9B%BD)
    https://ja.wikipedia.org/wiki/%E5%B0%8F%E7%94%B0%E5%8E%9F%E5%9F%8E
    https://ja.wikipedia.org/wiki/%E4%B8%8A%E6%9D%89%E8%AC%99%E4%BF%A1
    https://ja.wikipedia.org/wiki/%E9%87%8C%E8%A6%8B%E7%BE%A9%E5%A0%AF
    https://ja.wikipedia.org/wiki/%E6%B1%9F%E6%88%B8%E5%B7%9D
    https://en.wikipedia.org/wiki/Suruga_Province