Tag: Shogunate

  • Memento Mori, Part 2

    Memento Mori, Part 2

    Last time we looked at Mori Motonari, the lord who took his clan from struggling to hold onto their domains to controlling one of the largest territories of any clan during the Sengoku Period. Motonari’s son, Takamoto, died early, and so it would fall to his grandson, Terumoto, to lead the clan after Motonari himself passed in 1571.

    Mori Terumoto

    Terumoto was born in 1553, at a time when his clan, the Mori, were already on the rise. Under the leadership of Motonari, the clan had recently purged the Inoue, who had presented a serious internal threat, obliging Motonari to get rid of them. Shortly before Terumoto was born, the Ouchi, nominal overlords of the Mori, were seriously weakened by an internal coup, allowing Motonari to expand his clan’s power base still further, and not long after that, the Mori would win the decisive Battle of Itsukushima, establishing themselves as the (relatively) unchallenged power in the region.

    Throughout his early life, Terumoto hardly saw his father or grandfather, as both men were frequently on campaign, and the young boy, as the future leader of the Mori, was kept safe, far from the fighting. Takamoto was, by this point, technically the leader of the Mori (though Motonari would remain in control), and when he died suddenly in 1563, Terumoto, just 11 years old, became the nominal head of the clan. Due to his youth, however, Motonari agreed to serve as ‘co-leader’, whilst (again) retaining all the actual power.

    In 1565, as a sign of how far the Mori had risen, Terumoto’s coming-of-age ceremony was attended by an official representative of the Shogunate, lending formal (if only symbolic) prestige to the young man. After this, Terumoto, who was now legally an adult, became the official head of the clan, and from then on, most legal documents carried his signature, though he would continue to defer to his grandfather in practice.

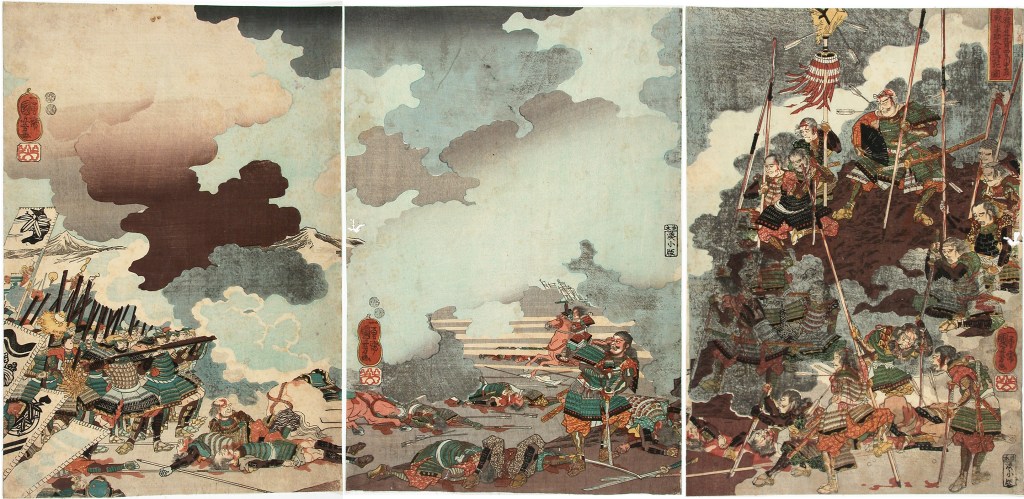
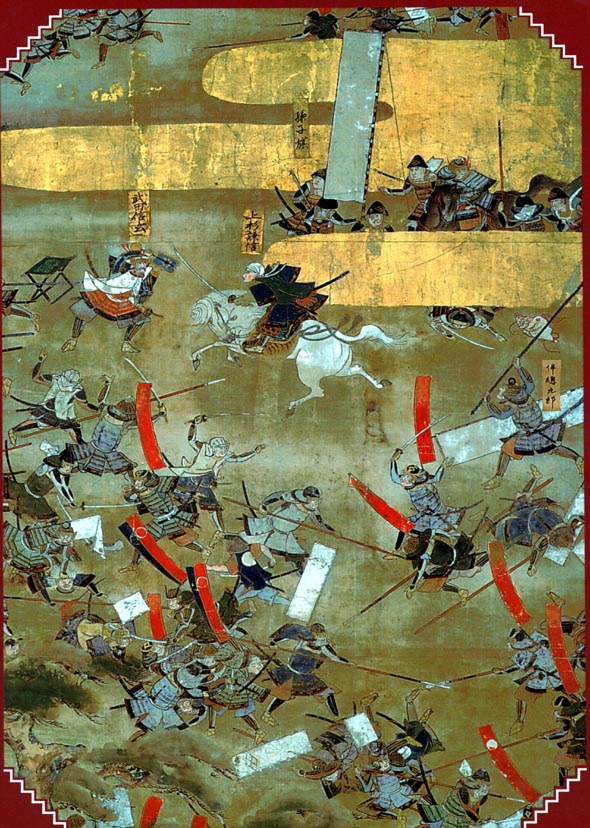
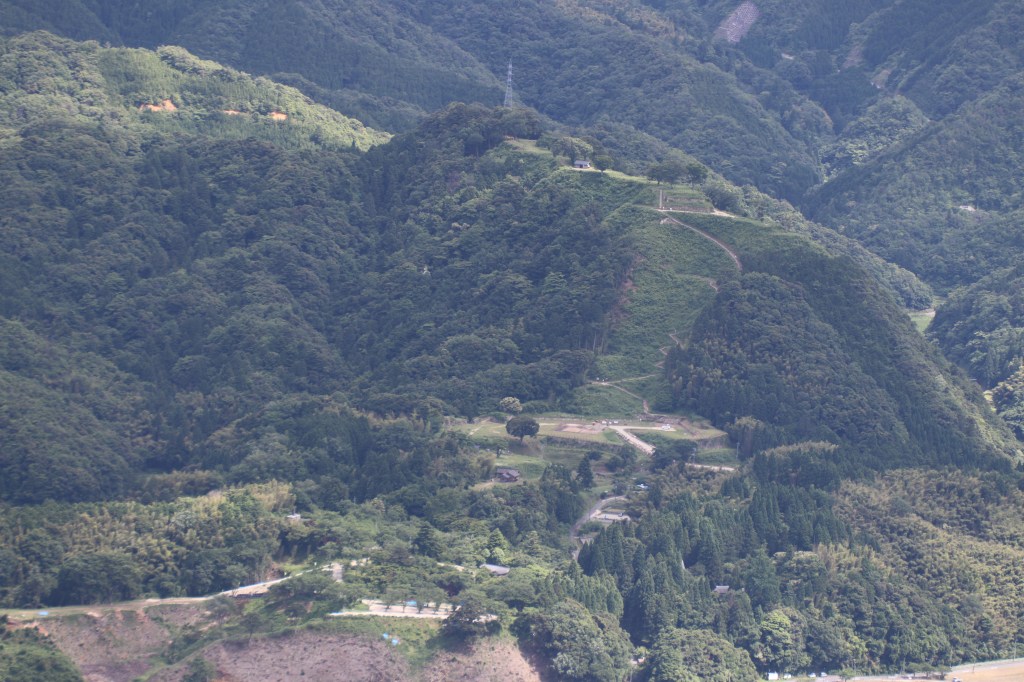
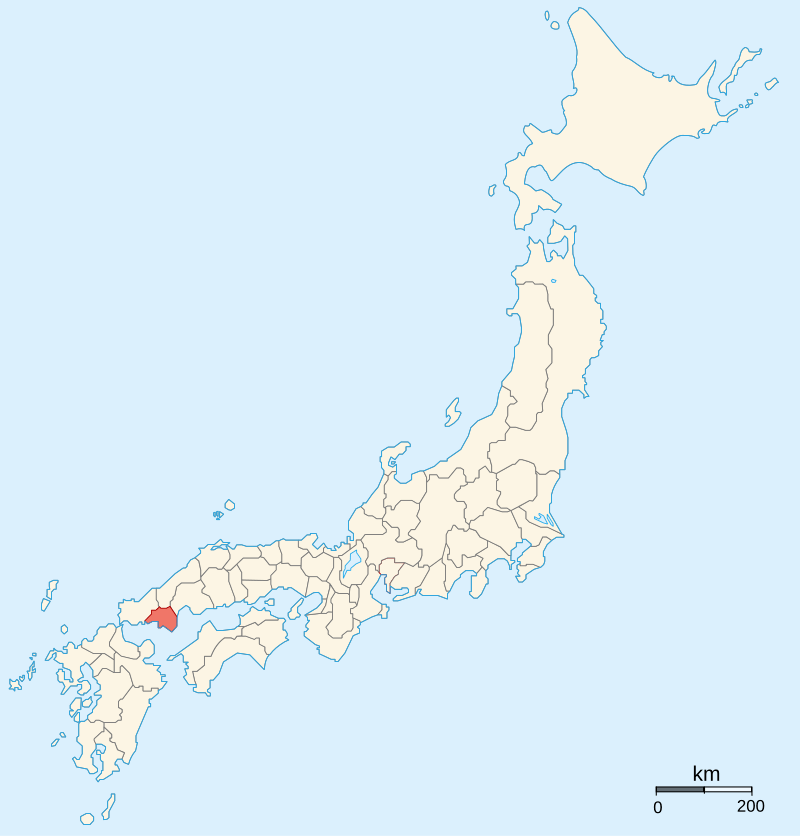
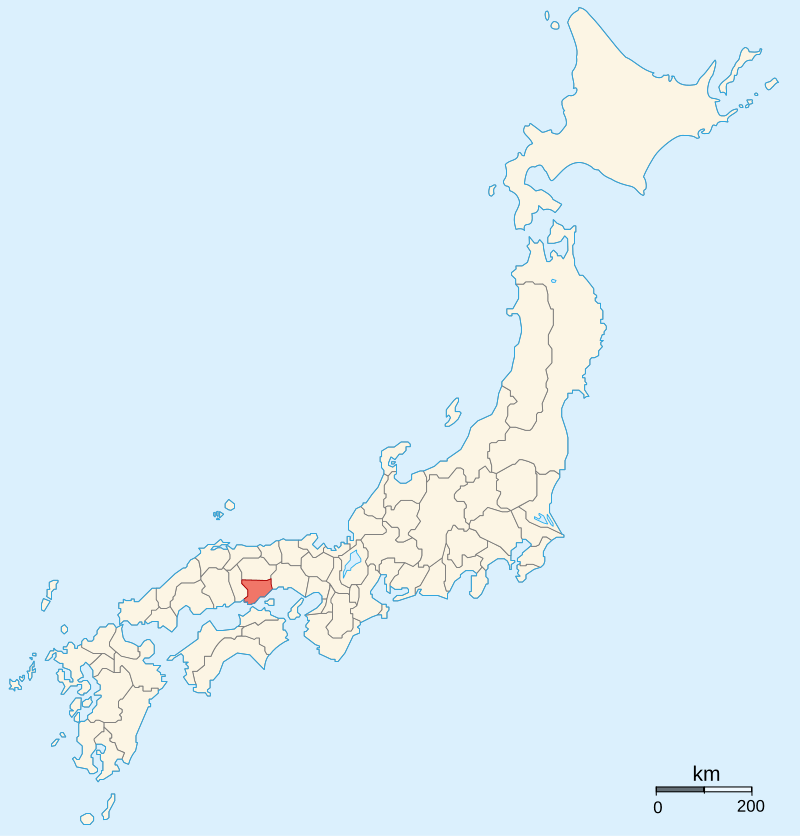
    Later that year, Terumoto would join his grandfather in Izumo Province, taking part in the campaign against the Amago, who had once been strong enough to demand fealty from the Mori, but were now on their last legs. This final campaign against the Amago would be concluded successfully in late 1566, with the surrender of their last stronghold at Gassan-Toda Castle, signalling the end of the war and the Amago Clan.

    The site of Gassan-Toda Castle as it appears today.
    安来市政策秘書課 – 投稿者自身による著作物, CC 表示-継承 4.0, https://commons.wikimedia.org/w/index.php?curid=74692475による

    Despite this victory, an uprising of former Amago retainers would occur in June 1569, followed by a similar uprising amongst former Ouchi warriors in October. These twin uprisings were either instigated or supported after the fact by the Otomo, whom the Mori had been fighting for control of Northern Kyushu with.

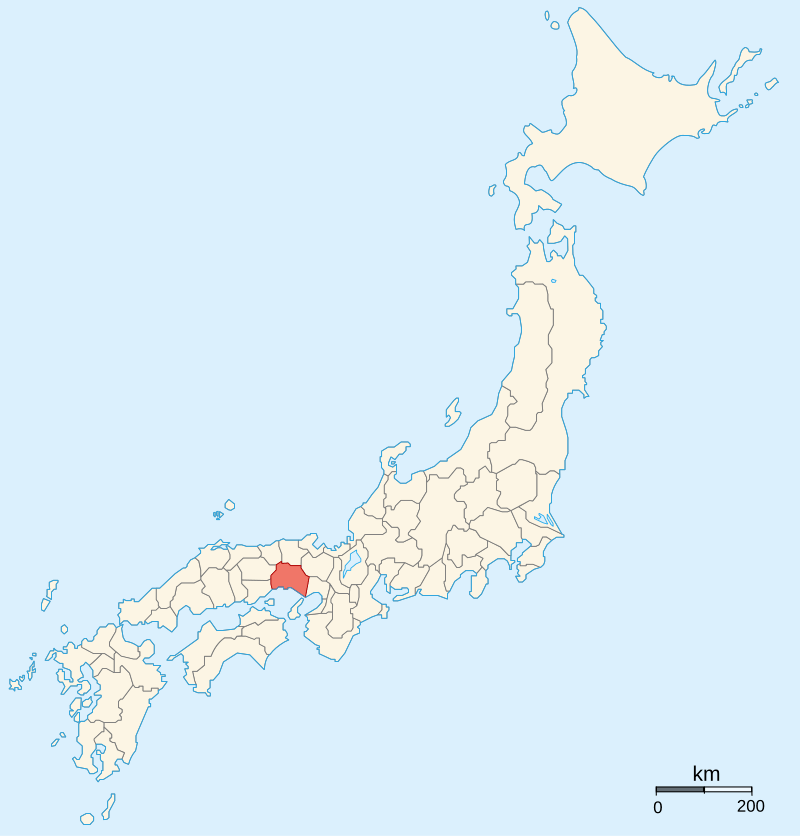
    Mori control of Izumo, Suo, and Nagato provinces was suddenly under serious threat. Withdrawing forces from Kyushu allowed them to quickly deal with the Amago rebellion, but the Ouchi proved a much sterner test, and required the Mori to dedicate even more resources to putting them down. Though victorious in early 1570, the consequences were that the Mori lost all their influence in Kyushu and had to continue a long, bloody campaign, trying to stamp out the embers of the Amago.

    Suo Province
    Izumo Province
    Nagato Province

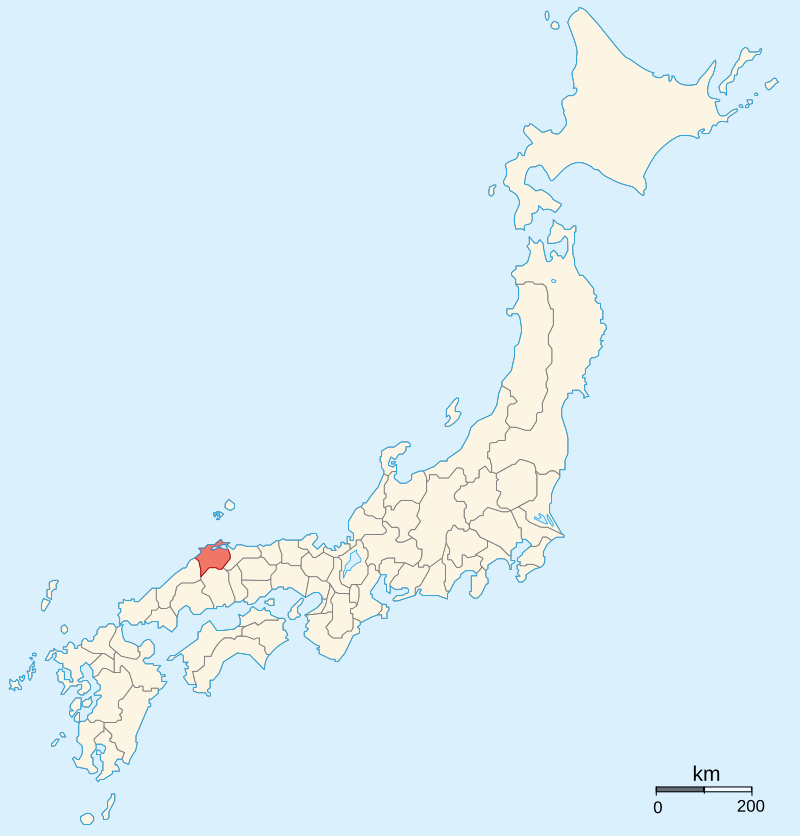
    By Ash_Crow – Own work, based on Image:Provinces of Japan.svg, CC BY 2.5, https://commons.wikimedia.org/w/index.php?curid=1691776

    Around this time, wider events began to have an impact on the Mori as well, bringing them onto the main stage of events in and around Kyoto. Earlier, in 1565, Shogun Ashikaga Yoshiteru was assassinated in what became called the Eiroku Incident, and his replacement, Ashikaga Yoshiaki, went looking for support from the clans further away from the capital.

    In 1568, the new Shogun dispatched a request for aid to several powerful leaders, including Uesugi Kenshin, Oda Nobunaga, and Mori Motonari. The Uesugi and Mori refused, but Nobunaga, based closer to the capital and possessing uncommon ability and ambition, responded positively and dispatched forces to Kyoto.

    Ashikaga Yoshiaki, the last of the troubled Ashikaga Shoguns.

    Not long after that, the Oda and Mori began to cooperate against their common enemy, the Miyoshi (who also happened to be the clan behind the assassination of the previous Shogun, which was handy). Over the next few years, an alliance would be established, and Nobunaga would actually dispatch forces to help the Mori put down the Amago and Ouchi, but beyond that, there would be little direct cooperation.

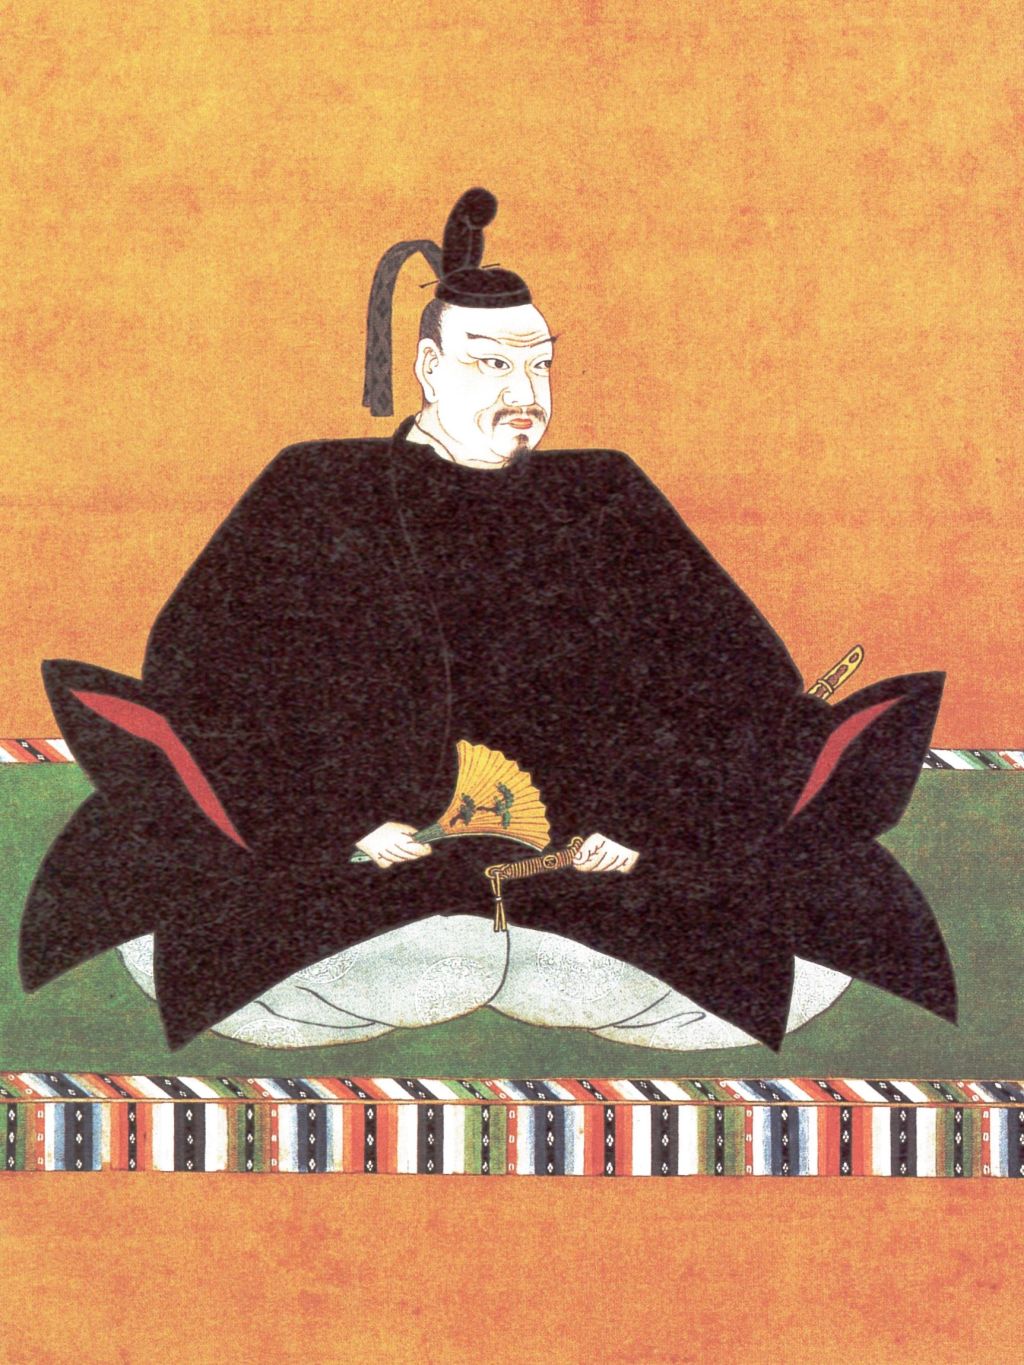
    When Mori Motonari died in 1572, leaving Terumoto to lead the clan alone, relations with Nobunaga were already in decline. Previously, the Mori had sought to use the authority of the Shogun (by now under Nobunaga’s control) to advance their own goals, and for a time, Nobunaga was happy to acquiesce, but after 1572, it became clear that Nobunaga had plans of his own that didn’t necessarily involve the Mori.

    Though the Shogun had largely been under Nobunaga’s control since 1565, at first, it had been a subtle arrangement. Nobunaga was in charge, but Yoshiaki was permitted to still act like the Shogun, even if his commands and proclamations (such as they were) were increasingly screened and eventually written by Nobunaga.

    Oda Nobunaga.

    Yoshiaki didn’t passively accept this, however. His problem was that he had little military strength of his own (a problem for the Ashikaga Shoguns since the very start), and with Nobunaga’s pre-eminent military position, the Shogun needed help. He thought he might find it in the Mori, one of the few clans that had the strength to challenge Nobunaga directly.

    In 1573, at the recommendation of the Shogun, Terumoto was granted the title of Uma no Kami, which translates as “Master of Horse”. Though Imperial titles had long since become little more than baubles, they still carried prestige, and Yoshiaki almost certainly did it to butter the Mori up and bring them over to his side, against Nobunaga.

    Yoshiaki was desperate by this point. Earlier that year, Takeda Shingen, who had agreed to march on Kyoto at least nominally in support of the Shogun, had died suddenly, bringing an end to the prospect of Takeda support. In early Spring, Yoshiaki raised an army anyway, hoping to take advantage of Nobunaga being distracted elsewhere, but instead suffered a series of defeats, which culminated in the Battle of Makishima Castle in July, which saw Yoshiaki exiled from Kyoto.

    The monument at the ruins of Makishima Castle.
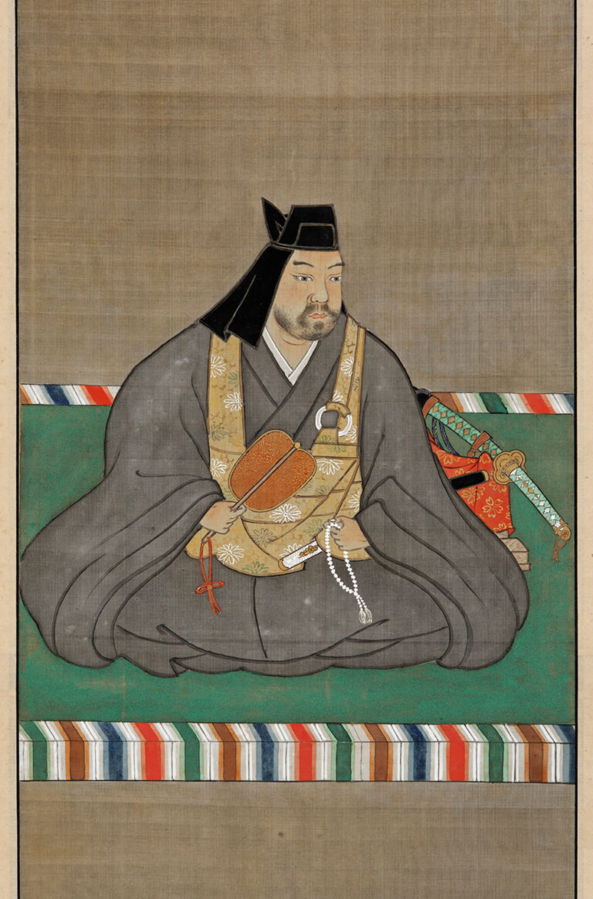
    Muscla3pin – 投稿者自身による著作物, CC 表示-継承 4.0, https://commons.wikimedia.org/w/index.php?curid=77200674による

    Shortly after this, Nobunaga, aware of his vulnerable position, wrote to Terumoto, assuring him that it was the actions of the Shogun that led to Oda troops formally occupying the capital, and that he would do everything he could to maintain peace in the realm. Given that there hadn’t been peace in the realm for more than a century at this point, it leads us to conclude Nobunaga was just being polite.

    Though Terumoto probably eyed Nobunaga’s expansionism warily, the alliance was, for now, convenient for both sides, as it largely secured the border between the two powerful clans and allowed them to carve up the territory of the smaller clans caught in the middle. Terumoto did continue to try to mediate a peace between Yoshiaki and Nobunaga, though neither side seems to have negotiated with much faith.

    Scholars speculate that both Terumoto and Nobunaga wanted to avoid a situation in which the Shogun would flee to Mori territory, Terumoto because had no interest in helping Yoshiaki, but couldn’t rely on some of his more tenuous vassals not making trouble, and Nobunaga for pretty much the same reason, the Mori were one of the few clans strong enough to oppose him, and if they backed the Shogun, Nobunaga might be in trouble.

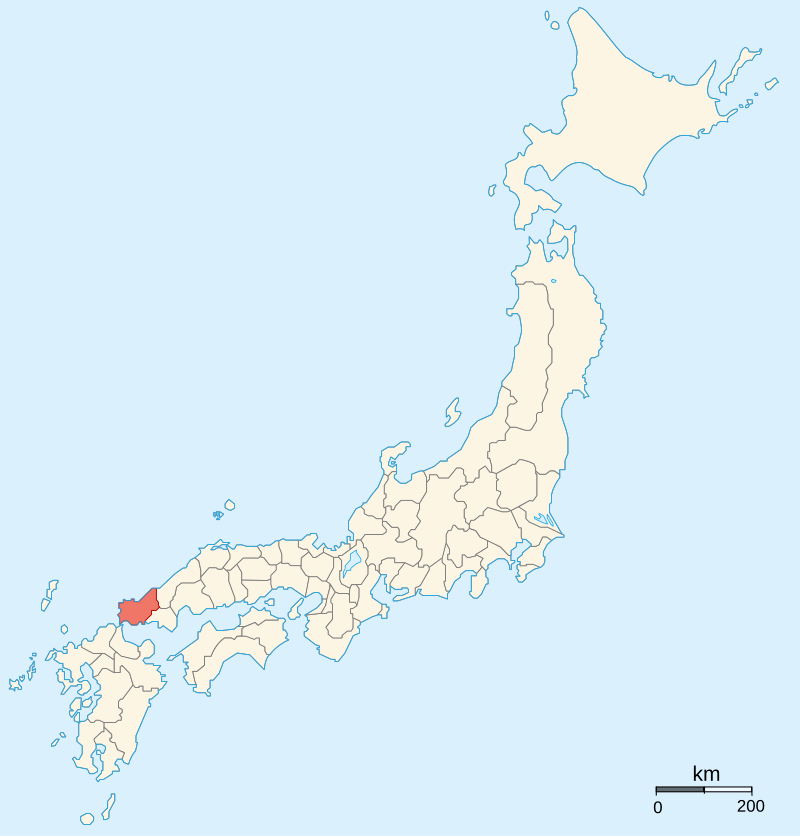
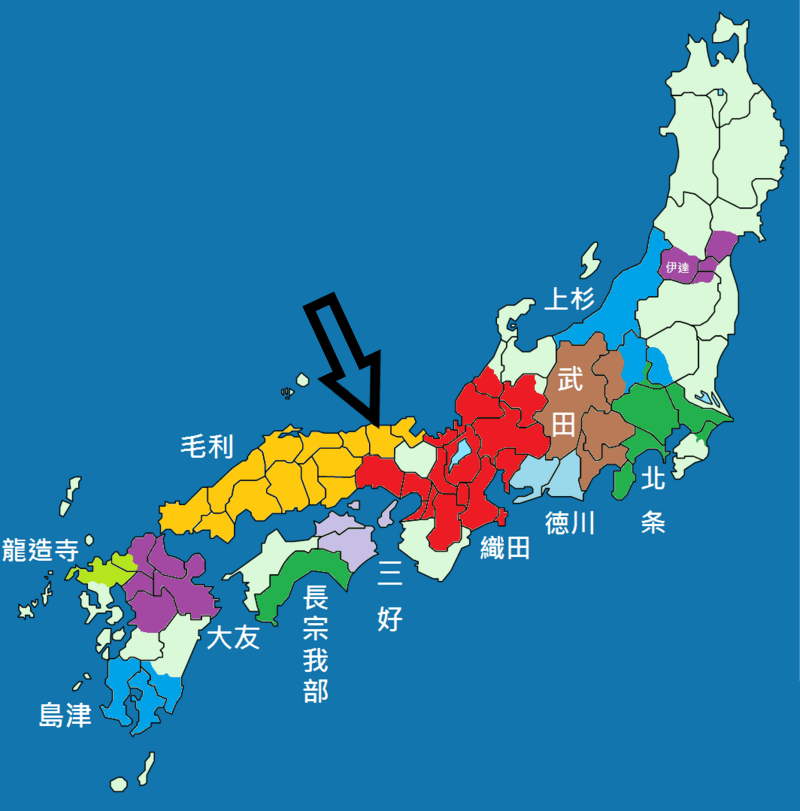
    Though Nobunaga was allied with the Mori, he took other actions that would be considered unfriendly. On the Eastern borders of Mori territory (the West, as far as Nobunaga was concerned) lay the Urakami Clan, who dominated the three provinces of Bizen, Harima, and Mimasaka. The Mori and Urakami had engaged in a long war before the Urakami had agreed to submit to the Mori in exchange for recognition of this territory, terms to which the Mori agreed, effectively turning the Urakami into vassals.

    Bizen Province
    Harima Province
    Mimasaka Province

    However, Nobunaga issued a “Red Seal Letter” (an official, legally binding document named for its eponymous red seal), recognising the Urakami as lords of the three provinces. This was, in effect, simply making official something that was already a fact; however, when the Urakami accepted the letter, they effectively ceased to be Terumoto’s vassals, that is, if the Mori accepted the new situation.

    The Mori, not surprisingly, did not. In 1575, they attacked the Urakami, defeating them in a series of battles and essentially eliminating them as a power, taking direct control of the provinces. The Urakami had apparently expected Nobunaga to dispatch forces to aid them, but he had erred on the side of caution, deciding that the Urakami were an acceptable sacrifice for keeping the peace with the Mori, at least for now.

    An immediate consequence of this was that there were no more buffers between the Mori and Oda territories, which now shared a border. The relationship was already tense, and it only grew worse as both sides became involved in Tajima Province. Expecting that Nobunaga would seek to make the province part of his domain, Terumoto made an alliance with the province’s local power, the Yamana. You may remember that name from earlier posts, and well done if you did; the Yamana were still around at this point, though no longer the great clan they once were.

    A map showing the borders between the Mori (in Yellow) and the Oda (in Red) in 1575, with Tajima Province marked.
    By Alvin Lee – Own work, CC BY-SA 4.0, https://commons.wikimedia.org/w/index.php?curid=39200929

    Then in 1576, the Shogun, Ashikaga Yoshiaki, having been forced to flee Kyoto by Nobunaga, found himself in Bingo Province, controlled by the Mori. Terumoto was not happy about this. Although he had ostensibly supported the restoration of the Shogunate, he understood that the only way that could happen was through war with Nobunaga, which he had no interest in. When the Shogun showed up on his doorstep and formally asked the Mori to support him in returning to Kyoto, then Terumoto was in a tricky spot.

    The Mori had promised Nobunaga that they would not harbour the exiled Shogun. On the other hand, Nobunaga had taken actions that were widely seen as trying to undermine Mori power, and although he had attacked them directly, the damage had been done.

    Terumoto, for his part, took a long time making up his mind. We’ll never know exactly what he was thinking, but it’s easy to imagine that Terumoto had plenty of reason to be wary of Nobunaga, who had already meddled in Mori affairs and would probably do so again if given the chance. The Mori were also one of the few clans with the power to actually face Nobunaga directly, something that Terumoto must have been aware of.

    Terumoto would declare for the Shogun in May 1576, effectively ending his alliance with Nobunaga and setting the Mori on a collision course with the Oda, but more on that next time.

    Sources
    https://ja.wikipedia.org/wiki/%E6%AF%9B%E5%88%A9%E8%BC%9D%E5%85%83
    https://en.wikipedia.org/wiki/M%C5%8Dri_Terumoto
    https://ja.wikipedia.org/wiki/%E6%9C%88%E5%B1%B1%E5%AF%8C%E7%94%B0%E5%9F%8E
    https://ja.wikipedia.org/wiki/%E6%A7%87%E5%B3%B6%E5%9F%8E%E3%81%AE%E6%88%A6%E3%81%84
    https://ja.wikipedia.org/wiki/%E6%9C%B1%E5%8D%B0%E7%8A%B6
    https://en.wikipedia.org/wiki/Oda_Nobunaga
    https://en.wikipedia.org/wiki/Ashikaga_Yoshiaki

  • The Battles of Kawanakajima

    The Battles of Kawanakajima

    Having looked closely at the lives and careers of Takeda Shingen and Uesugi Kenshin, it is impossible not to notice the frequent mention of a place called Kawanakajima, and the series of battles that took place there from 1553 to 1564.

    The battles at Kawanakajima were not the only confrontations between the Takeda and Uesugi clans, nor were they the largest or most significant battles in the Sengoku period, but they have been the subject of extensive study, writing, and mythologising, as they seem to symbolise the famous rivalry between Shingen and Kenshin, and so they’re worth a closer look.

    Kawanakajima

    Kawanakajima as it appears today.
    By Bloglider at Japanese Wikipedia – Own work by the original uploader (Original text: Photo by Bloglider.), CC BY-SA 3.0, https://commons.wikimedia.org/w/index.php?curid=12400636

    The area called Kawanakajima is located in the northern part of Nagano Prefecture, and is the area surrounding where the Chikuma and Sai rivers meet. Now within the modern city of Nagano, in the 16th century the area was in Shinano Province and had long served as a key transportation route from north to south, and as such had frequently been a battleground.

    There had been many small, but long-established clans in the area, but by the early 1500s, it was largely under the control of the Murakami Clan, who would come into frequent conflict with the Takeda, from neighbouring Kai Province, who were beginning to expand into Shinano around this time.

    Starting in 1542, Takeda Shingen began a concerted effort to bring the province under his control, but he faced resistance of varying degrees of severity during his campaign, and it was the Murakami who proved the sternest test. At the Battle of Uedahara in 1548, the Murakami inflicted a serious defeat on the Takeda, and although Shingen would recover, he suffered a further defeat at the Siege of Toishi Castle in 1550.

    Takeda Harunobu, better remembered as Takeda Shingen.

    Shingen had what we might call “Bouncebackability”, and in 1551, Toishi Castle fell, leaving the Takeda in control of most of Shinano, with the exception of the area including, and to the north of, Kawanakajima. The clans in this area had previously allied with the Murakami, but with their defeat, they went looking for new friends.

    They found them in the Nagao Clan of Echigo, and their lord, Kagetora, better known to history as Uesugi Kenshin, who advanced into northern Shinano to support these local clans and to oppose the Takeda.

    The First Battle

    In April 1553, Shingen resumed his advance against the remaining clans in northern Shinano, meeting only sporadic resistance and forcing the weakened Murakami to ask for intervention from Kenshin. He responded, and a combined force of around 5000 men counterattacked and defeated the Takeda at the Battle of Yahata in May.

    Nagao Kagetora, better known as Uesugi Kenshin.

    This success would be short-lived, however, as Shingen would resume his advance that summer, forcing the Murakami back again, until September, when Kenshin himself led a force into Shinano, engaging and defeating the Takeda at the Battle of Fuse, before laying siege to several castles in quick succession. Shingen would seek to outmanoeuvre Kenshin and cut off his retreat, but Kenshin responded with a strategic retreat to a place called Hachimanbara.

    Unable to cut off Kenshin’s retreat, Shingen instead retreated to Shioda Castle, entrenching himself there and avoiding direct battle. With neither side apparently up for the fight, both armies gradually disengaged, with Kenshin returning home at the end of September, and Shingen following suit a few weeks later.

    The First Battle of Kawanakajima was more of an extended series of engagements than a pitched battle, and both sides achieved some strategic goals. Kenshin was able to stop the Takeda advance into northern Shinano, whereas Shingen was able to consolidate his control in the central and eastern parts of the province, free from outside intervention.

    The Second Battle

    Through the remainder of 1553 and into 1554, Takeda Shingen continued to expand and consolidate his control of the areas of Shinano south of Kawanakajima. He has also formed an alliance with the Hojo and Imagawa Clans, securing his southern borders and gaining an ally (in the Hojo) against Kenshin’s ambitions in the wider region.

    Shingen also sought to keep Kenshin off balance by supporting local rivals and instigating rebellions amongst his vassals. Though Kenshin was often able to swiftly put down these uprisings, in 1555, a previously loyal vassal, Kurita Eiju, who was based near the Zenkoji Temple, defected to the Takeda side. This was significant because Eiju controlled the southern half of the Nagano Basin, of which Kawanakajima was a central part.

    Zenkoji Temple as it appears today.
    By 663highland, CC BY 2.5, https://commons.wikimedia.org/w/index.php?curid=48785737

    Shingen marched north to support his new ally, whilst Kenshin was obliged to dispatch an army to retake the lost territory. Eiju, alongside 3000 Takeda allies, holed up at Asahiyama Castle (in modern Nagano City), a strategically important location that controlled crossings of the Sai River.

    Kenshin could have manoeuvred around the strong point, but this would have left an enemy garrison at his rear, so instead, he entrenched his forces at Katsurayama (also in modern Nagano) and constructed a castle there, effectively bottling up the garrison at Asahiyama and neutralising the threat.

    Shingen was not idle during all this construction; however, he dispatched an army in support of Kurita Eiju, and it arrived in early July, facing Kenshin’s forces across the Sai River. The only serious engagement of the Second ‘Battle’ was on July 19th, when Kenshin sent forces across the river and engaged in sporadic fighting against the Takeda. Whether this was a serious attempt to force a crossing or just a kind of skirmish isn’t clear, but Kenshin’s forces swiftly withdrew, and both sides spent the next 200 days glaring at each other across the river.

    Eventually, events away from Kawanakajima would force a resolution. Shingen was a long way from his home base in Kai and was beginning to struggle to feed his army, whereas Kenshin was facing issues on his western borders from increasing activity from the local Ikko-Ikki, as well as dissatisfaction from his vassals over the months of inactivity.

    The Ikko-Ikki proved to be difficult to deal with for many lords. Uesugi Kenshin was no different.

    Eventually, both sides agreed to mediation, led by the Imagawa Clan, and a peace was agreed in October. The terms set the border between the rivals as the Sai River, as well as calling for the destruction of Asahiyama Castle, and the complete withdrawal of both armies from the area.

    In the immediate aftermath, Kenshin would turn to deal with the Ikko-Ikki, and Shingen would subdue the remaining independent lords in southern Shinano, but neither side was done with Kawanakajima.

    The Third Battle

    In 1556, Kenshin, apparently suffering from what we might now call ‘burnout’, announced his intention to renounce his lordship and become a monk. His retainers, horrified at the prospect, did everything they could to persuade him to change his mind. They were ultimately successful, and a good thing too, because through the interim period, Shingen had again begun putting pressure on local lords to switch sides, or face conquest.

    During the New Year festivities in January 1557, Kenshin, who had by now given up on his idea of becoming a monk (and the restful lifestyle that would have provided him), offered prayers at the Hachimangu Shrine (in Chikuma, Nagano) for the defeat of Takeda Shingen.

    Hachiman Shrine as it appears today. It’s now called Takemizuwake Shrine.

    Shingen, apparently put out by these attempts at divine intervention, advanced again, taking Katsurayama Castle (the site of the second ‘battle’) in mid-February, then advanced north, defeating the Takanashi Clan, who were allies of Kenshin. Kenshin’s response was delayed by winter snows, but he eventually came south, capturing several Takeda castles and even rebuilding Asahiyama.

    Shingen would continue to evade Kenshin’s advance, and both sides continued to dance around each other until an indecisive clash at Uenohara in late August, after which, Kenshin, who had advanced far from his supply bases in Echigo, withdrew. At this point, the Shogun, Ashikaga Yoshiteru, intervened, sending a letter requesting that both sides make peace, apparently in the hope that they would then send forces to aid the Shogunate.

    Neither side did, but a truce was agreed upon, which did not last long, as both Kenshin and Shingen would dispatch armies to duke it out in Northern Shinano. Kenshin arguably got the better of it, as the remaining clans in the area, previously just allies, were forced to become effectively his vassals.

    The Fourth Battle

    In 1559, Kenshin went to Kyoto to ask that the Shogun grant him the position of Kanto Kanrei, which had long been held by the Uesugi clan. Though the power of the Shogun and the prestige of any positions he might bestow were long since diminished, Kenshin was able to combine his appointment as Kanrei with his considerable martial talents to gather a large army and attack the Hojo in the Kanto region.

    In 1560, he was apparently able to gather an army of 100,000 men (though this is probably exaggerated) and advance deep into Hojo territory, even besieging their capital at Odawara in March 1561, though he was unable to take the formidable fortress. In response, the Hojo called for help from their ally, Takeda Shingen, who responded by invading Northern Shinano once again.

    The modern reconstruction of Odawara Castle.
    By Akonnchiroll – Own work, CC BY 4.0, https://commons.wikimedia.org/w/index.php?curid=145493350

    When news of Shingen’s attack reached Kenshin’s army, many of his supporters returned home, and he was obliged to lift the siege of Odawara and turn to face the Takeda. Beginning in August, the Takeda and Uesugi forces would again seek to gain advantage, advancing and retreating in turn, largely centred on Kaizu Castle, newly constructed at Shingen’s command.

    This would continue until late October, when the Takeda devised a strategy to launch a surprise attack against the Uesugi, with a second force positioned nearby to ambush and (hopefully) destroy the Uesugi as they attempted to regroup. Kenshin, however, was made aware of the Takeda’s movements, and, taking advantage of a moonless night, he had his army change position, moving them closer to the main Takeda force.

    Just after dawn on October 28th, a thick fog covered the ground around Kawanakajima, obscuring both armies. When the fog cleared, however, the Takeda were confronted with the sight of the entire Uesugi army positioned in front of them. Almost as soon as visibility allowed, Kenshin ordered a furious attack that smashed into the Takeda force and forced them onto the back foot.

    The Uesugi made it as far as the Takeda’s main camp, and it is here that one of the most famous tales of the Sengoku period takes place. In the heat of the battle, a warrior wearing a white robe (or towel) around his head charged directly at Takeda Shingen. This warrior slashed three times at Shingen, who was able to parry the blows with his war fan (made of iron, not the usual paper, luckily), before Takeda’s soldiers came to the rescue and forced the white-clad warrior to retreat.

    The moment that Uesugi Kenshin and Takeda Shingen are said to have met on the battlefield.

    It was later revealed that this warrior was Uesugi Kenshin himself, and the duel became a legendary scene, symbolising the violence of the age, and the particular rivalry between Shingen and Kenshin. Unfortunately, we’re not sure that the duel actually took place. Takeda sources describe it as I’ve written here, whereas the Uesugi say the duel did take place, but that it was either a different attacker, or that it took place, not in the Takeda camp, but nearer the river, where the fighting was fiercest.

    Whether the famous duel actually happened or not, the battle itself was a bloody affair. The Uesugi attack was ferocious and drove the Takeda back to their camp, but failed to break them. At the same time, Takeda reinforcements rushing towards the battlefield were held up by a Uesugi rearguard.

    The Uesugi army (right) advance against the Takeda (left)

    If the battle had been brought to a conclusion that morning, then it’s likely the Uesugi would have won; however, the Takeda reinforcements arrived at around noon, and, fearing encirclement, Kenshin ordered a retreat. Shingen pursued him until around mid-afternoon, but then called it off, bringing an end to the bloodiest of the Battles of Kawanakajima.

    Exact death tolls are always tricky, as are the size of the opposing armies, but total numbers of combatants are estimated to have been around 20,000 for the Takeda and 13,000 for the Uesugi. When the fighting was over, the Takeda had suffered 4000 casualties, to the Uesugi’s 3000, and since they remained in control of the field, the battle was arguably a Takeda victory.

    The Fourth Battle of Kawanakajima was by far the bloodiest.

    That being said, the Uesugi would also claim victory, as they had foiled Takeda’s attempts to trap them, stopped their advance, and, despite a bloody day, their army remained more or less intact. Strategically, the battle was probably a draw, as it ultimately didn’t change much on the ground, neither side was able to secure new territory in the aftermath, and apart from the casualties (who would no doubt be comforted to know they’d died for nothing), both sides remained relatively strong.

    The Fifth Battle

    The Fifth and Final Battle of Kawanakajima occurred in 1564. In the interim period, Kenshin had continued to send forces into the Kanto, and Shingen had continued to try to expand his control of Shinano and other surrounding provinces.

    In Hida Province, a proxy war between a faction backed by the Uesugi and one by the Takeda swiftly drew both clans into direct confrontation once again. Shingen dispatched troops, and Kenshin moved to intercept them. The Takeda would get as far as the southern end of the Nagano Basin, but there would be no serious fighting. The Uesugi were content to limit themselves to blocking Shingen, and Shingen seemed to be content to allow himself to be blocked.

    Both sides eventually withdrew after nearly two months of little more than dirty looks, and this would prove to be the last confrontation between the clans at Kawanakajima.

    Aftermath

    The conflict between the Takeda and Uesugi Clans did not end after the Fifth Battle (such as it was), but both sides had more pressing concerns elsewhere. Kenshin was keen to focus on Etchu Province, the source of frequent Ikko-Ikki attacks, whilst Shingen’s attention was drawn south, and then eventually towards Kyoto as the political situation shifted dramatically.

    When Shingen died in 1573, Kenshin is supposed to have wept openly at the loss of his great rival, but the fortunes of both clans would continue to decline. The Takeda would be heavily defeated at the Battle of Nagashino in 1575, and their power would be permanently diminished. Then, in 1578, Kenshin died, and the Uesugi Clan was wracked by a civil war to determine who would succeed him.

    The Takeda would eventually be destroyed by Oda Nobunaga in 1582, whereas the Uesugi would survive the Sengoku Period and the centuries to come. In fact, as I mentioned in their brief profile, direct descendants of this famous clan still live in Japan to this day.

    Ultimately, the Battles of Kawanakajima became the stuff of myth and legend in the decades following the actual events. This was largely due to the actions of Tokugawa Ieyasu and his descendants, who made concerted efforts to elevate the actions of Takeda Shingen to almost semi-divine status.

    A 19th Century artistic representation of the Battle of Kawanakajima.

    The reality is that the battles were locally important, but ultimately proved to be fringe events in the course of the enormous bloodshed elsewhere in Japan during this period, as we shall soon see.

    Sources
    https://ja.wikipedia.org/wiki/%E4%BF%A1%E6%BF%83%E6%9D%91%E4%B8%8A%E6%B0%8F
    https://en.wikipedia.org/wiki/Battles_of_Kawanakajima
    https://ja.wikipedia.org/wiki/%E5%B7%9D%E4%B8%AD%E5%B3%B6%E3%81%AE%E6%88%A6%E3%81%84
    https://ja.wikipedia.org/wiki/%E6%97%AD%E5%B1%B1%E5%9F%8E
    https://ja.wikipedia.org/wiki/%E6%AD%A6%E6%B0%B4%E5%88%A5%E7%A5%9E%E7%A4%BE
    https://ja.wikipedia.org/wiki/%E9%AB%98%E6%A2%A8%E6%B0%8F%E9%A4%A8
    https://en.wikipedia.org/wiki/Uesugi_Kenshin
    https://en.wikipedia.org/wiki/Takeda_Shingen