Tag: Siege of Odawara

  • The Odawara Campaign

    The Odawara Campaign

    Just a quick note from me: Due to real-life changes with workload, I’ve decided to reduce the number of blog posts to one per week. Going forward, the blog will be posted on Fridays.

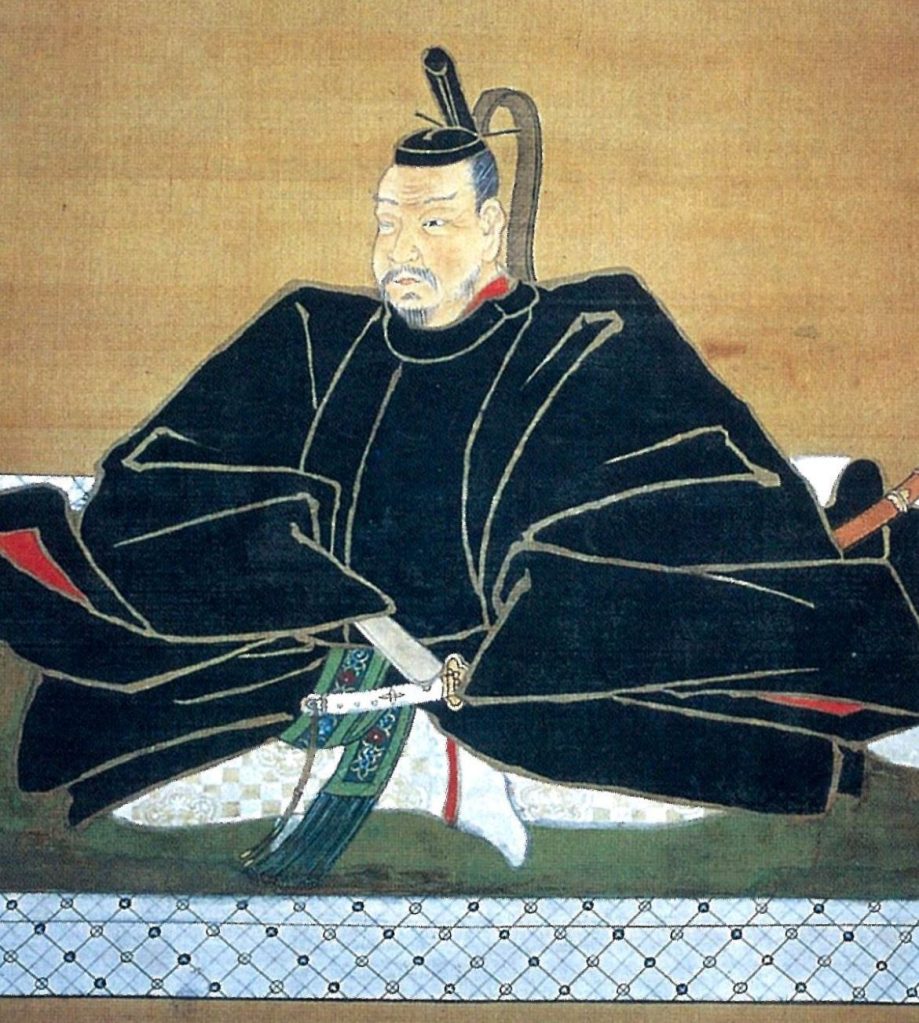
    In 1589, the Hojo openly defied Toyotomi Hideyoshi’s peace orders, prompting the new regent to declare them in rebellion against the throne. (Side note, Hideyoshi, as the son of a peasant, couldn’t be declared Shogun, so he took the title of Kampaku, officially the chief advisor of the Emperor, but in reality, the political master of Japan.)

    Toyotomi Hideyoshi

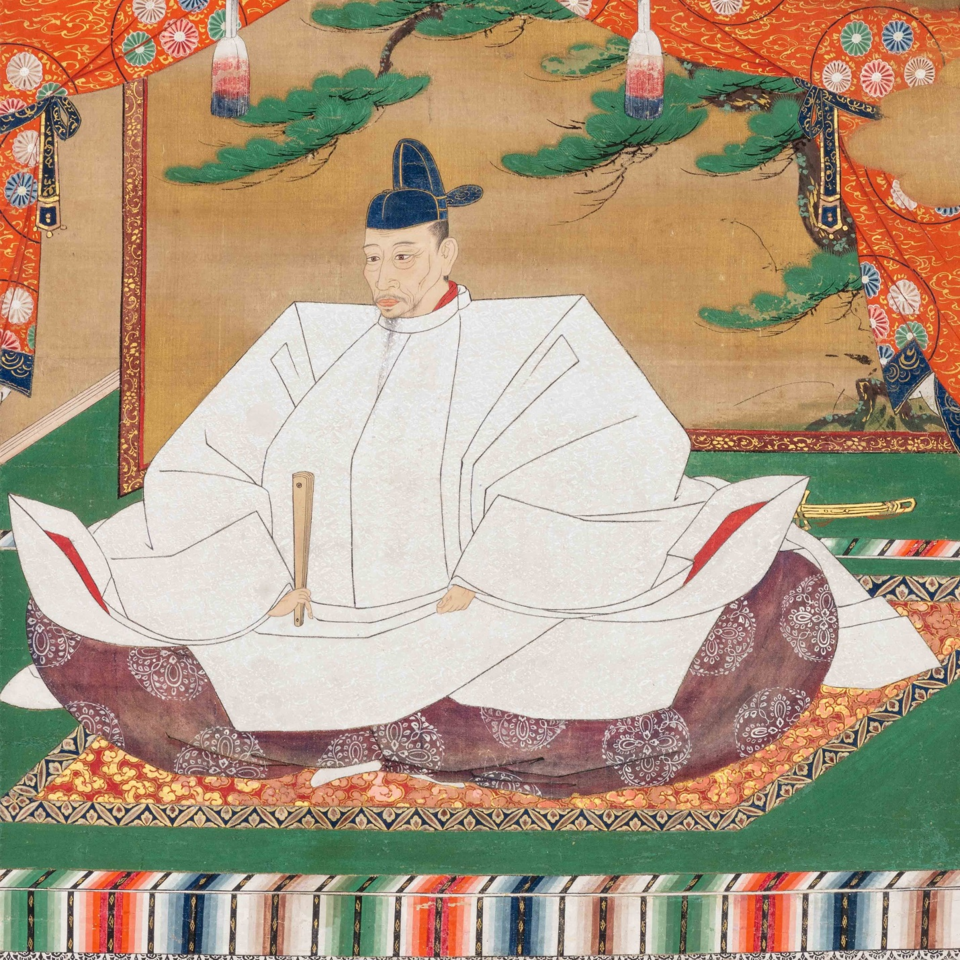
    There were some final (and quite half-hearted) attempts at negotiation, but Hideyoshi’s position was clear: either the Hojo would submit, or they would be destroyed. The Hojo, an old, proud, and powerful clan, refused to bow, and by 1590, Hideyoshi had mustered an army of some 200,000 men to force the issue.

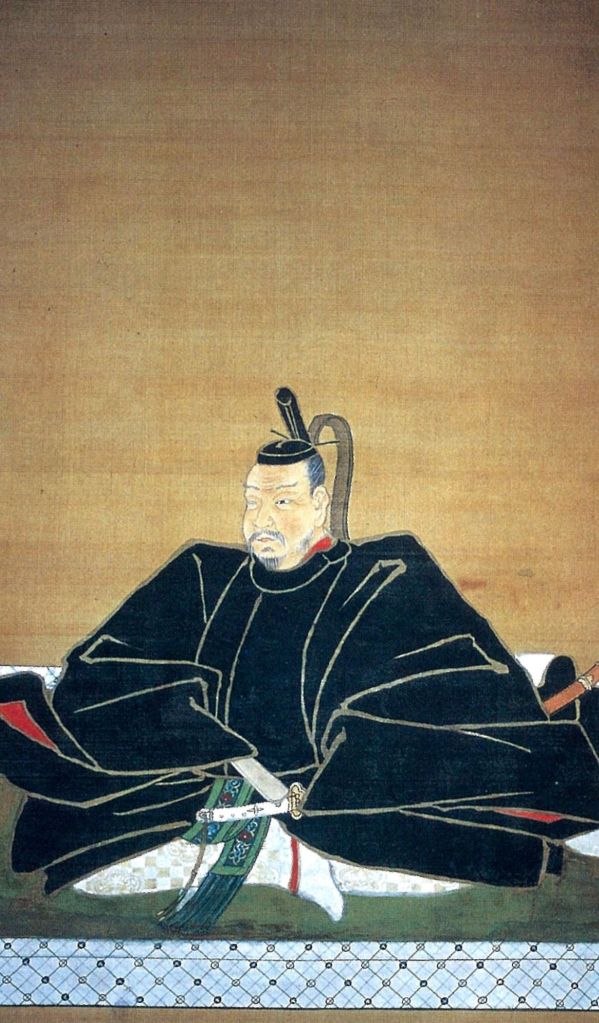
    Tokugawa Ieyasu, whose lands lay between the Hojo and Hideyoshi, initially sought to mediate, as his daughter was married to Hojo Ujinao, the nominal lord of the clan. These attempts failed, however, and Ieyasu threw in his lot with Hideyoshi, making preparations in his lands for the movement of thousands of troops advancing on the Kanto.

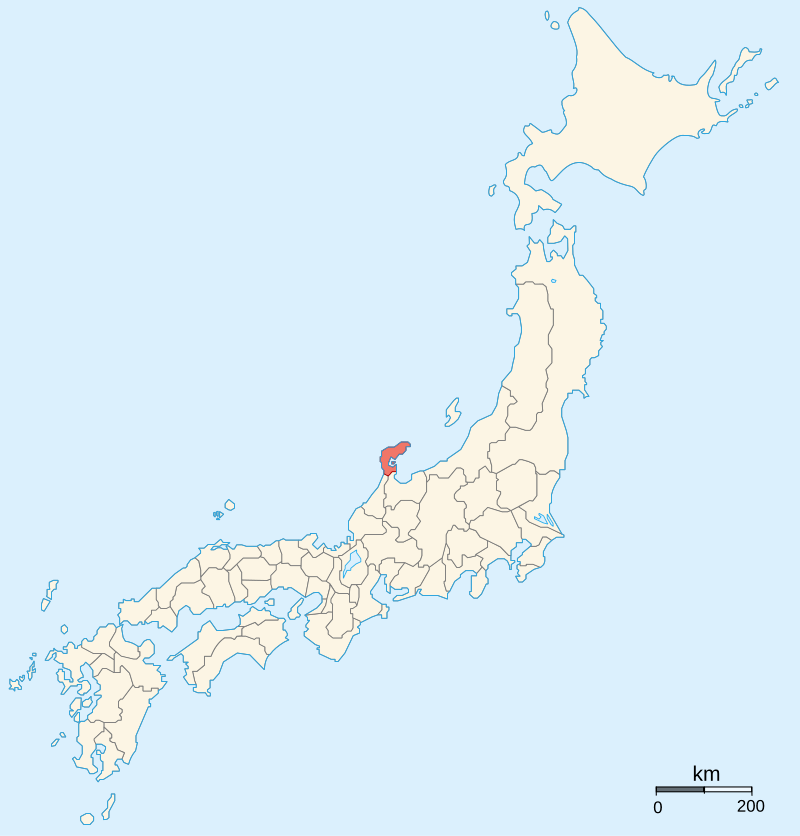
    The Kanto is surrounded by mountains and, at least in theory, very easy to defend, as there are only a limited number of passes through which a large body of troops can pass. The Hojo knew this and fortified as many of these passes as they could. Unfortunately, they were now being attacked on practically all sides. As well as the Tokugawa-Toyotomi force coming from the east, they also face an army sent along the Nakasendo road to attack Usui Pass in the north, and a force dispatched from the North-East would advance into Musashi Province and attack the castles there. Even the ocean to the south wasn’t open to the Hojo, as a naval force attacked Nagahama Castle in Izu.

    The site of Nagahama Castle today.

    The main blow would come from the west, however, as Hideyoshi led his army in an attack on the apparently formidable fortress of Yamanaka. Before the outbreak of hostilities, the Hojo had dispatched a garrison of 4000 men to the castle and set about improving its fortifications. Unfortunately, this work was not completed by the time Hideyoshi’s army arrived, and, despite its reputation as the “gateway” to the Kanto, Yamanaka fell in a single morning, despite brave resistance from the overmatched garrison.

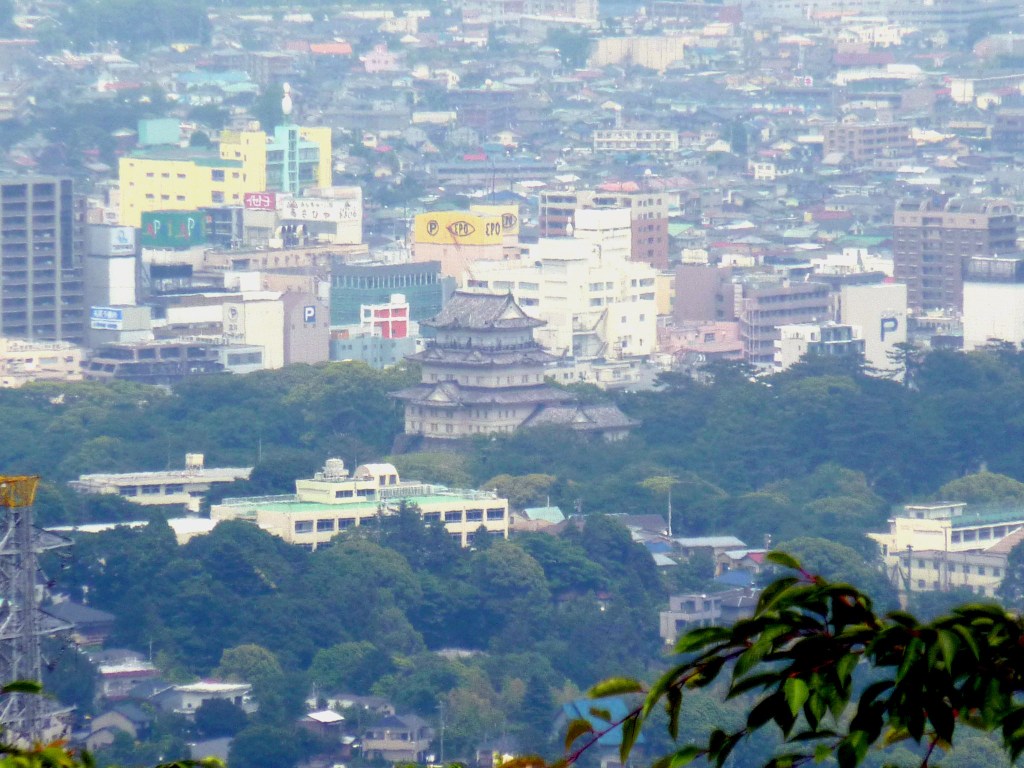
    Other castles in the area were taken or besieged, bottling up their garrisons and preventing them from supporting the main attack on Odawara, which itself came under siege in early May. Odawara itself was an enormous castle, and despite the size of Hideyoshi’s army, there was no serious attempt to take it by storm. Instead, the siege camp became something of a small town, with everything from prostitutes to theatrical troupes plying their trade amongst the besiegers, whilst the Hojo defenders were often obliged to sleep on the battlements in their armour, for fear of a sudden attack.

    With Odawara now firmly under siege, Hideyoshi was confident enough to dispatch forces to support the campaigns in other parts of Hojo territory, with many of the castles falling with surprising speed. This was largely due to the fact that the Hojo had mobilised the vast majority of their forces for the defence of Odawara itself, leaving most of the outlying castles only lightly defended. When faced with the overwhelming strength of the forces arrayed against them, most of these castles surrendered immediately, or else were taken after only brief resistance.

    The layout of Odawara Castle.

    There is some evidence that the speed at which many of these castles fell led Hideyoshi to criticise his generals in the region, suggesting that taking so many castles so easily could not be considered a military achievement.

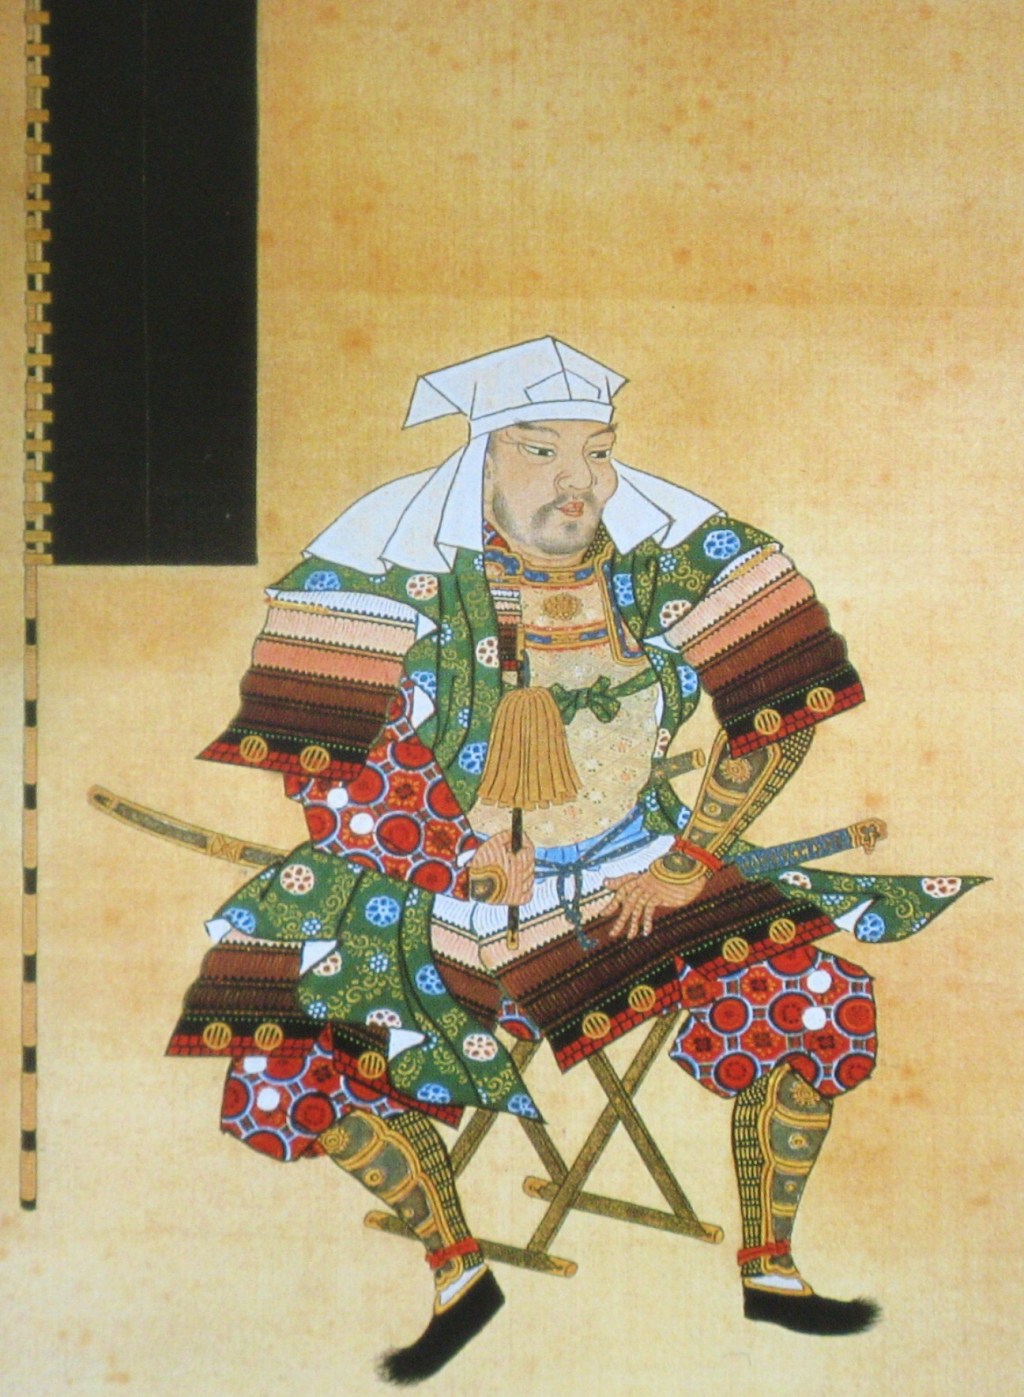
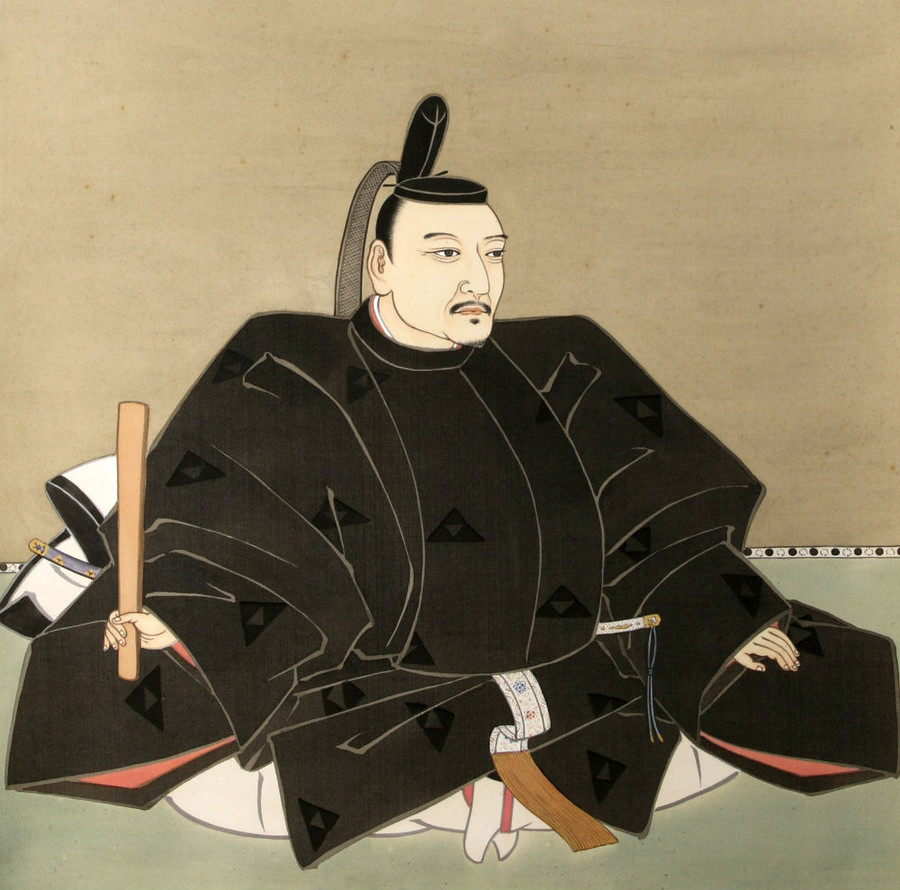
    The ease of the advance wasn’t true everywhere, however. At Iwatsuki (in modern Saitama), a force of 20,000 was held up by the defenders for several days despite a numerical advantage of 10-1. When the castle fell, Hideyoshi ordered that all the fighting men be killed, and the women and children taken prisoner. Instead, the commanding general, Asano Nagamasa, had already agreed to spare the surviving warriors, the women and the children as part of the surrender agreement.

    Meanwhile, the Siege at Hachigata Castle (also in Saitama) concerned Hideyoshi enough that he sent a sternly worded letter to Nagamasa, ordering him to focus his efforts there. Nagamasa did so, and a combined army of some 35,000 men attacked Hachigata, forcing the garrison to surrender. Once again, arrangements were made to spare the garrison and non-combatants, though this time it doesn’t seem to have been in defiance of Hideyoshi’s orders.

    The site of Hachigata Castle as they appear today.
    Taketarou – 投稿者自身による著作物, CC 表示-継承 3.0, https://commons.wikimedia.org/w/index.php?curid=1273726による

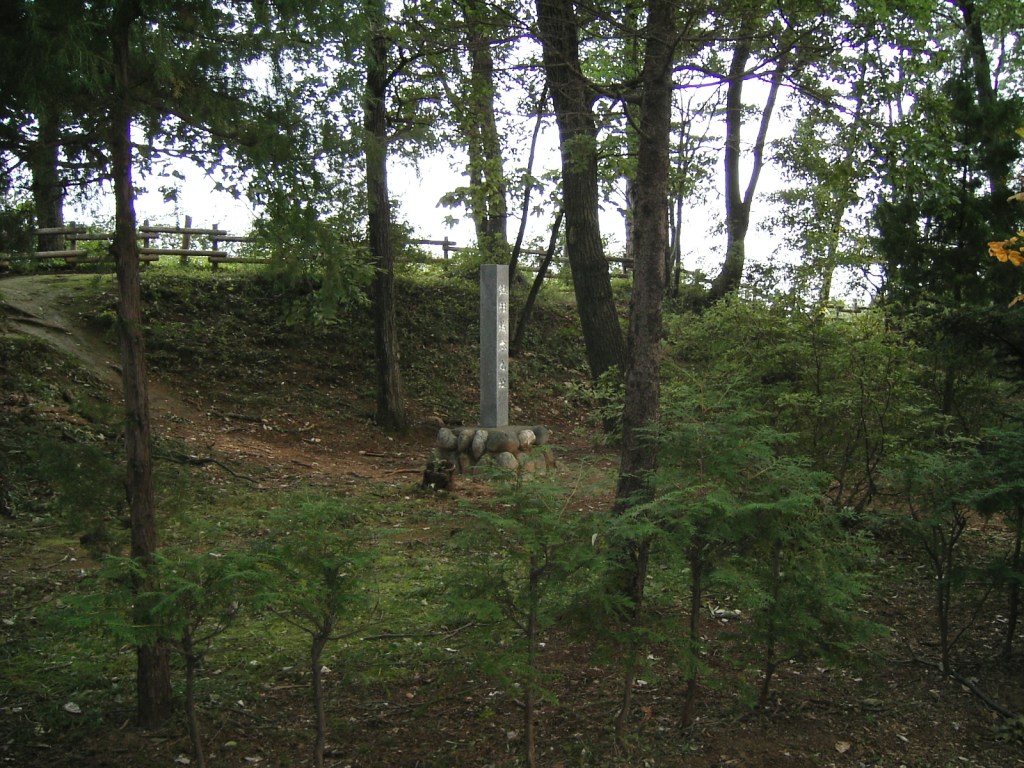
    While most castles were taken by force, negotiation, or a combination of the two, some held out, either through the skill of their defenders or, as was the case at Tatebayashi Castle, by apparently divine intervention. The castle was apparently founded with the help of a grateful fox, who rewarded the lord of the castle for rescuing its baby by marking out the foundations of the fortress in an area of swampy ground.

    This soggy position made the castle very difficult to approach, and when it came under siege, the attackers laid down logs across the swamp to create a roadway to the castle walls. With their pathway secure, the besiegers got a good night’s rest and prepared for a dawn attack. When the sun rose, they found that the roadway had disappeared completely, something put down to the fox spirit protecting the castle rather than the possibility that the logs had just sunk.

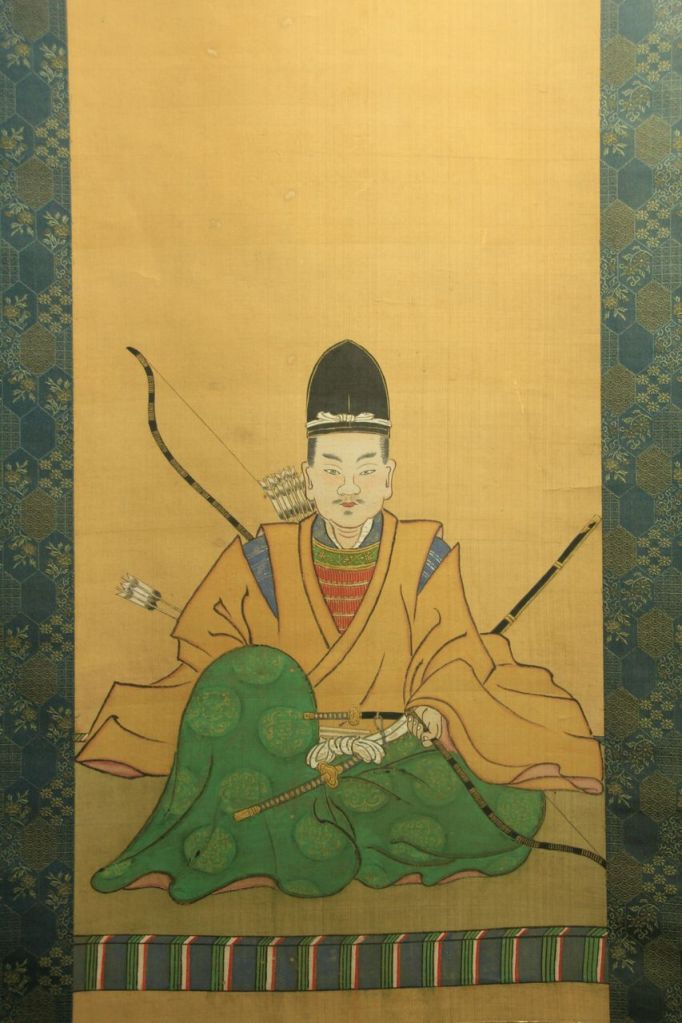
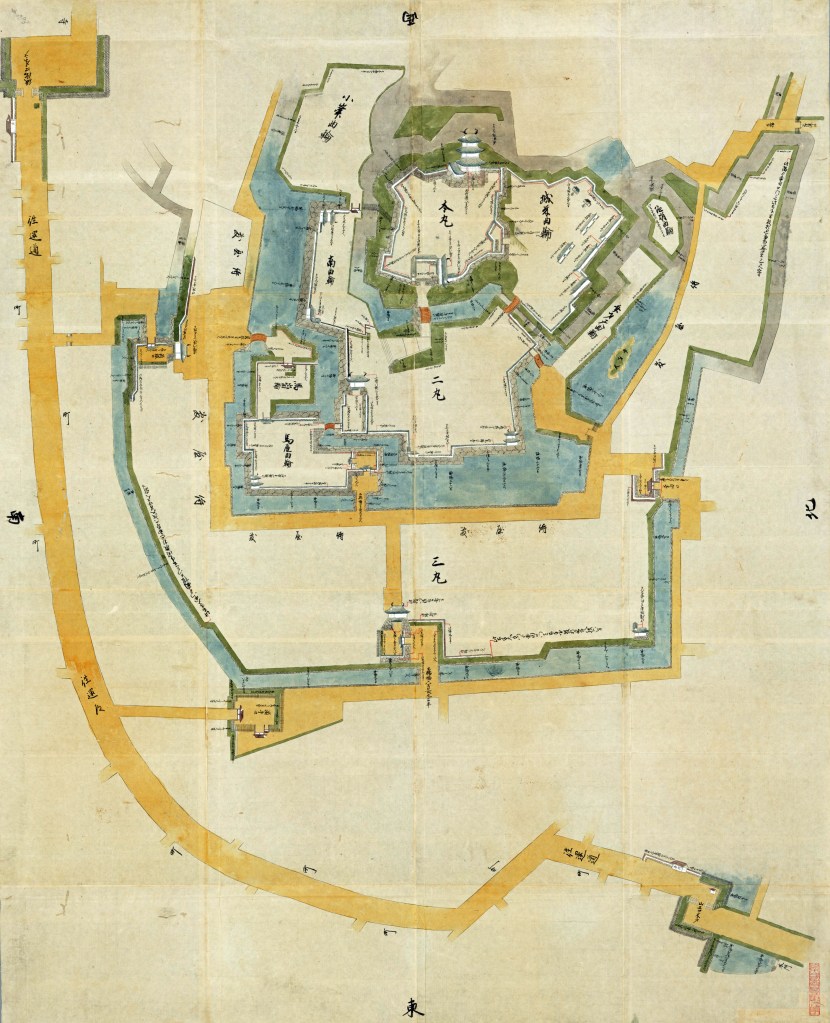
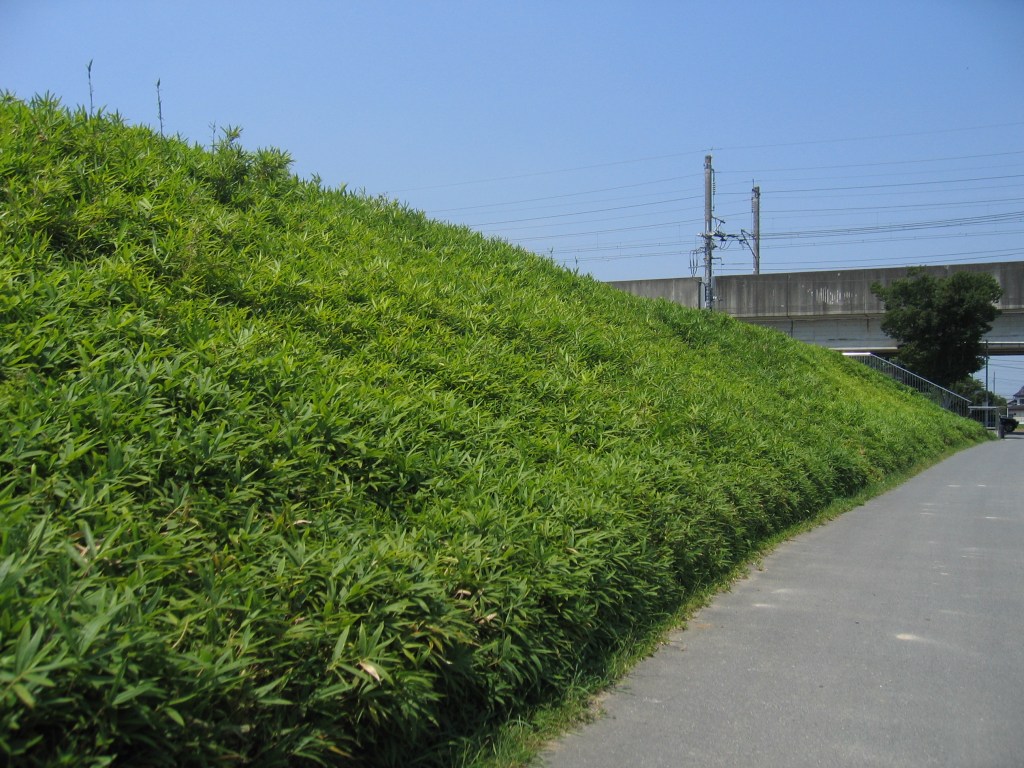
    Another famous, watery siege was that of Oshi Castle. Surrounded on two sides by rivers, Oshi was besieged by forces led by Ishida Mitsunari (who will become very important). Much ike Tatebayashi, Oshi’s watery position made it difficult to overcome. Mitsunari (apparently on written instructions from Hideyoshi) set about building an enormous levee surrounding the fort, forcing the water from the two rivers to inundate the castle and flood out its defenders.

    The levee (Ishida Tsutsumi) as it appears today in modern Konosu, Saitama.
    京浜にけ – 投稿者自身による著作物, CC 表示-継承 3.0, https://commons.wikimedia.org/w/index.php?curid=100409931による

    To the besiegers’ surprise, the waters didn’t actually flood the castle; instead, they gave it the appearance of floating on the water, leading it to be referred to as the “Floating Castle” (this is the title of a manga and its later 2012 adaptation, both about the siege). Following several days of heavy rain, the levee broke (or was sabotaged in some sources), flooding the siege camp and killing up to 200 warriors.

    The failure of this approach would seriously damage Mitsunari’s military reputation (some sources point out that he was just following Hideyoshi’s instructions, but the damage was done), and the siege was eventually taken over by Asano Nagamasa. An all-out assault on the castle was impossible due to the effects of the flooding, which had turned the ground into an impassable quagmire, and Oshi has the distinction of being one of the few fortresses that held out until the end of the Odawara Campaign, before eventually surrendering nearly 2 weeks after the fall of Odawara.

    Odawara, as one of the most formidable castles in the realm, hadn’t come under direct attack, but the siege had been dragging on for weeks, and news from other parts of the Kanto was almost universally bad, sapping the already fragile morale of the defenders. Shortly after the siege began, the loyalty of the Date Clan was still in doubt, and the Hojo held out hope that they might receive aid from outside the Kanto. Date forces indeed entered the Kanto, but in support of Hideyoshi, ending any hope of relief.

    Date Masamune. His decision to support Hideyoshi ended any hope the Hojo had of outside support.

    Though no general assault was launched, there were a few small-scale skirmishes and sporadic gunfire, and by early summer, signs of a breakdown in morale were appearing on both sides, with an increase of desertion amongst the besiegers, and the ever-present possibility of defection from the Hojo, especially as news of the rapid fall of other castles arrived.

    Negotiations began early in the siege, largely facilitated by Tokugawa Ieyasu, Hojo Ujinao’s father-in-law. Rumours of a peace agreement spread almost immediately, and Ujinao’s grandmother and step-mother (Ujimasa’s second wife) both died mysteriously on the same day. Historians generally believe they committed suicide, either in protest of a peace deal or in prospect of one.

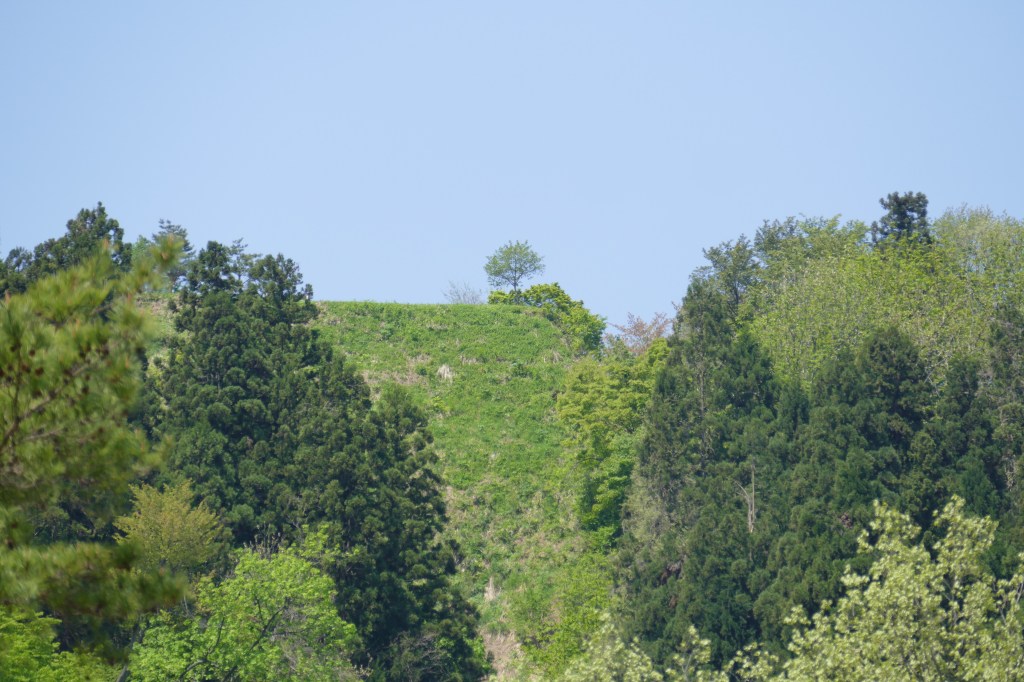
    News of the fall of other fortresses was followed by the public display of the heads of those killed, and then the wives and children of the survivors outside the castle walls, further depleting the defenders’ morale. Towards the end of the siege, the appearance of Ishigakiyama Castle, built in just a few months, on a mountain not far from Odawara, effectively ended what remained of the Hojo’s will to resist.

    Odawara Castle as seen from Ishigakiyama.

    A side note here, there is a popular legend that Ishigakiyama Castle was ‘built in one night’, which was clearly impossible, with later sources suggesting that rather than literally being built overnight, the castle was instead constructed behind a forest, which was itself cut down overnight, giving the impression that the castle had appeared from nowhere. Modern scholars doubt that either version is true, as Ishigakiyama is easily visible from Odawara, and though the castle was certainly built unusually quickly, it is now thought to have been constructed in full view of the Hojo, to highlight the impossibility of their situation.

    After this, the besiegers made a point of keeping up a light but continuous rain of gunfire on the castle, intending to grind down their morale, and when a final, furious night attack from the castle was repelled in August, the writing was on the wall, and a delegation from the Hojo was sent out to offer the seppuku of Hojo Ujinao and the surrender of the castle, in exchange for the lives of the remaining garrison.

    Hideyoshi accepted the surrender of the castle on the condition that all the remaining senior Hojo, Ujinao, his father Ujimasa, and uncle Ujiteru, commit seppuku, and that the provinces of Musashi, Sagami, and Izu (the Hojo heartlands) be given up. Further resistance was now impossible, and the Hojo agreed. Tokugawa Ieyasu successfully intervened for the life of his son-in-law, Ujinao, but he would fall sick (possibly with smallpox) and die by the end of the year.

    Hojo Ujinao.

    In the aftermath of the fall of Odawara, the Kanto would come under the control of Tokugawa Ieyasu, who had previously agreed to trade his three home provinces for the five of the Kanto, making his new base at Edo Castle, the site of the modern Imperial Palace in Tokyo. In the long-term, this would prove to be a genius move on Ieyasu’s part, but for now, the man who came out on top was Toyotomi Hideyoshi.

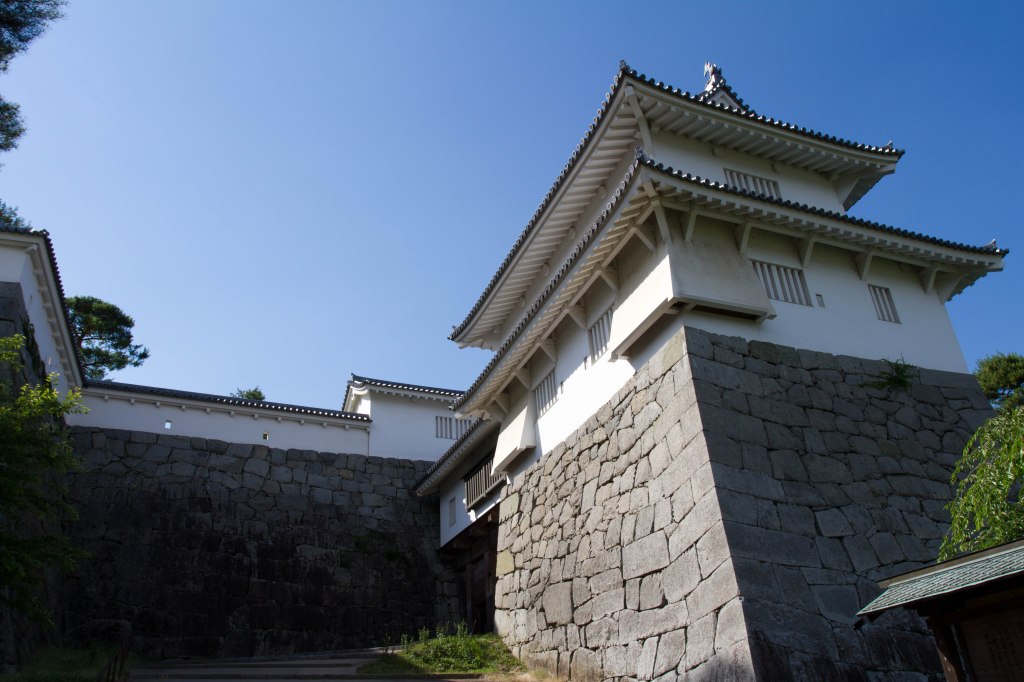
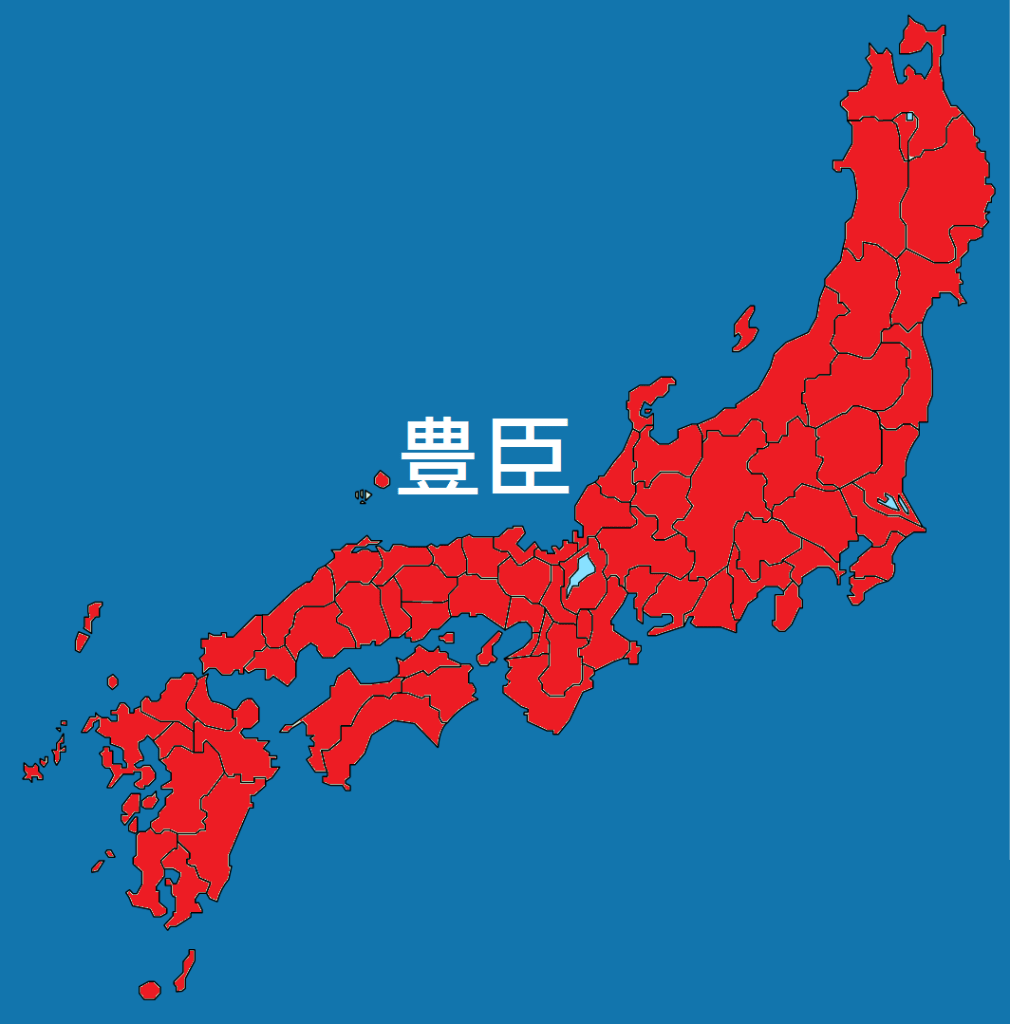
    With the Hojo defeated, there were no longer any serious rivals to his rule. For the first time in more than a century, the realm was united under a single, undisputed leader, who set about ensuring it would never again fall into chaos.

    The situation after the fall of Odawara. No more division, no more chaos, at least on paper.
    By Alvin Lee – Own work, CC BY-SA 4.0, https://commons.wikimedia.org/w/index.php?curid=39214210

    Hideyoshi’s conquest of Odawara marked the end of the second phase of Japan’s reunification. Next week, we’ll take a step back to look at another name we’ve mentioned a lot, Oda Nobunaga, the first of the great unifiers.

    Sources
    https://ja.wikipedia.org/wiki/%E6%83%A3%E7%84%A1%E4%BA%8B%E4%BB%A4
    https://ja.wikipedia.org/wiki/%E5%B1%B1%E4%B8%AD%E5%9F%8E
    https://ja.wikipedia.org/wiki/%E5%B0%8F%E7%94%B0%E5%8E%9F%E5%BE%81%E4%BC%90
    https://ja.wikipedia.org/wiki/%E7%9F%B3%E5%9E%A3%E5%B1%B1%E5%9F%8E
    https://ja.wikipedia.org/wiki/%E5%BF%8D%E5%9F%8E%E3%81%AE%E6%88%A6%E3%81%84
    https://ja.wikipedia.org/wiki/%E5%BF%8D%E5%9F%8E
    https://ja.wikipedia.org/wiki/%E7%9F%B3%E7%94%B0%E5%A0%A4
    https://ja.wikipedia.org/wiki/%E9%A4%A8%E6%9E%97%E5%9F%8E
    https://ja.wikipedia.org/wiki/%E5%B2%A9%E6%A7%BB%E5%9F%8E
    https://ja.wikipedia.org/wiki/%E6%B5%85%E9%87%8E%E9%95%B7%E6%94%BF
    https://ja.wikipedia.org/wiki/%E9%89%A2%E5%BD%A2%E5%9F%8E
    https://ja.wikipedia.org/wiki/%E9%9F%AE%E5%B1%B1%E5%9F%8E
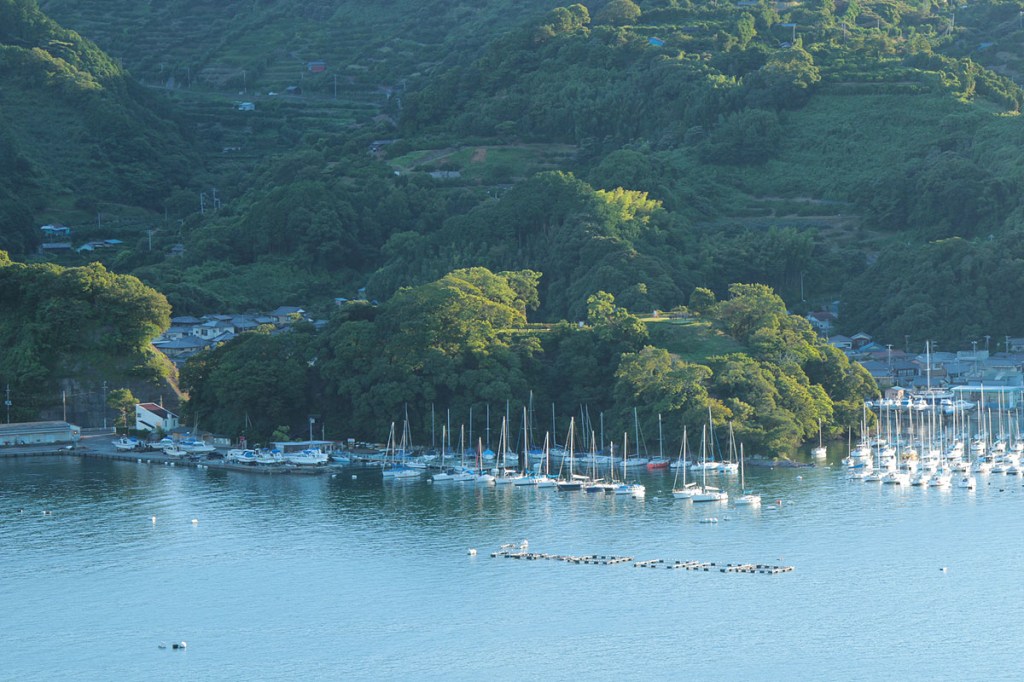
    https://ja.wikipedia.org/wiki/%E9%95%B7%E6%B5%9C%E5%9F%8E_(%E4%BC%8A%E8%B1%86%E5%9B%BD)
    https://ja.wikipedia.org/wiki/%E6%9D%BE%E4%BA%95%E7%94%B0%E5%9F%8E
    https://en.wikipedia.org/wiki/Toyotomi_Hideyoshi
    https://en.wikipedia.org/wiki/Siege_of_Odawara_(1590)


  • Kings in the North, Part 2

    Kings in the North, Part 2

    This is the 50th post on this blog. Well done for getting this far.

    In 1565, Date Harumune retired and handed control of the clan over to his son Terumune. Despite this, Harumune held onto the real power, and it wasn’t until 1570, when Terumune accused several of his father’s supporters of treason and had them removed, that he gained actual power.

    Date Terumune

    Despite this, Terumune continued most of his father’s policies, especially in diplomacy. The alliance with the Ashina Clan was maintained, and Date diplomats reached out to the Hojo, Oda, and Shibata Clans, establishing friendly relations with several of Japan’s most powerful warlords. The Sengoku in Sengoku Jidai literally means ‘country at war’; however, alongside his diplomatic efforts, Terumune showed he wasn’t afraid to throw his weight around if an opportunity presented itself.

    In 1578, the death of Uesugi Kenshin presented just such an opportunity, and Terumune dispatched forces to intervene in the internal struggle that followed. The Date intervention was ultimately unsuccessful, largely due to the military skills of the Shibata Clan, vassals of the Uesugi, who fought off the Date in several engagements.

    Frustrated, Terumune withdrew, but the Shibata had apparently expected more generous rewards for their service, and in 1581, when it was clear that they would not beforthcoming, the Shibata rebelled. Terumune dispatched his army once again, this time in support of the Shibata, and the conflict within the Uesugi Clan would drag on for years.

    Shibata Shigeie, one of the Shibata brothers who gave the Date so much trouble.
    さどこhttp://blog.livedoor.jp/sadosado_4hi/archives/8412806.html, CC 表示-継承 4.0, https://commons.wikimedia.org/w/index.php?curid=99877267による

    Closer to home, the long war against the nearby Soma Clan continued into Terumune’s reign. The Soma were based in southern Mutsu Province (the area of modern Fukushima Prefecture) and had proven to be tenacious opponents of the Date, with neither side ever able to establish a permanent advantage over the other, despite decades of conflict.

    In the period of 1582-84, however, the Date finally managed to overcome the Soma. Although the latter clan was not completely subdued, the strategic situation compelled them to make peace in 1584, with the border between the two clans agreed upon by treaty.

    Also in 1584, the long-time allies of the Date, the Ashina Clan, fell prey to an internal power struggle, after their lord, Moritaka, was murdered by a retainer (the official reason is said to be ‘due to sodomy’, so make of that what you will). The new head of the clan was just a month old, and so the Ashina were effectively subordinate to the Date, despite nominally remaining independent.

    Shortly after this, Terumune retired, handing leadership over to his son, Masamune. Sources disagree on the exact reason for this, with some suggesting that Terumune planned to make his second son head of the Ashina, only to encounter serious opposition from within the Ashina and his own clan, who then forced him to abandon the idea and retire in disgrace. Other sources say that Terumune learned a lesson from the fate of the Ashina and decided to hand over the leadership of the Date to his son while he was still alive, rather than leave the succession to chance.

    Date Masamune

    Regardless of the reason, Masamune became head of the clan in 1585, and immediately set out to prove that he was not going to do things the same way as his father had. Whilst Terumune had intended to continue the war against the Uesugi, along with his Ashina and Mogami allies, Masamune made peace, without consulting either clan, leading to a sudden and serious decline in relations.

    Masamune would definitively end the alliance shortly afterwards when he invaded Ashina territory, which the Ashina, unsurprisingly, interpreted as a hostile act. The invasion would prove to be a back-and-forth affair, with the Ashina successfully repelling the Date’s first attacks only to be defeated by a second wave, led by Masamune himself.

    In late 1585, the Ashina asked for a truce, and a peace was mediated by Terumune and his uncle, Sanemoto. The negotiations would prove to be a ruse, however, as Ashina forces kidnapped Terumune at sword point and tried to escape back to their own territory. What happened next is a matter of debate; some sources state that Terumune, seeing that he couldn’t escape, ordered the pursuing Date forces (his own men) to open fire with their bows, killing the entire party, including Terumune.

    Another source suggests that the Ashina, trapped by the Date pursuit, killed Terumune themselves, and were then cut down. A third source (written later) states that Masamune himself was responsible for Terumune’s death, and may have orchestrated the whole thing to get rid of his father. Though the exact circumstances will never be known, Terumune’s death also signalled the end of serious attempts to end the local conflicts through negotiation.

    Shortly after his father’s somewhat controversial death, Masamune continued the war. In January 1586, he laid siege to Nihonmatsu Castle (in the city of the same name, in modern Fukushima). At this time, an army led by the Satake Clan, from Hitachi province (to the south), arrived to relieve the castle. The Date were defeated at the Battle of Hitotori Bridge, and Masamune himself was badly wounded before a rearguard action allowed him to escape.

    The restored Nihonmastu Castle.
    baku13 – 投稿者自身による著作物, CC BY-SA 2.1 jp, https://commons.wikimedia.org/w/index.php?curid=11354374による

    The defeat was evidently not serious, because only a few months later, after the Satake had withdrawn, Masamune tried again, once again besieging Nihonmatsu Castle, forcing its surrender in July. Not long after this, he negotiated a peace with the Satake with the intention of focusing his efforts on finishing off the Ashina. This peace was short-lived, even by the standards of the day, as a succession crisis within the Ashina Clan drew the attention of the Satake, who supported a rival candidate to Masamune’s preferred choice.

    Masamune interpreted this as the Satake intending to bring the Ashina under their control, which would have put the Date in an extremely vulnerable situation. In response, he declared his intention to wage a full-scale war against both the Ashina and Satake. In 1587, Toyotomi Hideyoshi, by now acting as regent, issued an order that all private wars should halt, an order that Masamune, for now at least, ignored.

    Masamune initially had reason to regret his continued belligerence. In 1588, his old enemies, the Mogami Clan, took advantage of Masamune being distracted elsewhere and invaded Date territory at the same time as the Ashina Clan attacked in the south. After defeats at the Battle of Osaki and then at Koriyama, Masamune was obliged to seek peace with both clans, stabilising the situation in the short term.

    In 1589, the peace with the Ashina Clan broke down once again, with Masamune invading the Aizu region (in the west of modern Fukushima). Masamune won a decisive victory at the Battle of Suriagehara in July 1589, causing the Ashina to flee their home castle at Kurokawa (modern Aizuwakamatsu) and seek help from the Satake. The Satake were obeying Hideyoshi’s peace order, however, and no help was forthcoming. Shortly after this, Masamune moved his base to Kurokawa Castle, and when a second order from Hideyoshi arrived, threatening direct intervention, Masamune took the opportunity to make peace.

    Fukushima Prefecture, where Aizu is located.

    A year later, Hideyoshi ordered the Date to join him in his attack on the Hojo Clan at the siege of Odawara. This put Masamune in a difficult spot, since the rule of his father, Terumune, the Date and Hojo had been nominal allies, and when Hideyoshi’s order arrived, it wasn’t immediately clear which side Masamune would join. Masamune eventually marched in support of Hideyoshi, but the regent wouldn’t forget Date disobedience of his peace order.

    Sources
    https://ja.wikipedia.org/wiki/%E4%BC%8A%E9%81%94%E6%94%BF%E5%AE%97
    https://ja.wikipedia.org/wiki/%E8%B1%8A%E8%87%A3%E7%A7%80%E6%AC%A1
    https://ja.wikipedia.org/wiki/%E6%91%BA%E4%B8%8A%E5%8E%9F%E3%81%AE%E6%88%A6%E3%81%84
    https://ja.wikipedia.org/wiki/%E8%8B%A5%E6%9D%BE%E5%9F%8E
    https://ja.wikipedia.org/wiki/%E4%BA%8C%E6%9C%AC%E6%9D%BE%E5%9F%8E
    https://ja.wikipedia.org/wiki/%E4%BD%90%E7%AB%B9%E6%B0%8F
    https://en.wikipedia.org/wiki/Hitachi_Province
    https://en.wikipedia.org/wiki/Aizu
    https://ja.wikipedia.org/wiki/%E4%BC%8A%E9%81%94%E6%B0%8F
    https://ja.wikipedia.org/wiki/%E4%BC%8A%E9%81%94%E8%BC%9D%E5%AE%97

  • The Dragon of Echigo

    The Dragon of Echigo

    Much like Takeda Shingen, Kenshin’s real name wasn’t Kenshin, but Kagetora, with Kenshin being a religious name given in later life. However, as this is the name he is best known by, we will be referring to him as it throughout.

    Uesugi Kenshin, the Dragon of Echigo and the topic of this post.

    If you live your life in such a way that you earn the nickname ‘Dragon of something’ and have followers who think of you as an avatar of the God of War, then I’d say you’ve done pretty well for yourself. By this standard, our subject for today, Uesugi Kenshin, is a historical figure worthy of a closer look.

    Confusingly enough, Uesugi Kenshin wasn’t actually a member of the Uesugi family to begin with. He was a scion of the Nagao family, a strong clan who were vassals of the Yamanouchi branch of the Uesugi Clan, based in Echigo Province, in what is now Niigata Prefecture.

    Echigo Province.
    By Ash_Crow – Own work, based on Image:Provinces of Japan.svg, CC BY 2.5, https://commons.wikimedia.org/w/index.php?curid=1655309

    Born in 1530, it is quite likely that Kenshin’s mother was a concubine, and what’s more, the boy himself was the second son. He was never intended to inherit control of the Nagao Clan, and he entered the temple at Risenji at age 11, apparently set on a life as a monk.

    He doesn’t seem to have stayed at Risenji for long, however, as when his father died in 1542, just a year later, he was at the funeral with armour and sword at his side, and shortly after that, he was at Tochio Castle when a rebellion against Kenshin’s brother (the new Lord Nagao) broke out. Despite being just 14, Kenshin is supposed to have led the defence of the castle and won his first victory.

    At the time, though the Uesugi were nominally the lords of the region, the Nagao served as deputy (and de facto) governors in their place. After the death of Kenshin’s father, it was his elder brother, Harukage, who inherited this position. The brothers don’t seem to have gotten along very well, however, and in the late 1540s, a movement emerged within the Nagao clan that sought to replace Harukage with Kenshin as head of the clan.

    The remains of Tochio Castle, site of Kenshin’s first victory.
    nubobo – 栃尾城本丸跡, CC 表示 2.0, https://commons.wikimedia.org/w/index.php?curid=59682349による

    Exactly why the clan was so against Harukage isn’t clear, but their efforts were ultimately successful. In 1548, under mediation from Uesugi Sadazane (their nominal overlord), Harukage agreed to adopt Kenshin, then retire as head of the clan, clearing the way for Kenshin to become head of the Nagao Clan aged just 18 or 19 (depending on the source).

    In 1550, Sadazane died without an heir, leaving Echigo Province without a lord. At this point, Shogun Ashikaga Yoshiteru instructed Kenshin to take the position of shugo of the province, effectively making him the new lord. Shogunate recognition was not quite the prestigious thing it had once been, however, and not long after this, supporters of Kenshin’s brother rose up in rebellion against him.

    Kenshin quickly bottled up the rebels at Sakado Castle, when the castle fell, the leader of the rebels was spared because he was Kenshin’s brother-in-law, and following this, Kenshin, still aged just 22 had established effectively control over the whole of Echigo Province.

    Looking back for a moment, five years earlier, the Uesugi Clan (or more accurately, the Ogigayatsu branch of the clan) had been defeated at the Battle of Kawagoe by the new rising star of the Kanto, the Hojo Clan. The Ogigayatsu-Uesugi were wiped out after this battle, leaving only the Yamanouchi Branch of the clan. In 1552, Uesugi Norimasa, who was, on paper, the Kanto Kanrei (Shogun’s deputy) was finally driven out of the Kanto entirely and sought refuge with Kenshin.

    A later depiction of Kawagoe Castle.

    Unsurprisingly, harbouring their enemies didn’t do much for the relationship between Kenshin and the Hojo, and Kenshin would send an army to oppose the Hojo’s invasion of Kozuke Province (modern Gunma Prefecture), capturing Numata Castle, and forcing the Hojo to retreat.

    A year later, Kenshin would face a new enemy, as Takeda Shingen’s long-running invasion of Shinano eventually obliged some of the clans there to flee and seek refuge with Kenshin in Echigo. Much like the Hojo, the Takeda didn’t take kindly to someone giving refuge to their enemies, and one of Japanese history’s most famous rivalries was born.

    In August 1553, an army led by Kenshin himself advanced against the Takeda in Shinan, defeating Shingen himself at the Battle of Fuse on August 30th, then again at Yuwata on September 1st. After this, Shingen adopted a strategy of avoiding direct battle with Kenshin, and the conflict settled into a stalemate that was later called the First Battle of Kawanakajima.

    A modern view of Kawanakajima.
    日本語版ウィキペディアのBlogliderさん – 原版の投稿者自身による著作物 (Original text: Photo by Bloglider.), CC 表示-継承 3.0, https://commons.wikimedia.org/w/index.php?curid=12400636による

    In 1554-55, Kenshin was obliged to face a rebellion launched by treacherous vassals in league with Shingen. Putting down the rebellion quickly, Kenshin again marched into Shinano in April 1555 to face the advancing Takeda forces, again led by Shingen.

    At the Second Battle of Kawanakajima, the two sides faced each other in another stalemate, which dragged on for five months, before mediation from the Imagawa Clan led to both sides withdrawing after little actual fighting.

    In the following year, Kenshin apparently announced he would retire and become a monk, however, another outbreak of Takeda-backed rebellion forced him to change his plans, and after a period of peace, in 1557, Shingen again advanced against Kenshin’s allies in Shinano, forcing him to intervene and leading to the Third Battle of Kawanakajima, which, much like the previous two, swiftly settled into stalemate.

    A year later, Kenshin dispatched an army in an ultimately unsuccessful invasion of Kozuke Province and then in 1559 he was ‘invited’ for a meeting with the Shogun, Ashikaga Yoshiteru. Some sources say that Kenshin was granted the title of Kanto Kanrei at this time, the position traditionally held by the Uesugi Clan. He also apparently donated funds towards the maintenance and repair of the Imperial Palace.

    Swords supposedly gifted to Kenshin by the Emperor, photographed in 1928.

    It seems that Kenshin enjoyed good relations with the Shogunate, but the already well-established decline of the Shogun’s power is highlighted again when he asked Kenshin, Shingen, and the Hojo to make peace in order to combine their forces against the Shogun’s enemies. All three parties refused.

    In March 1560, the Imagawa Clan’s devastating defeat at Okehazama opened the way for Kenshin to intervene directly in the Kanto again, as the Imagawa had been allied to his enemies, the Hojo, and their defeat left the Hojo vulnerable. Later that year, Kenshin launched another large-scale invasion of Kozuke Province, driving the Hojo back and capturing several important castles before celebrating New Year at Maebashi Castle, the gateway to the Kanto Plain.

    In March 1561, Kenshin was formally adopted by the Yamanouchi-Uesugi Clan (the only remaining branch) and changed his surname to match. Though he would be known as Uesugi Kagetora from this point, we will continue to call him Kenshin to keep things simple.

    In August of that year, Kenshin led another large army into Shinano, and engaged the Takeda at the Fourth Battle of Kawanakajima. Unlike the previous three, this battle was not an extended stalemate, but a bloody one. Both sides suffered heavy casualties, with sources ranging from around 20% losses, to as high as 60 or 70%, and when the battle was over, the Takeda held the field, but made no attempt to intervene as the Uesugi withdrew, leading some to suggest the battle was a bloody draw.

    A legendary depiction of the Fourth Battle of Kawanakajima, depicting the (possibly apocryphal) moment that Uesugi Kenshin and Takeda Shingen met on the field.

    The Takeda and Hojo clans, recognising the Uesugi as their common enemy, renewed their combined efforts and launched a joint counter-attack in Musashi Province in late 1561. At first, Uesugi forces were successful against the alliance, even getting as far as besieging Odawara Castle, the Hojo’s main stronghold, before being forced to withdraw after allied counter-attacks in other parts of the Kanto.

    The strategic situation in the Kanto would ebb and flow over the following years, as Uesugi, Takeda, and Hojo armies advanced and retreated, and the local lords would switch sides depending on whoever appeared to be in the ascendancy.

    All three factions would be occupied with fighting each other, but also engaged in other battles and proxy wars with allies and supporters of each other’s enemies. For Kenshin, this meant being obliged to dispatch forces into neighbouring Etchu Province in 1568, to deal with Ikko Ikki forces nominally allied with Shingen.

    Etchu Province.

    Seeking to take advantage of this distraction, Takeda forces attacked in Shinano and were ultimately defeated, but a rebellion in Echigo (Kenshin’s home province) meant he was unable to take advantage of this victory in the short term.

    Later that year, the strategic situation would shift in Kenshin’s favour, however, as the long-term decline in Takeda-Imagawa relations finally led to open conflict between two of his main rivals. The Imagawa would request aid from both the Uesugi and the Hojo, and while Kenshin would refuse, the Hojo dispatched forces to oppose the Takeda, bringing an end to the alliance that had done so much to oppose Kenshin.

    However, years of expensive (and bloody) campaigns in the Kanto had left the Uesugi exhausted, and in 1569, Kenshin reluctantly agreed to a peace deal with the Hojo, which saw the Uesugi withdraw from Musashi Province (modern day Tokyo and Saitama) and the Hojo withdrew from Kozuke.

    With his borders with the Hojo (relatively) secure, Kenshin was able to focus on campaigning against the Takeda again. In 1570 and 1571, he would engage the Takeda and their allies in Etchu and Shinano Provinces, generally having the better of the fighting, but the situation would shift again in 1572 when the lord of the Hojo, Ujiyasu, passed away, and was replaced by Ujimasa, who made peace with the Takeda, turning on the Uesugi. At the same time, the Etchu Ikko Ikki launched a fresh attack, instigated by Takeda Shingen.

    Hojo Ujimasa, who reversed his father’s diplomatic policy.

    The Ikko Ikki would initially be successful against Kenshin, but by mid-1573, the momentum had shifted back in his favour, and several key fortresses within Etchu were taken. Also in that year, Kenshin’s long-time rival, Takeda Shingen, passed away, an event that apparently caused Kenshin to weep openly, but also significantly weakened the Takeda.

    Over the following two years, Kenshin was forced to split his focus between his ongoing campaign in Etchu and the situation in the Kanto. By the end of 1574, the Hojo had effectively ended any Uesugi presence in the region, and although Kenshin would launch counterattacks, the writing was on the wall for Uesugi power in the Kanto.

    In 1576, Kenshin would receive a request for aid from the Shogun, seeking support against Oda Nobunaga, who now dominated central Japan and had forced the Shogun into exile. In order to get to Kyoto, Kenshin was obliged to focus all his resources on securing Etchu and Noto Provinces. This campaign would drag on throughout 1576 and 1577, delayed by intervention from the Hojo and internal rebellion, but by November 1577, Kenshin had secured control of the provinces and was poised to strike at Kyoto itself.

    Noto Province.
    By Ash_Crow – Own work, based on Image:Provinces of Japan.svg, CC BY 2.5, https://commons.wikimedia.org/w/index.php?curid=1690738

    Mustering a large army, Kenshin would march out to meet a force led by Nobunaga’s generals, Shibata Katsuie and Hashiba Hideyoshi (better remembered to history as Toyotomi Hideyoshi), who were not fond of each other. A dispute led to Hideyoshi withdrawing his forces early, and when the two sides clashed at the Battle of the Tedori River on November 3rd, Kenshin would emerge victorious.

    The exact course of the battle, and even the size of the forces involved, is not clear from contemporary sources, but Kenshin would withdraw temporarily, issuing instructions for a renewed campaign to begin in the spring. The battle at the Tedori River had opened a strategic opportunity for Kenshin, and it has been speculated that he might have been able to complete his march on Kyoto.

    Much like his rival, Shingen, however, Kenshin would never make the march. In early March, Kenshin would collapse (allegedly whilst in the toilet) and fall into a coma from which he would never wake up; he died on March 13th, aged 49.

    The site of Kenshin’s grave at Risenji, where he studied as a boy.
    By shikabane taro, CC BY 3.0, https://commons.wikimedia.org/w/index.php?curid=54071606

    Much like the Takeda after the death of Shingen, the Uesugi would be seriously weakened by Kenshin’s death. Though they had been a threat to Nobunaga, Kenshin’s death, and the ongoing effects of years of more or less constant conflict, rendered them powerless to stop the rise of Nobunaga, and after his death in 1582, the Uesugi would make their peace with his successors.

    Decisions made at the end of the Sengoku Jidai would see the clan’s star fall even further, though that is a story for another time.

    Sources
    https://ja.wikipedia.org/wiki/%E4%B8%8A%E6%9D%89%E8%AC%99%E4%BF%A1
    https://ja.wikipedia.org/wiki/%E6%89%8B%E5%8F%96%E5%B7%9D%E3%81%AE%E6%88%A6%E3%81%84
    https://en.wikipedia.org/wiki/Battle_of_Tedorigawa
    https://ja.wikipedia.org/wiki/%E5%B7%9D%E4%B8%AD%E5%B3%B6
    https://ja.wikipedia.org/wiki/%E5%89%8D%E6%A9%8B%E5%9F%8E
    https://ja.wikipedia.org/wiki/%E6%B2%BC%E7%94%B0%E5%9F%8E
    https://en.wikipedia.org/wiki/Battles_of_Kawanakajima