Tag: Siege of Osaka

  • Tokugawa Ieyasu and the Road to Osaka.

    Tokugawa Ieyasu and the Road to Osaka.

    By 1614, Ieyasu was unquestionably the master of Japan. Though he had formally resigned as Shogun in favour of his son, Hidetada, a decade earlier, the reins of power were firmly in his hands. Already in his 70s, practically ancient by the standards of the day, he was no doubt considering the sort of questions a man at the end of his life might contend with: “What happens after I am gone?”

    Hidetada was, by most accounts, a perfectly capable Shogun. He had earned a relatively good reputation on the battlefield, and most sources agree that he was hard-working and well-trained by his father. The problem for Ieyasu was that, despite everything, Tokugawa rule was not entirely unchallenged.

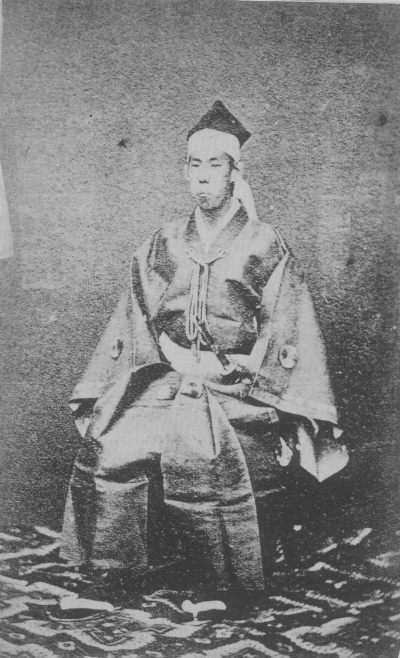
    Ieyasu as he appeared in later life. By 1614, he was the master of Japan, but despite all his power, his rule was not unchallenged.

    After the Battle of Sekigahara, Ieyasu had explicitly refused to take any action against Hideyoshi’s infant son, Hideyori. Instead, he had ensured that the Toyotomi Clan remained wealthy, and as long as Hideyori remained holed up in Osaka Castle, Ieyasu was content to leave him be.

    For his part, Hideyori initially seemed happy enough to remain where he was, spending large sums of money on restoring or rebuilding temples that had been damaged during the war, though his exact motivation for this has been questioned by scholars, with some suspecting he was seeking to gain divine support, and others suggesting that he was simply religious.
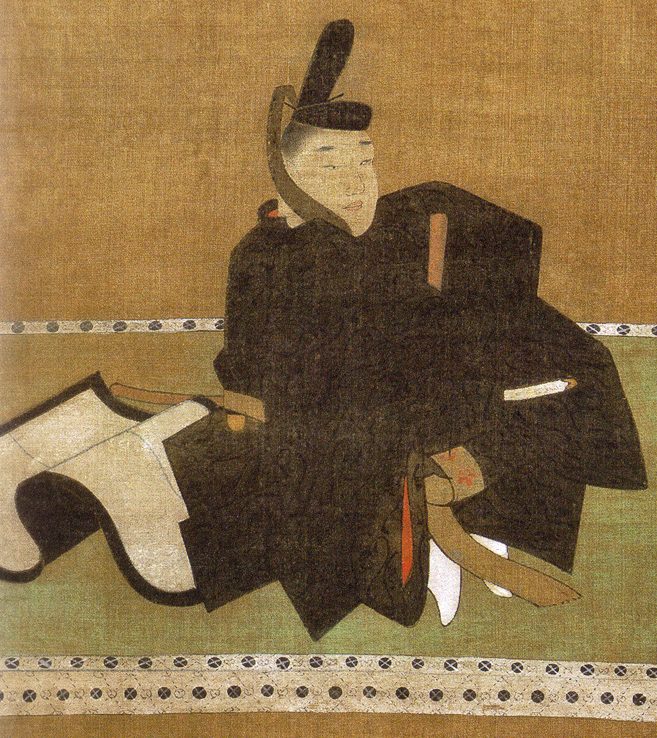
    Toyotomi Hideyori. Though he was his father’s heir, he seemed content to live a peaceful life.

    By late 1614, Hideyori was in his 20s and was beginning to attract attention as Hideyoshi’s rightful heir. One somewhat fanciful account tells us that by this time, Hideyori was nearly 2 metres tall and weighed over 160kg, and while no other sources corroborate his impressive size, he was beginning to become a focal point for Anti-Tokugawa elements in the realm.

    Ieyasu had plenty of reason to fear Hideyori’s challenge to his family’s rule; some scholars even suggest that Hideyori’s generosity towards various temples was actively encouraged by the Shogun as a way to drain Toyotomi resources that might otherwise have been spent on preparations for war. Whether this is true or not, it was increasingly clear that Ieyasu couldn’t simply let Hideyori be; all he needed was a pretext.
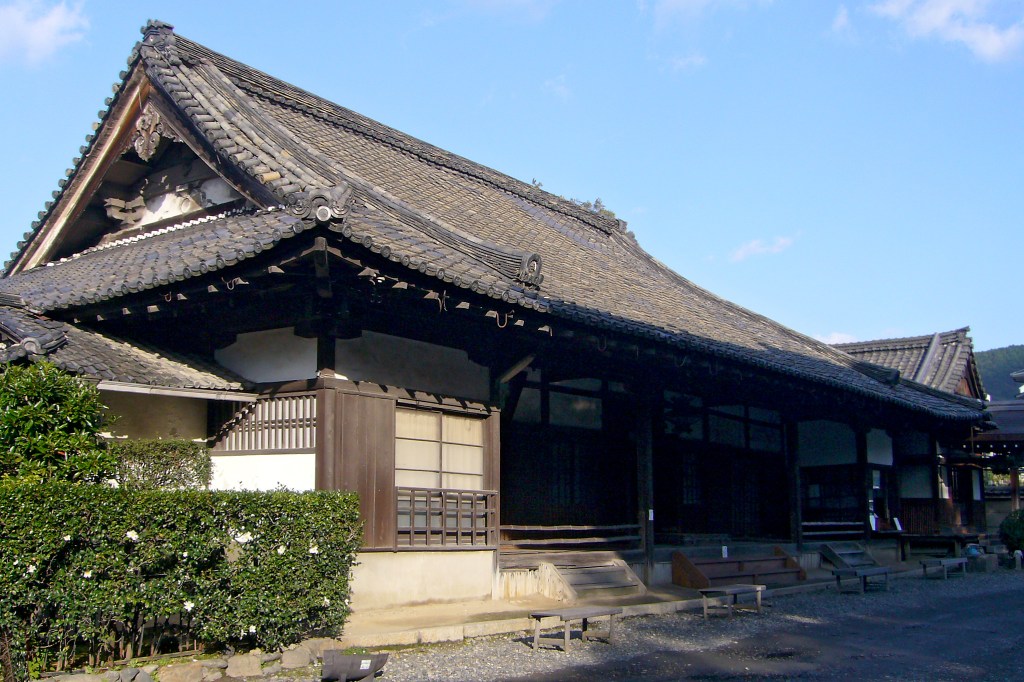
    The main hall of Hokoji as it appears today. Though it was relocated in the 19th Century, it is believed to have been originally built in the 17th.

    As part of his widespread temple-rebuilding projects, Hideyori commissioned a new bell for the Hokoji Temple near Kyoto. This was initially an uncontroversial act, but rumours soon spread that the bell had been inscribed with words that could be construed as prayers for the restoration of the Toyotomi and the downfall of the Tokugawa.

    The phrases themselves translate into English as “National peace and prosperity” and “Lord and subject enjoy abundant happiness“. From a modern perspective, neither of these seem particularly problematic, but the problem was that, in Japanese characters, the writing contained parts of Ieyasu’s name, split in two (ie, and yasu), which was construed as a form of cursing him, whilst the second phrase suggested that the “lord” in question was the Toyotomi.
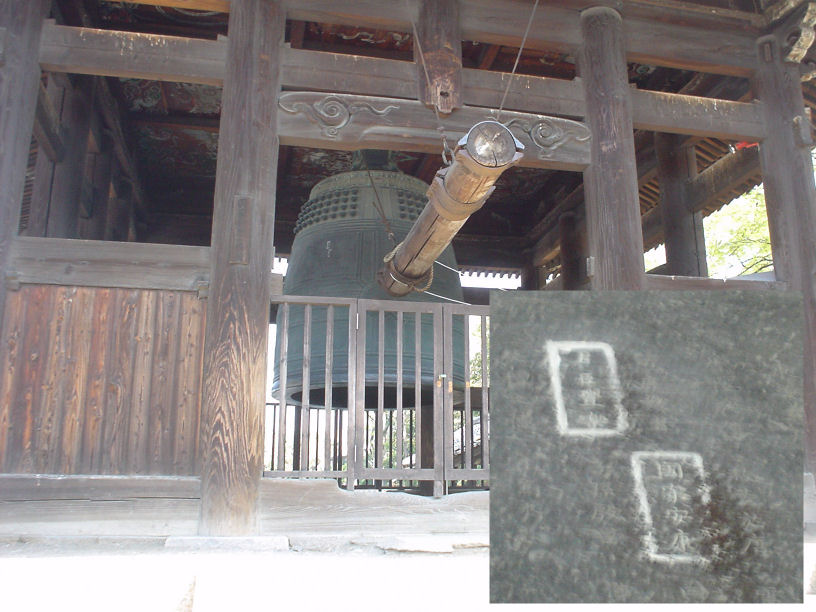
    The bell and the inscription that caused all the trouble.
    +- – 投稿者自身による著作物, CC 表示-継承 3.0, https://commons.wikimedia.org/w/index.php?curid=107332539による

    This was an age of superstition, and signs and portents were taken seriously, but even so, this was as good a reason as any for Ieyasu to finally deal with the Toyotomi once and for all. He apparently wasn’t immediately set on a military option, as negotiations took place in late 1614 to try to defuse the tension. An emissary, Katagiri Katsumoto, was dispatched to explain the ‘true’ meaning of the bell, but he was unable to meet with Ieyasu or Hidetada directly, and instead returned to Osaka with three possible proposals.

    It’s important to note that none of these proposals appear in any Tokugawa documents from the time, and some scholars believe they were the invention of Katsumoto himself. They were as follows:
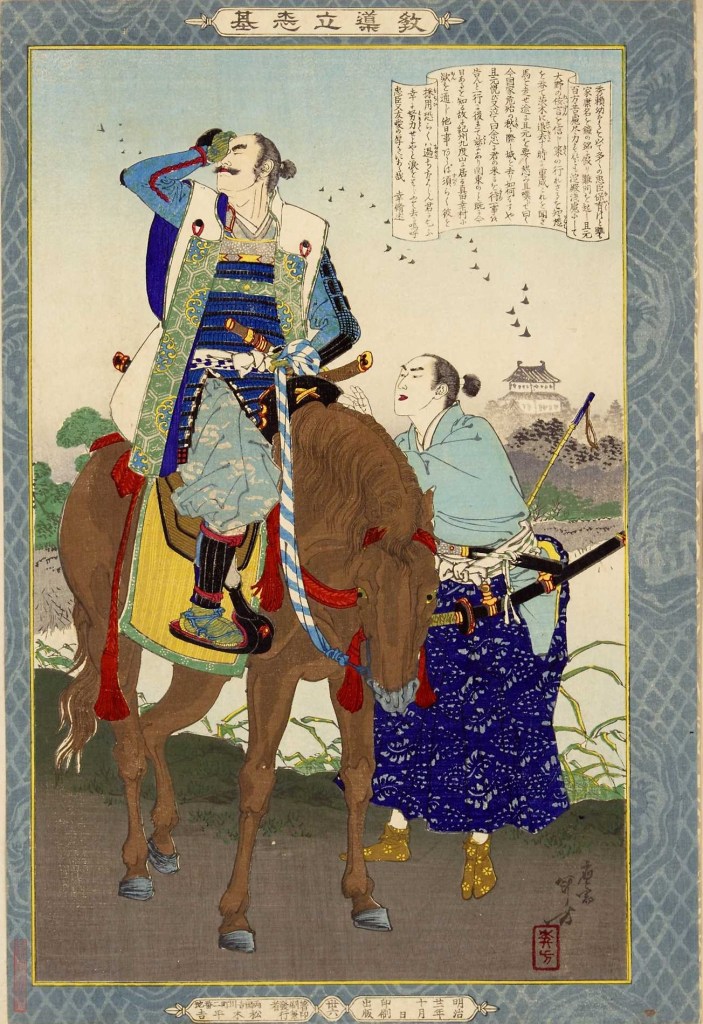
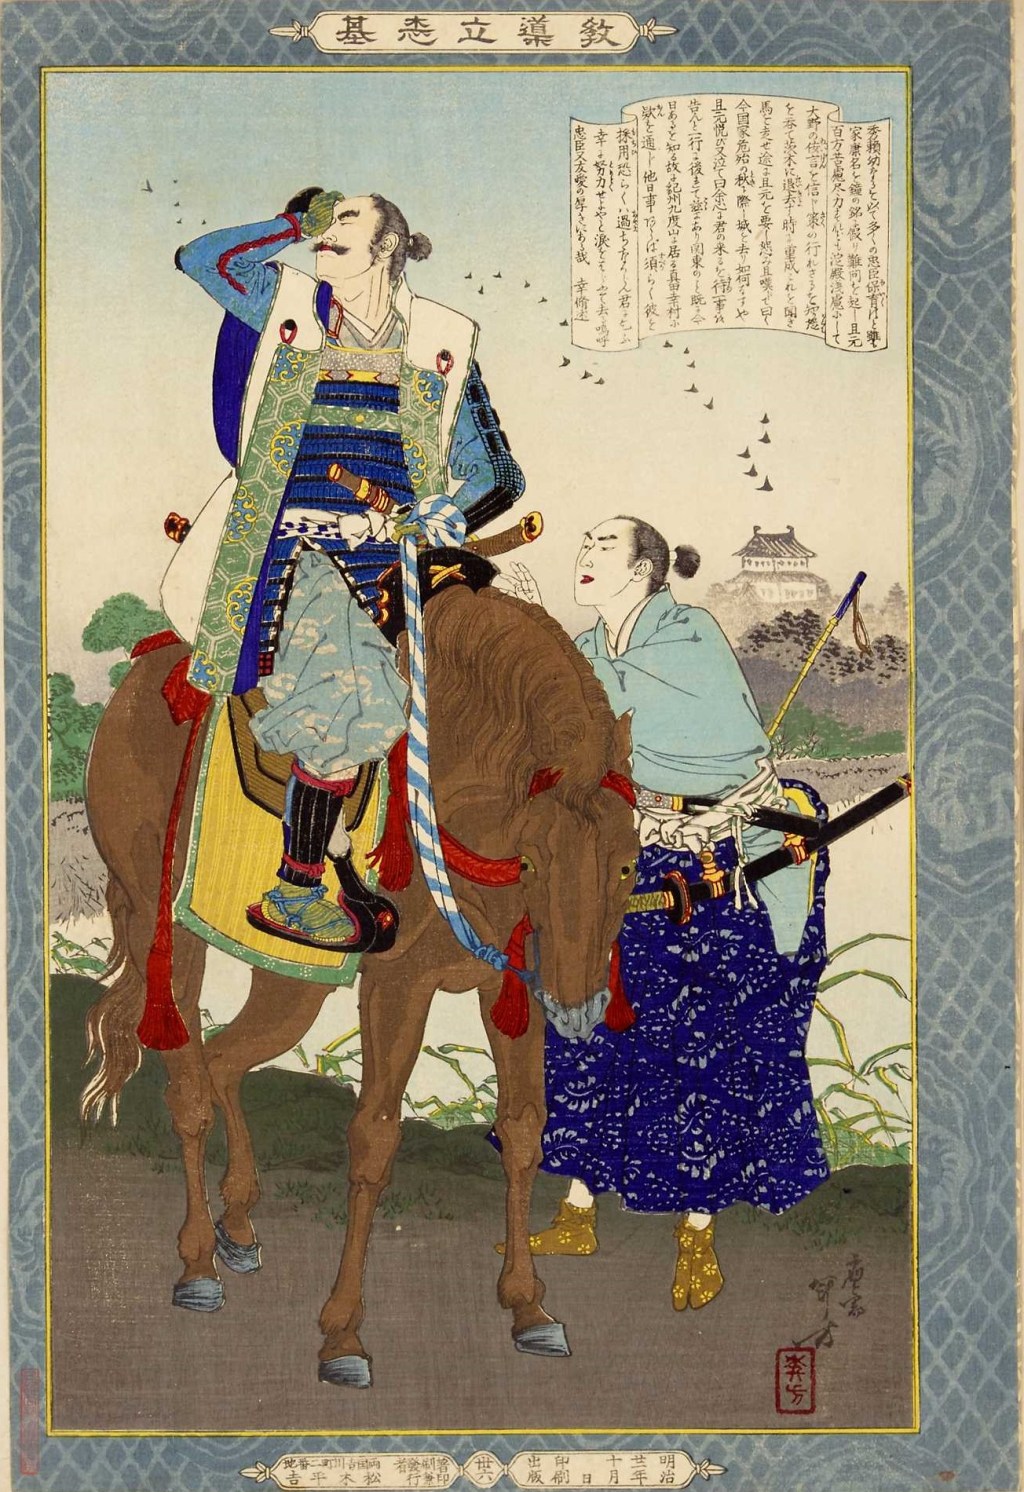
    A 19th-Century depiction of Katagiri Katsumoto departing on his mission to Ieyasu.

    1) Hideyori would reside alternately in Edo and Osaka, as part of the Sankinkotai policy, in which Daimyo were obliged to live one year in Edo, and one year in their home provinces. Hideyori had previously been exempt, and accepting Sanki-kotai would have essentially confirmed him as a vassal of the Shogun.

    2) Hideyori’s mother, Lady Yodo, would be sent to Edo as a hostage. She would likely have lived in comfort, but her life would have been forfeit if Hideyori ever stepped out of line.

    3) Hideyori agreed to give up the formidable Osaka Castle and accept an alternative domain elsewhere.
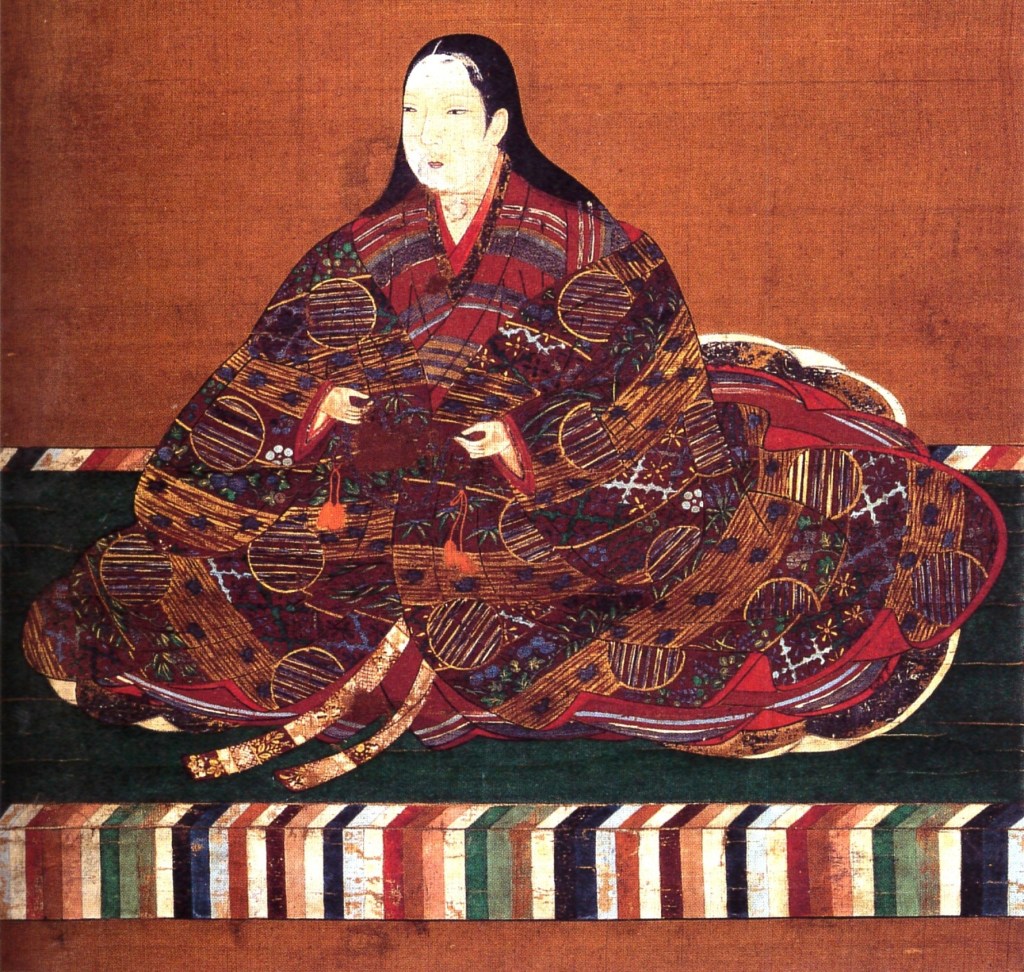
    Hideyori’s mother, Lady Yono (Yodo-Dono). It was suggested that she might be given as a hostage to guarantee peace, a suggestion that was sharply rejected by Hideyori.

    Whether these proposals truly came from the Shogunate or not, they were so offensive to the Toyotomi that Katsumoto came under suspicion of collusion with the Tokugawa. Although no contemporary evidence exists, other Toyotomi vassals believed the rumours and tried to have Katsumoto killed. The man himself escaped by fortifying his residence, and it took direct intervention from Hideyori to end the crisis, with Katsumoto agreeing to become a monk.

    Hideyori swiftly dispatched emissaries to Ieyasu, explaining that the fortification and massing of troops were in no way aimed at the Tokugawa, and that it had been an internal matter, now resolved. Ieyasu either genuinely or else conveniently chose not to believe this explanation, and gave orders for forces to be gathered to punish the Toyotomi.
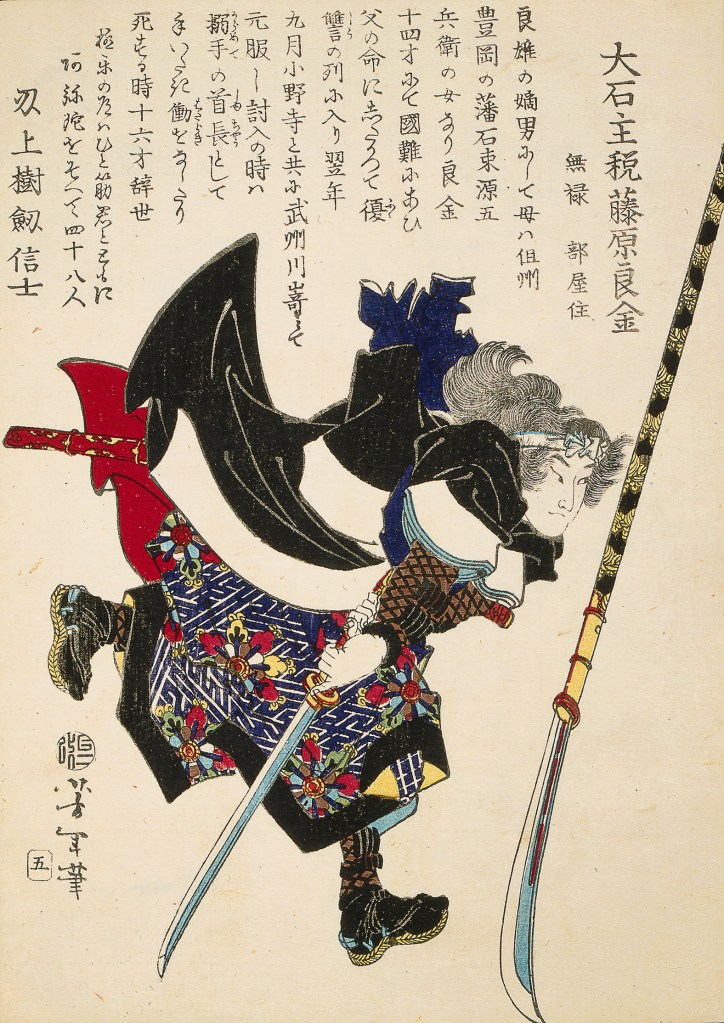
    A later depiction of a Ronin. Although often romanticised in later years, in the period immediately following Sekigahara, huge numbers of recently unemployed Samurai were a serious problem, but, as Hideyori would prove, a potentially useful source of manpower.

    In response, the Toyotomi issued a call to arms, gathering those loyal to the Toyotomi through old association or opposition to the Tokugawa. Very few Daimyo rushed to join up, but the vast wealth left behind at Osaka Castle by Hideyoshi was used to persuade thousands of Ronin (masterless Samurai) to come to Osaka and fight for the Toyotomi.

    Meanwhile, food, provisions, and weapons were either purchased or “acquired” from storehouses in and around Osaka, with or without the owners’ permission. In relatively short order, the Toyotomi had gathered some 100,000 men in Osaka.
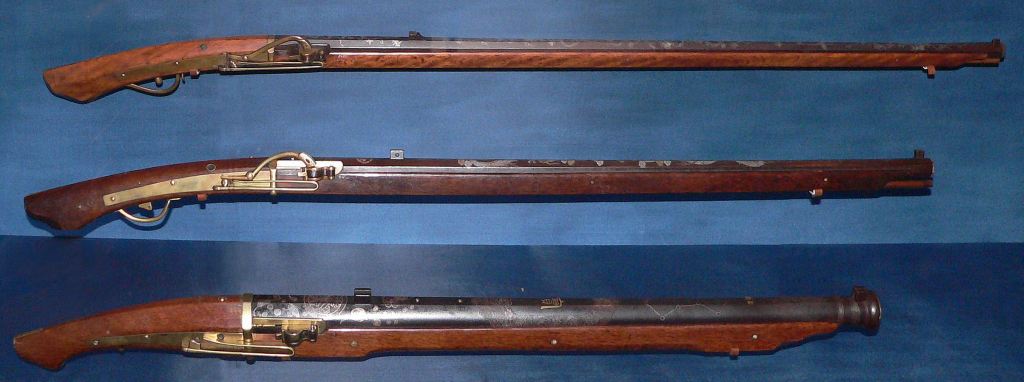
    Guns from the period. Although Samurai are most famously associated with their swords, by this time, guns were as common, if not more so.

    Some were motivated by a genuine desire to see the Toyotomi family restored to power, either out of loyalty or with the expectation of reward should they succeed. Others were there to take revenge on the Tokugawa, with many having become Ronin in the aftermath of Sekigahara, where dozens of lords had lost everything as punishment for opposing Ieyasu. Still others were naked opportunists, motivated to fight for cash rewards or to restore/earn a reputation, as their forefathers had done.

    In response, Ieyasu and Hidetada mustered a force which was, in some accounts, twice the size of the one now surrounding Hideyori, and these men suffered little, if any, confusion about their intentions, loyalty to the Shogun, and hostility to the Toyotomi. Such a massive force was almost impossible to gather in one place, and so detachments of various sizes made their way towards Osaka.
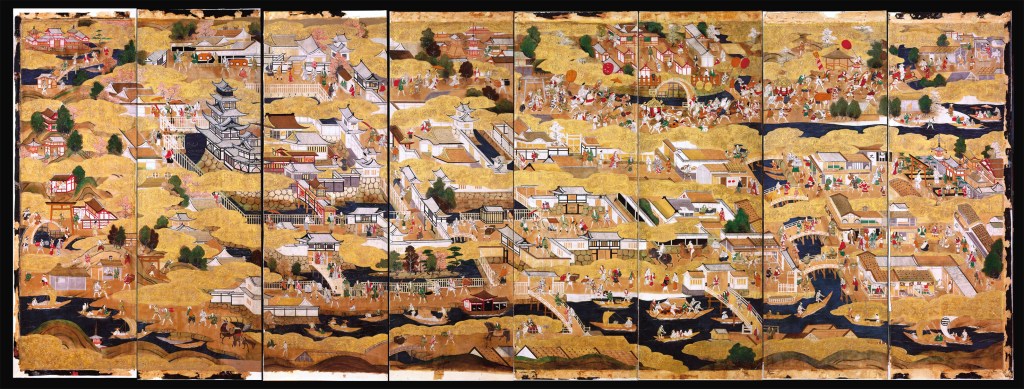
    A contemporary image of the area around Osaka, with the port of Sakai represented in the top right.

    The Toyotomi forces were not idle in the meantime, attacking and briefly taking the important port at Sakai (modern Osaka) before being forced to withdraw by a Tokugawa counter-attack. Understanding the disparity in forces, the Toyotomi then retreated to Osaka Castle, arguably the strongest fortress in the realm, and waited for the storm to break.


    Sources
    https://ja.wikipedia.org/wiki/%E5%A4%A7%E5%9D%82%E3%81%AE%E9%99%A3
    https://ja.wikipedia.org/wiki/%E5%A0%BA
    https://ja.wikipedia.org/wiki/%E5%BE%B3%E5%B7%9D%E5%AE%B6%E5%BA%B7
    https://ja.wikipedia.org/wiki/%E6%B5%AA%E4%BA%BA
    https://ja.wikipedia.org/wiki/%E6%96%B9%E5%BA%83%E5%AF%BA%E9%90%98%E9%8A%98%E4%BA%8B%E4%BB%B6
    https://ja.wikipedia.org/wiki/%E6%96%B9%E5%BA%83%E5%AF%BA
    https://ja.wikipedia.org/wiki/%E5%BE%B3%E5%B7%9D%E7%A7%80%E5%BF%A0
    https://ja.wikipedia.org/wiki/%E6%B7%80%E6%AE%BF
    https://ja.wikipedia.org/wiki/%E8%B1%8A%E8%87%A3%E7%A7%80%E9%A0%BC
  • Memento Mori, Part 3

    Memento Mori, Part 3

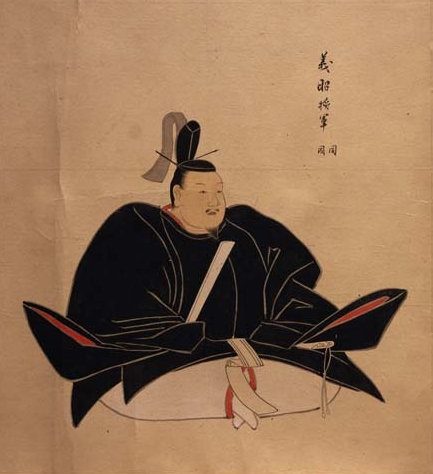
    Last time, we looked at how the relationship between Mori Terumoto and Oda Nobunaga broke down, leaving both sides on the verge of conflict. After Terumoto declared for the Shogun, Ashikaga Yoshiaki (the last Ashikaga Shogun) declared that Terumoto would serve as ‘Vice Shogun’, a slightly ambiguous position which was rendered largely moot in practice, as the Shogun relied almost entirely on Mori’s strength of arms, reducing him to little more than a figurehead.

    Ashikaga Yoshiaki, the last of the Ashikaga Shoguns, and little more than a figurehead.

    The first action of this new ‘Shogunate’ (read: Mori) army was supporting the besieged warrior monks of Ishiyama Hongan-ji. You may recall in the post about the Ikko-Ikki, we mentioned Nobunaga’s campaigns against Hongan-ji, which ultimately lasted more than a decade, and left the temple a charred ruin.

    The Mori, possessing one of the most powerful navies amongst the Sengoku Daimyo, dispatched a fleet which made short work of the Oda forces in Osaka Bay, opening the way for supplies to be delivered to Hongan-ji. This victory prolonged the siege and gave the Mori unchallenged control of the Seto Inland Sea in the short term.

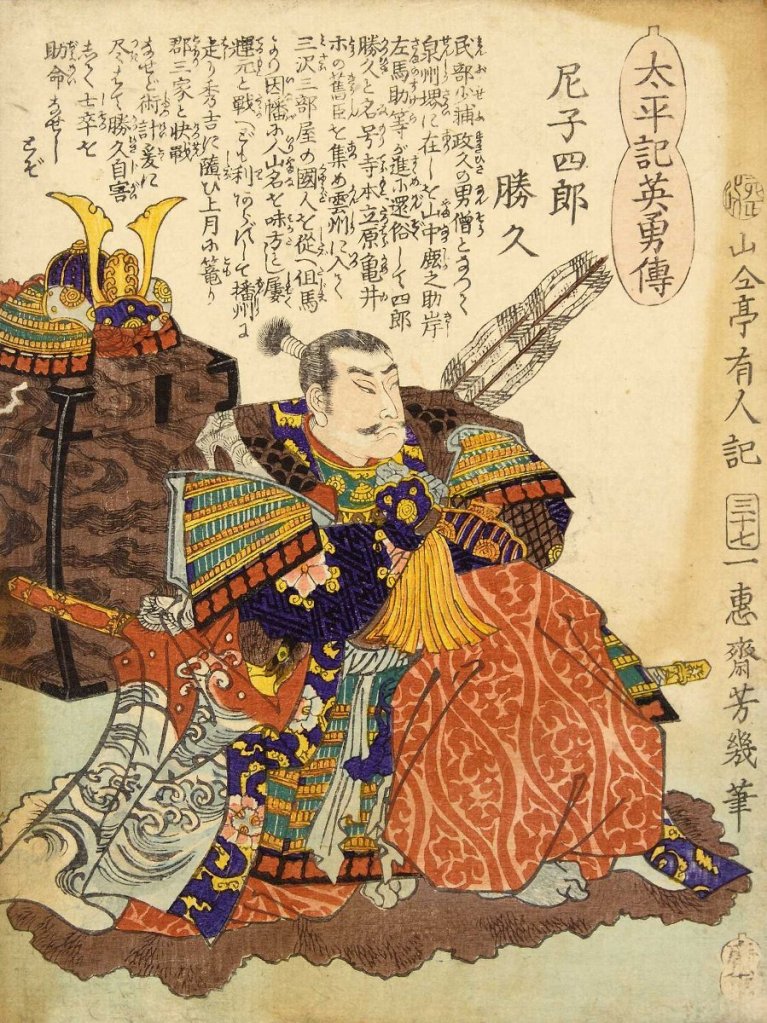
    Later that year, Nobunaga sought to restore the Amago Clan (long-time enemies of the Mori) to a position of strength, putting up Amago Katsuhisa, the last Amago ‘lord’ at Kozuki Castle, in Harima Province, hoping to attract Amago loyalists and any other opponents of the Mori, and make life difficult for Terumoto.

    A later image of Amago Katsuhisa, the last ‘lord’ of the Amago Clan.

    In response, Terumoto himself led an army to lay siege to Kozuki, and when a relief force, led by Hashiba (later Toyotomi) Hideyoshi, arrived, Terumoto handily defeated it, driving the Oda out of Harima Province, taking Kozuki Castle, and obliging the remaining Amago partisans to commit seppuku, which isn’t bad for a day’s work.

    Not long after this success, Terumoto would expand his influence in Harima still further, convincing several lords to defect to the Mori, and bottling up Nobunaga’s remaining loyalists in the province. After this series of successes, Terumoto had Nobunaga on the back foot, and in response, he pressured the Imperial Court to issue an order that Hongan-ji make peace with Nobunaga. The monks of Hongan-ji expressed a desire to make peace, but not without Terumoto, to whom they owed a debt of gratitude. In response, Nobunaga agreed and began negotiations with Hongan-ji and the Mori.

    The strategic situation shifted considerably in the early winter, however, as a Mori fleet dispatched to deliver further supplies to Hongan-ji was defeated by new ironclad ships of the Oda Navy. The exact nature of these vessels isn’t clear; the word ‘ironclad’ is a direct translation from Japanese, implying the vessels were at least partially armoured, though the exact style and extent of armour isn’t clearly recorded.

    An example of the type of warship used by the Mori Navy.

    Shortly after this victory, which drove the Mori beyond Awaji Island and opened Osaka Bay to the Oda, Nobunaga swiftly called off negotiations and made plans to continue the war. Despite the defeat, the Mori were still in a very strong position, however, and at this point, Terumoto made plans to advance on Kyoto and take the fight to Nobunaga directly.

    Plans were laid, including negotiation with Takeda Katsuyori for a simultaneous attack on Nobunaga’s ally, Tokugawa Ieyasu, and Terumoto set the date of the start of the campaign for early 1579. However, early 1579 came and went, and the Mori did not march. A series of rebellions broke out around the same time, supposedly instigated by both Nobunaga and the Otomo Clan (rivals to the Mori on Kyushu), and Terumoto had his hands full.

    The situation went from bad to worse for the Mori throughout 1579, as several border clans, angered at what they saw as a ‘betrayal’ when Terumoto failed to march on Kyoto, defected to the Oda side, disrupting communications with troops on the front line, and opening several gaps in Mori defences. The Mori failure to march also resulted in no further attempts to relieve Hongan-ji, and it was forced to surrender in early 1580.

    Not long after that, Nobunaga was able to focus significant forces on the Mori, and an army led by Hashiba Hideyoshi took advantage of the Mori’s weak position and launched a series of successful attacks against them, capturing castle after castle. A counter-attack in February 1582 led to a brief reprieve, but news from elsewhere was bad.

    A later artistic depiction of Toyotomi Hideyoshi (then still called Hashiba) around 1582.

    The Takeda, with whom the Mori had allied against Nobunaga, were decisively defeated in early Spring, and with their removal, Nobunaga turned his entire attention to the Mori. The situation was dire. A little more than five years earlier, the Mori had been a match for Nobunaga; indeed, had Terumoto marched on Kyoto, he would have had a good chance of success.

    Now, however, Nobunaga was stronger than ever, and internal rebellion, defections, and military defeats meant that the Mori were far weaker in comparison. Had Nobunaga advanced, he almost certainly would have won.

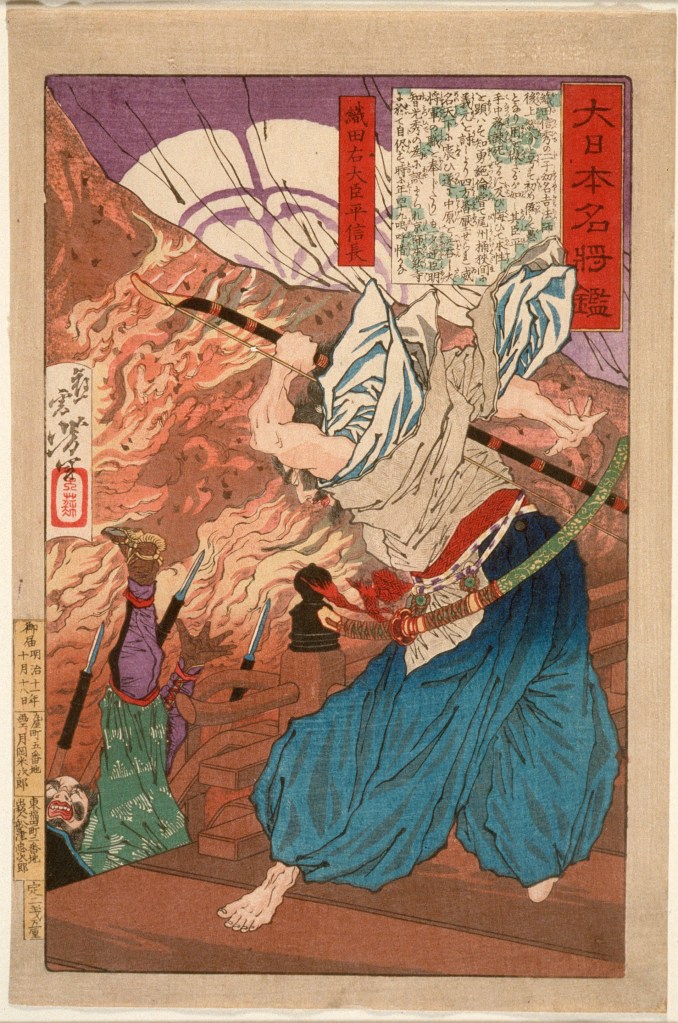
    As is so often the case, however, fate intervened. Nobunaga was betrayed by one of his generals in June 1582 and killed. His supporters immediately turned on each other, with Hashiba Hideyoshi, the man who had been leading the charge against the Mori, wishing to establish himself as Nobunaga’s successor, and so he concluded a swift peace with the Mori. For his part, Terumoto was glad to accept, even though it meant sacrificing three provinces. When news of Nobunaga’s death broke, Ashikaga Yoshiaki, still with the Mori, ordered Terumoto to march on Kyoto and take advantage of the situation.

    A 19th century depiction of Oda Nobunaga’s final moments.

    Terumoto refused, still forced to deal with internal rebellion, and although there would be plenty of opportunities to involve himself in the chaotic fighting that followed Nobunaga’s betrayal, the Mori would not move, instead adopting a ‘wait and see’ approach, which, in hindsight was wise, as although history would record Hideyoshi as the ultimate victor, in the summer of 1582, that was far from certain.

    One thing that Terumoto did agree to, however, was refusing to accept the ceding of three provinces to Hideyoshi as part of their peace deal. No doubt the Mori felt that Hideyoshi had misled them (Terumoto hadn’t known about Nobunaga’s death before the agreement), and with Nobunaga’s successors tearing each other apart, the Mori were in a good position to keep hold of their territory.

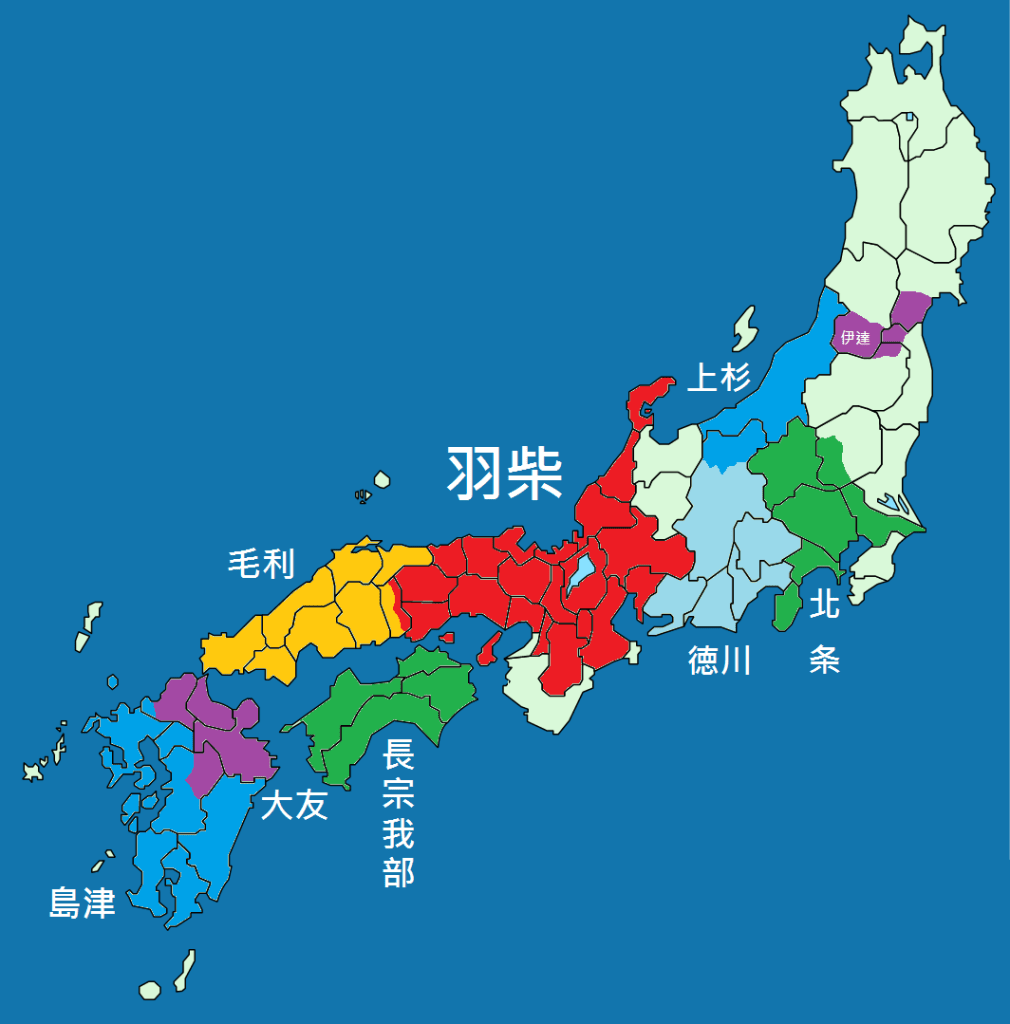
    Negotiations dragged on, even after Hideyoshi was able to win a decisive victory at the Battle of Shizugatake in April 1583, and he began to lose patience, threatening a resumption of war if the Mori didn’t concede. It would not be until early 1585 that a peace was actually agreed, and it was achieved largely without fresh fighting. The Mori would be allowed to keep seven provinces, representing much of the territory that had been taken by Terumoto’s grandfather, Motonari. In exchange, the Mori agreed to support Hideyoshi’s campaigns to unite the realm, especially in Shikoku and Kyushu, which the Mori assisted in invading in May 1585 and August 1586, respectively.

    The strategic situation in 1584, just after Hideyoshi secured power. The Mori are represented in yellow, and Hideyoshi in red.
    By Alvin Lee – Own work, CC BY-SA 4.0, https://commons.wikimedia.org/w/index.php?curid=39198357

    Finally, in the summer of 1586, Terumoto formally became a vassal of Hideyoshi (by now known as Toyotomi), ending decades of conflict and proving to be a significant step in bringing the Sengoku Jidai to an end more generally. A testament to the new trust placed in the Mori came in 1590, when Hideyoshi attacked the Hojo Clan, masters of the Kanto. Though the Mori did not join the campaign, Mori troops were entrusted with guarding the capital while Hideyoshi was away.

    Around this time, Terumoto completed his new base at Hiroshima Castle and would take part in Hideyoshi’s ill-fated invasion of Korea in 1592. We will go into more detail about the events that followed later, but after Hideyoshi’s death in 1598, Terumoto was named as one of five regents for his infant son, Hideyori.

    The five regents were meant to stabilise the realm until Hideyori came of age, but it didn’t work; Tokugawa Ieyasu was swiftly opposed by the other four as it was believed (rightly as it turned out) that he wished to overthrow the current government and make himself Shogun. The tension would eventually lead to a new outbreak of violence, and a brief campaign culminated in the decisive Battle of Sekigahara in 1600.

    Teruhito and the Mori Clan were officially in opposition to the victorious Ieyasu, but had dispatched only a small force to Sekigahara, keeping their main strength at Osaka Castle to guard the heir. This was the strongest castle in the realm, and Terumoto had tens of thousands of fresh troops with which to hold it. Ieyasu, apparently aware of this, dispatched a letter to Terumoto, expressing his desire for positive relations between the two, and hoping that the Mori would depart Osaka without further violence.

    The walls of Osaka Castle as they appeared in 1865.

    Terumoto agreed when Ieyasu confirmed that the Mori would lose no territory in the aftermath. However, Ieyasu would almost immediately go back on his word once Terumoto was safely away from Osaka. The Mori were reduced to just two provinces in the far west, Suo and Nagato, and almost all the territory taken by Motonari and Terumoto was lost.

    Terumoto himself would officially retire as head of the clan not long after Sekigahara and became a monk, though in reality, he would retain most of the actual authority within the clan. One challenge that came about almost immediately was the loss of income that came with the loss of territory. Before Sekigahara, the Mori had had an income of more than 1 million koku (a Koku being approximately how much rice one man needed for a year). After Sekigahara and the loss of five of their provinces, this income was down to less than 300,000.

    This loss in income led to a loss in strength, as many of the clan’s retainers found their stipends reduced or lost entirely, leading them to seek employment elsewhere (just in case you thought Samurai were all about unquestioned loyalty.) Terumoto rather astutely recognised that this reduction might actually benefit the clan long term, as disloyal vassals would leave quickly, and even those who remained could be chosen based on ability, leading to a reduction in the clan’s overall strength, but perhaps improving skill and efficiency, at least in theory.

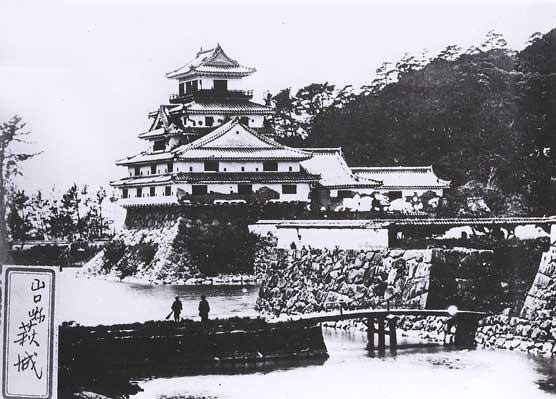
    A 19th century photograph of Hagi Castle, where the Mori Clan were based after their forced relocation.

    This would prove a wise move, as a land survey in 1610 showed that the Mori’s financial situation was better than originally assumed, and the reduction in vassals and retainers had led to a leaner, more efficient administration.

    Peace in the realm would last a while under Tokugawa Ieyasu’s rule, but it was a fragile thing. In 1614, the now adult Toyotomi Hideyori (Hideyoshi’s heir) brought about a crisis when a new prayer bell was inscribed with language that was interpreted as calling for the overthrow of the Tokugawa. Hideyori holed up in Osaka Castle and called on all ‘loyal vassals’ to come to his aid. Most, including Terumoto, ignored him, and when Ieyasu marched on Osaka, he requested the Mori dispatch their navy in support, which they duly did.

    Terumoto also led an army to Osaka, though the Mori would ultimately play a relatively small role in the so-called Winter Siege of Osaka. The following year, during what is called the Summer Siege, Ieyasu attacked Osaka again, this time successfully, capturing and executing Hideyori, and bringing his line to an end.

    Tokugawa Ieyasu, the man who would ultimately bring the Sengoku Jidai to an end.

    The Mori were again asked to dispatch an army, but delays in orders and the length of the march meant they arrived only after Osaka had fallen. There was some concern that this delay might be interpreted as treachery by Ieyasu; however, even the savvy political operator, Ieyasu, chose to lay the blame on slow communication instead, sparing the blushes of the Mori.

    Terumoto, his health failing and age catching up with him, handed full control of the clan over to his heir, Hidenari, in 1621, and although a formal system of ‘dual leadership’ would continue, it was becoming increasingly clear that Terumoto’s time was running out.

    He would continue to play a role in the affairs of the Mori until his death in 1625, and his clan’s distant position from the new capital in Edo afforded them a certain degree of autonomy, at least with regard to internal affairs, in the years that followed.

    That would prove important in the 19th century, as the arrival of American ships in Edo Bay forced Japan to end its period of isolation. It would be the Mori Clan, based in what by then was called the Choshu Domain, who would lead the charge against the Tokugawa Shogunate, overthrowing it, and re-establishing Imperial Rule in the so-called Meiji Restoration, but we are getting way ahead of ourselves.

    Mori Motonari, the last lord of Choshu Domain.

    Mori Terumoto is one of the giants of the Sengoku Era. Building on the successes of his grandfather, Motonari, he led the Mori to a position in which they may well have been able to take power for themselves, had things gone a little differently. Ultimately, despite never gaining ultimate power for themselves, Terumoto and his successors would prove to be one of the success stories of this period, surviving the turmoil and even thriving in the new Japan of the 19th Century.

    Sources
    https://ja.wikipedia.org/wiki/%E6%AF%9B%E5%88%A9%E8%BC%9D%E5%85%83
    https://ja.wikipedia.org/wiki/%E5%BA%83%E5%B3%B6%E5%9F%8E
    https://ja.wikipedia.org/wiki/%E4%BA%AC%E8%8A%B8%E5%92%8C%E7%9D%A6
    https://ja.wikipedia.org/wiki/%E9%B3%A5%E5%8F%96%E5%9F%8E
    https://ja.wikipedia.org/wiki/%E9%89%84%E7%94%B2%E8%88%B9
    https://ja.wikipedia.org/wiki/%E5%89%AF%E5%B0%86%E8%BB%8D
    https://en.wikipedia.org/wiki/M%C5%8Dri_Terumoto
    https://ja.wikipedia.org/wiki/%E5%B0%BC%E5%AD%90%E5%8B%9D%E4%B9%85
    https://en.wikipedia.org/wiki/Toyotomi_Hideyoshi
    https://en.wikipedia.org/wiki/Tokugawa_Ieyasu